
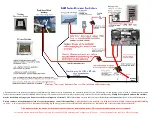
C440-HVAD Quick Start Guide
C
o
l
e ma
n
A
i
r
The C440-HVAD balances the
tried and true with the newest
technologies, resulting in a
super capable diversion
controller for your alternate
energy system that’s easy to
use and even easier to love.
The digital version of the
C440-HVA
•
Fully digital user interface.
•
Solenoid based with 3-stage charge control.
•
No jumpers or potentiometers need to be set.
•
LCD 2 x 16 back-lit display.
•
Both manual and automatic equalize modes are available.
•
Dual shunts for monitoring both solar and turbine amperage and wattage.
•
Automatic nominal battery voltage detection.
•
Nearly all charge parameters can be managed through the user interface.
•
Relay on time can be controlled and set for diversion times up to several hours.
•
Upper and lower set points can both be set.
•
Automatic LCD back light dimming to save energy.
•
Dual Truck Star breakers, one each for your turbine input and diversion output.
•
12, 24 or 48-volt battery systems.
•
Vented cover.
•
Modular PCB Layout.
** The solenoid in this unit has been tested to over 440 amps. We have installed two 150-amp breakers as a standard
configuration.
This allows for 9000 watts of wind power in a 48-volt system, 4500 watts in a 24-volt system and 2250 watts in a 12-volt
system.
Solar systems should be designed for no more than 125 amps continuous current. **
3/27/2017
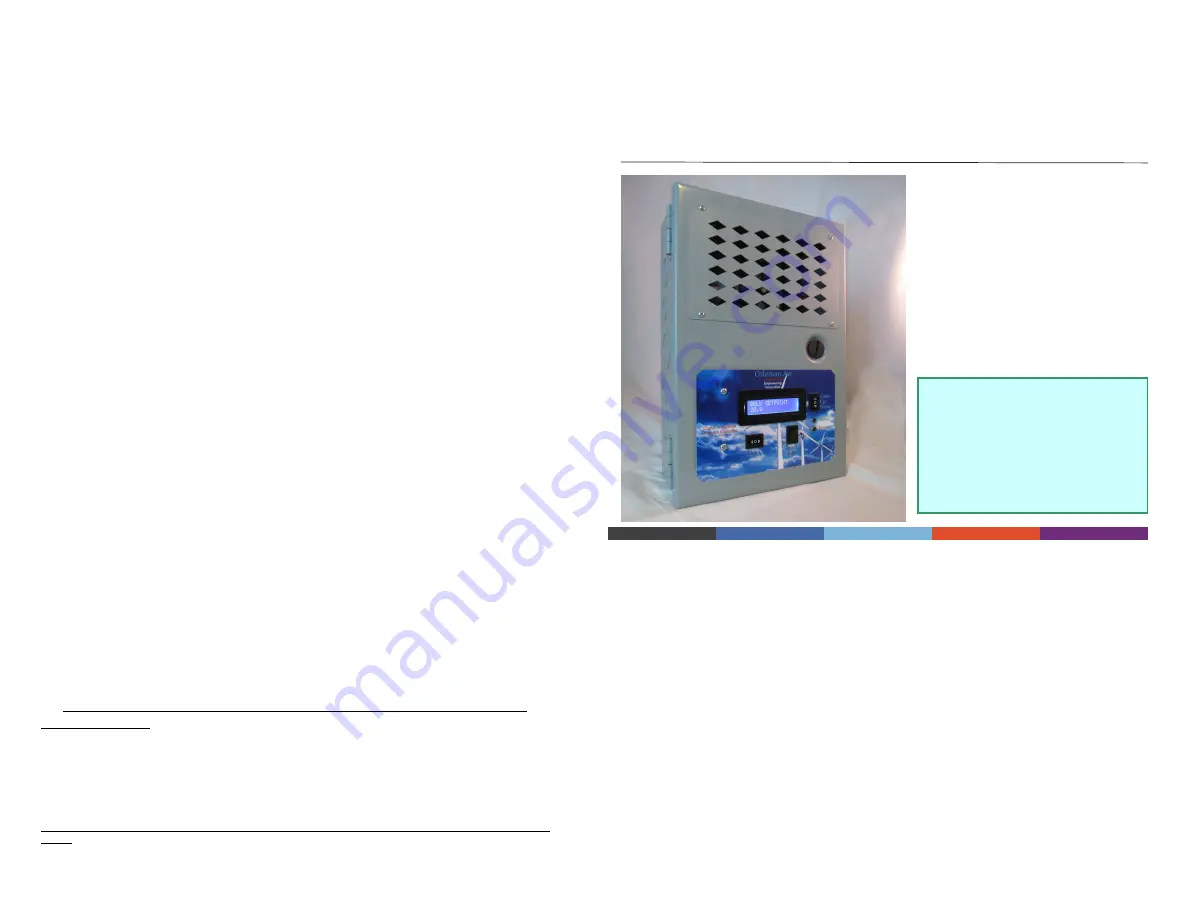
This unit is designed for mounting in a dry indoor environment. The enclosure will not protect the
contents from moisture. Please do not mount outdoors where rain, snow or high moisture content is a
possibility.
All user settable parameters as well as additional information are
accessible via the user interface which consists of the LCD screen
and the three buttons located on the front cover.
Pressing any key during the normal operation of the unit will cause the
main menu to be displayed. Using the right/left buttons will scroll
through the menu options. Pressing the “Enter” button will cause that
menu option or value to be selected. Use of the up/down menu
increases and decreases the current menu value. Pressing the up
button exits the menu (unless you are currently modifying a value, in
which case it will increase the value. First press “Enter” to select the
current value, and then press the up button to exit the menu).
The Red LED on the front of the unit indicates an error of some
nature. The exact cause of the error will be shown on the LCD screen
(unless you have activated one of the menu options).
The Green LED on the front cover is lighted when the unit is first
turned on and also any time the charge performance is considered high
enough to complete the current charge cycle. If the solar/turbine
power is not adequate to complete the charge cycle, the cycle will be
extended and the mode timer will not count down. When this green
LED is lighted, the charger is able to pass enough current to the
batteries to complete a full charge of the batteries.
The internal LED on the upper left of the large PCB board (motherboard) is lighted
when the solenoid is engaged.
The red LED on the small daughter board is lighted when there has been an over-
voltage detected. To clear an over-voltage condition, all power to the unit must
be disconnected for at least 10 seconds. Once power is re-applied, the unit should
clear the fault.
Over-voltage conditions should be addressed by ensuring your
wind turbine and/or solar inputs never exceed 100 volts
and both wind and solar
are never enabled without first ensuring the controller is powered up and running
from the batteries.
This is the quick start guide
only.
See http://ColemanAir.us to
download the full instruction
and installation manual.


