
WEATHERMASTER
™
17'x9'
1
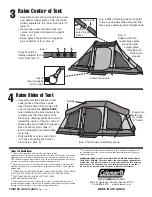
Layout & Positioning of Tent
– Layout and position tent with door
facing desired direction. (illus. 1)
– Stake down tent, starting with
the corners. Do not stretch
too tight. Angle the stakes
slightly toward the tent.
(illus. 2) Keep the floor taut.
– Unzip the door.
2
Assemble & Place Roof Poles
– Assemble all shock-corded
roof poles. When assembled will
form a continuous arch with both
ends pointing down. (illus. 3)
– Select center roof poles with
red stickers and square ends. Then
insert them through the two center
roof sleeves. (illus. 4)
– Select end roof poles with
blue stickers and round ends. Then
insert them through the roof sleeves
at each end of the tent. (illus. 4)
When You Are Ready
To Set Up Your Tent
– Select a level campsite clear
of rocks, branches and other
hard or sharp objects.
– Do not set up your tent
under trees.
– For best results in windy
conditions, position the end
of tent into the wind.
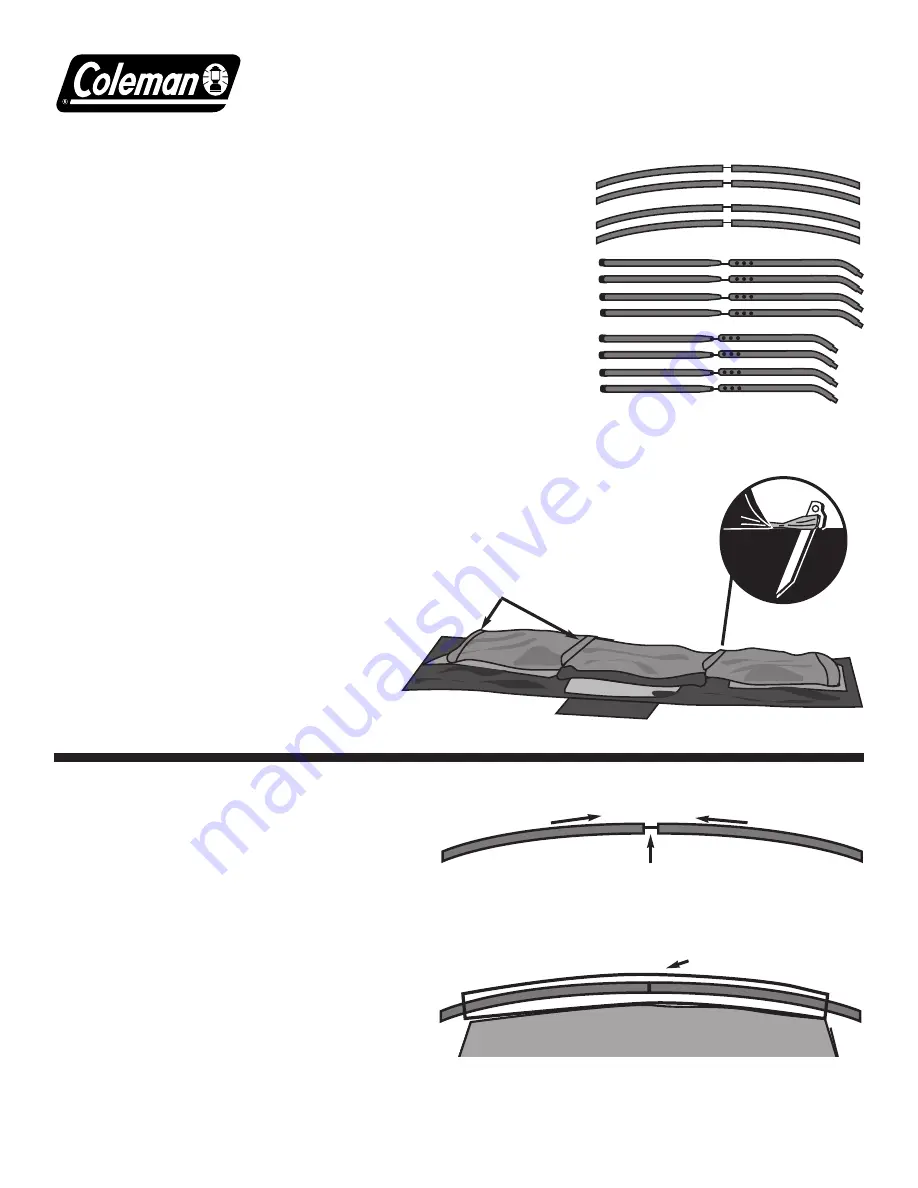
(2) Center Curved Roof Poles
(Red Sticker) Part No. 9232E302
(2) End Curved Roof Poles
(Blue Sticker) Part No. 9232E303
(4) End Brace Poles
(Blue Sticker) Part No. 9232E305
(4) Center Brace Poles
(Red Sticker) Part No. 9232E304
Rainfly Part No. 9232E307
Instructions apply to Part Number 9232E199
illus. 3 Curved roof pole assembly.
illus. 4 Curved roof pole system shown
inserted through pole sleeves. Square end, red
sticker poles go into two center pole sleeves. Round end,
blue sticker poles go into two end pole sleeves.
illus. 2
Stake loops
properly staked
Front door
Roof sleeve
illus. 1
Pole sleeves
Shock corded poles
Forms an arch
POLE ASSEMBLY PARTS


