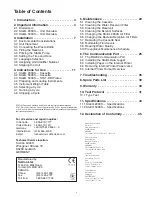
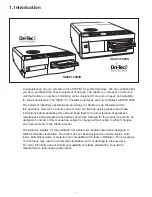
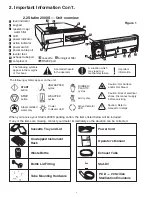
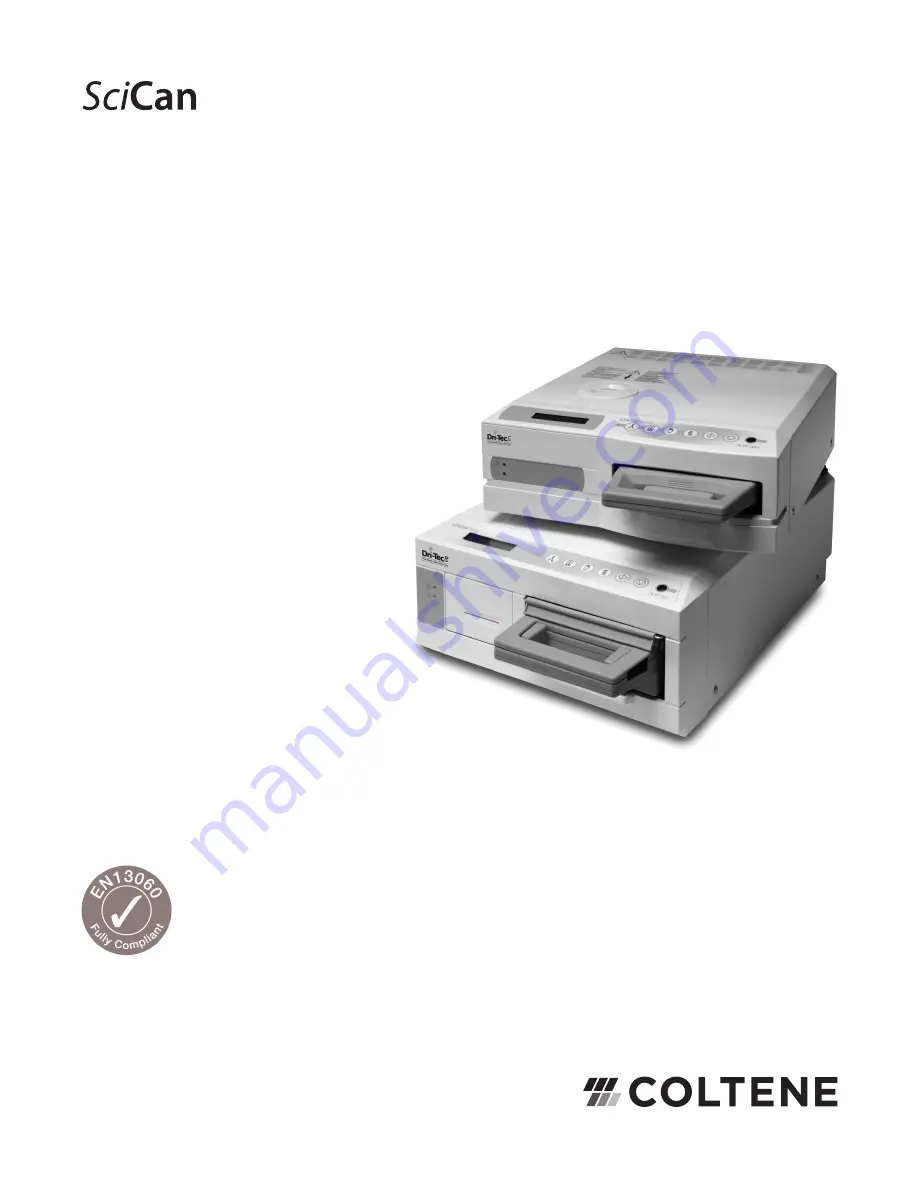
background image

95-108430 EU EN R13. STATIM 2000/5000 Operator’s Manual. Copyright 2020 SciCan Ltd. All rights reserved.

STAT

IM

®

 2000S/5000S

CASSETTE  AUTOCLAVE

• Operators Manual

Summary of Contents for SciCan STATIM 2000S

Page 1: ...95 108430 EU EN R13 STATIM 2000 5000 Operator s Manual Copyright 2020 SciCan Ltd All rights reserved STATIM 2000S 5000S CASSETTE AUTOCLAVE Operators Manual ...

Page 2: ...ng Internal Printer Paper Jams 6 5 Internal Printer Output Overview 7 Troubleshooting 35 8 Spare Parts List 39 9 Warranty 40 10 Test Protocol 41 10 1 Type Test 11 Specifications 43 11 1 Statim 2000S Specifications 11 2 Statim 5000S Specifications 12 Declaration of Conformity 45 STATIM Cassette Autoclave and Statim are registered trademarks and STAT DRI Your Infection Control Specialist and DriTec ...

Page 3: ...this unit and keep them for future reference Operational maintenance and replacement instructions should be followed for the product to perform as designed Contents of this manual are subject to change without notice to reflect changes and improvements to the Statim product The Statim is suitable for the sterilization of dental and medical instruments designed to withstand steam sterilization The ...

Page 4: ... governing verification of the sterilization procedure Drying Performance The Statim 2000S and 5000S have been designed to provide a complete sterilization solution for your unwrapped and wrapped instrument needs rapid sterilization balanced with rapid drying by using the SciCan Dri Tec Drying Technology The Statim 2000S uses convection heat to dry instruments by utilizing the remaining heat in th...

Page 5: ...e port 11 compressor 12 cassette 13 biological filter 14 RS232 port Cassette Tray and Lid Unwrapped Instrument Rack Waste Bottle Bottle Lid Fitting Power Cord Operator s Manual Exhaust Tube Tube Mounting Hardware Stat Dri Figure 1 P C D 20 SciCan Sterilization Emulators A potential hazard to the operator A situation which may lead to a mechanical failure Important information RUBBER PLASTIC cycles...

Page 6: ...Waste Bottle Bottle Lid Fitting Drying Enhancement Plates Power Cord Operator s Manual Exhaust Tube Tube Mounting Hardware Stat Dri n 13 n 12 n 9 n 8 n 7 n 10 n 2 n 1 n 6 n 4 n 3 n 5 Figure 2 2 3 Statim 5000S Unit overview P C D 20 SciCan Sterilization Emulators The following symbols appear in the margins of this book The following symbols appear on the unit A potential hazard to the operator A si...

Page 7: ...agnetic Environment The Statim has been tested and meets applicable standards for electromagnetic emissions While the unit does not emit any radiation it may itself be affected by other equipment which does We recommend that the unit be kept away from potential sources of interference Electrical Requirements Use properly grounded and fused power sources with the same voltage rating as indicated on...

Page 8: ...nt odors and discoloration of the contents A low level disinfectant prepared according to the manufacturer s instructions may be added to the waste bottle to remedy this situation As a minimum empty the waste bottle each time you refill the reservoir 6 Place the waste bottle near the unit Store the bottle below the unit The tube can be routed through a hole 8 mm in diameter in the counter top and ...

Page 9: ...o drain from the tube into a container for 30 seconds When the water flows in a steady stream replace the stopper 6 Lift the front left corner of the unit upward and reinsert the tube into the clip on the underside of the unit Push the excess length of tubing back into the space provided Make sure the plug in the drain tube is secured 3 6 Setting the Time and Date To set the time and date follow t...

Page 10: ...UBBER PLASTIC cycle button 3 While pressing the RUBBER PLASTIC cycle button power the Statim ON 4 Using the cycle buttons select a maximum of 3 digits to be used as the unit s identifier The UNWRAPPED button will increase the selected value and the WRAPPED cycle button will decrease it Use the RUBBER PLASTIC to move to the next digit 5 To save changes and return to the regular operating mode press...

Page 11: ... Place the end of the cassette into the unit 2 Gently push inward until you hear a click sound Never push the cassette into the Statim with force as the interior components could be damaged Removing the cassette 1 Grasp the handle with two hands and pull away from the unit 2 Pull the cassette clear of the unit and set down on a firm surface Disengaging the cassette When not in use the cassette sho...

Page 12: ... the cassette lid and disengage from the tray Rest the lid on its outer surface To close the cassette 1 Align the hinge tab on the lid with the hinge slot on the tray 2 As you begin to close the lid the hinge tab and slot will engage 3 Place the carry handle into the closed position Inserting the cassette into the Statim 5000S 1 Hold the cassette handle in one hand and the carry handle in the othe...

Page 13: ... ten plates can be arranged along the length of the rack Each unit is shipped with five STAT DRI plates Additional plates may be ordered from SciCan SciCan part number 01 103935 To install and adjust a STAT DRI plate follow these steps 1 Hold a plate over the desired position tilted slightly forward with the tabs down 2 Insert the tabs between the mesh of the unwrapped instrument rack 3 Each tab h...

Page 14: ...he Statim 5000S is designed to hold a maximum of 12 autoclave bags Care must be taken to ensure that the combined weight of the loaded bags does not exceed 1 5 kg 3 3 lbs The unwrapped instrument rack fitted with a maximum of 10 Stat Dri plates will hold 10 autoclave bags Rubber and Plastic Instruments The following materials can be sterilized in the Statim nylon polycarbonate Lexan polypropylene ...

Page 15: ...erilized In addition the weekly use of biological indicators which allow you to ascertain whether the instruments have been exposed to sterilization conditions is recommended Note for Ophthalmology Use In the field of ophthalmology proper wrapping or pouching of surgical instruments will reduce the exposure of instruments to any process residues during the sterilization cycle Due to the highly sen...

Page 16: ...rying can be interrupted at any time by pressing the STOP button To select one of these cycles Press the UNWRAPPED cycle button to scroll through the available cycles Once the desired cycle has been selected press the START button The unit memory remembers the last cycle run and then displays this first when the unit is powered on A B C D E F D Sterilizing 134 C 304 kPa 138 C 341 kPa E Venting F A...

Page 17: ...tim 2000S and 5000S feature two 121 C type S sterilization cycles To select one of these S Cycles Press the RUBBER PLASTIC button to scroll through the available cycles 4 Instructions For Use Con t A B C D E F D Sterilizing 134 C 304 kPa 138 C 341 kPa E Venting F Air Drying 3 5 min 18 min A 100 C 101 kPa B 6 purges Conditioning peak at 133 C 295 kPa vent to 115 C 169 kPa C Pressurizing HOLLOW WRAP...

Page 18: ...OP button is pressed during the air drying stage of the sterilization cycle and the cassette has not been removed from the autoclave the Air Dry Only cycle may be used to promote further drying If the cassette has been removed from the autoclave it may NOT be reinserted for the Air Dry Only cycle If the cassette contains wrapped instruments and the wraps are not dry when the cassette is opened the...

Page 19: ...LIZING 136 8 C 330 kPa 3 29 VENTING 108 C 134 kPa 1 Turn the power switch at the back of the unit to ON The LCD display reads 2 Press the appropriate cycle button on the keypad to scroll through the available cycles The display will read either As the button is released the display reads The amber indicator light comes on To indicate that the cycle is in progress the following messages are display...

Page 20: ...STOP button If the STOP button is pushed the cassette is removed or the unit detects a problem while operating the cycle will stop and the amber active light will flash Once a cycle has been stopped the STOP button must be pressed before another cycle can be started The display reads any of the following messages If the display shows the message CYCLE FAULT or NOT STERILE the cassette contents are...

Page 21: ...k or when required The filter can easily be removed and cleaned by placing the filter upside down under running water to wash away the particles until clean and then placed back into the reservoir opening If a replacement water reservoir filter is required order part number 01 109300S 5 3 Cleaning the Reservoir Check the reservoir for dirt or particles The reservoir may be cleaned by draining foll...

Page 22: ...rk on the filter matches the direction of the arrow on the bracket Push the left hand filter fitting into tube B n 4 5 Gently press the replacement filter into the filter bracket n 3 The arrow mark of the filter should be facing out and pointing to the left 6 Re connect tube A n 1 to the right hand filter fitting 5 7 Replacing the Cassette Seal To ensure optimum performance of your Statim cassette...

Page 23: ...team 5 8 Maintaining Fluid Levels Use only steam process distilled water containing less than 5 ppm total dissolved solids having conductivity of less than 10 µS cm in the Statim To fill the reservoir remove the cap from the top of the unit and fill the reservoir We recommend using a funnel to minimize spills Each time you refill the reservoir empty the waste bottle and refill with water to the MI...

Page 24: ...te Seal Replace every 500 cycles or six months whichever is first or whenever necessary Biological and or Replace every 500 cycles or six months whichever is first Air Filter Daily Weekly Every 6 months Operator Cassette Check the tray lid and seal for damage Replace if necessary Biological Filter Inspect the biological filter for moisture Solenoid Valve Inspect the valve and clean if dirty Replac...

Page 25: ... Setup menu Follow the instructions in section 6 2 Installing the SciCan Data Logger below to enable communication to either an external printer or the SciCan Data Logger OR Printer Model End Of Line Serial Port Printer user CR LF Bitrate character Epson TM U220D C31C515603 CR LF 9600 248 0xF8 Citizen IDP 3110 40 RF 120B CR 9600 N A Star Micro SP212FD42 120 CR 9600 210 0xd2 Star Micro SP216FD41 12...

Page 26: ...p menu 2 Using the UNWRAPPED and WRAPPED buttons scroll to RS232 and select it by pressing the RUBBER AND PLASTIC button 3 From the RS232 menu use the UNWRAPPED and WRAPPED buttons to scroll down to the USB FLASH MSD option and press the RUBBER AND PLASTIC button to select and return to the User Setup menu User Mode User Setup Menu To install the SciCan Data logger access the user setup menu by po...

Page 27: ...UBBER AND PLASTIC button 2 From the Printer user char menu using the UNWRAPPED button to increase the displayed value by one and the WRAPPED button to increase that value by ten enter the value 32 0x20 and press the RUBBER AND PLASTIC button to accept and return to the User Setup menu Save and Exit A Save and Exit must be performed after the above settings are completed If this is not done the inf...

Page 28: ... User Setup menu 2 Using the UNWRAPPED and WRAPPED buttons scroll to the Unit ID Setup and press the RUBBER AND PLASTIC button to select it 3 From the Setup Unit ID menu use the UNWRAPPED and WRAPPED buttons to change the displayed values and the RUBBER AND PLASTIC button to select and move to the next digit Press the STOP button when completed Step 4 Connecting the SciCan Data Logger 1 Ensure tha...

Page 29: ...me paper from the thermal paper roll n 3 and trim the corners using the paper cutting template included with each box 5 Move the paper roll arm n 4 into the loading position Place the paper roll n 3 on the arm so the paper strip feeds from the top of the roll and then carefully insert it into the paper feed slot n 5 until it stops If the paper does not feed from the top the heat sensitive side of ...

Page 30: ...gh the printer Never put a utensil or tool into the paper exit slot For full instructions on how to remove paper jams see section 6 4 Removing Internal Printer Paper Jams To replace the paper roll n 3 follow these steps 1 With scissors cut the paper between the roll and the paper feed slot n 5 2 Remove the roll from the arm and discard the unused portion 3 Press the paper advance button n 6 to fee...

Page 31: ...r 5 Note the orientation of the exposed printed wiring board and the paper roll arm n 4 assembled on the printer door n 1 6 Gently lift the printed wiring board upwards and away from the printer door Exercise care while handling the board The printer is integral to the wiring board Do not place strain on the connections of the ribbon cable soldered to the board Do not remove the connector of the f...

Page 32: ...sure that the flexible cables are not pinched between the cover and the door The power button and the paper advance button must protrude through the openings in the cover and operate freely 5 Using a 1 Phillips screwdriver secure the printer cover to the printer door with the three screws retained during the disassembly procedure Do not over tighten these screws 6 Plug your Statim 2000S 5000S into...

Page 33: ...e for each purge number of lines based on cycle selection this is a one purge cycle activity within B phase 10 Lowest Temp Press Time of conditioning purge for each purge number of lines based on cycle selection this is a one purge cycle activity within B phase 1 2 3 4 5 6 7 8 9 10 11 12 13 14 15 16 17 18 19 20 21 22 23 6 The Communication Port con t Acceptable Tolerances Sterilization time Steril...

Page 34: ...15 135 1 C 308 kPa 16 Max Temp Press during the sterilization phase upper limits of D phase 17 136 7 C 323 kPa 18 Temp Press Time of end of sterilization phase end of D phase 19 Time Venting started 7 43 start of E phase 20 Sterilization was successfully completed 21 Time Air Drying started 8 07 start of F phase 22 Cycle was stopped by user 23 Drying cycle aborted prior to completion load may not ...

Page 35: ...eaks attempt another cycle using a different cassette if possible If the leak persists turn the unit OFF remove and unload the cassette unplug the unit and call your dealer Best drying occurs when the cycle continues to completion Allow the cycle to finish Make sure the instruments are loaded correctly in the cassette Refer to section 4 4 Preparing and Loading Instruments Check the unit leveling C...

Page 36: ...other cycle before proceeding to the next solution Remove the cassette Be careful The metal parts will be hot and the cassette will contain hot steam Inspect the cassette to ensure that the holes in the back of the seal are perfectly aligned and that the flexible lip of the seal is completely free Check the exhaust tube for kinks or obstructions If kinked straighten the tube If the tube cannot be ...

Page 37: ...the water conductivity meter check the quality of the water before refilling the reservoir Refer to the steps described in section 3 9 Shipping the Unit to empty the reservoir The level of the water in the reservoir is low Refill the reservoir Refer to the steps described in section 3 4 Filling the Reservoir Check for a paper jam If the paper is jammed follow the paper removal procedures outlined ...

Page 38: ... the MSD is corrupted or unreadable Refer to the STATIM screen to confirm successful sterilization The MSD may have been unplugged while data was being written to it The MSD should not be unplugged until after SAFELY REMOVE MSD MSD FLASH DETECTED is displayed The corrupted files or directories may be lost Reformat the MSD on your computer Message MSD FLASH FULL REPLACE MSD The MSD is full Export t...

Page 39: ...01 102119S Filter Biological 01 103139S Conductivity Meter 01 103475S Tray 2000S 01 103557S Power Cord Repl Denmark det 01 106030S Cassette Lid Handle 2000S 01 106071S Extended Cassette Lid Handle 5000S 01 104093S Exhaust Tube 3 m long 01 104786S Instrument Holder 4 mm 5000S 01 100207S Compressor Filter 2000S 01 103935 STATDRI Plates 5000S 01 104104 Extended Length Cassette 5000S 01 104499 Extende...

Page 40: ... within thirty 30 days of the date of such a failure and further provided that the defective part s are returned to SciCan prepaid This warranty shall be considered to be validated if the product is accompanied by the original purchase invoice from the authorized SciCan dealer and such invoice identifies the item by serial number and clearly states the date of purchase No other validation is accep...

Page 41: ...NWRAPPED S 134 C 3 5 min HOLLOW UNWRAPPED S 134 C 3 5 min HOLLOW UNWRAPPED S 134 C 3 5 min HOLLOW UNWRAPPED S 134 C 3 5 min HOLLOW UNWRAPPED S 134 C 3 5 min HOLLOW UNWRAPPED S 134 C 3 5 min HOLLOW UNWRAPPED S 134 C 3 5 min HOLLOW UNWRAPPED S 134 C 3 5 min HOLLOW UNWRAPPED S 134 C 3 5 min HOLLOW UNWRAPPED S 134 C 3 5 min HOLLOW UNWRAPPED S 134 C 3 5 min HOLLOW UNWRAPPED S 134 C 3 5 min HOLLOW WRAPP...

Page 42: ...0 00 11 45 60 00 8 05 60 00 17 30 60 00 10 50 60 00 26 15 60 00 22 35 60 00 32 00 60 00 25 20 60 00 15 35 60 00 10 40 60 00 24 00 60 00 15 30 60 00 30 05 60 00 25 10 60 00 38 30 60 00 30 00 60 00 20 15 60 00 18 40 60 00 22 50 60 00 20 20 60 00 35 15 60 00 33 40 60 00 37 50 60 00 35 20 60 00 HOLLOW UNWRAPPED S 134 C 3 5 min HOLLOW UNWRAPPED S 134 C 18 min HOLLOW WRAPPED S 134 C 3 5 min HOLLOW WRAPP...

Page 43: ...d Top 5 cm Sides 5 cm Back 5 cm Front 48 cm Clearance required for movement of the door s 48 cm Minimum charge in the water reservoir 550 mL PRV value pressure relief valve Set at 43 5 PSI to release pressure in overpressure situations Thermal Fuse Cuts power to boiler in event of overheat Electrical Rating 220 240 V 50 60 Hz 6 A Current AC Protection Class I Protection covered Ambient Operating T...

Page 44: ... 57 cm Minimum charge in the water reservoir 550 mL PRV value pressure relief valve Set at 43 5 PSI to release pressure in overpressure situations Thermal Fuse Cuts power to boiler in event of overheat Electrical Rating 220 240 V 50 60 Hz 6 A Current AC Protection Class I Protection covered Ambient Operating Temperature 5 C 40 C Sound levels Mean 57 dB Peak 65 dB Humidity 80 Max Max Altitude 2000 ...

Page 45: ...his Declaration of Conformity All supporting documentation is retained at the manufacturer s premises DIRECTIVE General Applicable Directive Medical Device Directive Council Directive 93 42 EEC of 14 June 1993 concerning medical devices MDD 93 42 EEC Annex II excluding 4 Standards Harmonized Standards published in the Official Journal of the European Communities applicable to this product are ISO ...

Reviews: