background image

Digital Wireless Telephone

System User’s Guide

(For IMPACT 224 / 560 / FX System)

R

Scout

900

MXS

Scout

900

MX

Summary of Contents for Scout 900MXS

Page 1: ...Digital Wireless Telephone System User s Guide For IMPACT 224 560 FX System R Scout 900MXS Scout 900MX ...

Page 2: ...gh your Comdial dealer Accessory Product Code Vibrator Kit 900 VIB Belt Clip Kit 900 HOL Headset 900 HDS Standard Battery Kit 900 BAT STD Extended Life Battery Kit 900 BAT EXT Replacement Handset without Battery 900 HS Replacement Base Unit 900 BASE AC Battery Back Up 900 BAT AC Charging Stand 900 ACPK Wall Mounting Kit 900 WM Ask your dealer about the accessory bag and other items that are availa...

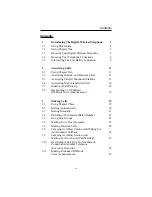
Page 3: ...Making A Call Pick Up 15 2 6 Responding To A Subdued Off Hook Voice Announcement 16 3 Making Calls 19 3 1 Using Chapter Three 19 3 2 Dialing Automatically 20 3 3 Dialing Manually 21 3 4 Redialing A Previously Dialed Number 22 3 5 Using Line Groups 22 3 6 Waiting For A Line Queuing 23 3 7 Making Intercom Calls 24 3 8 Camping At A Busy Station And Waiting For An Automatic Callback 26 3 9 Camping At ...

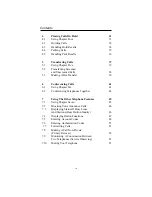
Page 4: ...hapter Six 41 6 2 Conferencing Telephones Together 42 7 Using The Other Telephone Features 45 7 1 Using Chapter Seven 45 7 2 Blocking Voice Announce Calls 46 7 3 Displaying Status Of Busy Lines And Stations Busy Button Inquiry 46 7 4 Displaying Button Functions 47 7 5 Entering Account Codes 48 7 6 Entering Authorization Codes 53 7 7 Forwarding Calls 51 7 8 Making A Call Non Private Privacy Release...

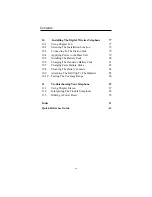
Page 5: ...BLF Console 60 8 Sending And Receiving Non Verbal Messages 61 8 1 Using Chapter Eight 61 8 2 Lighting The Message Waiting Light 62 8 3 Sending LCD Messages 64 8 4 Sending Response Messages 66 9 Programming Your Telephone 69 9 1 Using Chapter Nine 69 9 2 Programming For Speed Dialing 70 9 3 Storing Speed Dial Numbers 72 9 4 Storing DSS Numbers 73 9 5 Storing The Memory location Speed Dial Numbers 7...

Page 6: ...ling The Battery Pack 80 10 6 Charging The Handset s Battery Pack 81 10 7 Charging Extra Battery Packs 82 10 8 Cleaning The Battery Contacts 84 10 9 Attaching The Belt Clip To The Handset 85 10 10 Testing The Coverage Range 86 11 Troubleshooting Your Telephone 87 11 1 Using Chapter Eleven 87 11 2 Interpreting The Trouble Symptoms 88 11 3 Making A Power Reset 89 Index I1 Quick Reference Guide A1 vi...

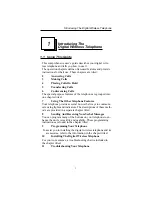
Page 7: ...vides several non verbal ways to communi cate using lights and indicators The descriptions of these meth ods are provided in a separate chapter titled 8 Sending And Receiving Non Verbal Messages You can program many of the buttons on your telephone to en hance the unit s versatility and usability These programming instructions are found in the chapter titled 9 Programming Your Telephone To assist ...

Page 8: ...or wherever you ve located the base unit This freedom allows you to carry on a telephone conversation and still be free to do other things If you should wander out of range while on a call you will lose voice contact with your party but your handset will keep its display and status lights active for approx imately 20 seconds During this 20 second time period you can step back in range and resume y...

Page 9: ...ounding type attachment plug or a polarized attachment plug The grounding type attachment plug is a three wire grounding type that has a third pin for grounding purposes It will only fit into a grounding type power out let This is a safety feature If you are unable to insert the plug into the power outlets at your location contact an electrician to replace your obsolete outlets Do not defeat the s...

Page 10: ... may be toxic if swallowed 4 Exercise care in handling the battery pack in order not to short it with conducting materials such as rings bracelets and keys The battery or conductor may over heat and cause burns 5 Charge the battery pack only in accordance with the instructions and limitations specified 6 Observe proper polarity orientation between the battery pack and battery charger SAVE THESE IN...

Page 11: ...e 2 3 hours typical Standby Mode 38 hours typical Nine channels means that nine simultaneous conversations can occur when a group of digital wireless telephones are operating in close proximity A tenth telephone will display System Busy when its user tries to make a call The digital wireless telephone transmits and receives according to the specifications set forth by the Federal Communications Co...

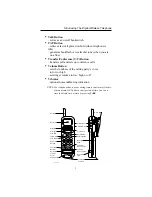
Page 12: ...eceiver allows you to hear your calling party s voice Function Buttons provides access to the intercom F4 and three outside lines F1 F3 at default but can be reprogrammed as function buttons when needed Head Set Jack allow you to connect a headset to the handset Hold Button places calls on hold stores pauses in a number sequence during program ming Message Talk LED shows message waiting and off ho...

Page 13: ... Digital Wireless Telephone VOL MUTE HEAD SET F1 F2 F3 F4 1 2 4 7 F1 F2 F3 F4 3 5 8 0 6 9 ABC T C HOLD MEMO TAP TALK GHI PRS DEF JKL TUV OPER MNO WXY Antenna Receiver Display Message Talk LED Talk Button TAP Button Numeric Keypad Function Buttons Optional Vibrator Access Microphone Volume Button Belt Clip Mute Button T C Button Hold Button Memo Button Battery Pack Function Button LEDs Function But...

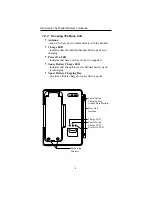
Page 14: ... power supplied Spare Battery Charge LED indicates that the optional extra handset battery pack is recharging Spare Battery Charging Bay provides a trickle charge for spare battery packs 8 Introducing The Digital Wireless Telephone CHARGE POWER BATT CHARGE Scout 900MX EXP95BAN Base Unit Antenna Charge LED Spare Battery Charge LED Power On LED Spare Battery Charging Bay Under Base Station Rechargin...

Page 15: ...rged you will see the message LOW BATT on the dis play and the handset will beep once every three seconds Only the TALK button will operate When you get this indication complete your call as quickly as possible Return the handset to the base unit for charging Allow 8 10 hours without interruption for the battery pack to fully re charge Alternately you can replace the handset s battery pack with an...

Page 16: ......

Page 17: ...aying on your desk or clipped to your belt press the TALK button for the ringing line Your installer can enable the synchronized ringing feature in your system If this feature is active You may have to press TALK after you lift the handset from the base unit s cradle to answer a ringing line Because of the feature versatility the instructions in this chap ter tell you to lift handset and press TAL...

Page 18: ...l will sound the ringer and light the status light as sociated with the line or intercom button that the call is on If you have the ringer volume turned off and are using the op tional vibrator you will feel the vibration indicating a ringing call To answer a ringing call lift handset and press TALK if necessary press line button or intercom button if necessary 12 Answering Calls ...

Page 19: ...for your telephone to include a DSS STATUS button at a function but ton location F1 F4 If so you can use that button to switch from monitoring all of the telephone s activity to just monitor ing its personal intercom activity To monitor another telephone observe the BLF light indications next to a personal inter com appearance DSS button F1 F4 Off idle Flashing ringing On busy or on hold NOTE If y...

Page 20: ...e night transfer of ringing feature directs incom ing calls to a particular zone After the attendant has set up this feature you can answer an outside call when it rings anywhere in the system If your telephone rings lift handset and press TALK if necessary press line button if necessary When you hear loud ringing anywhere in the system press intercom button if necessary dial 65 through 68 to sele...

Page 21: ...call that is ringing at any telephone in the system if you know the tele phone s extension number To answer a call that is ringing within your group lift handset and press TALK if necessary press intercom button if necessary dial 4 answer call To answer a call that is ringing at any telephone in the system lift handset and press TALK if necessary press intercom button if necessary dial S 4 dial ex...

Page 22: ...OHVA caller s voice giving you a message Your distant on line party cannot hear the SOHVA call If your installer has programmed one of the function buttons F1 F4 on your telephone as a SOHVA button you can press it to respond verbally to the SOHVA call Alternately you can use a RESPONSE MESSAGE button to respond to the SOHVA call in a non verbal manner or you can ignore the SOHVA call The SOHVA ca...

Page 23: ...nitiated a SOHVA call from an LCD speakerphone hear the SOHVA voice announcement press the appropriate fixed RESPONSE MESSAGE but ton to send a preselected message I Will Call Back for example to the calling telephone or while still on the call press the scrolling RESPONSE MESSAGE button to scroll through the system supplied messages press when your display shows the message you wish to send the m...

Page 24: ......

Page 25: ...so you will have access to the assigned line or intercom as soon as you press TALK You will not have to press a function button to se lect a line or intercom Because of this versatility the instruc tions in this chapter tell you to lift handset and press TALK if necessary The instructions also tell you to press line or inter com button if necessary Use this chapter to understand the many ways to m...

Page 26: ... button locations Plus the hand set provides additional memory locations for speed dial use To automatically dial a speed dial number stored at one of the programmable function buttons lift handset press preprogrammed speed dial button F1 F4 line se lection is usually a part of the stored speed dial number With your station at idle you can use the following procedure to automatically dial a person...

Page 27: ...ly dial a number over any available telephone line or intercom you select Or if the installer assigned a prime line prime intercom or the idle line preference feature to your station your digital wireless telephone will automatically select a line for use when you lift its handset To dial an outside number manually lift handset and press TALK if necessary press line button to select line or interc...

Page 28: ...ers speak to him Busy tone press TALK to disconnect NOTE Remember it is very common for your digital wireless telephone to automatically select a line for your use when you lift the handset and press TALK Under these circumstances you must first select the intercom and press TAP before you can dial the code for a speed dial number 3 5 Using Line Groups Some systems have telephone lines arranged in...

Page 29: ...ary press button to select intercom if necessary dial the desired line group access code hear busy tone dial 6 If you have line appearance for a particular line and wish to queue for it note the busy status light LED lift handset and press TALK if necessary press button to select intercom if necessary dial S 6 press line button When line group is free your telephone sounds several short tone burst...

Page 30: ... set a voice announce block condition at his or her tele phone to prevent all voice announce calls Furthermore if he or she blocks voice announce the system also blocks SOHVA calls The following instructions assume a tone first default setting Any user can change a call to voice announce signaling for that call simply by pressing the INTERCOM button again after dialing the extension number or by p...

Page 31: ...number speak your announcement To voice announce automatically lift handset and press TALK if necessary press DSS button speak your announcement Some systems will be arranged so that certain stations have a hot line feature If your station is so arranged every time you lift the handset your LCD speakerphone will automatically ring a pre selected station programmed by the installer To make an inter...

Page 32: ... hangs up When the station you called becomes available your telephone will ring with five short tone bursts When you hear this lift handset and press TALK if necessary press button to select intercom The other telephone will start ringing If you do not select the intercom after the ringback tones within the time limit set by the installer the system cancels the call back at that time however you ...

Page 33: ...n place the current call on hold or disconnect from the call to answer your call waiting tone or choose to ig nore your call waiting tone and continue current conversation To cancel call waiting lift handset and press TALK if necessary press button to select intercom press dial 6 your telephone automatically hangs up Toansweracall waitingtoneifyoureceiveonewhileonacall hear short tone burst in rec...

Page 34: ...will sound and screen options will remain displayed To override an in progress call at another telephone make intercom call and hear a busy signal dial S 0 3 all parties will hear several tone bursts join in progress call To override a Do Not Disturb condition at another station make intercom call and hear a do not disturb signal dial S 0 3 speak your announcement if in voice first mode or hear ri...

Page 35: ...OHVA button as follows make intercom call and hear busy tone decide whether to interrupt or not if you decide not to interrupt the called party hang up or to interrupt press preprogrammed SOHVA button and hear several quick tone bursts make announcement busy tone means that the called telephone is in speakerphone mode and you cannot make announcement that your SOHVA has been de nied through system...

Page 36: ......

Page 37: ...hapter Four You can place calls on hold and pick them up a short time later in several different ways This chapter explains the various methods you can use to hold a call 4 2 Holding Calls 4 3 Handling Hold Recalls 4 4 Parking Calls 4 5 Handling Park Recalls 4 ...

Page 38: ...your system the system will cause a one second tone burst to sound at your telephone and the flash rate of the line button becomes faster If the call is on exclusive hold it will revert to manual hold after the hold recall time period When you answer a call on a group intercom and place it on hold the system keeps the call on hold on the group intercom this means that you or any other user can pic...

Page 39: ... You can have your telephone scroll or scan through the calls currently on hold at your station in order to retrieve a specific held call lift handset if your station does not have prime line or idle line preference press HOLD once for each call in the hold queue until you reach the call you wish to service press TAP to retrieve call For example if five calls are holding and you wish to retrieve t...

Page 40: ...ill revert to manual hold af ter the hold recall period you will hear four short tone bursts at 12 second intervals Any user whose telephone line appear ance for the recalling line can pick up calls that revert to man ual hold If you placed a line on manual hold or exclusive hold and that line is recalling answer retrieve recall press HOLD to place the call on hold at your station and restart HOLD...

Page 41: ... you press a personal or group intercom button and dial a code to retrieve a parked call the system removes it from the park orbit and places it at your station on the intercom that you selected To park a call in orbit while on the call press intercom button press S dial code for park orbit 91 99 for orbits 1 9 remember the code for later use or make it known to those who need to know it in order ...

Page 42: ...l originated To answer a park recall press button for recalling line The call will then connect to your station To place a park recall on hold at your station press HOLD If the call remains on hold for a period of time it will ring back to your telephone as a hold recall To re park a park recall and restart the park timer answer retrieve call lift handset and press TALK if necessary press intercom...

Page 43: ...an transfer calls from your digital wireless telephone to another system telephone in several ways The information in this chapter describes those ways 5 2 Transferring Screened And Unscreened Calls 5 3 Making A Hot Transfer 37 Transferring Calls 5 ...

Page 44: ...e as set by the your installer the transferred call returns to your tele phone To screen and transfer a call to another telephone in the system answer call press T C call is automatically placed on hold dial extension number of telephone to receive transfer when intercom party answers announce call press TALK to disconnect Intercom party can then an swer the call If the intercom party is busy take...

Page 45: ...wer the call If you make a hot transfer to a monitor telephone you can voice announce the call over the telephone s speaker but the person receiving the outside line transfer will need to lift the handset to answer the call the telephone will not ring after you have made the announcement Please note that you can not make a hot transfer to a telephone if its user has enabled the Voice Announce Bloc...

Page 46: ......

Page 47: ...ital wireless telephone together on a call with one or more system telephones the arrangement is known as conferencing Use the information contained in this chapter to understand how to make a conference 6 2 Conferencing Telephones Together 41 Conferencing Calls 6 ...

Page 48: ... up to you If you are involved in a conference call with two outside lines you can drop out of this established conference call and leave the outside lines in the conference with each other This is known as an unsupervised conference call To set up a conference call that includes any combination of outside lines and intercom parties make first call press T C call is placed on hold automatically se...

Page 49: ...off press TAP to return to conference To drop out of a conference call between you and two outside lines creating an unsupervised conference press and hang up lines remain lighted and in use until both outside parties disconnect if only one party drops out of an unsupervised conference the remaining party is placed on hold To rejoin an unsupervised conference between two outside lines press TAP NO...

Page 50: ......

Page 51: ...o tell you to press line or intercom button if necessary 7 2 Blocking Voice Announce Calls 7 3 Displaying Status Of Busy Lines And Stations Busy Button Inquiry 7 4 Displaying Button Functions 7 5 Entering Account Codes 7 6 Entering Authorization Codes 7 7 Forwarding Calls 7 8 Making A Call Non Private 7 9 Monitoring A Conversation Between Two Telephones Service Observing 7 10 Muting Your Telephone...

Page 52: ...ntify the station that is busy on a line and the line on which a station is busy this latter feature usually requires an optional DSS BLF console The system presents the information to your display for 10 seconds after you request it If your telephone does not have this fea ture it displays busy status without identifying information To identify the station that occupies a busy line lift handset a...

Page 53: ... your function buttons for special purpose tasks and you need to remind yourself of the button s feature To button query your telephone lift handset and press TALK if necessary press intercom button if necessary Dial SS 8 press the button in question read the displayed information display will hold for few seconds before the telephone returns to idle 47 Using The Other Telephone Features ...

Page 54: ...all answer call press intercom button dial T 0 4 call is automatically placed on hold dial account code Your telephone automatically returns to the call after you ve dialed the complete account code To enter account code on an outgoing call lift handset and press TALK if necessary press line button if necessary press intercom button dial T 0 4 call is automatically placed on hold dial account code...

Page 55: ...assigned to you by your installer when he or she programs the system When you enter your assigned autho rization code at another system telephone the code alerts the system to make your normal features available to you at that telephone This means that you can use the same calling fea tures on that telephone that the system allows you to use on your telephone however you cannot disturb the last nu...

Page 56: ...ny others that you might in clude becomes part of the lock code The telephone display will show a to represent a pause as part of the code as you enter it You must allow for any pauses at wherever location that you inserted them in the number string when you unlock your tele phone This feature provides you with a method for creating a very effective lock and unlock password To unlock your telephon...

Page 57: ...y to answer a call yet find it inconvenient to have your calls permanently forwarded The system installer sets the number of rings that sound at your telephone before the system forwards the calls To forward your calls lift handset and press TALK if necessary press intercom button if necessary dial one of the following codes Forward Immediately Forward After Ring No Answer Or Busy All calls S52 S5...

Page 58: ...ase they need a method to make the call non private If you have this situation with your digital wireless telephone ask your sys tem installer to assign a PRIVACY RELEASE button on your telephone at one of your function buttons F1 F4 To release privacy from your telephone while on a call press preprogrammed PRIVACY RELEASE button The light associated with the PRIVACY RELEASE but ton will remain on...

Page 59: ...utton if necessary dial 0 3 dial extension number of telephone to be monitored press TALK to end monitoring 7 10 Muting Your Telephone By using the MUTE button you can block transmission of your voice to the calling party For example if someone comes into your office to talk to you and you do not want this conver sation to interrupt the distant party press the MUTE button To mute your telephone pr...

Page 60: ...se telephones located in a specific area Check with your system administrator to deter mine the type of paging and access method that you should use To send a paging announcement lift handset and press TALK if necessary press intercom button if necessary dial 70 77 for zones 1 8 when the system is operating in the defaulted mode zone 1 provides an all call func tion make announcement NOTE To guard...

Page 61: ...set and press TALK if necessary press intercom button if necessary dial 01 press TALK to end To override a do not disturb condition at another telephone make intercom call and hear DND tone dial S 0 3 called party will hear several short tone bursts wait for a reply NOTE When you override a Do Not Disturb condition at another sta tion the condition remains disabled until that station user re enabl...

Page 62: ...uses no ringer sound you have reached the vibrator enable setting The display indicates Ringer Off at this setting Your final change becomes the new default setting and will result in your telephone ringing at that level for all future calls until you change the default by repeating the procedure There are two handset loudness levels also two levels on the optional headset as well Set the volume l...

Page 63: ... need to send tones during a di aling sequence e g to send bank by phone tones you can convert to tone while dialing The system will switch back to pulse dialing when you end your call You can store a as part of an automatic dialing number to cause pulse to tone switch ing where needed To convert to tone dialing at any time during dialing or while on an active call press 57 Using The Other Telepho...

Page 64: ...nter com number you can receive messages that someone else sends you The system automatically installs the Tracker pager for your use however you can disable it when you do not wish to receive paged messages and when you leave at the end of your day Of course if you do disable your Tracker pager at the end of your day be sure to enable it at the beginning of your next day To track a called party a...

Page 65: ...another Tracker page orbit or retrieve the call for servicing To retrieve a call that you parked using the Tracker option press HOLD button to scroll your held calls display shows Page and extension number of each parked call press TAP to retrieve the displayed parked call If you receive a parked call message on your Tracker pager lift handset and press TALK if necessary press intercom button if n...

Page 66: ...r use the system automatically clears the console s buttons so that you can immediately store your functions at the buttons when you need them To store information at the console buttons use the procedures detailed in sections 9 3 9 4 and 9 6 in this book When using these procedures press a console button to denote the button location for storage instead of pressing a button on your tele phone To ...

Page 67: ...1 Using Chapter Eight This chapter details the several different methods that you can employ to send and receive messages with your digital wireless telephone without using verbal communications 8 2 Lighting The Message Waiting Light 8 3 Sending LCD Messages 8 4 Sending Response Messages 8 ...

Page 68: ...dial tone at that station to sound in a broken manner when the station user takes his or telephone off hook If a telephone that receives a message has a DSS button that is programmed to call the station that left a message the light next to that DSS button on the message receiving station will flash To turn on the message waiting light and a broken dial tone at an idle telephone lift handset and p...

Page 69: ...e message waiting light when you are either de livering or receiving a message press intercom button NOTE Only the person who sent the message and the person receiving the message can turn the indicator off To receive a message at your station observe flashing message waiting light and the LCD mes sage indicating who called for you press intercom button press HOLD system automatically connects you...

Page 70: ...ssage list 01 30 on the next page If you use the default messages of Back At and Call add to them as follows For default message 1 dial code for time numbers and colon from dialing codes table for example dial 12 00 01 29 04 05 for a space and the time 1 45 For default message 2 dial code for telephone number of where you ll be for example dial 12 09 07 08 15 02 02 00 00 for a space and the number...

Page 71: ...ack at default message 1 02 Call default message 2 03 Ask them to hold default message 3 04 Take a message default message 4 05 I will call back default message 5 06 07 08 09 10 11 12 13 14 15 16 17 18 19 20 21 22 23 24 25 26 27 28 29 30 65 Sending And Receiving Non Verbal Messages ...

Page 72: ...a different message every time If you program a fixed RESPONSE MES SAGE button you can send the same message every time in re sponse to a situation which saves you the trouble of scrolling to the message you want to send This section tells you how to use the RESPONSE MESSAGE button s to send messages to LCD speakerphones Refer to the chapter titled Programming Your Telephone in this guide for inst...

Page 73: ... to send a preselected message I Will Call Back for example to the calling telephone or while still on the call press the scrolling RESPONSE MESSAGE button to scroll through the system supplied messages press when your display shows the message you wish to send the message will then be displayed at the calling telephone and the SOHVA call will be terminated 67 Sending And Receiving Non Verbal Mess...

Page 74: ......

Page 75: ...s pro gramming steps that you can take with your LCD speakerphone 9 2 Programming For Speed Dialing 9 3 Storing Speed Dial Numbers 9 4 Storing DSS Numbers 9 5 Storing the Memory Location Speed Dial Numbers 9 6 Storing The Feature Codes 9 7 Storing The Response Message Button 69 Programming Your Telephone 9 ...

Page 76: ...d the number digits that you are storing Then as you program the speed dial numbers write the numbers on your telephone s ID strips You can also fill out the charts on the next page if you wish for a personal record of your stored numbers NOTE 1 You cannot reprogram the INTERCOM button location from your telephone however your installer through VDT programming can reassign these buttons to other l...

Page 77: ...ts for future reference Speed Dial Numbers Key Pad Buttons Function Buttons 1 F1 2 F2 3 F3 4 F4 5 6 7 8 9 0 Speed Dial Numbers Handset Memory Locations 01 11 02 12 03 13 04 14 05 15 06 16 07 17 08 18 09 19 10 20 71 Programming Your Telephone ...

Page 78: ... if needed NOTE You may need a pause between numbers to compensate for dif ferences in response time between your system and the host sys tem ask your attendant about this To store a pause press HOLD then continue dialing If your system is behind a host system that needs a hookflash to access a feature press TAP to store a hookflash then continue dialing press T C to store the number press next lo...

Page 79: ...xt DSS number repeat the previous step until all DSS numbers are stored or press TALK to end NOTE Storing a new DSS number at a button location overwrites an existing DSS number already stored there 9 5 Storing The Memory Location Speed Dial Numbers To store speed dial numbers at the handset memory locations lift handset and press MEMO dial speed dial number press MEMO dial memory location 01 20 d...

Page 80: ...d feature at a function button when he or she programs your telephone thus saving you the trouble of doing it yourself If he or she does this you may be able to overwrite that programming with some of your own however you can not overwrite line and intercom assignments To store a feature code at a function button lift handset and press TALK if necessary press intercom button if necessary dial SS3 ...

Page 81: ...ESSAGE button with that message and label the button accordingly Alternately you can give yourself a scrolling button that allows you to review a list of messages and choose the particular message that you want to send You can obtain the list of system supplied messages from your attendant To store a RESPONSE MESSAGE button lift handset and press TALK if necessary press intercom button if necessar...

Page 82: ......

Page 83: ...stall the digital wireless telephone and its accessories 10 2 Selecting The Installation Location 10 3 Connecting To The Station Jack 10 4 Applying Power to the Base Unit 10 5 Installing The Battery Pack 10 6 Charging The Handset s Battery Pack 10 7 Charging Extra Battery Packs 10 8 Cleaning The Battery Contacts 10 9 Attaching The Belt Clip To The Handset 10 10 Testing the Coverage Range 77 Instal...

Page 84: ...t of your digital wireless telephone on a desk or tabletop near a standard 120V AC outlet and within reach of the station jack Keep the base Unit and handset away from sources of electrical noise for ex ample motors fluorescent lighting and similar devices You may find that you can extend the digital wireless telephone s operating range by locating the base unit at an elevated height An elevated l...

Page 85: ...face Use caution when installing or modifying telephone lines 10 4Applying Power To The Base Unit 1 Using only the AC adapter supplied with the digital wire less telephone plug the AC adapter cord into the AC adapter input jack on the base unit Route the cord through the strain relief channel 2 Plug the AC adapter into a standard 120VAC wall outlet 3 Route the power cord where it will not create a...

Page 86: ... one in its place This will ensure that the battery in the handset will be charged as quickly as possible If you see a low battery notice in the display while you are on a call you can quickly change the battery pack without losing the call Your telephone holds the call for approximately 20 sec onds after you remove the battery pack from the handset This is ample time during a conversation for you...

Page 87: ... can place the handset on the base unit either face down or face up with or without the belt clip attached The battery pack in the handset automatically recharges in either position Please note that the telephone s buttons are inoperative while the handset is on the charger 2 Make sure the CHARGE LED turns on If the CHARGE LED does not turn on check to see that the AC adapter is plugged in and tha...

Page 88: ... Position the battery pack so the inner side is facing toward the top of the base unit 2 Slide the battery pack into the charging compartment until it clicks into place Note that the battery pack charging compartment has a latch that keeps the battery pack in place during charging 3 Make sure the BATTERY CHARGE LED turns on If the BATTERY CHARGE LED does not turn on verify that the battery pack is...

Page 89: ...83 Installing The Digital Wireless Telephone CHARGE POWER BATT CHARGE EXP95BTC Charging Compartment Battery Pack Scout 900MX ...

Page 90: ...se unit about once a month Use a pencil eraser or other contact cleaner Do not use any liquids or solvents 84 Installing The Digital Wireless Telephone CHARGE POWER BATT CHARGE EXP95CON F1 F2 F3 F4 1 2 4 7 F1 F2 F3 F4 3 5 8 0 6 9 ABC T C HOLD MEMO TAP TALK GHI PRS DEF JKL TUV OPER MNO WXY Contacts Contacts Contacts Scout 900MX ...

Page 91: ...venient portability Notice that the belt clip includes a metal loop that you can use to suspend the hand set from a lanyard if you wish To remove the belt clip pry one tab at a time from the notch on the side of the handset Carefully lift the belt clip off CAUTION The belt clip is designed to fit snugly onto the handset 85 Installing The Digital Wireless Telephone VOL MUTE EXP95CLO Lanyard Loop ...

Page 92: ...ge the display shows In Range and the handset sounds a single tone burst or if the handset is out of range the display shows NO SER VICE and the handset sounds three tone bursts move away from the base unit s location in an ever increasing distance while repeating the above test until you no longer get an In Range display the maxi mum distances in any direction at which you can get the In Range di...

Page 93: ...pter s information to help identify the cause of im proper operation 11 2 Interpreting The Trouble Symptoms 11 3 Making A Power Reset 11 2 Interpreting The Trouble Symptoms Should your digital wireless telephone fail to operate properly review the following list of symptoms and causes for help 87 Troubleshooting Your Telephone 11 ...

Page 94: ...re base unit antenna is fully vertical Move handset closer to base unit Error Tone May occur when incorrect buttons are pressed during speed dial programming For example if a button has a line assigned to it it is not available as a programmable button and an error tone sounds if it is pressed during programming Scrambled display No link Feature access problems Reset power Display shows No Comm ba...

Page 95: ... a power re set procedure To reset power on the base unit disconnect the AC adapter plug from the base unit wait several seconds reconnect AC adapter plug to base unit To reset power on the handset lift the handset from the base unit remove the battery pack wait several seconds replace battery pack 89 Troubleshooting Your Telephone ...

Page 96: ......

Page 97: ...warding 7 7 Call Pick Up Making A 2 5 Call Waiting 3 9 Camping At A Busy Station And Waiting For An Answer Call Waiting 3 9 Camping At A Busy Station And Waiting For An Automatic Callback 3 8 Charging Extra Battery Packs 10 7 Charging The Handset s Battery Pack 10 6 Cleaning The Battery Contacts 10 8 Conferencing Calls 6 Conferencing Telephones Together 6 2 Connecting To The Station Jack 10 3 Cons...

Page 98: ...reless Telephone 1 K Knowing Your Digital Wireless Telephone 1 3 Knowing Your Telephone s Functions 1 4 Lighting The Message Waiting Light 8 2 L Line Groups Using 3 5 Low Battery Indication Interpreting 1 5 M Making A Call Non Private Privacy Release 7 8 Making A Call Pick Up 2 5 Making A Hot Transfer 5 3 Making A Power Reset 11 4 Making A Subdued Off Hook Voice Announcement 3 11 Making Calls 3 Ma...

Page 99: ...ation 10 2 Sending A Paging Announcement 7 11 Sending And Receiving Non Verbal Messages 8 Sending LCD Messages 8 3 Sending Response Messages 8 4 Setting A Do Not Disturb Condition At Your Telephone 7 12 Setting The Volume Control 7 13 Service Observing 7 9 Speed Dial Number Storing 9 3 Speed Dial Numbers Storing The Memory Location 9 5 Speed Dial Programming 9 2 Station Jack Connecting To 10 3 Sto...

Page 100: ...ls 5 2 Trouble Symptoms Interpreting 11 3 Troubleshooting Your Telephone 11 U Using Line Groups 3 5 Using The Other Telephone Features 7 Using The Tracker Paging System 7 15 Using This Guide 1 1 Using Your Digital Wireless Telephone With A DSS BLF Console 7 16 V Voice Announce Block 7 2 Volume Control Setting The 7 13 W Waiting For A Line Queuing 3 6 4 Index ...

Page 101: ...ned Button Button Query INTERCOM SS8 Call Divert Station INTERCOM S 55 extension no INTERCOM 55 extension no Call Forward Personal INTERCOM S 51 extension no INTERCOM 5 Call Forward All Calls INTERCOM S 52 extension no Call Forward Ring No Answer All Calls INTERCOM S 54 Call Forward Ring No Answer Personal Calls INTERCOM S 53 Call Park Orbit 91 99 INTERCOM S 91 99 Call Park Pick Up INTERCOM 91 99 ...

Page 102: ...ng Meet Me INTERCOM 78 Remote Station INTERCOM 05 extension no INTERCOM 05 extension no Response Message INTERCOM SS 6 button select msg code Service Observing INTERCOM 03 extension no Speed Dial Station 1 0 Speed Dial System S 100 S 299 Speed Dial Programming INTERCOM SS 1 Station Lock INTERCOM 04 code INTERCOM 04 code Tracker Page Send INTERCOM S 8 Tracker Page Receive INTERCOM 8 orbit code Trac...

Page 103: ...culties arising from the interpretation of the information con tained herein The information contained herein does not purport to cover all details or variations in equipment or to pro vide for every possible contingency to be met in connection with installation operation or maintenance Should further in formation be desired or should particular problems arise which are not covered sufficiently fo...

Page 104: ...Printed in U S A GCA 70 303 03 11 99 ...

Reviews: