background image

300001739168 Rev B

Page 1

www.commscope.com                                                                                                                                     © 2016 

CommScope.

 All Rights Reserved.

Installation Instructions

INTRODUCTION  . . . . . . . . . . . . . . . . . . . . . . . . . . . . . . . . . . . . . . . . . . . . . . . . . . . . . . . . . . . . . . . . . . . . . . . . . . . . . .2

1

SPECIFICATIONS  . . . . . . . . . . . . . . . . . . . . . . . . . . . . . . . . . . . . . . . . . . . . . . . . . . . . . . . . . . . . . . . . . . . . . . . .3

2

UNPACKING AND INSPECTION . . . . . . . . . . . . . . . . . . . . . . . . . . . . . . . . . . . . . . . . . . . . . . . . . . . . . . . . . . . . . . .3

3

CHASSIS INSTALLATION . . . . . . . . . . . . . . . . . . . . . . . . . . . . . . . . . . . . . . . . . . . . . . . . . . . . . . . . . . . . . . . . . . .4

3.1

Rack Installation  . . . . . . . . . . . . . . . . . . . . . . . . . . . . . . . . . . . . . . . . . . . . . . . . . . . . . . . . . . . . . . . . . .4

3.2

Quareo Cross-Connect Solution Installation . . . . . . . . . . . . . . . . . . . . . . . . . . . . . . . . . . . . . . . . . . . . . . . .6

3.3

Grounding Chassis . . . . . . . . . . . . . . . . . . . . . . . . . . . . . . . . . . . . . . . . . . . . . . . . . . . . . . . . . . . . . . . . .7

3.4

Power Cabling . . . . . . . . . . . . . . . . . . . . . . . . . . . . . . . . . . . . . . . . . . . . . . . . . . . . . . . . . . . . . . . . . . . .8

3.4.1

AUX Power  . . . . . . . . . . . . . . . . . . . . . . . . . . . . . . . . . . . . . . . . . . . . . . . . . . . . . . . . . . . . . .   9

3.4.2

Interface Connection Ethernet Port (RJ45 Connector) PoE Switch  . . . . . . . . . . . . . . . . . . . . . . . . .   9

3.5

Blade Installation . . . . . . . . . . . . . . . . . . . . . . . . . . . . . . . . . . . . . . . . . . . . . . . . . . . . . . . . . . . . . . . . . .9

3.6

Cable Installation . . . . . . . . . . . . . . . . . . . . . . . . . . . . . . . . . . . . . . . . . . . . . . . . . . . . . . . . . . . . . . . . . 11

3.6.1

LC or MPO Trunk Cable Installation. . . . . . . . . . . . . . . . . . . . . . . . . . . . . . . . . . . . . . . . . . . . .  11

3.6.2

LC Array Cable Installation  . . . . . . . . . . . . . . . . . . . . . . . . . . . . . . . . . . . . . . . . . . . . . . . . . .   13

3.6.3

LC Trunk Cable Installation LC to LC Blade  . . . . . . . . . . . . . . . . . . . . . . . . . . . . . . . . . . . . . . .   14

3.6.4

MPO Trunk Cable Installation MPO to MPO Blade . . . . . . . . . . . . . . . . . . . . . . . . . . . . . . . . . . .   18

3.6.5

MPO Trunk Cable Installation MPO to LC Blade  . . . . . . . . . . . . . . . . . . . . . . . . . . . . . . . . . . . .   22

4

TECHNICAL ASSISTANCE. . . . . . . . . . . . . . . . . . . . . . . . . . . . . . . . . . . . . . . . . . . . . . . . . . . . . . . . . . . . . . . . . . 24

Content

Page

24749-A

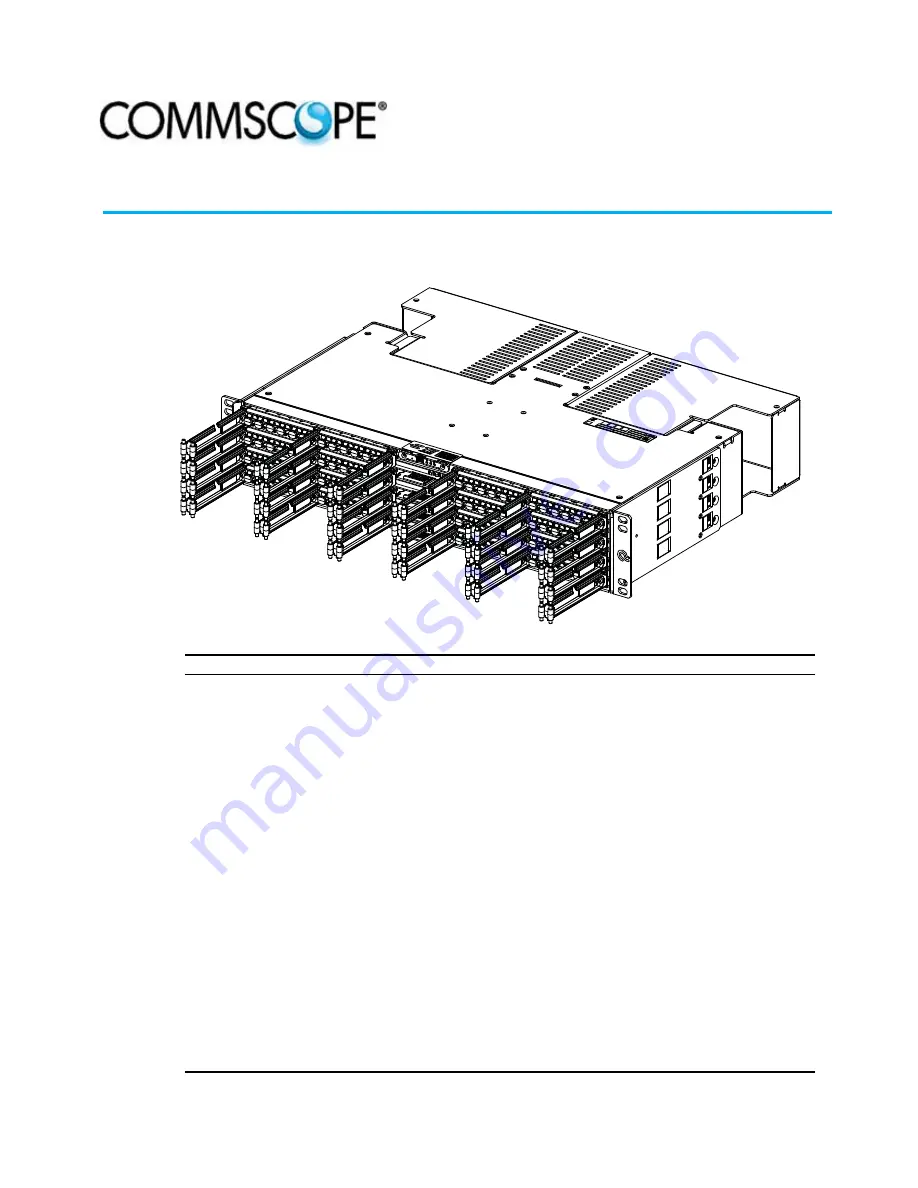
Quareo 4000 Network Chassis

ADCP-92-309
Issue 4, July 2016

Quareo

Summary of Contents for Q4000

Page 1: ...Cabling 8 3 4 1 AUX Power 9 3 4 2 Interface Connection Ethernet Port RJ45 Connector PoE Switch 9 3 5 Blade Installation 9 3 6 Cable Installation 11 3 6 1 LC or MPO Trunk Cable Installation 11 3 6 2 LC Array Cable Installation 13 3 6 3 LC Trunk Cable Installation LC to LC Blade 14 3 6 4 MPO Trunk Cable Installation MPO to MPO Blade 18 3 6 5 MPO Trunk Cable Installation MPO to LC Blade 22 4 TECHNICA...

Page 2: ... if the hazard is not avoided Warning Warning is used to indicate the presence of a hazard that can cause severe personal injury death or substantial property damage if the hazard is not avoided Caution Caution is used to indicate the presence of a hazard that will or can cause minor personal injury or property damage if the hazard is not avoided Warning To prevent electrical shock never install c...

Page 3: ...uld be given to supply connections other than direct connections to the branch circuit e g use of power strips Caution This equipment is to be installed only in Restricted Access Areas dedicated equipment rooms equipment closets etc in accordance with Articles 110 16 110 17 and 110 18 of the National Electrical Code ANSI NFPA 70 Table 1 Network Chassis Specifications PARAMETER SPECIFICATION REMARK...

Page 4: ...ounting screws Caution This equipment is to be installed only in Restricted Access Areas dedicated equipment rooms equipment closets etc in accordance with Articles 110 16 110 17 and 110 18 of the National Electrical Code ANSI NFPA 70 Warning To prevent electrical shock never install chassis in a wet location or during a lightning storm When installing or modifying telephone lines disconnect lines...

Page 5: ... assembly the operating temperature of the rack environment may be greater than the ambient temperature Be sure to install the chassis in an environment that is compatible with the maximum rated ambient temperature See Specifications Caution Installation of the equipment in a rack should be such that air flow to the equipment is not compromised Note Ethernet cabling distance to and from the chassi...

Page 6: ...ss Connect Solution Installation In the Quareo cross connect solution frame there are eight spaces for mounting network chassis Consider them to be numbered one through eight starting at the top see Figure 2 Figure 2 Quareo Cross Connect Solution Frame FRONT VIEW 24732 A 1 2 3 4 5 6 7 8 ...

Page 7: ...ade in accordance with all local and national electrical codes 1 Locate ground location on chassis see Figure 4 At grounding location remove protective tape from chassis 2 Using AWG 14 1 6mm solid copper wire secure two hole ground lug to one end of the ground wire installer provided Secure ground lug to chassis with two 10 32 screws Torque ground screws to approximately 15 pound inches 1 7 Newton...

Page 8: ...controller the PoE connection powers the controller The AUX power connection is not required for power If both a PoE switch and an AUX power source connection is made to the controller the AUX power connection powers the controller If a standard Ethernet non PoE connection is made to the controller the AUX power connection is required to power the controller A PoE switch and an AUX power supply ca...

Page 9: ...ble to the rear of the chassis Secure cable to chassis using tie points provided Leave enough cable slack to make connection to the appropriate location on the Controller 3 5 Blade Installation Several single mode or multimode blades are available for installation in the network chassis They are LC to MPO LC to LC and MPO to MPO For cable clamping and management reasons mixing of fiber cable fanou...

Page 10: ... push in to next detent 4 Push in on second set of latches and push blade all the way into the chassis 5 When blade is pushed all the way into the chassis it is connected to the back plane 6 Route incoming fibers to chassis See Section 3 6 Cable Installation a If Managed Fiber Cables are used attach cables to appropriate adapters b If LC to MPO blades are used attach MPO cables to appropriate adap...

Page 11: ...and secure with hardware provided Some blades use Mille Ties to secure cables to the sliding blade cable tie clip Some LC to LC blades use a fanout retainer and blade cable cover to hold fibers in place From the tie point the optical fibers are routed to the adapters at the front of the blade Use procedure Section 3 6 1 LC or MPO Trunk Cable Installation or Section 3 6 2 LC Array Cable Installatio...

Page 12: ...8 inch 20 cm service loop within the chassis this allows blades to be withdrawn Tighten compression fitting screws to secure cables at the cable entry location 6 Connect cables to the back of the blade a Leave blade fully inserted in the chassis when connecting MPO connectors to MPO to LC adapters b Before connecting MPO connectors to MPO to MPO adapters pull blade out to the second detent 7 Use M...

Page 13: ...Route cables to chassis securing cables to rack per local practices 3 Adjust cables leaving an 8 inch 20 cm service loop within the chassis that allows blades to be withdrawn 4 Before connecting fibers to adapters pull blade out to the second detent 5 Slide fiber fanout onto posts on chassis After installing the last fiber fanout slide a fanout retainer over each post 6 Use Mille Ties to secure ca...

Page 14: ...blade A clip is installed on the rear of the blade to secure fanout to the blade Use the following procedure to install the cable 1 Locate the cable entry location that is specified for cable installation 2 Route cables to chassis securing cables and breakout to rack per local practices 3 Assemble grommets and cable clamps on fiber cables as shown in Figure 10 Note To prevent cable congestion inst...

Page 15: ...for securing cables to the chassis More than one grommet may be needed to secure cables in the clamp 5 Remove cable covers from blades by sliding towards the rear of the blade and lifting out of the retaining slot See Figure 11 Figure 11 Fiber Cover Removal 24905 A USE GROMMET FOR SMALLER NUMBER OF CABLES SCREWS COVER PLATE CABLE CLAMP 8 INCH 20 CM SERVICE LOOP FIBER COVER 24914 A ...

Page 16: ...rved 6 Place fanouts into retaining positions on rear of blade Secure fanouts to blade with clips provided See Figure 12 for clip installation Figure 12 Fanout Clip Installation 24916 A CABLE CLAMPS MILLE TIES FANOUT FANOUT CLIP FIBER BREAKOUT 8 INCH 20 CM SERVICE LOOP ...

Page 17: ...e dust cap from one of the patch cord connectors and then clean the connector as specified in the Optical Fiber Connector Wet and Dry Cleaning Instructions ADCP 90 159 or by locally approved procedures d Insert connector into the adapter e While holding fibers in place slide blade cover into slot Pull cover to the front of the blade and latch in place See Figure 14 9 Close blade Caution Always all...

Page 18: ...ical fibers are routed to the adapters at the front of the blade Use the following procedure to install the cable 1 Locate the cable entry location that is specified for cable installation 2 Route cables to chassis securing cables and breakout to rack per local practices 3 Assemble grommets and cable clamps on fiber cables as shown in Figure 15 4 Cable clamps and several grommets are provided with...

Page 19: ...spect and clean MPO connector per ADCP 96 150 instructions before terminating c Insert connectors into the adapters Caution Always allow sufficient fiber length to permit routing without severe bends Non bend optimized fibers may be permanently damaged if bent curved to a radius of less than 1 5 in 3 81 cm 24905 A USE GROMMET FOR SMALLER NUMBER OF CABLES SCREWS COVER PLATE CABLE CLAMP 8 INCH 20 CM...

Page 20: ...ope All Rights Reserved d Route fibers between lances at the rear of the blade Use a Millie Tie to secure fibers to the blade See Figure 16 Figure 16 Cable Placement 24918 A CABLE CLAMP 8 MPO CABLES 8 INCH 20 CM SERVICE LOOP MILLE TIES FIBER BREAKOUT ...

Page 21: ...ervice loop within the chassis this allows blades to be withdrawn See Figure 17 Tighten compression fitting screws to secure cables at the cable entry location Use a Millie Tie to bundle fibers together Figure 17 Cable Installation 24919 A CABLE CLAMP 8 MPO CABLES 8 INCH 20 CM SERVICE LOOP MILLE TIES FIBER BREAKOUT ...

Page 22: ...ut to rack per local practices 3 Assemble grommets and cable clamps on fiber cables as shown in Figure 18 4 Cable clamps and several grommets are provided with the cable clamp kit for securing cables to the chassis More than one grommet may be needed to secure cables in the clamp Figure 18 Cable Clamp Installation 5 Connect cables to the back of the adapters 6 Remove dust cap inspect and clean MPO...

Page 23: ...itting screws to secure cables at the cable entry location Use a Millie Tie to bundle fibers together Figure 19 Cable Installation Complete chassis installation by installing controllers chassis status board and connecting Ethernet port to the chassis controller Refer to appropriate installation instructions for complete details 24920 A CABLE CLAMPS 8 INCH 20 CM SERVICE LOOP MILLE TIES MPO CONNECT...

Page 24: ...ADCP 92 309 Issue 4 July 2016 Page 24 4 TECHNICAL ASSISTANCE Contact the Technical Assistance Center TAC for technical question Call 800 830 5056 or send an email to TAC Americas commscope com ...

Page 25: ...ADCP 92 309 Issue 4 July 2016 Page 25 2016 CommScope All Rights Reserved ...

Reviews: