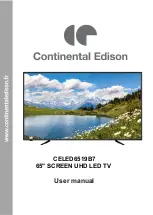
background image


CELED6519B7 

65" SCREEN UHD LED TV  


User manual 


Summary of Contents for CELED6519B7

Page 1: ...CELED6519B7 65 SCREEN UHD LED TV User manual ...

Page 2: ...on of the device The warning sign showing a lightning bolt in a triangle indicates that this product contains dangerous electrical voltages CAUTION TO AVOID THE RISK OF ELECTROCUTION DO NOT REMOVE THE COVER OR THE BACK OF THE DEVICE NO PARTS ARE REPLACEABLE BY THE USER PLEASE CONTACT QUALIFIED PERSONNEL IN CASE OF FAILURE The warning sign showing an exclamation point in a triangle indicates that t...

Page 3: ...able of the device is damaged it must be replaced by the manufacturer its after sales service or a similarly qualified person to avoid any danger The device must not be exposed to dripping or splashing water moisture or liquids Do not place the device near water for example in a bathroom or near a sink No objects filled with liquids such as vases should be placed on or above the device Never touch...

Page 4: ... it may come into contact with electrical components which can cause an electric shock or fire In case of thunderstorm or lightning immediately unplug the mains cable from the wall outlet Always turn off the device when not in use Unplug the mains cable from the electrical outlet when the device will not be used for a long period of time Unplug the device from the electrical outlet before cleaning...

Page 5: ...f furniture that can support the weight of the TV safely Make sure that the device does not protrude from the edge of the furniture on which it is placed Never place the device on a tall piece of furniture e g cabinets or bookcases without attaching both the furniture and the device to a suitable stand Do not place the device on a trolley or on a stand that is not stable Do not install the device ...

Page 6: ...equivalent type Batteries must not be exposed to excessive heat such as that from the sun fire or similar origin Never throw batteries into fire and never expose them to heat sources Do not mix different types of batteries or new and used batteries The batteries must be inserted according to the polarities indicated on the battery and in the battery case of the remote control Used batteries must b...

Page 7: ...t listen at a high sound level for a long time EU Declaration of Conformity Market Maker Brand Licensing hereby declares that the device complies with the essential requirements and other relevant provisions of Directive 2014 53 EU The Declaration of Conformity can be viewed at the following address http www mms support net OTA ECD_MMBL_CELED6519B7 pdf ...

Page 8: ...ing 16 C Installing the feet 17 D Basic connections 18 IV OPERATION 22 A First installation 22 B Main menu TV settings 23 C Basic operations 23 D Setup 29 1 Channel menu 30 2 Picture menu 32 3 Sound menu 33 4 Time menu 34 5 Lock menu 35 6 Settings menu 36 E AV and other modes 38 V MAINTENANCE AND CLEANING 39 VI TROUBLESHOOTING TIPS 40 VII WARRANTY 42 VIII DISPOSAL 43 ...

Page 9: ...eaning of the conformity marking The CE marking indicates that the product meets the main requirements of the European Directives 2014 35 EU Low Voltage 2014 30 EU Electromagnetic Compatibility 2014 53 EU Radio Equipment 2011 65 EU Limitation of use of certain hazardous substances in electronic equipment ...

Page 10: ...en 2 IR Infrared sensor for remote control power indicator 3 Feet 4 SOURCE to select the input source 5 MENU to display the settings menu 6 CH CH to scroll through the channels to the next or the previous one 7 VOL VOL to increase or decrease the volume 8 ON OFF to turn the TV on or off ...

Page 11: ...o broadcast the sound of an external terminal on the TV Use a 3 5 mm stereo cable to connect the PC to the TV 5 HDMI1 HDMI2 HDMI3 HDMI4 allows the broadcast of an uncompressed digital video and audio signal via a single cable 6 ANT to connect the coaxial cable of a terrestrial antenna 7 USB to connect a USB device such as a storage device to access the TV s media functions ...

Page 12: ...ite programs 8 FAV To view the list of favourite programs 9 CH CH To view the next or previous channel 10 VOL VOL To increase or decrease the volume 11 P MODE To switch between picture modes 12 S MODE To switch between the different Audio modes 13 INPUT To change the video source 14 SLEEP To set the time before standby 15 ASPECT Press repeatedly to change the size of the image 16 INFO To view the ...

Page 13: ...e To stop playback 25 HOLD Play Pause during Timeshift To go back quickly 26 SUBPAGE To display the teletext subpage For fast forward 27 SIZE Press repeatedly to change the picture size in Teletext mode To read the previous file 28 CANCEL To exit the OSD menu To read the next file 29 SUB T To show or hide subtitles 30 TV RADIO To switch between TV and radio modes 31 REC Starts RECORDING a digital ...

Page 14: ...re 0 C to 40 C Remote control power supply 2 x 1 5V LR03 AAA batteries not provided Voltage and output current of the USB port 5V 0 5A Hotel lock Yes Speaker Built in 2 x 8W Inputs Antenna HDMI YPbPr AV USB Outputs Optical Audio L R Functions via USB PVR digital video recorder Multimedia playback formats via USB Video AVI MPG MOV TS MKV DAT MP4 VOB Music MP3 M4A Photos JPEG PNG BMP Text TXT These ...

Page 15: ...ELED6519B7 Modèle D65RWB624 U T2 Energy efficiency class A Visible screen diagonal 164cm 64 5 inches Power consumption in On mode W 137W Energy consumption kWh per year based on the power consumption of a TV operating four hours a day for three hundred and sixty five days The actual consumption depends on the conditions of use of the TV 200 kWh year Power consumption in Standby mode W 0 5W Power c...

Page 16: ...recyclable PE polyethylene PS polystyrene PP polypropylene This means that they can be recycled by disposing of them in appropriate collection containers Other packaging elements adhesive fasteners must be disposed of with household waste For more information www quefairedemesdechets fr B Wall mounting Contact a professional to get help with wall mounting your TV We cannot be held responsible in t...

Page 17: ... of the TV should protrude slightly from the edge of the flat surface to allow the feet to be attached without damaging the LED screen Step 2 Align the bottom of the TV with the feet until they are fully in place mounting holes aligned Step 3 Tighten the supplied screws using a screwdriver NOTE unplug the TV from the mains outlet when installing or removing the feet of the TV Contact one of our pa...

Page 18: ...y other device Connect to an outdoor antenna ANT Plug an antenna into the antenna terminal to get the best possible picture quality The use of antenna amplifiers is optional or depends on the type of outdoor antenna used OPTICAL Connections Use an OPTICAL cable to connect the television to an audio amplifier or another audio decoding device for audio output OPTICAL cable not provided ...

Page 19: ...e terminal to that of the cable YPbPr and audio connection NOTE when connecting an external device match the colour of the terminal to that of the cable AV cable not provided Back of the external terminal Back of the external terminal AV cable not provided YPbPr cable not provided ...

Page 20: ...vided Back of the external terminal Use an AUDIO cable to connect the television to an audio amplifier Use an HDMI cable to connect the TV to another device to receive a high definition multimedia signal Back of the external terminal HDMI cable not provided ...

Page 21: ...21 USB input terminal BEFORE CONTINUING CHECK THAT ALL EQUIPMENT AND THEIR MAINS CABLES ARE CONNECTED AND CONFIGURED CORRECTLY The USB stick is not provided ...

Page 22: ...enu language then press to highlight the next line Country Press to select Country then press to select the desired country Press to highlight the next line Power saving Press to select Power saving then press to select the desired mode Press to highlight the next line Time zone Press to select Time zone then press to select the desired time zone Press the OK key to display the next page ...

Page 23: ...y to exit the menu C Basic operations Press the ON OFF key on the TV or remote control to turn the TV on Press this key again to set the TV to standby Press the INPUT key on the TV or remote control to switch between the different sources available Selecting the desired program Press the CH key to move to the next channel Press the CH key to move to the previous channel Press the numeric keys to d...

Page 24: ...ewed TV guide in DTV mode only Press the TVG key to display the program guide Press to select a channel then press to select the desired program Press the INFO key to view the program information Press the RED key to program a recording for the selected program Press the GREEN key to program a reminder for the selected program Press the YELLOW key to view the list of previous programs and press th...

Page 25: ...ion If the toolbar is hidden press the EXIT key to display it again Press the key to show the confirmation window Press to pause or continue recording To watch a recording press the INDEX key to display the list of recordings Press to select a file then press the OK key to start playback Timeshift in DTV mode only 1 Insert a USB storage device into the USB port 2 When watching a digital program pr...

Page 26: ...ward playback of the video Forward allows a fast playback of the video Previous to read the previous file Next play the next file Stop to stop playback and return to the previous folder CharSet Font to set the subtitle font Repeat All to select the repeat mode Repeat one ALL none Set A allows you to play the video between 2 points A and B previously selected by pressing this key Playlist to view t...

Page 27: ...usic to play or stop the background music To add background music an audio file must be present in the folder being played Playlist to view the list of pictures Info to display the current picture information Resolution Size Date Time Rotate to rotate the picture Enlarge enlarges image Reduce reduces image Move the image increase the size of the image beforehand Highlight the icon and press the OK...

Page 28: ...y the next page Press to select the disc you want to browse then press the OK key to select it Press to select a text file and press the OK key to view it Press the INFO key to display the next menu Press to select an option then press the OK key to confirm the selection Previous page to view the previous page Next page to view the next page Previous to read the previous text file Next to read the...

Page 29: ...ol to turn the TV on Press again to set the TV to standby Press the INPUT key on the TV or remote control to switch to DTV AV HDMI mode Press the INPUT key to display the list of sources Press to select the source to use Press the OK key to select the source ...

Page 30: ...u 4 Once the settings have been made press the EXIT key to exit the settings page Auto Tuning Press to select Auto Tuning then press the OK key to display the submenu Press to select the desired country search type and reception mode then press the OK key to start automatic channel search ATV manual tuning Press to select ATV manual tuning then press the OK key to display the submenu DTV manual tu...

Page 31: ...e by pressing the OK key The Blue key to skip the highlighted channel Your TV will automatically skip this channel when you use the CH keys to scroll through the channels The FAV key to add a channel to the list of favourite channels Schedule PVR recording Press to select Schedule then press the OK key to display the submenu Press the YELLOW key to add a recording Press the BLUE key to change it P...

Page 32: ...able picture modes are Dynamic Standard Soft and Custom NOTE press the P MODE key on the remote control to switch between the different picture modes Contrast Press to select Contrast then press to set the option Brightness Press to select Brightness then press to set the option Colour Press to select Colour then press to set the option Tint Press to select Tint then press to set the option NOTE t...

Page 33: ...ss the MENU key to display the main menu Press to select SON from the main menu and press to access the settings 1 Press to select the option to set in the SOUND menu 2 Press to adjust the desired setting 3 Press the MENU key to return to the previous menu 4 Once the settings have been made press the EXIT key to exit the settings page Sound mode Press to select Sound mode then press the OK button ...

Page 34: ...he option AD Switch Press to select AD Switch then press the OK button to display the sub menu Press to turn the option on or off Press to highlight the next line then press to adjust the volume of the audio description 4 Time menu Press the MENU key to display the main menu Press to select TIME from the main menu and press to access the settings 1 Press to select the option to set in the TIME men...

Page 35: ... to display the sub menu Press to set the option The durations available are Off 3H 4H and 5H OSD timer Press to select OSD timer then press the OK key to display the submenu Press to set the option The available timeouts are 10 S 15 S 20 S and 30 S 5 Lock menu Press the MENU key to display the main menu Press to select LOCK from the main menu and press to access the settings 1 Press to select the...

Page 36: ...o select Parental Guidance then press the OK button to display the sub menu Press to set the option The available modes are Off 4 to 18 Key lock Press to select Key lock then press to turn the lock on or off Hotel mode Press to select Hotel mode then press the OK key to display the submenu NOTE we recommend the use of Hotel mode only in a hotel environment You should avoid using it at home 6 Setti...

Page 37: ... or off PVR file system Press to select PVR file system then press the OK key to display the submenu This menu displays all information about the connected USB media Press the MENU button to go back to the previous menu HDMI ARC CEC Press to select HDMI ARC CEC then press the OK key to display the submenu Press to select a setting then press to adjust the desired setting Press the MENU key to retu...

Page 38: ...ess the OK key to display the submenu Press to confirm your selection E AV and other modes Press the INPUT key on the TV or on the remote control to display the desired source NOTE to learn more about how these modes work see IV OPERATION D SETTINGS ...

Page 39: ...ce is very dirty wipe it with a soft cloth that is lightly moistened with water Then wipe again with a dry soft cloth Never insert objects or liquids into the ventilation openings on your TV This could result in damage or even a short circuit or risk of electric shock Never use alcohol benzene solvent or other chemicals Do not use compressed air to remove dust ...

Page 40: ...und Adjust the volume using the VOL VOL keys Press the MUTE key to cancel the silent mute mode Unplug the headphones If audio equipment is plugged in make sure it is properly connected Check that the TV and stereo equipment are properly configured Check the audio settings Noise or other type of interference Electronic equipment near the unit creates interference Check the equipment cable connectio...

Page 41: ...ce is not formatted Make sure that the USB device is compatible and that the multimedia data formats can be read The TV turns itself off Check if the Standby timer and Automatic standby settings are not enabled in the Time menu If the TV is used as a PC monitor check the PC power and standby settings Coloured dots appear on the screen Although the LED screen is manufactured with high precision tec...

Page 42: ...e product with food or liquids and due to corrosion caused by rust 3 Any unauthorised incident abuse misuse modification disassembly or repair 4 Any improper maintenance operation use that is not in accordance with the product instructions or incorrect voltage connection 5 Any use of accessories not provided or approved by CONTINENTAL EDISON The warranty will be void if the nameplate and or serial...

Page 43: ...at the end of the service life of this device it must not be disposed of with unsorted municipal waste It must be disposed of in the recovery and collection systems made available to you by local authorities waste disposal centres and distributors As a final consumer your role is paramount in the cycle of reuse recycling and other forms of recovery of this Electrical and Electronic Equipment You h...

Page 44: ...CELED6519B7_102018_V1 ...

Reviews: