background image

LINC PANORAY

2021 OWNER’S MANUAL 

FOR SELECT SUPER AIR NAUTIQUE MODELS

Summary of Contents for LINC PANORAY

Page 1: ...LINC PANORAY 2021 OWNER S MANUAL FOR SELECT SUPER AIR NAUTIQUE MODELS ...

Page 2: ...are and Maintenance Touchscreen Display Helm Command User Interface Split Interface Mode General Layout Fullscreen Mode and Layout Using Helm Command Rotary Knob Button Shortcuts Volume Button User Button Speed Button Tab Button Home Button HOME MENU Main Tab Surf Speeds Wakeboard Speeds Ski Speeds GS Series Only Status Tab River Mode Tab Steering Assist Tab Optional AUDIO MENU Main Tab Dynamic So...

Page 3: ... is a multifunctional tool that provides GPS tracking multimedia display speed control and enables equipment operators to view many different engine parameters and service codes CARE AND MAINTENANCE General maintenance is not required however a soft cloth can be used for cleaning the unit Window cleaner or alcohol can also be used to clean the glass portion of the display Do not use harsh or abras...

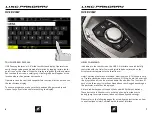
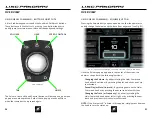
Page 4: ...n addition to the touchscreen the LINC 3 0 interface can also be fully controlled with the Helm Command pictured above located on the driver s armrest adjacent to the throttle arm Helm Command features a machined aluminum knob This knob is able to 1 rotate clockwise and counterclockwise 2 tilt up down left and right like a joystick and 3 can be pressed down like a button The functions of each of t...

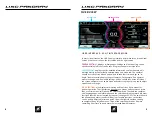
Page 5: ...vidual audio settings he she should look at the left side of the screen navigate to the audio menu and select the proper menu tab to adjust specific audio settings RIGHT SECTION also displays information and functions but is meant for quicker operation The right section does not use menus and contains only two tabs at all times the vitals tab and the switchboard tab The vitals tab contains vital e...

Page 6: ...e referred to as a page Most settings and functions are illustrated here as a stack up of smaller horizontal bars with curved ends AUDIO BAR This area always displays the current stereo source and the volume level of the audio system Tapping the or the on the volume level will increase or decrease the volume Tapping the volume horn icon will mute or unmute the audio system RIGHT TAB BAR This tab b...

Page 7: ...oard is required e g when creating a name Map Menu Full Map tab Preferences Menu System tab diagnostic pages and dealer menu pages Full screen pages will slightly re position critical gauges and settings to the top and bottom of the screen Current speed and volume level move to the top in the FULLSCREEN STATUS BAR whereas the depth and fuel gauges move to the bottom in the MENU TAB BAR FULLSCREEN ...

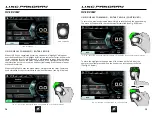
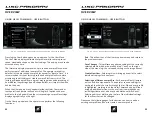
Page 8: ...d menu simply rotate the knob the opposite way The menu will appear with the tab that was last selected see Fig A2 below USING HELM COMMAND ROTARY KNOB When LINC 3 0 has completed its start up sequence a highlight will appear over the Menu Wheel This highlight is similar to a computer cursor it shows the current position for user interaction and it will respond to input from the rotary knob or the...

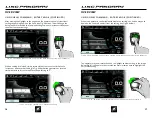
Page 9: ...increase visibility over the other functions settings USING HELM COMMAND ROTARY KNOB CONTINUED When the operator is comfortable with where the setting is at he she may push down on the knob to de select from the setting see Fig A6 below The operator may now rotate the knob to highlight another setting In the image below Fig A7 the operator has rotated counter clockwise once to highlight the Surf M...

Page 10: ...OB CONTINUED Once again an operator can select functions settings by pushing down on the knob in Fig H below the operator has selected the Surf Mode setting USING HELM COMMAND ROTARY KNOB CONTINUED As mentioned previously when the operator is comfortable with where the setting is at he she may push down on the knob to de select from that setting see example below FIG A9 ROTATING CLOCKWISE TO CHANG...

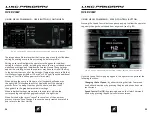
Page 11: ...e and the track from any menu see Fig B1 Once the Volume pop up appears in the center of the screen the operator can perform the following functions Changing the Volume by either rotating the Helm Command knob either direction or by pressing the plus and minus icons via touchscreen Pause Play or Mute Un mute by pressing down on the Helm Command knob or by pressing the pause icon via touchscreen Ch...

Page 12: ...e settings displayed graphically on the right On the User pop up menu the operator can perform the following functions Exit This will exit out of the User drop down menu and return to the previous screen Save Changes This will save any altered settings of the currently selected profile which are noted by blue icons on the right side of the menu e g the set speed setting on the image above Create N...

Page 13: ...ator presses Enter to accept the changes the name and then it will change back to the graphical preview of settings When individual settings are adjusted the operator will see the corresponding settings change graphically on the right side When finished either press cancel to cancel out of the new user process or press Save Changes to save the newly created user profile and return to the User List...

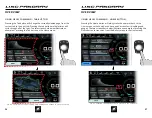
Page 14: ...an example of pressing the Tab button on the Home menu USING HELM COMMAND HOME BUTTON Pressing the Home button will always take the operator back to the Home menu so that he she can have quick access to vital settings and gauges The two screenshots below illustrate an example of pressing the Home button to transition from the Ballast menu to the Home menu FIG B6 PRESSING THE TAB BUTTON ON HELM COM...

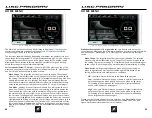
Page 15: ...icon that is not highlighted while driving at set speed the surf wave will quickly move to that side while the boat is underway If Surf Mode is OFF then the wave will stay symmetrical behind the boat and will not be large enough on either side to properly surf behind NOTE Surf Mode is not available when Speed Control is Off Wakeboard set speeds 13 0 mph or above the boat should be in most circumst...

Page 16: ... AT THE REAR OF THE BOAT G and GS Series Boats FIG C5 NAUTIQUE HYDRO GATE LOCATED AT THE REAR OF THE BOAT 210 and 230 Boats NCRS NSS AND HYDRO GATE SYSTEMS The primary way to control the wake wave behind the boat is through the Wake Wave Shape function on the Home Menu This function helps control the automated NCRS and NSS systems and ensures they work in conjunction with one another to produce th...

Page 17: ...ver Mode is a feature that allows the driver to keep the boat s speed over water constant at the push of a button when a current is present To compensate for the current the boat s speed over ground or GPS speed must be adjusted up or down depending on the direction of the boat relative to the current River Mode has two key settings River Current should be pressed when driver is changing direction...

Page 18: ...us requires additional user input for the river current speed or river offset Paddle Wheel speed control is not as accurate as GPS but takes the speed of the river current into account thus requiring less input from the user Fig E3 on the next page shows what the interface looks like when Paddle Wheel is selected RIVER MODE TAB Paddle Wheel Offset lets the operator adjust the offset of the paddle ...

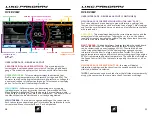
Page 19: ...p turns at increased engine speed can produce STEERING ASSIST TAB HOME MENU FIG F1 STEERING ASSIST TAB ON THE HOME MENU FIG F2 AUTO STEERING ASSIST SET TO LOW AND THRUSTER IN USE BLUE GRAPHICS Auto Steering Assist Off Low High this will enable the automatic steering assist feature which will determine the direction and amount of thrust based off of the steering wheel position and the direction the...

Page 20: ...he stern thruster when 1 the boat is below 4 mph 2 the boat is in gear and 3 the steering wheel is turned past the dead band The curved line below the text indicates the amount of run time that the stern thruster can be used the smaller the curved line the smaller amount of run time that remains The segmented gauge illustrates the current steering wheel rudder position This will correspond to the ...

Page 21: ...le Unmute Mute if using AM FM SirusXM or Auxiliary inputs Source displays the currently selected audio source The operator can change between the AM radio FM radio Auxiliary input SirusXM satellite radio USB device Weather Band Bluetooth audio and turning the stereo off in this area FIG G1 MAIN TAB ON THE HOME MENU AUDIO MENU MAIN TAB If the stereo is turned off the screenshot depicted below in Fi...

Page 22: ...onal functionality to control playlists from USB devices The Browse Files function will bring up a pop up menu that will allow the operator to navigate through the folders and files that are on the USB connected device Please note that it may take a while for the system to load all of the folders files that are stored on the USB connected device Weather Band stereo plays Weather Band frequencies a...

Page 23: ...the tower speakers Sub If equipped controls the volume level of the subwoofer s FIG G5 ZONE CONTROL TAB ON THE MEDIA MENU AUDIO SETUP TAB The Audio Setup Tab enables operators to fine tune the audio system to their preferences The operator can adjust the overall bass mid treble and Auto Volume Auto Vol settings from this tab Bass modifies sounds from the audio system that are low in pitch Mid modi...

Page 24: ...dapt to volume changes that the operator makes while driving For example if the operator is at 2 mph and he she lowers the volume to 5 then the volume will lower to 5 whenever the operator is below 5 mph again If the operator is driving at the set speed 25 0 mph in Fig G6 and he she increases the volume to 31 the volume will then become 31 whenever he she reaches set speed again The Minimum and Ma...

Page 25: ... photo mode it will start or stop the timelapse recording GoPro Mode selects the mode of the connected GoPro camera The four modes are 1 Video 2 Single Photo 3 Burst Photo and 4 Timelapse Photo SETTINGS TAB The Settings tab contains the following information functions in order from top to bottom Camera Name The upper area will contain the name of the currently connected GoPro camera and the curren...

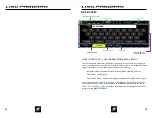
Page 26: ... left of the network name Scroll down to select the desired camera From there a keyboard will pop up for you to enter the password for the GoPro WiFi the password may be displayed on your camera s screen After entering the password the pop up menu will disappear the system will finish the connecting process with the camera and then the name of the camera will appear with a battery status icon and ...

Page 27: ...op up menu will appear see Fig H7 Scroll through the list of previously connected GoPro cameras and select the desired camera The pop up menu will then disappear and the name of the camera will appear with a battery status icon and the Connected text At this stage you may now remotely control your GoPro camera through the Control tab or you may view the saved files on your GoPro camera through the...

Page 28: ... all files that are stored on the connected GoPro camera As the operator highlights a file an image preview will appear in the viewing area Please note that when a video is highlighted only a still image will appear in the viewing area When the file is selected the operator can choose to go back to the file menu or can choose to delete that file If there is no GoPro camera connected then a message...

Page 29: ... that tank until it is completely empty at 0 Once again the operator may at any time press stop pump s to turn the pump s off The Quick Toggle feature allows the operator the fill or drain all ballast tanks simultaneously SET LEVEL TAB The Set Level tab enables the operator to set desired ballast tank levels in 10 increments To set a ballast tank level select a ballast tank and increase or decreas...

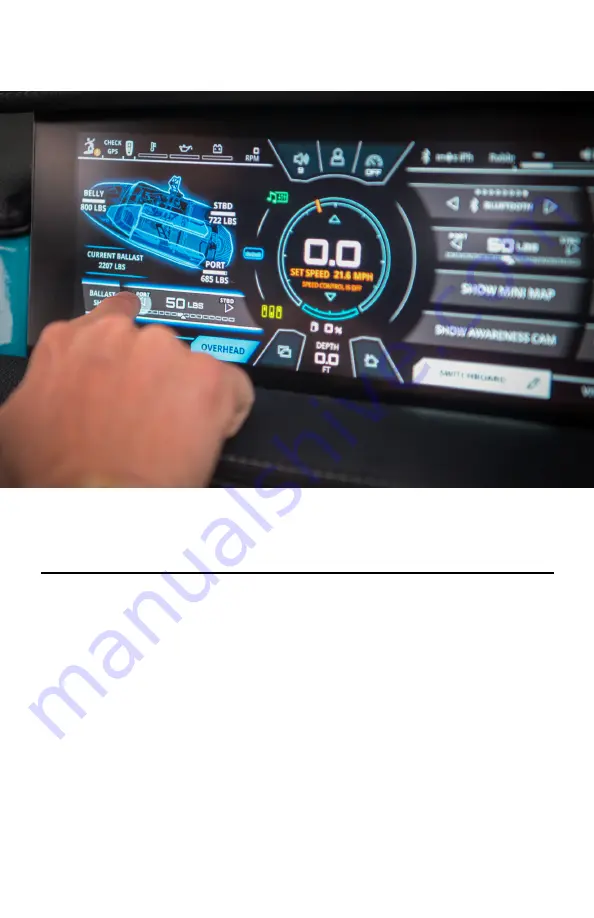
Page 30: ...so features a Ballast Shift function Ballast Shift allows the operator to shift weight Port to Starboard or vice versa in 50 lb 23 kg increments This is useful when the boat is slightly unbalanced and needs to have weight adjusted in small increments To use Ballast Shift just select Ballast Shift and set the amount of weight to be shifted to the Port or Starboard sides After a short verification p...

Page 31: ...rtesy Lighting Package option available on G and GS boats The Courtesy Color tab enables the operator to customize the color and brightness of the courtesy lights in the boat which includes the small circular courtesy lights lighted cup holders and the lighted Nautique badges Courtesy Lights turns all of the courtesy lights on or off Courtesy Brightness adjusts the brightness of the courtesy light...

Page 32: ...C system will default the system back to the 12 factory pre set colors and the 4 empty slots When a color slot is selected in the Favorite Colors pop up several options appear see Fig K6 Back Arrow Icon Will take the operator back to the list of favorite colors Select Will immediately change all courtesy lights to that specific color Overwrite Will overwrite that slot with the current color of the...

Page 33: ... SWITCHING MENU SWITCHING MENU CLIMATE TAB NOTE the heater switches shown in the above example are optional and are not equipped on every boat This tab only exists if those heater switch options are equipped From the Climate tab the operator may turn on off the heater fan and driver seat heater The current on off state of the passenger seat heater is shown here but it cannot be controlled by LINC ...

Page 34: ...of the boat is pointed to North Up will always orient the map to where North is at the top of the screen Zoom In plus sign Zooms in on the map Zoom Out minus sign Zooms out on the map FIG M1 MINI MAP ON THE MAP MENU MAP MENU FULL MAP TAB The Full Map tab shows a larger fullscreen view of the map The Full Map tab includes the same four functions as the Mini Map tab but also features a slideout wind...

Page 35: ...ted and deleted Save Track saves the current track Clear Track clears the current track FIG M3 FULL MAP WITH SLIDEOUT WINDOW FOR WAYPOINTS AND TRACKS MAP MENU FULL MAP TAB WAYPOINTS AND TRACKS Once a waypoint is selected from the list of saved waypoints the operator may do the following from the Waypoint Manager Change Icon Edit Name changes the icon or edits the name of the waypoint Show On Map m...

Page 36: ...uzzes when the set speed is achieved Depth Buzzer the LINC unit audibly buzzes when the boat is in shallow waters and buzzes when the minimum depth is reached Minimum Depth sets when the Depth Buzzer goes off DISPLAY TAB The Display tab contains the following settings Display Brightness adjusts the brightness of the LINC display Units toggles the units displayed on LINC between English and Metric ...

Page 37: ... Surf Select if turned on it allows certain settings to be changed by someone who is riding surfing behind the boat with the Surf Select Remote or Surf Select App on a Pebble Watch Pair Remote for Surf Select allows a surfer to switch surf sides behind the boat with the Surf Select Remote Pair Pebble for Surf Select allows a surfer rider to switch surf sides change set speed change NSS setting cha...

Page 38: ...prior stored faults SYSTEM TAB SYSTEM INFO System Info identifies the LINC display and the current software installed on the display When pressed the Factory Rest Settings button will reset everything in LINC back to the factory default settings NOTE The Reboot to Bootloader button is intended for Nautique or Dealer technicians only This button allows technicians to load LINC software files via th...

Page 39: ...TION SWITCHBOARD TAB The right section of the screen does not contain any menus but contains two permanent tabs The Switchboard tab and the Vitals tab The switchboard tab allows the operator to select his her four favorite functions so that they can be quickly adjusted or turned on off from the right side of the screen without having to navigate to any left side menus The operator can freely mix a...

Page 40: ...switchboard functions are organized into tabs at the bottom of the screen You may change which tab is visible through the touchscreen or through the tab button on the Helm Command keypad SWITCHBOARD TAB EDITING THE FUNCTIONS Also note that there may be a scroll bar on the left side of the screen indicating that you may need to scroll down to see additional functions Some switchboard functions are ...

Page 41: ... for the boat in a large easy to read format This includes Engine temperature Engine oil pressure Battery charging voltage Engine RPM Air Temperature Water Temperature The tab also includes the Speed Control On Off so that users can quickly turn that on or off as needed FIG P4 SWITCHBOARD TAB ON THE RIGHT SECTION OF THE DISPLAY ...

Page 42: ...pressing Ignore will close the diagnostic message window If ignore is pressed a smaller message will appear in upper left hand corner of the screen until the problem is corrected see image below CIRCUIT FAULT MESSAGE WARNING It is strongly advised that you contact your Nautique dealer immediately when a circuit fault appears If a circuit fault message is displayed a brief description will appear P...

Page 43: ...LINC PANORAY 2021 OWNER S MANUAL FOR NAUTIQUE 200 MODELS ...

Reviews: