background image

CRYSTAL SERIES

INSTALLATION GUIDE 

n

 GUIDE D’INSTALLATION

INSTALLATIONSANLEITUNG 

n

 Guía de instalación  

РУКОВОДСТВО ПО УСТАНОВКЕ


n

 GUIA DE INSTALAÇÃO

インストールガイド


SPECIAL EDITION

47100 Bayside Parkway • Fremont • California • 94538 • USA | corsair.com

© 2017 CORSAIR COMPONENTS, Inc.

All rights reserved. CORSAIR, the sails logo, and Crystal Series are registered  

trademarks of CORSAIR in the United States and/or other countries. 

All other trademarks are the property of their respective owners. 

Product may vary slightly from those pictured.

49-001639 AA

Summary of Contents for 570X SPECIAL EDITION

Page 1: ... EDITION 47100 Bayside Parkway Fremont California 94538 USA corsair com 2017 CORSAIR COMPONENTS Inc All rights reserved CORSAIR the sails logo and Crystal Series are registered trademarks of CORSAIR in the United States and or other countries All other trademarks are the property of their respective owners Product may vary slightly from those pictured 49 001639 AA ...

Page 2: ...English 5 14 Français 15 24 Deutsch 25 34 Español 35 44 Россию 45 54 Português 55 64 日本語 65 74 ...

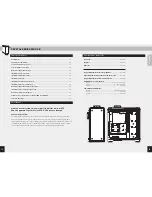
Page 3: ... 570X SE Tempered Glass Premium ATX Mid Tower Case Length 479mm Width 231mm Height 511mm Maximum GPU length 370mm Maximum CPU cooler height 170mm Maximum PSU length 225mm Fan locations Front 3 x 120 2 x 140mm Top 2 x 120 140mm Rear 120mm Radiator compatibility Front 280mm 360mm Top 240mm Rear 120mm Crystal Series 570X SE With immaculate tempered glass enclosing the entire chassis every component o...

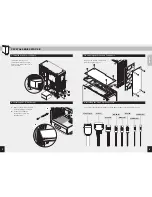
Page 4: ...ilters Rear HDD Mounts Rear SSD Mounts Removable Fan Trays PSU Cover x3 SP120 Front Fans 570X RGB uses SP120 RGB A B C D E F G H I RE MA RK A AT X M MI CR O AT X A M A M A M A M A A H D A G E D C B G F I A a x6 Cable ties f x1 Motherboard standoff d x12 Short fan screws e x8 Long fan screws b MBD HDD screws x20 c x8 SSD ODD screws g x2 Hook and loops straps ...

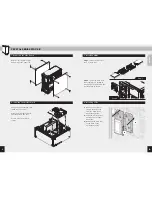
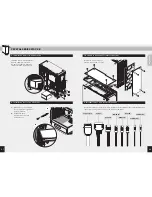
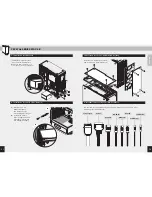
Page 5: ...the case Secure with the included screws Step 1 Place the drive into the 3 5 drive tray Step 2 Slide the drive and rail assembly into the HDD mounting location behind the motherboard as shown 1 Remove the screws to release the drive tray from the back of the motherboard tray 2 Slide the 2 5 drive into the tray until it snaps into place 3 Reattach the drive tray to the back of the motherboard tray ...

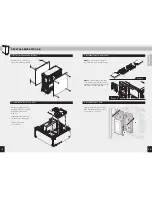
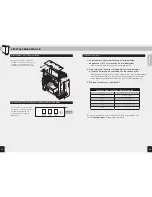
Page 6: ...l the PSU into the lower chamber of the case and secure with four screws from behind 1 Remove thumbscrews and corresponding slot covers 2 Install the expansion card and secure with thumbscrews USB 3 0 HD AUDIO RESET SW POWER LED POWER LED POWER SW HDD LED USB 3 1 Type C See your motherboard s manual for front panel header locations and pin outs 400C_400Q STEP 5 REM ARK A ATX M M IC RO ATX A M A M ...

Page 7: ...r with the I O panel s power and reset header No only the LED headers 2 Who should I contact if I received my case damaged or one of the fans is no longer working Please go to corsair force com and request an RMA so that we can replace the damaged part s 3 Where can I mount a fan To learn more about this case visit the product page at corsair com Fan Mount Locations Front 3x120mm 2x140mm 3x120mm i...

Page 8: ...570X SE en verre trempé Longueur 479mm Largeur 231mm Hauteur 511mm Longueur maximale de la carte graphique 370mm Hauteur maximale du refroidisseur du processeur 170mm Longueur maximale du bloc d alimentation 225mm Emplacement des ventilateurs Avant 3 x 120 2 x 140mm Haut 2 x 120 140mm Arrière 120mm Compatibilité du radiateur Avant 280mm 360mm Haut 240mm Arrière 120mm Crystal Series 570X Le cadre é...

Page 9: ... Fixations de disque SDD arrière Tiroirs de ventilation amovibles Capot de l alimentation 3 ventilateurs avant SP120 570X RGB utilise SP120 RGB A B C D E F G H I a x6 Attaches de câbles f x1 Entretoise de carte mère d x12 Vis de ventilateur courtes e x8 Vis de ventilateur longues b Vis de carte mère disque dur x20 c x8 Vis de SSD lecteur optique RE MA RK A AT X M MI CR O AT X A M A M A M A M A A H...

Page 10: ...e de 3 5 Étape 2 Faites glisser le disque et le rail dans l emplacement de montage du disque dur derrière la carte mère comme indiqué Enclenchez la plaque de protection E S de la carte mère dans la découpe d accueil Alignez la carte mère sur les entretoises du boîtier Fixez à l aide des vis incluses Faites glisser le disque de 2 5 dans le plateau jusqu à ce qu il s enclenche en position 600C_600Q ...

Page 11: ...ide de quatre vis Retirez les vis moletées et enlevez le panneau en verre Consultez le manuel de la carte mère pour plus d informations sur l emplacement des connecteurs et des broches de sortie du panneau avant 1 Retirez les vis de serrage et les capots de logement correspondants 2 Installez la carte d extension et fixez la à l aide de vis USB 3 0 HD AUDIO RESET SW POWER LED POWER LED POWER SW HD...

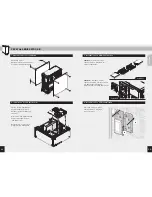
Page 12: ...mmagées 3 Où puis je monter un ventilateur Pour en savoir plus sur ce boîtier veuillez vous rendre sur le site corsair com à la page des produits Montage pour ventilateur Emplacements Avant 3x120mm 2x140mm 3x120mm inclus Haut 2x140mm 120mm Arrière 120mm inclus Bas x Côté x Milieu x 9 Retrait des tiroirs de ventilation 10 Utilisation du contrôleur de ventilateur RGB 570X RGB Dévissez le tiroir de v...

Page 13: ...ximale GPU Länge 370mm Maximale Höhe des CPU Kühlsystems 170mm Maximale Netzgerät Länge 225mm Lüfterpositionen Vorderseite 3 x 120 2 x 140mm Oben 2 x 120 140mm Rückseite 120mm Radiatorkompatibilität Vorderseite 280mm 360mm Oben 240mm Rückseite 120mm Crystal Series 570X SE Das gesamte Gehäuse ist von makellosem Hartglas umschlossen sodass alle Komponenten Ihres Aufbaus für jedermann sichtbar sind D...

Page 14: ... HDD Schrauben x20 c x8 SSD ODD Schrauben Seitenabdeckungen aus Hartglas Frontblende aus Hartglas Oberabdeckung aus Hartglas Staubfilter Rückseitige HDD Montagepunkte Rückseitige SSD Montagepunkte Abnehmbare Lüftereinschübe Netzteil Abdeckung x3 SP120 Frontlüfter 570X RGB verwendet SP120 RGB A B C D E F G H I RE MA RK A AT X M MI CR O AT X A M A M A M A M A A H D A G E D C B G F I A g x2 Klettbänd...

Page 15: ...ür 3 5 Zoll Laufwerke Schritt 2 Schieben Sie das Laufwerk und die Schieneneinheit wie abgebildet hinter dem Motherboard in den HDD Schacht Lassen Sie die I O Blende des Motherboards in die dafür vorgesehene Öffnung einrasten Richten Sie das Motherboard mit den Abstandsbolzen im Gehäuse aus Befestigen Sie es mit den mitgelieferten Schrauben Schieben Sie das 2 5 Zoll Laufwerk in den Einschub bis es ...

Page 16: ... Entfernen Sie die Rändelschrauben und nehmen Sie die Glasabdeckung ab Die Position der Frontplatten Header und die Pinbelegung finden Sie in der Anleitung Ihres Motherboards 1 Entfernen Sie die Rändelschrauben und dazugehörige Steckplatzabdeckungen 2 Installieren Sie die Erweiterungskarte und befestigen Sie sie mit den Rändelschrauben USB 3 0 HD AUDIO RESET SW POWER LED POWER LED POWER SW HDD LED...

Page 17: ...fter anbringen Weitere Informationen über dieses Gehäuse finden Sie auf der Produktseite bei corsair com Punkte für Lüfterhalterungen Vorderseite 3x120mm 2x140mm 3x120mm inbegriffen Oberseite 2x140mm 120mm Rückseite 120mm inbegriffen Unterseite x Seite x Mitte x 9 Entfernen der Lüftereinschübe 10 Verwendung der RGB Lüftersteuerung 570X RGB Schrauben Sie den Lüftereinschub ab und ziehen Sie ihn aus...

Page 18: ...X premium de cristal templado Largo 479mm Ancho 231mm Alto 511mm Longitud máxima de la GPU 370mm Altura máxima del ventilador de la CPU 170mm Longitud máxima de la PSU 225mm Ubicaciones de los ventiladores Parte delantera 3 x 120 2 x 140mm Parte superior 2 x 120 140mm Parte trasera 120mm Compatibilidad con los radiadores Parte delantera 280mm 360mm Parte superior 240mm Parte trasera 120mm Serie Cr...

Page 19: ...neles deslizables de cristal templado Carcasa frontal de cristal templado Panel superior de cristal templado Filtros antipolvo Módulos de soporte posterior para disco duro Módulos de soporte posterior para disco duro en estado sólido Bandejas de ventilador extraíbles Cubierta de la unidad de alimentación Tres ventiladores frontales SP120 570X RGB utiliza SP120 RGB A B C D E F G H I RE MA RK A AT X...

Page 20: ...la bandeja para unidades de 3 5 pulg Paso 2 Deslice la unidad y las guías en el soporte del disco duro ubicado detrás de la placa base como indica la imagen Coloque la protección de E S de la placa base dentro del orificio Alinee la placa base con los soportes en el chasis Asegúrela con los tornillos que se incluyen Deslice la unidad de 2 5 pulg en la bandeja hasta que quede sujeta en el lugar 600...

Page 21: ...rasera Quite los pernos y tire del panel de cristal para extraerlo Consulte el manual de la placa base para localizar la ubicación de los cabezales del panel delantero y de los pernos de salida 1 Extraiga los tornillos de mariposa y las cubiertas de las ranuras correspondientes 2 Instale la tarjeta de expansión y asegúrela con los tornillos de mariposa USB 3 0 HD AUDIO RESET SW POWER LED POWER LED...

Page 22: ...e chasis visite la página del producto en corsair com Puntos de montaje para ventiladores Parte delantera 3x120mm 2x140mm 3x120mm incluido Parte superior 2x140mm 120mm Parte trasera 120mm incluido Parte inferior x Parte lateral x Parte del medio x 9 Extracción de las bandejas del ventilador 10 Uso del controlador del ventilador RGB 570X RGB Desatornille la bandeja del ventilador y deslícela para e...

Page 23: ...ате Mid Tower Длина 479mm Ширина 231mm Высота 511mm Максимальная длина графического процессора 370mm Максимальная высота охладителя центрального процессора 170mm Максимальная длина блока питания 225mm Расположение вентиляторов Спереди 3 x 120 2 x 140mm Сверху 2 x 120 140mm Сзади 120mm Совместимость радиаторов Спереди 280mm 360mm Сверху 240mm Сзади 120mm Crystal Series 570X SE Благодаря безупречном...

Page 24: ...опителей съемные лотки вентилятора крышка блока питания три передних вентилятора SP120 в 570X RGB используется SP120 RGB A B C D E F G H I a x6 Кабельные стяжки g x1 Изолирующие винты для материнской платы e x12 Короткие винты для вентилятора f x8 Длинные винты для вентилятора b Винты для материнской платы или жестких дисков x20 c x8 Винты для твердотельных накопителей или оптических дисков RE MA ...

Page 25: ...ек для 3 5 дюймовых дисков Шаг 2 Задвиньте диск и блок направляющих в крепления для жесткого диска за материнской платой как показано на рисунке Вставьте заглушку портов ввода вывода материнской платы в вырез В корпусе выровняйте материнскую плату с изолирующими винтами Закрепите плату входящими в комплект винтами Задвигайте 2 5 дюймовый диск в отсек до фиксации на месте 600C_600Q Step 5 1 2 3 R E...

Page 26: ...ами Снимите винты с накатанными головками и вытащите стеклянную панель Расположение разъемов и контактов для передней панели см в руководстве по материнской плате 1 Отверните барашковые винты и снимите соответствующие крышки разъемов 2 Установите плату расширения и закрепите ее винтами USB 3 0 HD AUDIO RESET SW POWER LED POWER LED POWER SW HDD LED USB 3 1 Type C 400C_400Q STEP 5 REM ARK A ATX M M ...

Page 27: ...поврежденные детали 3 Где можно установить вентилятор Дополнительную информацию об этом корпусе см на странице продукта на веб сайте corsair com Расположение мест для монтажа вентиляторов Спереди 3x120mm 2x140mm 3x120mm включены Сверху 2x140mm 120mm Сзади 120mm включены Снизу x Сбоку x Посредине x 9 Снятие лотков вентилятора 10 Использование контроллера вентилятора RGB 570X RGB Отвинтите лоток вен...

Page 28: ...PU 370mm Altura máxima da ventoinha da CPU 170mm Comprimento máximo da PSU 225mm Locais das ventoinhas Frente 3 x 120 2 x 140mm Topo 2 x 120 140mm Traseira 120mm Compatibilidade do radiador Frente 280mm 360mm Topo 240mm Traseira 120mm Crystal Series 570X SE O vidro temperado impecável ao redor de todo o chassi permite que todos os componentes da sua construção sejam visíveis A Crystal Series 570X ...

Page 29: ...DD x20 c x8 Parafusos para SSD ODD Painéis laterais de vidro temperado Painel frontal de vidro temperado Painel superior de vidro temperado Filtros de pó Pontos de montagem traseiros para HDD Pontos de montagem traseiros para SSD Bandejas de ventilação removíveis Tampa da PSU x3 Ventoinhas frontais SP120 570X RGB usa SP120 RGB A B C D E F G H I RE MA RK A AT X M MI CR O AT X A M A M A M A M A A H ...

Page 30: ...unidades de 3 5 Passo 2 Deslize o conjunto da unidade e do trilho para o local de instalação do HDD por trás da placa mãe conforme mostrado Encaixe a blindagem de E S da sua placa mãe na abertura Alinhe a placa mãe com os suportes do gabinete Fixe com os parafusos incluídos Deslize a unidade de 2 5 para a bandeja até que ela se encaixe 1 2 3 600C_600Q Step 5 1 2 3 Passo 2 Passo 1 R E M A R K A A T...

Page 31: ...afusos por trás Remova os parafusos de polegar e retire o painel de vidro Consulte o manual da sua placa mãe para obter as localizações e encaixe de pinos da haste do painel dianteiro 1 Remova os parafusos e as tampas de slot correspondentes 2 Instale a placa de expansão e fixe com parafusos USB 3 0 HD AUDIO RESET SW POWER LED POWER LED POWER SW HDD LED USB 3 1 Type C 400C_400Q STEP 5 REM ARK A AT...

Page 32: ...ontar uma ventoinha Para saber mais sobre este gabinete visite a página do produto em corsair com Montar um fã Frente 3x120mm 2x140mm 3x120mm incluído Topo 2x140mm 120mm Traseira 120mm incluído Fundo x Lateral x Centro x 9 Remover bandejas de ventilação 10 Usar o controlador de ventoinha RGB 570X RGB Desaperte os parafusos da bandeja de ventilação e deslize a do chassi para instalar ventoinhas e r...

Page 33: ...79mm 幅 231mm 高さ 511mm GPU 最大長 370mm CPU クーラー最大高さ 170mm PSU 最大長 225mm ファンの位置 前部 3 x 120 2 x 140mm 上部 2 x 120 140mm 背部 120mm ラジエーターの互換性 前部 280mm 360mm 上部 240mm 背部 120mm Crystal Series 570X SE 強化ガラスがシャーシ全体を覆っているので 自作マシンのすべてのパーツを見せること ができます Crystal Series 570X SE は 事実上あらゆるサイズのラジエーターと最高 6 個のケースファンに十分なスペースを提供します 付属の 3 個の SP120 ファンと楽なケ ーブル管理で 自作マシンを次のレベルに引き上げることができます Crystal Series 570X SE 強化ガラス プレミアム AT...

Page 34: ...DD 用マウント リア SSD 用マウント 取り外し可能ファントレイ PSU カバー x3 SP120 フロントファン 570X RGB は SP120 RGB を使用 A B C D E F G H I a x6 ケーブル結束バンド f x1 マザーボード用絶縁 ネジ d x12 冷却ファン用ネジ 短 e x8 冷却ファン用ネジ 長 b マザーボード HDD 用ネジ x20 c x8 SSD 光学ドライブ 用ネジ RE MA RK A AT X M MI CR O AT X A M A M A M A M A A H D A G E D C B G F I A g x2 マジックテープ式スト ラップ ...

Page 35: ...側面パネルを取り 外します ステップ 1 3 5 インチドライブトレ イにドライブを挿入します ステップ 2 図に示すように マザ ーボードの後ろから HDD 取り付け位 置にドライブとレールアセンブリを挿 入します マザーボードの I O シールドをホ ールにはめ込みます マザーボードをケースの絶縁ネジ 穴に合わせます 付属のネジで固定します トレイに 2 5 インチドライブを挿 入し 所定の位置にカチッと収ま るようにします 600C_600Q Step 5 1 2 3 ステップ 2 ステップ 1 R E M A R K A A T X M M IC R O A T X A A ...

Page 36: ...ットをケースの下段チャ ンバーに挿入し 後ろから 4 本の ネジで固定します 蝶ねじを外し ガラスパネルを取 り外します フロントパネルのヘッダーの場所とピン配列は マザーボードのマニュアルを確認してください 1 蝶ネジと対応するスロットカ バーを取り外します 2 拡張カードを取り付けて 蝶ネジで固定します USB 3 0 HD AUDIO RESET SW POWER LED POWER LED POWER SW HDD LED USB 3 1 Type C 400C_400Q STEP 5 REM ARK A ATX M M IC RO ATX A M A M A M A M A A 1 400C_400Q STEP 6 2 ...

Page 37: ...破損した部品の交換について RMA を依頼してください 3 どこにファンを搭載できますか ケースの詳細情報は 弊社の製品ページ corsair com にアクセスしてください ファンマウントの位置 前面 3x120mm 2x140mm 3x120mm 含まれました 上面 2x140mm 120mm 背面 120mm 含まれました 底面 x 側面 x 中央 x 9 ファントレイの取り外し 10 RGB ファンコントローラ 570X RGB の使用 ファントレイのねじを外し シャーシから 引き出して シャーシの外側にファンとラ ジエーターを設置します 詳細については 付属の RGB フ ァンコントローラクイックスター トガイドを参照してください REM ARK A AT X M M IC RO AT X A M A M A M A M A A ...

Page 38: ...CRYSTAL SERIES 570X SE 76 75 Notes Notes ...

Reviews: