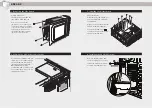
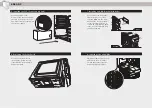
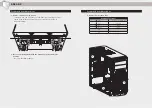
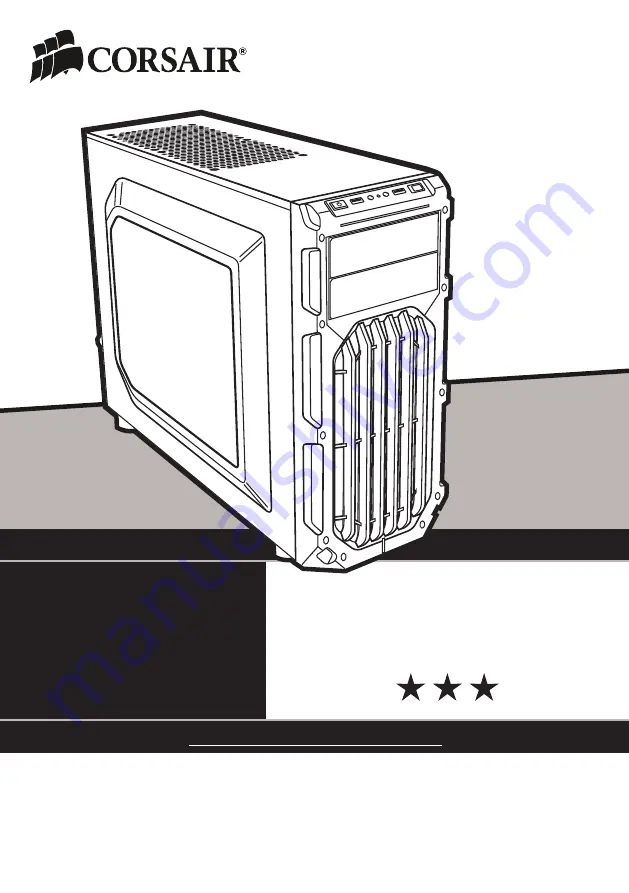
background image

INSTALLATION GUIDE

SPEC-03

CARBIDE

SERIES®

MID-TOWER GAMING CASE

Summary of Contents for Carbide Series SPEC-03

Page 1: ...INSTALLATION GUIDE SPEC 03 CARBIDE SERIES MID TOWER GAMING CASE ...

Page 2: ... and room for massive graphics cards makes the SPEC 03 stand out among the crowd Congratulations 1 Case specifications 2 Accessory kit contents 3 Case features 4 Removing the side panels 5 Utilizing the CPU power cable cut out 5 Installing the motherboard 6 Installing the PCI E PCI card s 6 Installing the PSU 7 Removing the front fascia 7 Installing an ODD 8 Installing SSDs and HDDs 8 Installing a...

Page 3: ...3 0 Headphone Mic and Power Reset Removable front fascia Front 120mm LED intake fan with x2 140mm fan compatibility Rear 120mm exhaust fan x2 Top 120mm fan mounts Windowed side panel x3 5 25 Tool free drive bays Bottom PSU mount and dust filter Front dust filter and mesh cover x2 Tool free 2 5 drive mounts Top dust filter with pins x2 Tool free removable ODD covers CPU backplate cutout A B C D E F...

Page 4: ...uidance Align your motherboard with the pre installed standoffs Use the provided screws to secure the motherboard to the motherboard tray Remove thumbscrews and corresponding slot cover s Install the add on card and secure with thumbscrews To install your flat CPU 8 4 pin cable route the cable through the motherboard tray before installing the motherboard Only Flat Cables will be compatible and yo...

Page 5: ...e bay until the tool free latch clicks securing the drive To release an optical drive push in the tool free tab then pull the drive outward Simply pull back retention arm and slide in the 2 5 SSD or 3 5 HDD until the retention arm snaps back into place Position the PSU on the bottom of the case then align the case holes and secure the PSU with screws provided with your power supply carbide spec 03...

Page 6: ...r motherboard s manual for fan header locations plug in the included fan cable See your motherboard s manual for front panel header locations and pin outs USB 3 0 HD AUDIO RESET SW POWER LED POWER LED POWER SW HDD LED To install an additional 120mm or 140mm fan unscrew the top fan then slide it down to the mounting points below carbide spec 02 STEP 08 carbide spec 02 STEP 08 ...

Page 7: ...fascia step 6 then unscrewing the 2 screws at each side of panel drawing 2 Does the polarity matter with the I O panel s power and reset header No only the LED headers 3 Where can I mount a fan Fan Mount Locations Front x2 120mm or x2 140mm Top x2 120mm Rear 120mm Bottom 120mm Side x Mid x Frequently Asked Questions 1 2 3 4 1 4 2 3 ...

Reviews: