background image

Summary of Contents for 247.29933

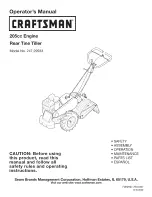
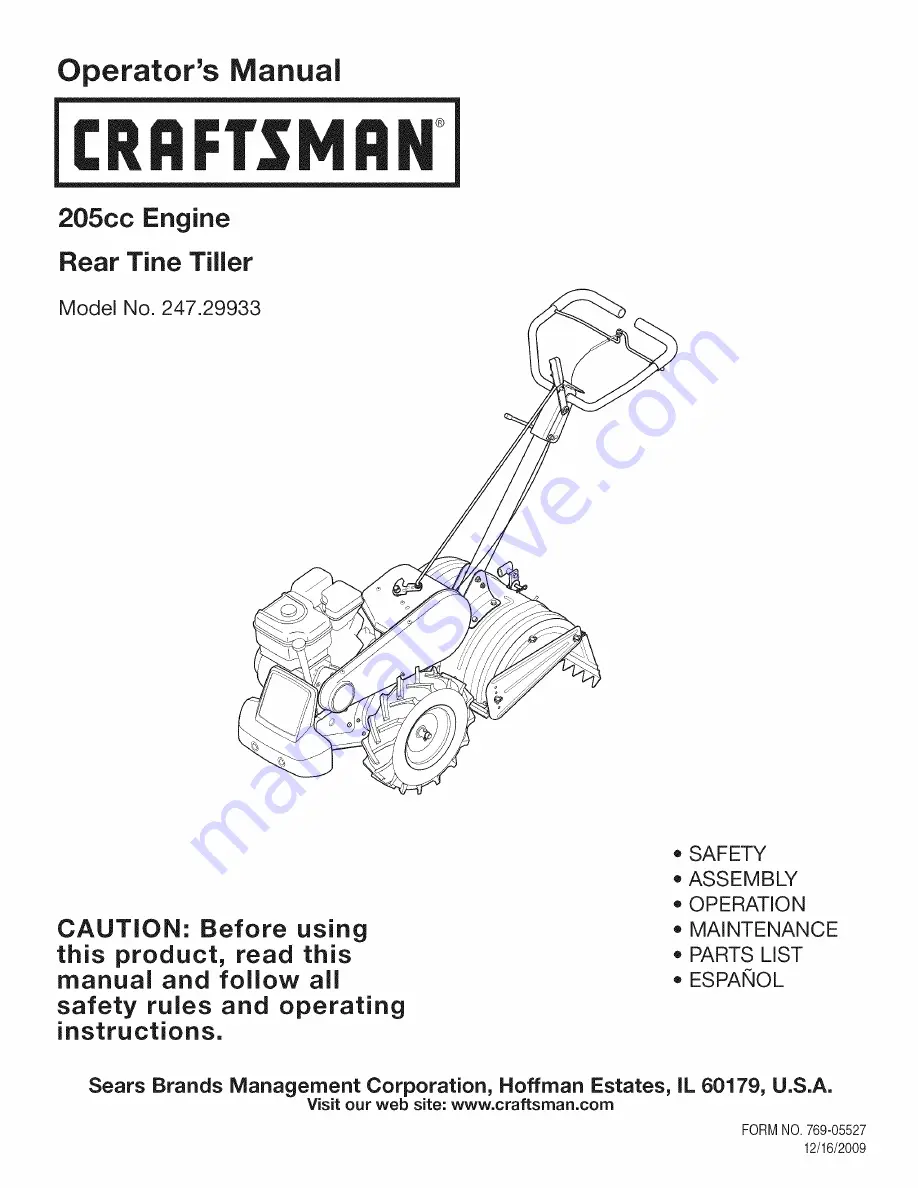
Page 1: ...ON Before using this product read this manual and follow aJl safety rules and operating instructions SAFETY ASSEMBLY OPERATION MAINTENANCE PARTS LIST ESPANOL Sears Brands Management Corporation Hoffman Estates iL 60179 U S A Visit our web site www craftsman com FORMNO 769 05527 12 16 2009 ...

Page 2: ...es or belts Tireor wheelreplacement or repairresultingfromnormalwear accident orimproperoperationor maintenance Repairsnecessarybecauseof operatorabuse includingbutnot limitedto damagecausedby impactingobjectsthat bendthe frameor motorcrankshaft Repairsnecessarybecauseof operatornegligence includingbut not limitedto electricalandmechanicaldamagecausedby improper storage orfailureto maintainthe equ...

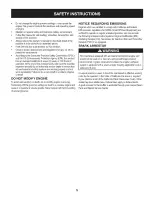
Page 3: ... can resultin seriousinjuryto the operatorand or bystanders Forquestions call 1 800 4MY HOME Befamiliarwithall controlsandtheir properoperation Knowhow to stopthe machineanddisengagethemquickly Neverallowchildrenunder14yearsof ageto operatethis machine Children14andover shouldreadandunderstandthe instructionsandsafeoperationpracticesin thismanualandon the machineandbe trainedandsupervisedby anadul...

Page 4: ...fic Do notcarry passengers Neveroperatethe machineat hightransportspeedson hardor slipperysurfaces Exercisecautionto avoidslippingor falling Lookdownand behindandusecare whenin reverseor pulling machinetowardsyou Startthe engineaccordingto the instructionsfoundinthis manual and keepfeetwell awayfromthe tinesat all times Afterstrikingaforeignobjector ifyour machineshouldstart mak inganunusualnoiseo...

Page 5: ...juryordeath donot modifyenginein anyway Tampering withthe governorsettingcan leadto a runawayengineand causeit to operateat unsafespeeds Nevertamperwithfactorysetting of enginegovernor NOTICE REGARDING EMISSIONS EngineswhicharecertifiedtocomplywithCaliforniaandfederal EPAemissionregulations for SORE SmallOff RoadEquipment are certifiedto operateon regularunleadedgasoline and mayinclude the followi...

Page 6: ... put hands or feet near rotating parts Contact with the rotating parts can amputate hands and feet WARNING GASOLINE IS FLAMMABLE Allow the engine to cool at least two minutes before refueling WARNING CARBON MONOXIDE Never run an engine indoors or in a poorly ventilated area Engine exhaust contains carbon monoxide an odorless and deadly gas WARNING HOT SURFACE Engine parts especially the muffler be...

Page 7: ...7 ...

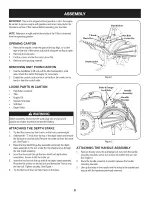
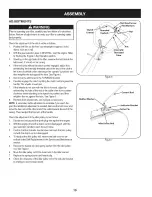
Page 8: ... preventunintendedstarting ATTACHING THE DEPTH STAKE 1 Tipthe tiller forwardso thatit restson thefrontcounterweight 2 Unthreadthe T knobfromthe topof the depthstakeand remove theflat washerand hexbolt Removethecotter pinfromtheclevis pin SeeFigure1 3 Raisethe fine shieldhingeflap assemblyandinsertthedepth stakeassemblyin the slot underthe fine shieldandupthrough thefine shieldassembly 4 Insertthe ...

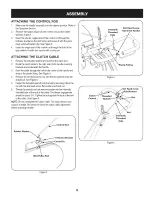
Page 9: ...andunderneaththe handle 3 Pushthecable throughthe holeinthe centerof the handleand snapin the plasticfitting SeeFigure4 4 Removetheslot headscrew nutandtwo fiatwashersfromthe clutchbail SeeFigure5 5 Fastenthe threadedeyeboltontothe bailby securingit fromthe top withthe slotheadscrew flatwashersandlocknut 6 Threadthe eyeboltandnut removedearlierintothe internally threadedtubeat the endof the cable ...

Page 10: ...lockwise whenstandingin the operator sposition andthen retightenthe nut againstthe tube SeeFigure6 8 Recheckbothadjustments andreadjustas necessary NOTE A secondarycableadjustmentis availableif you reachthe pointthatadditionaladjustmentis needed Removethe beltcoverand movethe hexnutsat the otherendof the cabletowardsthe endof the casing Then readjustthe hexnutsat the handle Checkthe adjustmentof t...

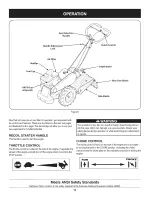
Page 11: ...sideof the engine Itregulatesthe spreadof the engineandwill shutoff theenginewhen movedintothe STOPposition The operationof anytiller can resultinforeignobjectsbeingthrown intothe eyes whichcan damageyoureyesseverely Alwayswear safetyglassesduringoperationor whileperforminganyadjustments or repairs CHOKE CONTROL The chokecontrolis foundon the sideof the engineandis activated by movingthe leverto t...

Page 12: ...t NEUTRAL REVERSE oroneof the FORWARD modes SeeFigure8 CLUTCH CONTROL Theclutchcontrolislocatedbeneaththe handle Squeezingthe clutch handleagainstthe handleengagesthe wheelandthe drive mecha nisms SeeFigure8 DEPTH STAKE Thislevercontrolsthe tillingdepthof the tines Pullthe cotterpinout fromthe clevispinto adjustthe tillingdepthto fivedifferentsettings SeeFigure8 HANDLE ADJUSTMENT LOCK The handlema...

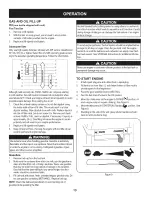
Page 13: ...uishcigarettes cigars pipes andothersourcesof ignition Gasoline 1 Removefuelcap fromthefuel tank 2 Makesurethecontainerfromwhichyouwill pourthe gasolineis cleanandfreefrom rustorforeignparticles Neveruse gasoline thatmaybestalefromlongperiodsof storageinitscontainer Gasolinethathas beensittingfor any periodlongerthan four weeksshouldbeconsideredstale 3 Fill fueltankwithclean fresh unleadedregularg...

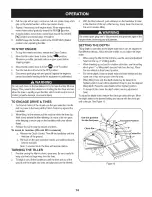
Page 14: ...ill in reverse a Releasethe ClutchControl Thenlift the handlebaruntilthe tinesareoff the ground b Pullbackonthe gearselectionhandle andwalkbackwards withthe machine Note In reversemode the tineswill reverserotation TURNING THE TILLER 1 Practiceturningthe tillerina level openarea Beverycarefulto keepyourfeetandlegs awayfromthetines 2 Tobeginaturn liftthe handlebarsuntil thetinesareout of the ground...

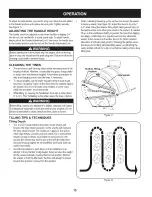
Page 15: ...of debris However occasionally dry grass stringystalks ortoughvinesmaybecometangled Followtheseprocedures to helpavoidtanglingandto clearthe tines if necessary To reducetangling setthe depth regulatordeepenoughtoget maximum chopping actionas the tineschopthe materialagainst theground Also try to till undercrop residuesorcovercrops whiletheyaregreen moistandtender Whiletilling try swayingthe handle...

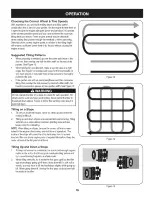
Page 16: ...erwidth SeeFigure15 Donot operatethe tilleron a slopetoo steepfor safeoperation Till slowlyand besureyou havegoodfooting Neverpermitthetiller to freewheeldown slopes Failureto followthiswarningcouldresultin persona injury Tilling on a Slope 1 Ti onlyon moderateslopes neveronsteepgroundwherethe footingisdifficult 2 Tillingupanddownslopesisrecommended overterracing Tilling verticallyon a slopeallows...

Page 17: ...andout of the vehicle Twoor morepeopleare neededto dothis The rampsmustbestrongenoughto supportthecombined weightof the tillerandany handlers The rampsshouldprovide goodtractionto preventslipping theyshouldalso haveside rails to guidethe tiller alongthe ramps andtheyshouldhavea locking deviceto securethemto the vehicle The handlersshouldwearsturdyfootwearthatwill helpto prevent slipping Positionth...

Page 18: ...lackof fuel oradda gasolineadditiveto the gas in thetank Changeoileverytwentyfivehourswhenoperatingengineunderheavyloadorin hightemperatures Alwaysstopengineanddisconnectsparkplugwirebeforeperforming lany maintenance or adjustments Alwayswearsafetyglassesduring operationorwhile performing any adjustmentsor repairs ENGINE MAINTENANCE DO NOTcheckfor sparkwithsparkplugremoved DO NOTcrank enginewithsp...

Page 19: ... important to engine life andperformance Neverrunthe enginewithoutan aircleaner completelyassembled Checkthe aircleanerbeforeeach use Paperfilterscannotbecleanedandmustbe replacedonce a year orevery 100operatinghours moreoftenif usedin extremelydusty conditions 1 Loosenscrewsthatholdthe airfiltercover SeeFigure19 2 Openthe coverand removethe pre cleanerandairfilter 3 Washthe pre cleanerandallowto ...

Page 20: ...of operation andeveryfifty hoursoreveryseasonthereafter Changeoil every twentyfivehourswhenoperatingengineunderheavyloadorin hightemperatures Figure20 4 Replaceandtightenthe oildrainendcap 5 Whenengineisdrainedof all oil placeenginelevel Refillwith approximately 20oz of freshoil Fillto FULLlineondipstick Donot overfill Referto CheckEngineOil inthis SERVICE MAINTENANCE section 6 Replacesparkplugwir...

Page 21: ... clutchhandleandthe clutchcable TIRE PRESSURE Checktheair pressurein bothtires The airpressureshouldbe between15 20PSI Keepbothtiresequallyinflatedto helpprevent machinefrompullingto one side HARDWARE Checkfor looseor missinghardwareafterevery10operatinghours andtightenor replace as needed beforereusingthe tiller Be sureto checkthe screwsunderneaththe tillerhoodthatsecurethe transmissioncoverandth...

Page 22: ...onsistsof a lefthandfineanda righthandfine NOTE Thefine assemblymovesina counter rotating motionwith the sharpedgesof thetinespositionedto enterthe soil firstwhen counter rotating Notethis positionof thetinesfor reinstallationof the newfine assemblies 3 To removeafine assembly simplyremovethe internalcotter pin securingthe clevispin SeeFigure24 4 Removethe clevispin andslidethe assemblyto the outs...

Page 23: ...nder Replacesparkplugandcrankit slowlyto distribute oil 4 Cleandebrisfromaroundtheengineandthe muffler Touchup any damagedpaint andcoatotherareasthatmayrustwitha light filmof oil 5 Storein a clean dry andwellventilatedareaawayfromany ap pliancethatoperateswitha flameorpilot light suchas a furnace waterheater orclothesdryer Alsoavoidany areawitha spark producingelectricmotor orwherepowertoolsare op...

Page 24: ... looseintransmissionpulley 2 Internaltransmissionwearor damage 1 Tineholdermountinghardwaremissing 2 Bolt looseintransmissionpulley 3 Internaltransmissionwearor damage 1 Worntines 2 ImproperDepthRegulator setting 3 Incorrectthrottlesetting 4 ForwardDriveBeltslipping 1 Reconnect wire 2 Putleverin STARTposition 3 Filltankwithclean freshgasoline 4 Cleanor replacefilter 5 Clean adjustgap or replace 6 ...

Page 25: ...25 ...

Page 26: ...Craftsman Tiller Model No 247 29933 17 14 28 46 32 3O 44 27 4O 18 49 26 ...

Page 27: ...mentCrank 50 24 784 0191 HexNutRetainerBracket 51 25 786 0120 0637 TillerDepthControl 52 26 786 0181 0691 ShaftRodLever 53 27 735 0127 Washer 33 IDx 87OD x 125 54 914 0104 686 0044B 0691 710 0176 710 3008 710 3022 710 04482 712 04063 712 04065 712 0421 926 0106 736 0204 938 0849 CotterPin 072x 1 12LG EndCoverAssembly HexHeadScrew 5 16 18x 2 75 HexHeadScrew 5 16 18x 75 HexHeadScrew 3 8 16x 2 75 Hex...

Page 28: ...Craftsman Tiller Model No 247 29933 53 _ 52 28 5 38 53 6 t iO 22 24 25 15 32 43 14 17 28 ...

Page 29: ...49 23 756 0405 FiatIdlerPulleyw Flanges 3 75O D 50 24 756 0971 EnginePulley InnerHalf 51 25 756 0972 EnginePulley OuterHalf 52 26 756 1162 inputPulley 4L x 8 594 53 27 786 0064A IdlerPulleyBracket 54 786 0185A 0637 Belt KeeperBracket 29 786 0187 0637 ShiftCoverBracket 30 786 0193 0637 Idler BeltKeeper 686 0109A 710 0653 710 1017 712 0392 915 0120 936 3020 784 0158A 0691 784 0208D 0691 ShiftCrankAs...

Page 30: ...Craftsman Tiller B IViodel No 247 29933 16 29 37 11 5O 46 18 44 38 16 30 29 40 12 16 30 ...

Page 31: ...21 717 0853A ClutchCollar 47 22 717 1582 GearSpur 44T 48 23 717 1583 GearSpur 30T 24 717 1584 GearSpur 30T 25 717 1585 GearSpur 44T 26 717 1587 GearSpur 44T 717 1594 921 0378 721 0379 786 0238 726 0277 932 0496 936 0163 936 0171 936 0226 936 0351 736 0407 736 0518 736 3088 686 04129 0637 GearSpur 16T ShaftSeal 1 0 ShaftSeal 75 Positioner GearBracket TaperedCap Plug Compression Spring 230OD Washer ...

Page 32: ...Briggs Stratton Engine Model 12T102 For Craftsman Tiller Model 247 29933 306 307 _ 1026 Y 415 12 46 742 746 _ 2191 _ 1220 _T_ 22 24 0 332 _ 146 741 32 ...

Page 33: ...Briggs Stratton Engine Model 12T102 For Craftsman Tiller Model 247 29933 535 45 1026 f 7 7 7 77 CL 7 Y 238 4o_ _ t i 1022 619 1034 1029 1022 914A_ 33 ...

Page 34: ...Briggs Stratton Engine Model 12T102 For Craftsman Tiller Model 247 29933 _ _ _ 703 _ _ 1425 L 825 _ 804 951 601A 127 _ 51 163 692 I lO8_ 276 _ 240 190 _ 34 ...

Page 35: ...Briggs Stratton Engine Model 12T102 For Craftsman Tiller Model 247 29933 663 281 562 i _ 356 _ _ _ _ _ 334 652A 209 621 35 ...

Page 36: ...Briggs Stratton Engine Model 12T102 For Craftsman Tiller Model 247 29933 951 i i 968 161 163 11 836A 36 ...

Page 37: ...Briggs Stratton Engine Model 12T102 For Craftsman Tiller Model 247 29933 23 lOOS _ _ _ _ 1070 _ _ 332 1211 1210 I 456 689 17_ 304 305 _ I 1036 EMISSIONS LABEL I 37 ...

Page 38: ...tton Engine Model 12T102 For Craftsman Tiller Model 247 29933 104 _ 51 121 CARBURETOR OVERHAUL KIT 127 0 163 633 _ 633A _ 358 ENGINE GASKET SET 20 163 868 51 993 883_ S 1095 VALVE GASKET SET S1 _ 868 0 99 1022 38 ...

Page 39: ...bly 020 Oversize 26 BS 791969 RingSet Standard BS 791969 RingSet 020 Oversize 27 BS 691866 Lock Piston Pin 28 BS 499423 Pin Piston 29 BS 690124 Rod Connecting 30 BS 791584 Dipper Connecting Rod 32 _BS691664 Screw ConnectingRod Short 32A BS 695759 Screw ConnectingRod Long 33 BS 499642 Valve Exhaust 34 BS 795443 Valve Intake 35 BS 691304 Spring Valve Intake 36 BS 691304 Spring Valve Exhaust 40 BS 69...

Page 40: ...755 Screw SupportBracket 663 BS 699206 Screw ControlPanel 668 BS 694257 Spacer 689 BS 691855 Spring Friction 692 BS 690572 Spring Detent 703 BS 795222 Clip 718 BS 690959 Pin Locating D O O BS 695087 Gear Timing 742 BS 692564 Retainer E Ring 746 BS 790278 Gear Idler 773 BS 694258 Retainer 804 BS 795223 Canister Carbon EVAP 825 BS 795226 Hose Air 830 BS 797441 Stud Rocker Arm 832 BS 693583 Guard Muf...

Page 41: ...Craftsman Tiller IViodel No 247 29933 777D14192 777S33508 777123106 777120358 777120451 777D14193 777X43688 41 ...

Page 42: ...are judgedonnormalengineperformance The warrantyis notrelatedto an in use emissiontest Sears Emission Control Defects Warranty Provisions Thefollowing arespecific provisions relative toyourEmission Control Defects Warranty Coverage Itisinaddition totheSears engine warranty fornon regulated enginesfoundin theOperatingand Maintenance Instructions 1 WarrantedParts Coverageunderthis warrantyextendsonl...

Page 43: ...ind lawn mower is used 20 to 25 hours per year Therefore the Emissions Durability Period of an engine with an intermediate rating would equate to 10 to 12 years The Air Index is a calculated number describing the relative level of emissions for a specific engine family The lower the Air Index the cleaner the engine This information is displayed in graphical form on the emissions label After July 1...

Page 44: ...apidResolution phonesupport froma Searsrepresentative Thinkof usas a talkingowner s manual Once youpurchasethe Agreement a simplephonecall isall thatit takesfor youto scheduleservice Youcan call anytimedayor night or schedulea serviceappointmentonline The RepairProtectionAgreement isa risk freepurchase Ifyou cancel for any reasonduringthe productwarrantyperiod wewill providea full refund Or a pror...

Page 45: ...o reparaci6nde neum_ticos o ruedascomoresultado del desgastenormal unaccidente o funcionamiento o mantenimiento incorrectos Reparaciones necesariascomo resultado del abusodel operador incluyendosin limitaci6nelda_oocasionadoporimpactarobjetosque tuercenlaestructurao el cig Je_al Reparaciones necesariascomo resultado de la negligenciadeloperador incluyendo sin limitaci6nda_oel tricoy mecanicodebido...

Page 46: ...dal operadory oa losobservadores Ante cualquierduda Ilarneal 1 800 4MY HOME Farniliaricese contodoslos controlesy su correcto funcionarniento Sepac6rnodetenerla rn_ quina y c6rno desconectarloscontrolesr_ pidarnente No perrnitanuncaque losni_os rnenoresde 14a_osutilicen estarn_ quina Los ni_osde 14a_osenadelantedebenleery entenderlas instrucciones de operaci6ny norrnasdeseguridad contenidasen este...

Page 47: ...aciausted Arranqueel motordeacuerdocon lasinstruccionesdel manualy aleje los piesde losdientesen todo momento Si golpeaalgQnunobjeto extra_oo si la m_quinacomienzaa emitir unsonidopococomL no a vibrar apagueel motordeinmediato Desconecteel cablede labuj a p6ngalohaciendomasacontrael motor y siga los pasossiguientes a Inspeccionela m_quinaparavet si est_da6ada b Repareo reemplacelas piezasda_adas c...

Page 48: ...s motoresque est_ncertificadosy cumplenconlas regulacionesde emisionesfederalesEPAy deCaliforniaparaSORE EquiposSmallOff Road Equipment est_ncertificadosparaoperarcongasolinacomL nsin plomoy pueden incluirlos siguientessistemasde controldeemisiones Modificaci6n de motor EM catalizadoroxidante OC inyecci6nde airesecundaria SAI y catalizadordetres vias TWO si est_nequipadosdeesamanera AMORTIGUADOR D...

Page 49: ...os pies cerca de piezas giratorias El contacto con las piezas giratorias puede ocasionar en la amputaci6n de manos o pies ADVERTENCIA LA GASOLINA ESINFLAMABLE Deje que el motor se enfrie por Io menos dos minutos antes de cargar combustible ADVERTENCIA MONOXIDO DE CARBONO Nunca encienda el motor en espacios cerrados o en una zona con poca ventilaci6n El escape del motor contiene mon6xido de carbono...

Page 50: ...ltivadorahaciaadelantehastaquedescansesobreel contrapesofrontal 2 Desenrosque la perillaen T de lapartesuperiorde la estaca de profundidad y retirelaarandelaplanay el pernohexagonal Saqueel elpasadorde chavetadel pasadorde horquilla Veala Figura1 3 Levanteel rnontajede la aletacon bisagrasdelprotectorde dientese inserteel rnontajede laestacade profundidad en la ranura debajodel protectory paraarri...

Page 51: ...orificiodelcentrodela manijae introduzca a presi6nel accesoriopl_stico Veala Figura4 4 Retireel tornillode cabezaranurada latuercay lasdos aran delasplanasdelganchodel embrague Veala Figura5 5 Fijeel pernode ojo roscadoal ganchosujet_ndolodesdearriba conel tornillodecabezaranurada las arandelasplanasy la tuercade seguridad 6 Enrosqueel pernode ojoy latuercaquequitaraanteriorrnente en el tubocon ro...

Page 52: ...a tuerca contrael tubo Yeala Figura6 8 Vuelvaa comprobarlos ajustesy repitasi es necesario NOTA Sedisponede unajustede cablesecundariosi Ilegaa un puntodondehacefaltaunajusteadicional Retirela cubiertade la correay muevalas tuercashexagonales delotro extremodelcable haciaelfinal de lacarcasa Luegoreajustelas tuercashexagonales de la manija Compruebe el ajustede lavarillade la poleaIocade la siguie...

Page 53: ...l reguladorest ubicadoen la partelateraldel motor Regulalavelocidaddel motor y Io apagacuandose Iocolocaen la posici6nSTOP detenci6n AI operarunacultivadoraes posiblequearrojeobjetosextra_osa losojos Io cualpodriacausarleslesionesgraves Utilicesiernpre losanteojosdeseguridadconesta unidado protectoresparaojos rnientraslabray rnientrasrealizaajusteso reparaciones CONTROL DE OBTLIRACION Elcontroldel...

Page 54: ...rchaatr_ s o unode losmodosde FORWARD Marchadirecta Veala Figura8 ESTACA DE PROFUNDIDAD Estapalancacontrolala profundidadde labranzade los dientes Tire del pasadordechavetahaciaafueradelpasadorde horquillapara ajustarle profundidadde lalabranzaa cincoajustesdiferentes Veala Figura8 TRABA DE AJUSTE DE LA iVlANIJA Lamanijapuedeajustarsea laalturadeseadadestrabandolatraba de ajustede lamanija luegomo...

Page 55: ... o cuandoelmotorest calienteo en marcha Apaguecigarrillos ci arros i as otrasfuentesdecombusti6n Gasolina 1 Saquela tapadelcombustibledeldep6sitodel mismo 2 Verifiquequeel recipiente del queva averterlagasolinaest_ limpioy librede 6xidoo de objetosextra_os No usenunca gasolinaquepuedaestarviejapor haberestadoalmacenada en su recipiente por largosperiodos Lagasolinaquehaestado estacionadaporun peri...

Page 56: ...radetenerlas ruedasy losdientes Para conducir hacia arras No realice labranza mientras se desplaza marcha arras a Libereel controldelernbrague Luegolevantela barrade controlhastaquelos dientesse separendelsuelo b Tirehaciaatr_ sde larnanijaselectorade carnbiosy carnine retrocediendo con la rn_ quina Nota Enrnodornarchaatr_ s los dientesinvertir_ n la rotaci6n DAR LA VUELTA CON LA CULTIVADORA 1 Pra...

Page 57: ...rreno No realicelabranzacercade dondehaycablesel_ctricos lineastelef6nicas ca_oso rnangueras enterrados SUGERENCIAS Y Ti_CNICAS DE LABRANZA la profundidad de la labranza Estaes unacultivadorade labranzacon done direcci6n DDT A rnedidaquelas ruedastiranhaciaadelante los dientesrotan haciaatr_ s A rnedidaquelas ruedastitan haciaatr_ s los dientesrotanhaciaadelante Estocrea unaacci6nde gancho de losd...

Page 58: ...oernpinadapara unaoperaci6nsegura Realicela labranzalentarnente y asegQrese de estarfirrnernente parado Nuncaperrnitaquela cultivadorase desplacecon las ruedaslibrescuestaabajo Si nose observaesta advertenciase puedenproducirlesionespersonales Labranza en pendiente 1 Realicela labranzaQnicarnente en pendientesrnoderadas nunca enterrenodernasiadoernpinadodondeseadificilrnantenerla estabilidad 2 Se ...

Page 59: ...ubirlao bajarladelvehiculo Para realizarestose necesitandoso m spersonas Las rampasdebenserIo suficientemente fuertescomopara soportarel pesocombinado de la cultivadoray de los cargadores Las rampasdebenproporcionarbuenatracci6nparaevitar resbalones debentener rieleslateralesparaguiarla cultivadora a Io largode lasmismasy debenestarequipadascon un disposifivode sujecbnquelas sujeteal vehiculo Losc...

Page 60: ...Carnbiar 1 Hacerfuncionarel motorhastaque sedetenga porfaltade combustible o agregaraditivopara gasolinaa la quese encuentraenel tanque Carnbieel aceitecadaveinticincohorassi el motortrabajacon cargapesadao a ternperaturas elevadas siernpredetengael motory desconecteel cablede labujiaantes de hacercualquiertipo de rnantenirniento oajustes Utilicesiernpre lanteojosdeseguridadduranteel funcionarnien...

Page 61: ...chofiltroes irnportante paralavida Otily el rendirniento del motor No ponganuncaenfuncionarniento el motorsin haberrnontadototalrnenteel filtrodeaire Verifiqueel depuradorde aireantesde cadauso Losfiltrosde papelnose puedenlirnpiar Se debenreernplazar unavezala_oo cada 100horasde funcionarniento y con mayor frecuenciasi se utilizanen lugaresdondehaygrancantidadde polvo 1 Aflojelos tornillosquesuje...

Page 62: ... horasdefuncionamiento y a partirde entoncescadacincuenta horasdefuncionamiento o unavez portemporada Cambie elaceitecadaveinticincohorassi el motortrabajaconcargas pesadaso a elevadatemperatura _6sitode combustibleest6vacio Elaceiteusadodel motorpuedecausarc_ ncerdepielsi entra en contactocon la pielde manerareiteraday porperiodosprolongados Si bienestoes improbable a menosque manipuleaceiteusado...

Page 63: ...reenlos dos neurn_ ticos Lapresi6nde airese debeencontrarentre15PSiy 20 PSI Mantengalosdos neurn_ ticos infladosde forrnaparejaparaevitarquela rn_ quina tire haciaunlado HARDWARE Verifiquesi hayherrajessueltoso faltantescada 10horasde operaci6ny aj_steloso c_ rnbielos seg_nsea necesario antesde volvera usarla cultivadora AsegOrese de inspeccionarlostornillos queest_ n debajode la cubiertadela cult...

Page 64: ...doy unconjuntodedientesderecho NOTA Elconjuntode dientesse rnueverotandoen sentidocontrario con los hordesafiladosdelos dientesubicadosparaintroducirseen el sueloprirnerocuandorotanen sentidocontrario Observeesta posici6ndelos dientesparapoderreinstalarlosconjuntosdedientes nuevos 1 Pararetirarunconjuntodedientes sirnplernente saquela chavetade ret_ninternaque sujetala chavetadehorquilla Vea la Fi...

Page 65: ...Vuelvaa colocarla bujfay d_ rnarchaalmotor lentarnente paradistribuirelaceite 4 Lirnpiela suciedadde las _ reas del motory del silenciador RetoquelapinturadaSada y revistaotras_ reas que puedan oxidarsecon unapelfculadelgadadeaceite 5 Alrnaceneen unsectorlirnpio secoy bienventilado lejosde cualquierartefactoquefuncionecon unaNarna o luz pilotocorno un homo calentadorde aguao secadorde ropa Tarnbi_...

Page 66: ... Trasmisi6ninternadesgastadao dafiada 1 Dientesdesgastados 2 Configuraci6nincorrecta del reguladorde profundidad 3 Configuraci6nincorrecta del regulador 4 Deslizamientode la correa de transmisi6nde marcha directa El motor recalienta El motor no seapaga Contactecon su centrode piezasy reparacionesSears Las ruedasy los dientesno giran Los dientesgiran las ruedas no Las ruedasgiran los dientes no Ren...

Page 67: ...apor defectos Los defectosse juzgandeacuerdocon elfuncionamientonormalde unmotor La garantiano est_relacionadaconunapruebade emisionesenuso Disposiciones de la garantJa Sears para defectos en el control de emJsiones Lassiguientessondisposiciones especificasrelacionadas conla coberturade lagarantiaparadefectosenel controldeemisiones Esuna_adidoa lagarantiade motorSearsparamotoresnoreguladosquese en...

Page 68: ...do de Duraci6n de Emisiones de un motor con una clasificaci6n intermedia seria equivalente a entre 10 y 12 afios Laclasificaci6n de aJre es un nQmero calculado para describir eJnivel reiativo de emisiones para un grupo de motores en particular Cuanto menor sea Jaclasificaci6n de aire mayor es JaJimpieza deJmotor La informaci6n se presenta de forma gr fica en Jaetiqueta de emisiones Despu_s del 1 d...

Page 69: ...R_pida el apoyotelef6nicode unCharnuscaal representante Pienseen nosotroscornoel manual de undue_ohablador Unavezadquiridoel Acuerdo puedeprograrnar el serviciocon tan s61orealizarunaIlarnadatelef6nica PuedeIlarnarencualquier mornento deldia o dela nocheo prograrnar un servicioen linea ElAcuerdode Protecci6nde Reparaci6n es unacornprasin riesgo Siustedanulaporalgunaraz6nduranteel periodode garanti...

Page 70: ...70 ...

Page 71: ...71 ...

Page 72: ...r of carry in items like vacuums lawn equipment and electronics call anytime for the location of your nearest Sears Parts Repair Service Center 1 800 488 1222 U S A 1 800 469 4663 Canada www sears com www sears ca To purchase a protection agreement on a product serviced by Sears 1 800 827 6655 U S A 1 800 361 6665 Canada Para pedir servicio de reparaci6n Au Canada pour service en fran ais a domici...

Reviews: