background image

Summary of Contents for 917.25009

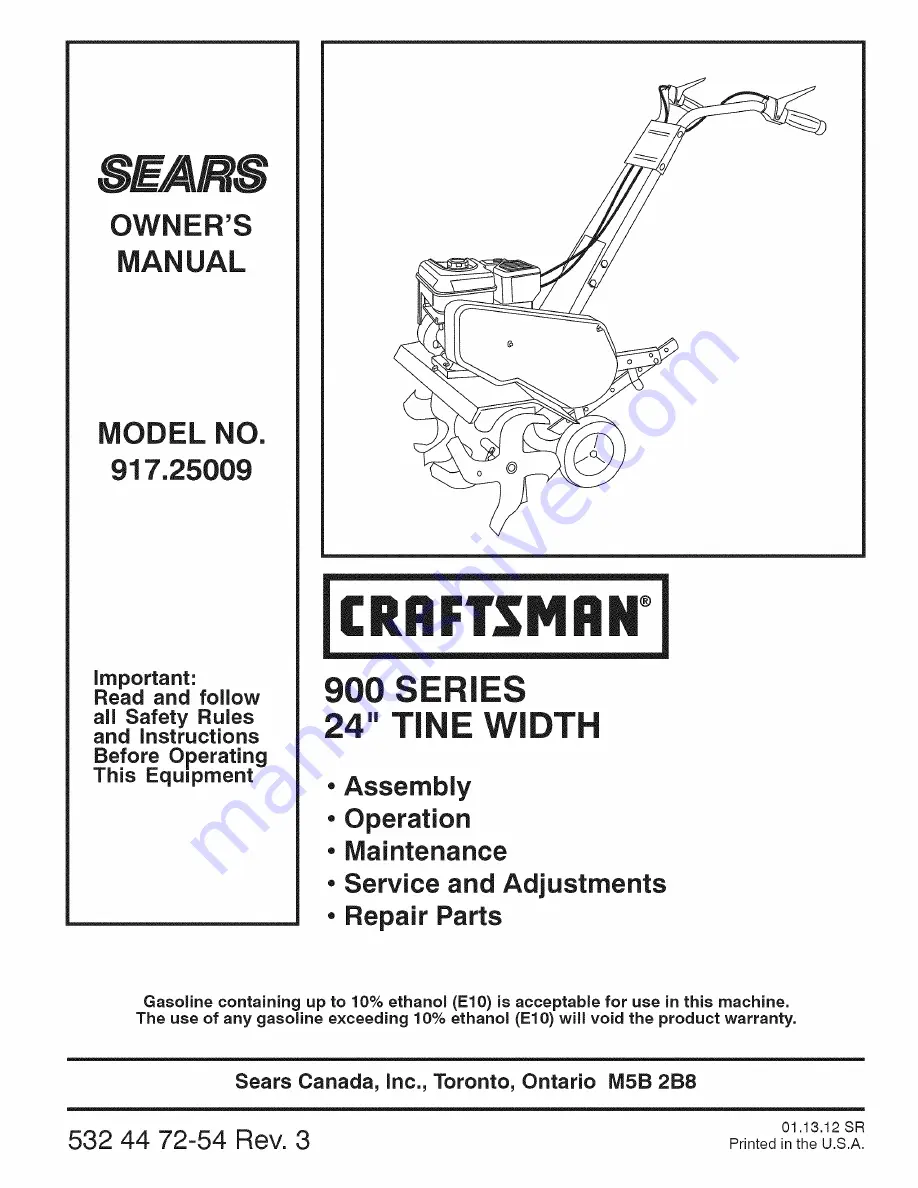
Page 1: ...TSMRN IES EW Assembly Operation Maintenance Service and Adjustments Repair Parts Gasoline containing up to 10 ethanol El0 is acceptable for use in this machine The use of any gasoline exceeding 10 ethanol El0 will void the product warranty Sears Canada inc Toronto Ontario M5B 2B8 01 13 12 SR 532 44 72 54 Rev 3 Printed inthe U S A ...

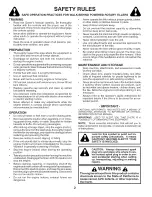
Page 2: ...pecting shut off the engine and make certain all moving parts have stopped Disconnect the spark plug wire and keep the wire away from the plug to prevent accidental starting Disconnect the cord on electric motors Do not run the engine indoors exhaust fumes are dangerous Never operate the tiller without proper guards plates or other safety protective devices in place Keep children and pets away Do ...

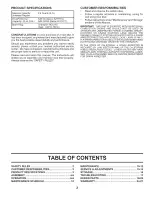
Page 3: ...TIES Read and observe the safety rules Follow a regular schedule in maintaining caring for and using your tiller Follow instructions under Maintenance and Storage sections of this Manual iMPORTANT THIS UNIT IS EQUIPPED WITH AN INTERNAL COMBUSTION ENGINE AND SHOULD NOT BE USED ON OR NEAR ANY UNIMPROVED FOREST COVERED BRUSH COVERED OR GRASS COVERED LAND UNLESS THE ENGINE S EXHAUST SYSTEM IS EQUIPPED...

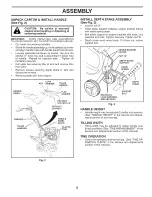
Page 4: ...ocket wrench set will make assembly easier Standard wrench sizes are listed 1 Utility knife 1 Screwdriver 1 Pair of pliers 2 1 2 wrenches OPERATOR S POSITION See Fig 1 When right or left hand is mentioned in this manual it means when you are in the operating position standing behind tiller handles FRONT LEFT RIGHT OPERATOR S POSITION Fig 1 CONTENTS OF HARDWARE PACK 1 Manual 2 Carriage Bolts 5 16 1...

Page 5: ... 16 18X1 1 4 HEX BOLT 5 16 18Xl CABLE S TILLER HANDLES HANDLE PANEL BOLTS PLASTIC INSTALL DEPTH STAKE ASSEMBLY See Fig 3 Loosen nut _ Insert stake support between engine bracket halves with stake spring down Bolt stake support to engine brackets with bolts lock washers and nuts Tighten securely Tighten nut _ Depth stake must move freely If it does not loosen support bolt ENGINE BRACKET HALVES NUT ...

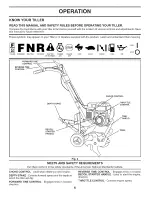
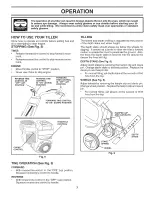
Page 6: ...RSE CAUTION ENGINE ENGINE FAST SLOW CHOKE FUEL OIL OR WARNING ON OFF FORWARD TINE CONTROL REVERSE TINE CONTROL DEPTH STAKE I CHOKE CONTROL THROTTLE TINE RECOIL STARTER HANDLE Fig 4 MEETS ANS SAFETY REQUIREMENTS Our tillers conform to the safety standards of the American National Standards Institute CHOKE CONTROL Used when starting a cold engine DEPTH STAKE Controls forward speed and the depth at w...

Page 7: ...h reverse tine control in the OFF up position Squeeze forward tine control to handle REVERSE With forward tine control in the OFF up position Squeeze reverse tine control to handle TILLING The speed and depth of tilling is regulated by the position of the depth stake and wheel height The depth stake should always be below the wheels for digging It serves as a brake to slow the tiller s forward mot...

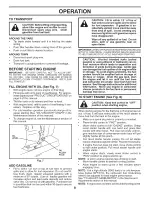
Page 8: ...spill or use gasoline near an open flame IMPORTANT WHEN OPERATING IN TEMPERATURES BELOW 32 F 0 C USE FRESH CLEAN WINTER GRADE GASOLINE TO HELP INSURE GOOD COLD WEATHER STARTING CAUTION Alcohol blended fuels called gasohol or using ethanol or methanol can at tract moisture which leads to separation and formation of acids during storage Acidic gas can damage the fuel system of an engine while in sto...

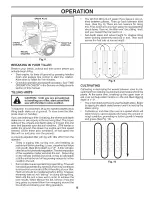
Page 9: ...and wind it may be advisable to till the soil at the end of the growing season to further condition the soil Soil conditions are importantfor proper tilling Tines will not readily penetrate dry hard soil which may contribute to excessive bounce and difficult handling of your tiller Hard soil should be moistened before tilling however extremely wet soil will ball up or clump during tilling Wait unt...

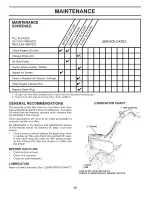
Page 10: ...nce To receive full value from the warranty operator must maintain tiller as instructed in this manual Some adjustments will need to be made periodically to properly maintain your tiller All adjustments in the Service and Adjustments section of this manual should be checked at least once each season Once a year you should replace the spark plug clean or replace air filter and check tines and belt ...

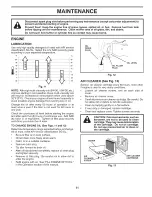
Page 11: ...r oil or equivalent Tighten oil filler plug securely each time you check the oil level TO CHANGE ENGINE OIL See Figs 11 and 12 Determine temperature range expected before oil change All oil must meet API service classification SG SL Be sure tiller is on level surface Oil will drain more freely when warm Catch oil in a suitable container Remove drain plug Tip tiller forward to drain oil After oil h...

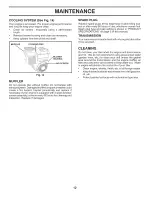
Page 12: ...d SPARK PLUG Replace spark plugs at the beginning of each tilling sea son or after every 50 hours of use whichever comes first Spark plug type and gap setting is shown in PRODUCT SPECIFICATIONS on page 3 of this manual TRANSMISSION Your transmission is sealed and will only require lubrication if it is serviced CLEANING Do not clean your tiller when the engine and transmission are hot We do not rec...

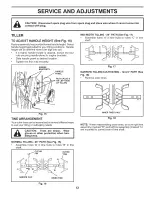
Page 13: ...EFT SIDE OF TILLER Fig 15 TINE ARRANGEMENT Your outer tines can be assembled in several different ways to suit your tilling or cultivating needs j CAUTION Tines are sharp Wear j gloves or other protection when ban dling tines NORMAL TILLING 26 PATH See Fig 16 Assemble holes _ in tine hubs to holes B in tine shaft CLEVIS OUTER fPIN TINE N lll i o ofl HAIRPIN CLIP INNER TINE Fig 16 13 MID WIDTH TILL...

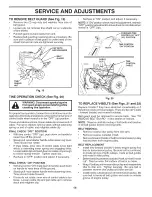
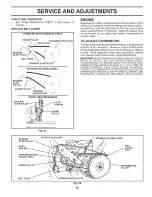
Page 14: ...ull recoil starter handle while observing tines Tines should rotate forward If tines do not rotate inner wire of control cable is too loose Loosen cable clip and pull cable up to remove slack and retighten clip Recheck in ON position and adjust if necessary NOTE If ON position check required adjustment recheck OFF position adjustment to insuretines do not rotate when control is OFF up FORWARD TINE...

Page 15: ...ice outlet TO ADJUST CARBURETOR The carburetor has been preset atthe factory and adjustment should not be necessary However engine performance can be affected by differences in fuel temperature altitude or load If the carburetor does need adjustment contact your nearest authorized service center department iMPORTANT NEVERTAMPERWITHTHE ENGINE GOVERNOR WHICH IS FACTORY SET FOR PROPER ENGINE SPEED OV...

Page 16: ...RAGE Drain the fuel tank Start the engine and let it run until the fuel lines and carburetor are empty Never use engine or carburetor cleaner products in the fuel tank or permanent damage may occur NOTE Fuel stablizer is an acceptable alternative in minimizing the formation of fuel gum deposits during storage Add stabilizer to gasoline in fuel tank or storage container Always follow the mix ratio ...

Page 17: ...ait several minutes before attempting to start 4 Clean or replace air cleaner cartridge 5 Drain fuel tank and carburetor and refill tank with fresh gasoline 6 Remove fuel tank and clean 7 Make sure spark plug wire is seated properly on plug 8 Replace spark plug or adjust gap 9 Make necessary adjustments 1 Place throttle control in FAST position 2 Clean or replace air cleaner cartridge 3 Replace sp...

Page 18: ...Grip Handle Handle LH Double Bend Nut Crown Lock 5 16 18 Washer 11 32 x 11 16 x 16 Ga Washer 3 8 x 7 8 x 14 Ga Bolt Fin Hx 5 16 18 x 1 25 Washer Lock 5 16 Nut Fin Hx 5 16 18 Nut Flange KEY NO 13 14 16 19 2O 29 3O PART NO DESCRIPTION 180847 Bolt RDHD 5 16 18 x 3 4 9209RX668 Assembly Panel 166381X498 Handle RH Double Bend 188562 Lever Control Tine 188555 Pin Pivot 12000059 Retainer Ring 181580 Routi...

Page 19: ...Head 3 8 16 x 2 00 Guard Belt Washer 9 32 x 5 8 x 16 Ga Nut Cap 1 4 20 Bolt Carriage 1 4 20 x 3 4 V Belt Forward Motion V Belt Reverse Ring Retainer Key Square Sheave Transmission Flat Bolt Belt Guard Ring Klip lO 112 32 16 14 15 18 KEY NO 21 22 23 24 25 26 27 28 29 3O 31 32 41 42 PART NO DESCRIPTION 73350600 Nut Hex Jam 3 8 16 161806 Pulley Idler 175377X479 Arm Idler 74760620 106968 73350500 7322...

Page 20: ... Nut Hex 5 16 18 Washer Lock 5 16 Locknut w washer 3 8 16 Clip Hairpin Support Depth Stake R H Stake Depth Pin Clevis Bolt Hex 3 8 16 x 1 3 4 Support Depth Stake L H 15 16 17 19 20 21 22 24 25 5388JX004 Spring Stake 121117X Bolt Shoulder 193851X613 Wheel 9190RX479 Bracket Wheel 73680600 Locknut Crown 3 8 16 74760516 Bolt Hex Head 5 16 18 x 1 73800500 Locknut w insert 5 16 18 73970500 Locknut Flang...

Page 21: ...Y PART NO NO DESCRIPTION 1 2 3 4 5 6 156934X479 3146R 156932X479 156931X479 156933X479 4929H Tine Outer R H Retainer Spring Tine Inner R H Tine Inner L H Tine Outer L H Rivet Pan Hd Drilled 1 4 Dia NOTE All component dimensions given in U S inches 1 inch 25 4 mm 21 ...

Page 22: ...her 13 32 x 13 16 x 11 Locknut 3 8 16 Shield Tine Bracket Engine R H Bracket Engine L H Nut Hex 5 16 18 Bolt Hex Head 5 16 18 x 2 5 Transmission Spacer Split KEY PART NO NO 16 19091412 17 19092016 18 10040400 19 74610412 20 21 751153 DESCRIPTION Washer 9 32 x 7 8 x 12 Ga Washer 9 32 x 1 1 4 x 16 Ga Washer Lock 1 4 Bolt Hex 1 4 28 x 3 4 Gr 5 Engine Briggs Model 12T402 1613 F8 446085 Order parts fro...

Page 23: ...89 110614 158700 158701 120076X 422972 409143 432278 423830 447254 DESCRIPTION Decal Logo Decal Logo Decal Logo Decal Hand Placement Decal Control Forward Decal Control Reverse Decal Warning Rotating Tines Decal Tine Shield Decal Tank Decal Air Cleaner Decal Ethanol E85 Warning Manual Owner s English French 23 ...

Page 24: ...anty obligation of the other manufacturer s engines b TransmLs sions Except where othmwise indicated on Exhibit A Transmission Transaxle including Drive Systems are not covered by this warranty In most cases these items are NOT manufactured by Husqvarna in which case they may be covered separately by their respective manufacturer s warranties if one is provided and included with the product at the...

Page 25: ...y removed damaged air filter excessive dirt abrasives salt water lnoismre corrosion rust varnish stale fuel or any adverse reaction due to incorrect storage procedures n Failures due to improper set up pre delivery service or repair service by anyone other than an authorized Husqvarna servicing dealer during the warranty period o Dirt comaminated grease or oil use of incorrect type of greases or o...

Page 26: ... NO WARRANTY NO WARRANTY Other Non Expendable Components 2 Years NO WARRANTY NO WARRANTY _Thro_rs Engine Other Non Expendable Components 2 Years 90 days 90 days rs Engine Battery 1 Year Pro rated NO WARRANTY NO WARRANTY Other Non Expendable Components 2 Years NO WARRANTY NO WARRANTY Tiller Tines NO WARRANTY NO WARRANTY Engine Other Non Expendab e Components 2 Years 1 Year 90 days Consumer Commerci...

Page 27: ...onents Parts Only Parts Only NO WARRANTY ISpreader 1 Year 1 Year 1 Year Ro_tic Robotic Mower 2 Years 90 days 90 days Battery 1 Year 1 Year 1 Year Accessories e g grass catcher bumper guard accessories etc 1 Year NO WARRANTY NO WARRANTY Replacement parts and or accessories provided under this Limited Warranty are warranted only for the BALANCE of the warranty period applicable to the part or access...

Page 28: ...iiiiiiiiiiiiiiiiiiiiii iiiiiiiiiiiiiiiiiiiiii iiiiiiiiiiiiiiiiiiiiii iiiiiiiiiiiiiiiiiiiiii iiiiiiiiiiiiiiiiiiiiii iiiiiiiiiiiiiiiiiiiiii Just Call 1 800 4 1VlY HOlVlE 1 800 469 4663 24 hours a day 7 days a week For the repair of major brand appliances in your own home no matter who made it no matter who sold it For your nearest Sears Parts and Service location to bring in products like vacuums la...

Reviews: