background image

Summary of Contents for 919.152141

Page 1: ...idelines Assembly Operation Maintenance Service and Adjustments Troubleshooting Repair Parts CAUTION Read the Saf_y Guidelines and All Instructions Carefully Before Opsr_ing Sears Roebuck and Co Hoffman Estates IL 60179 U S A Visit our Cre_tsmanwebslte www sears com craftsman 026336 R_ O 4 17 Q2 ...

Page 2: ...efect in material or workmanship within one year from the date of purchase RETURN IT TO THE NEAREST SEARS REPAIR CENTER THROUGHOUT THE UNITED STATES AND SEARS WILL REPAIR IT FREE OF CHARGE If purchased from Orchard Supply Hardware return to the nearest Orchard Stone and Orchard will repair it free of charge f this air compressor is used for commercial or rental purposes the warranty wi_lapply for ...

Page 3: ...tentially hazardous situation which if not avoided may result in Droner_ damaae SAVE THESE NS__FJUCT ONS _l IMPROPER OPERATION OR MAINTENANCE OF THIS PRODUCT COULD RESULT IN SERIOUS INJURY AND PROPERTY DAMAGE READ AND UNDERSTAND ALL WARNINGS AND OPERATING iNSTRUCTIONS BEFORE USING THIS EQUIPMEN _ Some dust created by power sanding _awing grinding drilling and other construction nctivitJB_contains ...

Page 4: ...length of hose explosion may be required Store flammable materials in a se ure location away from compressor Restricting any o_ the compreE _or ventilation openings w_ll cause serious overhearing and cou d cause fire Unattended operation ofthia product could result in persona injury or property damage To reduce _he rlak of fire do not allow th_ compressor to operate unattended Never place objects ...

Page 5: ...lt in serious nJui_ The lank _desigrled lo wi hstand specific operating pressures Never make adjustments or parts substitutions to alter the fButow sat operating pressures For essential control of air pressure you must install a pressure regulator and pressure gauge to the air outlet if not equipped of your compressor Follow the equipment manufacturers recommendation and never exceed the maximum a...

Page 6: ......

Page 7: ...ing to repair compressor with protective shrouds removed oan e_pose you Io moving parts and can result in serious injuw HOW TO PREVENT IT Never operate the ompr_msor with guardo or covers which are damaged or removed Any repairs rOClLJiredon this product should be portormed by authorized service center personnel III E vailil WARNING Risk or Serious Injury or Property Damage When TransPorting Compr...

Page 8: ...iliar with the operation and controls of _hc air compre _ r Keep opera_in are_ alger of el persons pets and ot_stacles Keep children away from the a_r compressor at all times Do not operate the product when fatigued or under the influence ot alcohol or drugs Stay atert at alt times Never defeat the safety features of this product Equip area of operation with a flr_ cxtinguisher Oo not oper lte m _...

Page 9: ...d It builds to a certain high pressure before the motor automatically shuts off protecting your air tank from pressure higher than its capacity The high pressure at which the motor shuts off is called cut out pressure Branch Circuit Circuit carrying electricity from electrical panel to ou leL This unit is capable of powering the following Accessories The accessories are available through the curre...

Page 10: ...he plug must be used with an outlet that has been installed and grounded in accordance with all local codes and ordinances IMPORTANT The outlet being used must be installed and grounded in accordance with all local codes and ordinances 2 Make sure the outlet being used has the same configuration as the grounded plug DO NOT USE AN ADAPTER See illustration _Groundod Outl_t_ G re tllldlrlg PIll 31 In...

Page 11: ... the Specification Chart for the voltage and minimum branch circuit requirements Certain airoompressor_ can be operated on a 15 amp circuit if the following conditions are met 1 Voltage supply through branch circuit is 15 crops 2 Circuit is not used to supply any other electrical needs lights appliances etc 3 E xtertsion cords comply with speciticatlons 4 Circuit is equipped with a 15 amp circuit ...

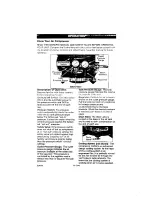
Page 12: ...opping out at its factory set pressure slightly higher than the pressure switch eut o t setting Outlet Pressure Gauge The outlet pressure gauge indicates the air _ essureavaUable at the outlet side of the regulator This pressure is controlled by the regulator and is always less than or equal to the tank pressure D20336 Tank Pressure Gauge The tank pressure gauge indicates the reserve air pressure ...

Page 13: ...n the check valve or a complete compressor pump has been replaced 1 Make sure the On Aut0 Off lever is in the OFF position NOTE Pull coupler back untiP it c_icks to prevent air from escaping through the quick connect On Au o Off Leve 2 Plug the power cord into the correct branch cimuit receptacle Refer to Voltage and Circuit Protectlon paragraph inthe Installation section of this manual 3 Open fil...

Page 14: ...ing for air tools and accessories The regulator outlet pressure must never exceed the maximum pressure rating low to Start 1 Turn the On Auto Off lever to AUTO and allow tank pressure to build Motor will stop when tank pressure reaches cut out pressure 2 Pull the regulator knob out and turn clockwise to increase pressure Whet_ the desired pressure is reached push knob in to lock in place The compr...

Page 15: ...at the safety valve operates freely If the valve is stuck or does not operate smoothly it must be replaced with the same type of valve 1 Set the On Auto Off lever to OFF 2 Putt the regulator knob out and turn clockwise to set the outlet pressure to zero 3 Remove the air tool or accessory Pull ring on safety valve allowing air to bleed from the tank until tank pressure is approximately 20 psi Relea...

Page 16: ...om air tank S_e To Drain Tank in the Maintenance section 3 Remove the hose by removing the hose clamp NOTE The hose clamp is not reusable You must purchase a new hose clamp see the Parts List Manual or purchase a standard hose clamp at a Iota hardware store 4 Unscrew the check vatve turn counter clockwise using a socket wrench Make sure the valve disc moves freely inside the check valve and the sp...

Page 17: ... 6 Assemble the regulator and orient as shown NOTE Arrow indicates flow of air Make sure it is pointing in the direction of air flow 4 Remove the regulator 5 App y pipe sealant tape to the nipple on the standpipe 7 8 Reapply pipe sealant to outlet pressure geuge and quick connect Reassemble outlet pressure gauge and quick connect Orient outlet pressure gauge to read correctly Tighten connect with ...

Page 18: ...elease safety valve ring 6 Drain water from air tank by opening drain valve on bottom of tank Water will condense in the air tank If not drained water will corrode and weaken the air tank causing a risk of air tank rupture 7 After the water has been drained close the drain or drain valve NOTE If drain valve is plugged release all air pressure The valve can then be removed cleaned then reinstalled ...

Page 19: ...uto Off levor to the OFF position if the outfit does not shut off contact s Trained Service Technician Contact a Trained Service Techniciam Tighten fittings where air sen be heard escaping Check fittings with soapy water solution Do Not Overti hten A defective check valve results in a constant air leak st the pressure release valve when there is pressure in the tank and the compressor is shut off ...

Page 20: ......

Page 21: ...for proper gauge wire and cord length Remove and clean or replace Check wiring connection inside pressure switch and terminal box area Have checked by a ira ned Service Technician Have checked by a Trained Se_ice Technician Oonot operate the compressor in the paint spray area See flammable vapor warning Bleed the line by pushing the lever on the pressure switch to the off position if the valve doe...

Page 22: ...Air Compressor Model Number 919 152141 D2 336 22 SP ...

Page 23: ...21921 D ESCRIPTION Tank Recess Rubber Bumper 3 used Screw 3 used Screw 2 used Nipple 1 4 18 NPT X 2 50 Strain Relief Bushing Drain Valve Safety Valve Regulator Quick Connect 1 4 NPT Gauge 2 2 used Nipple 1 4 18 NPTX 1 5 Strain Relief Bushing Bushing Reducer 1 8 1 4NPT Pressure Switch Fitting 90 Elbow Hose Check Valve Pump Isolator 4 used Pump Assembly Hose Clamp Label Drain Tank Eng Spa Cord Assem...

Page 24: ... Jil ivj I Jl D V T_ __ I _ _ Air Comprassor Model Number 919 152141 2 026336 24 ENG ...

Page 25: ...dbelf Assembly 13 x SUDL 9 1 Screw 8 32X 375 344 14 025731 Pump Isolator 5 used 15 x 88F 995 Washer Screws 10 24 x 7 8 4 used 17 D81659 Motor Corfi 18 CAC 1206 1 Hess Clamp 19 H 7051 Hose I 4 ID X lO Length 20 x SSF 3156 Screw lo 9X 50 P astite 5 used 21 Motor Brush Replacement NotIllu_ s_rated LA 3270 D26335 Label Warning Eng Span Operators Manual K 0387 Isolator Kit x KK 4929 Fastener Kit KK 496...

Reviews: