


M118.x
1 of 11
3330 Dixie-Narco Blvd.
Williston, SC 29853
www.dixienarco.com
M118.2
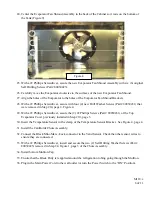
Evaporator Fan Motor Sub-Assembly
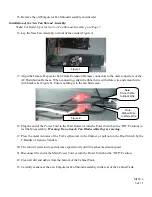
Wellington Fan Motor Installation
All Domestic P Series Models
Revised April 1, 2011
INDEX
•
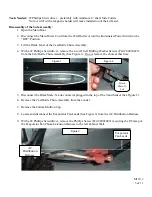
P Series Disassembly / Installation page 2
•
Narrow P Series Fan Shroud Assembly Build up page 7
•
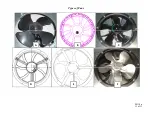
Evaporator Fan Replacement / Conversion Chart page 10
Models affected:
All Domestic P Series Model Venders Produced Beginning Production Run 6925CB and higher.
Reason:
To Provide Step-by-Step Instructions for the removal of the original Evaporator Fan Shroud Assembly and
installation of the new Evaporator Fan Shroud Assembly with the Wellington supplied Fan Motor.


