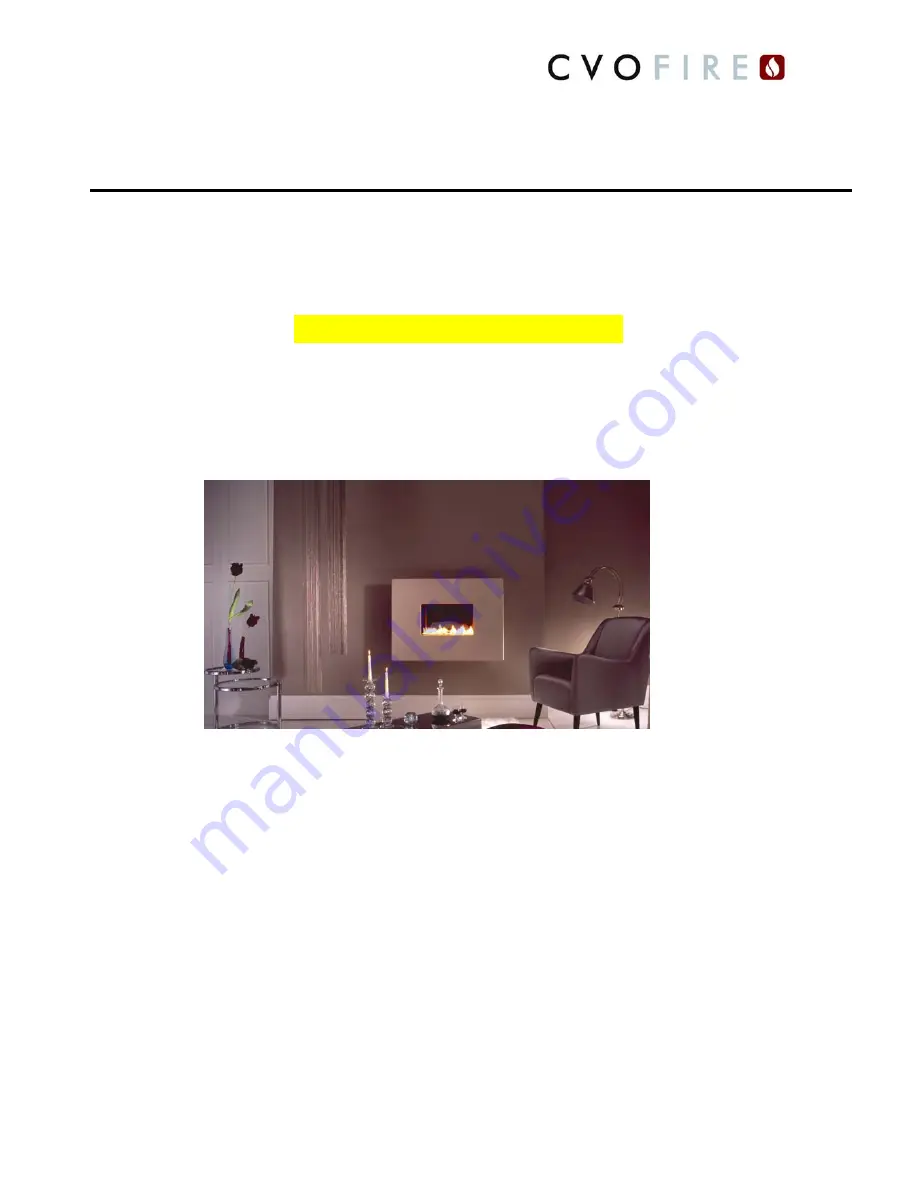
background image


Rev-18


PIN NUMBER:  0558BO5341


Spirit Fires Ltd. 4 Beaumont Square, Aycliffe Industrial Park, Newton Aycliffe, County Durham, DL5 

6XN. Tel: 01325 327221, Fax: 01325 327292, Email: info@cvo.co.uk, Web: www.cvo.co.uk 


TECHNICAL MANUAL & USER HANDBOOK   


FIRE LINE FLUELESS  


[Manual Ignition Version] 


This Manual covers both “Classico” (with Polished Interior) & 

“Moderno” (with Black Interior) Models with either a Standard 

(970mm) or Wide-Screen (1080mm) Fascia, for use with Natural 

Gas or LPG. 


Important : 

It is recommended, even if you have fitted 

these appliances before, that you take the time to read through 

these instructions and follow them step by step. 


Appliance Serial Number  ……………………………… 


Please quote this serial number when calling our customer service team 
regarding warranty issues or to order spare parts. The Warranty is valid 

for 1 Year from date of delivery. The Warranty card supplied is to be 

completed by the installer and returned to the address below. 


This manual must be handed to the owner of the property once the 

fire is commissioned and retained for future reference. 

Summary of Contents for FIRE LINE FLUELESS

Page 1: ...Fascia for use with Natural Gas or LPG Important It is recommended even if you have fitted these appliances before that you take the time to read through these instructions and follow them step by step Appliance Serial Number Please quote this serial number when calling our customer service team regarding warranty issues or to order spare parts The Warranty is valid for 1 Year from date of deliver...

Page 2: ...iance Contents Page 3 Parts List Construction Drawing Page 4 Introduction Page 5 Appliance Technical Data Page 7 Unpacking the Appliance Page 8 General Installation Requirements Page 12 Side View of Fire Page 13 Warning For Fire Guards and Hearths Page 13 Clearance to Combustible Materials Page 13 Preparing the Appliance Page 14 Before Connecting the Fire to Gas Line Page 15 Fitting Instructions P...

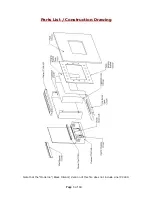
Page 3: ...Page 3 of 34 Parts List Construction Drawing Note that the Moderno Black Interior Version of this fire does not include Liner CC249 ...

Page 4: ...gories as shown below Check Packing box label and Data Plate for appliance gas type and categories before starting to install this fire Check the required room ventilation and minimum room size before installing the fire This appliance is for use with the following gas categories gases and supply pressures Natural Gas o I2H G20 at 20mbar o I2L G25 at 25mbar o I2E G20 at 20mbar o I2e G20 at 20mbar ...

Page 5: ...pliance Technical Data Refer to the appliance data plate affixed behind the fascia within the burner carriage ENSURE THAT THE LOCAL CONDITIONS OF USE CORRESPOND TO THE DATA ON THE BADGE See Data Plate for Input Rating ...

Page 6: ...7 2 0kW at burner pressures of 12 2 6 9mbar Noisy Pilot Fire Shut Down This appliance is fitted with a safety device This will operate if the requirements of the installation are not met If the fire is run for a period of time and starts to become noisy or suddenly shuts down this indicates a possible problem The most common fault is incorrect ventilation The ventilation is quoted as free air it i...

Page 7: ...round Box 2 o Fire Fascia Make sure the carton is stood upright and open the top Remove the cardboard and place to one side this can be used as a floor protector when installing the fire Remove the fire and examine its general condition paying particular attention to the fascia and the stainless steel inglenook If satisfied by the general condition place the decorative components to one side and p...

Page 8: ...inutes have passed the appliance can be re started in accordance with Appliance Start Up Shut Down Instructions In the event of repeated shut downs do not use the appliance and have the flue and appliance checked by a CORGI Engineer If any part of the pilot assembly needs to be replaced including the pilot burner thermocouple electrode and injector the complete assembly must be replaced with an or...

Page 9: ...e installed in the room When providing ventilation openings consideration must be given to the avoidance of locations where discomfort from draughts may cause the user to block the openings Similarly the possibility of curtains or furniture blocking ventilation openings must be considered Floor vents window vents or chimneys are not suitable means of ventilation On no account must inlet or outlet ...

Page 10: ...be fitted in basements which are not open on at least one side an open able window bathrooms or in corridors stairways landings or hallways of multi occupancy dwellings garages or rooms containing petroleum products Although the installation of our Flueless fires in bedrooms is permitted CVO Fire does not recommend it if in doubt please refer to BS5871 2007 for details or contact CVO Fire for furt...

Page 11: ...even if it is in an adjoining room When decorating the residue can linger for some time and this will lead to unpleasant smells from the appliance It may be some weeks before this odour clears and it is advised not to use the appliance during this period Always completely cover the appliance while decorating WALL MOUNTED The appliance has been designed to be installed onto a wall It must be placed...

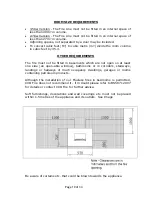
Page 12: ... of moisture etc Consult building control if in any doubt Any under grate draught devices must be sealed off A hearth will be required in accordance with both CORGI and local regulations on a non combustible surface if the fire is to be mounted on the wall less than 300mm from the base of the burner to the floor The client installer can construct supply their own hearth or CVO can supply it as an ...

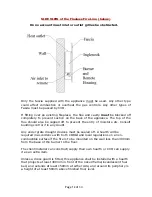
Page 13: ... the vicinity above the fire outlet shall be considered and the user advised Particular attention should be taken to ensure soft furnishings such as scatter cushions rugs and curtains are kept at least 1 5 metres from the appliance Material of any description should not be thrown on to the fuel bed Preparing the Appliance for Installation Unpack the unit Ensure the appliance is correctly marked fo...

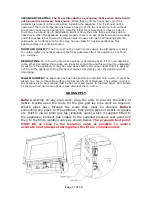
Page 14: ...n in the images The elbow should be connected to the isolation valve as shown in the images Gas Inlet Supply This is via an 8mm gas tap isolation valve which is supplied fitted to the appliance A Gas Inlet Elbow is required to check inlet pressure This is supplied with the fire and must be position as close to the isolation valve as possible It is recommended that if the gas pipe work is in excess...

Page 15: ...of the lower securing points which are located within the burner workings see A above Remove the burner and drill and plug holes then refit the burner onto the wall bracket and secure using the two screws provided WARNING This must be done as it ensures the fire cannot be lifted from the wall and the burner cannot warp while operating 4 A qualified GAS SAFE registered gas fitter must connect the g...

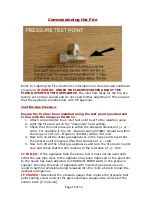
Page 16: ...Natural Gas 20mBar should be within the range of 19 to 21 Propane 37mBar will be 36 to 38 4 Now turn on all the other gas appliances in the house and check that the pressure still remains within the tolerance of 1mb 5 Now turn off all the other gas appliances and turn the fire down to pilot only and check that the still remains in the tolerance of 1mb IF FAILED If the appliance fails the above tes...

Page 17: ...ding the specified amount of free air if in doubt contact the vent manufacturer for vent free area sizing Does the room comply to the minimum size or greater Does the Room have a window that can be opened Has the customer being shown how to operate the appliance Has the customer been told of the reason for the air vent and why it must never be blocked Has the warranty card been completed and given...

Page 18: ... in the house which is causing a pressure drop Check for strong draughts There is gas but pilot does not light Check the pilot gas slot is clear Check the pilot flame is heating the thermocouple Check the thermocouple nut is properly tightened to the valve Is there another gas appliance in the house which is causing a drop in gas pressure Pilot lights but does not light main burner Check Room Size...

Page 19: ...Page 19 of 34 ...

Page 20: ...gistered fitter and in accordance with National and local Regulations Failure to do so will invalidate the Warranty and CVO Fire will not accept any claims for incorrect installation Manual Valve V4 28 AC027 This part can only be changed at the factory Call Customer Service on 01325 327221 Natural Gas 0 4 x 7 AC076 LPG 0 6 x 1 AC089 Pilot Natural Gas P4 37D AC043 Pilot LPG Propane P4 45 AC044 ...

Page 21: ... installer is to advise the user not to stand too close to the appliance for prolonged periods of time and warn that loose clothing is particularly at risk of burning due to the presence of an unguarded flame In addition the installer is to advise the user against placing combustible material directly in front of the appliance Floor coverings such as carpets are considered to be acceptable Flueles...

Page 22: ...e burner for servicing undo the screws that locks the fascia to the enclosure It is important the appliance is cool before commencing any work FASCIA REMOVAL REFIT Once the two cross headed screws have been removed it will be possible to lift the fascia up 30mm and gently pull the facia back from the locating squares It is recommended this operation be done with two persons Take care to stand the ...

Page 23: ...age 23 of 34 To refit the fascia is the reversal of removal NOTE The fascia must be locked in place by replacing the locking screws for safety reasons REFER TO DIAGRAM BELOW TO IDEINTIFY ALL BURNER PARTS ...

Page 24: ...he mixer tube and block the injector Do not Adjust the Aeration BURNER Clean the burner bar to remove any deposits OTHER Use a vacuum cleaner to remove any dust and debris that may have built up within the fire box chamber GAS CIRCUIT Test all joints for leaks if the burner has been dismantled RE LIGHT Light the fire using the method in the instructions and ensure that the pilot lights constantly ...

Page 25: ...be done at the factory When ordering replacement components or requesting technical assistance you should at all times quote the following Type of fire shown on front of booklet Gas supply LPG or Natural Gas when using LPG please supply details of supply type bottles or tank Control System Manual Control Version Unit serial number as shown on Data Sheet Component part number or description of faul...

Page 26: ...h Natural Gas or LPG Please quote the appliance serial number when calling our customer service team regarding warranty issues or to order spare parts The Warranty is valid for 1 Year from date of delivery The Warranty card supplied is to be completed by the installer and returned to the address below This manual must be handed to the owner of the property once the fire is commissioned and retaine...

Page 27: ...own Instructions Page 32 Oxygen Depletion system Page 32 Spark Failure Page 32 Decorating Page 32 Cleaning Instructions Page 32 New Fire Smell Burn in Period Page 33 Noisy Pilot Fire Shut Down Page 33 Important Note LPG Propane Users Page 34 Warranty Information Page 36 Contact Details ...

Page 28: ...ce fitted to this fire is also an atmosphere sensing device which shuts off both the main burner and pilot if evacuation of the combustion products is interrupted If the fire shuts itself off restart the fire following the procedure in section Lighting the fire If the fire continues to shut itself off do not use the fire and have the fire checked by a suitably qualified person Once the fire has be...

Page 29: ...y to hold the knob in this position for some seconds to clear the air from the pipe and allow gas to reach the pilot burner Once gas is available at the pilot continued rotation anti clockwise will cause the piezo igniter to spark This is accompanied by a click at the valve and should result in the pilot burner igniting This can be verified by looking at the front central area of the burner unit O...

Page 30: ...eat steps 1 and 2 Step 3 Hold the knob in for 10 12 seconds Step 4 Release knob and check pilot remains alight Step 5 Turn knob until the high flame logo is at the top the fire should then ignite Step 6 Adjust flames to high or low level by turning the knob either way without pressing in the knob To extinguish Step 1 Turning the Fire Off Turn control knob clockwise to MIN position Step 2 Press in ...

Page 31: ...after decorating can cause fumes to enter the room Cleaning instructions The fascia should be cleaned with warm soapy water a suitable metal polish should only be used for the stainless steel parts Care should be taken when polishing the vanity cover It is very important that no polish should be used on the surface of the burner No residue of polish should be left as this may cause unpleasant odou...

Page 32: ...pilot shield fitted see page 21 Free Air Wall Vent of specified size is installed in room Free Air Wall Vent is not blocked Free Air Wall Vent is over 1 metre away from the appliance Gas pressure is within the specified limits 1mBar Room appliance is installed in has a window which can be opened Failure to comply with the minimum requirements of the specification will render the appliance dangerou...

Page 33: ...ire appliance In order to make a warranty claim you will be required to supply the serial number of the appliance as shown on the front of this book and full details of the GAS SAFE engineer who installed the appliance we may request a copy of the installation receipt To register your appliance please complete and return the warranty card supplied with the fire Failure to supply details of the Reg...

Page 34: ...cliffe Industrial Park Newton Aycliffe County Durham DL5 6XN Tel 01325 327221 Fax 01325 327292 Email info cvo co uk Web www cvo co uk The following information supplied in this manual is correct at the time of publish Updated on 17 Nov 2011 There may be changes made in the future as we improve our products If there are any queries please write or call out Technical Department ...

Reviews: