background image

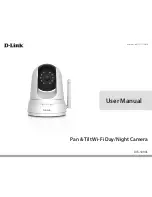
User Manual

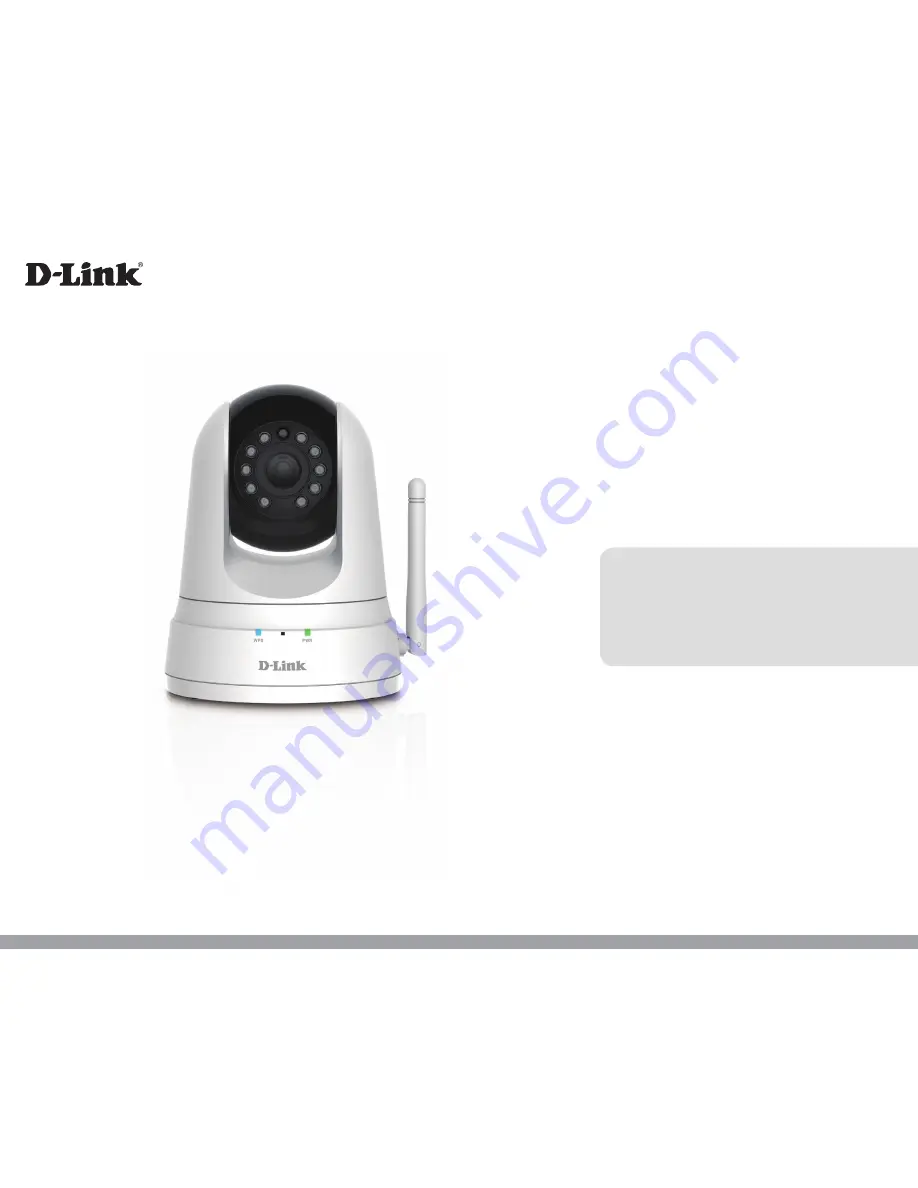
Pan & Tilt Wi-Fi Day/Night Camera

DCS-5000L

Version 1.00 | 11/13/2015

Summary of Contents for DCS-5000L

Page 1: ...User Manual Pan Tilt Wi Fi Day Night Camera DCS 5000L Version 1 00 11 13 2015 ...

Page 2: ...gistered trademarks of their respective companies Apple Apple logo Safari iPhone iPad iPod touch and Macintosh are trademarks of Apple Inc registered in the U S and other countries App StoreSM is a service mark of Apple Inc Chrome browser Google Play and Android are trademarks of Google Inc Internet Explorer Windows and the Windows logo are trademarks of the Microsoft group of companies Copyright ...

Page 3: ...allation 20 Wireless Installation Considerations 21 WPS Push Button Setup 22 Mounting Instructions 23 mydlink 25 Configuration 26 Using the Web Configuration Interface 26 Live Video 27 Setup 29 Wizard 29 Internet Connection Setup Wizard 30 Network Setup 32 Wireless Setup 34 Dynamic DNS DDNS 35 Image Setup 36 Video 37 Audio 38 Motion Detection 39 Sound Detection 40 Mail 41 FTP 44 Time and Date 46 D...

Page 4: ...4 D Link DCS 5000L User Manual Table of Contents Technical Specifications 60 Regulatory Statements 62 ...

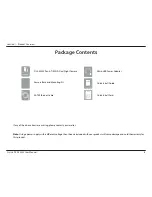
Page 5: ...ontact your reseller Note Using a power supply with a different voltage than the one included with your product will cause damage and void the warranty for this product DCS 5000L Pan Tilt Wi Fi Day Night Camera Micro USB Power Adapter CAT5 Ethernet Cable Camera Base and Mounting Kit Quick Install Guide Quick Install Card ...

Page 6: ...to your router Windows 10 8 32 64 bit 7 32 64 bit Vista 32 64 bit Mac OS X 10 7 or above Web based Configuration Utility Requirements Browser Requirements Internet Explorer 8 or higher Firefox 12 or higher Safari 6 or higher Note Make sure you have the latest version of Java installed Visit www java com to download the latest version mydlink Website Requirements Broadband Internet connection Compu...

Page 7: ...emotely and controlled from any PC laptop over your local network or through the Internet via a web browser The simple installation and intuitive web based interface offer easy integration with your Ethernet Fast Ethernet or 802 11 b g n wireless network Wireless N technology gives you the freedom to place the DCS 5000L anywhere within range of your existing wireless network The DCS 5000L also com...

Page 8: ...ly move to frequently used points of interest IR LEDs for Day and Night functionality The built in infrared LEDs enable night time viewing of up to 8 meters 26 feet giving you clear images regardless of lighting conditions MJPEG Codec for Smooth Space Efficient Video ThiscamerasupportsuseoftheMJPEGvideocodec whichgivesyouhigh qualityvideowithreducedbandwidthrequirements This means that you can enj...

Page 9: ...ity The Site Survey feature also allows you to view and connect to any available wireless networks within range of the camera Micro USB Powered for Convenience For added convenience the DCS 5000L can be powered via any Micro USB cable so you don t have to worry about looking for a matching power adapter when setting it up for use Simply use the included or standard Micro USB cable and plug it into...

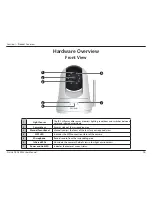
Page 10: ...dingly 2 Camera Lens Records video of the surrounding area 3 Manual Focus Bezel Manually adjust the focus of the lens for your required view 4 WPS LED Indicates the WPS connection status of the camera 5 Microphone Records audio from the surrounding area 6 Infrared LEDs Illuminate the camera s field of view in low light environments 7 Power and Link LED Indicates the camera s current status 4 5 1 2...

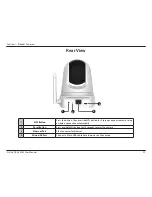
Page 11: ...s button then press the WPS button for 5 seconds on your router to set up a wireless connection automatically 2 Reset Button Press and hold this button for 10 seconds to reset the camera 3 Ethernet Port RJ45 connector for Ethernet 4 Micro USB Port Connect a Micro USB cable here to power on the camera ...

Page 12: ...ur camera Refer to Zero Configuration Setup on page 15 CameraInstallationWizard If you do not have a mydlink enabled router use the Camera InstallationWizard to guide you through setup and initial configuration of your camera Refer to Camera Setup Wizard on page 18 Manual Hardware Installation This section shows you how to manually set up your camera however in order to use the mydlink features of...

Page 13: ...gure your camera without a PC and lets your camera work together with other mydlink Lite compatible devices Search for the free mydlink Lite app on the App Store or Google Play and download it to your smartphone or tablet You can also use a QR code reading app to scan the corresponding code for your device below ...

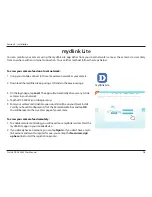
Page 14: ...Me box and tap OK You will be taken to the LiveView page of your camera You can monitor your camera using the mydlink Lite app either from your local network same as the camera s or remotely from anywhere with an Internet connection To use either method follow the steps below 1 To enable remote monitoring you will need to use mydlink services Start the mydlink Lite app on your mobile device 2 If y...

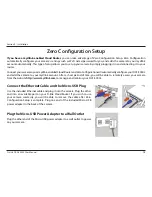
Page 15: ...dd the camera to your mydlink account After a short period of time you will be able to remotely access your camera from the website http www mydlink com to manage and monitor your DCS 5000L Zero Configuration Setup Connect the Ethernet Cable and the Micro USB Plug Use the included Ethernet cable and plug it into the camera Plug the other end into an available port on your D link Cloud Router If yo...

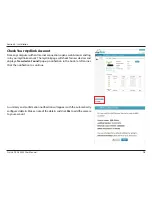
Page 16: ...ote of the details and click Yes to add the camera to your account Check Your mydlink Account FromanycomputerwithanInternetconnection openawebbrowserandlog in to your mydlink account The mydlink page will check for new devices and display a New device Found pop up notification in the bottom left corner Click the notification to continue DCS 5000L DCS 5000L ...

Page 17: ... and move the camera to its intended location your router s wireless settings have been automatically transferred to the camera and no further configuration is required Your camera is now set up and you can skip to mydlink on page 25 to learn more about the mydlink features of this camera or toConfiguration on page 26 for advanced configuration of your camera Note If the live image is blurry or ou...

Page 18: ...uble click on it to start the wizard Simply click Set up your Cloud Camera to go through the Setup Wizard which will guide you step by step through the installation process from connecting your hardware to configuring your camera and registering it with your mydlink account If you do not have a mydlink enabled cloud router you can use the Camera SetupWizard to guide you through the process of addi...

Page 19: ...izard Once the file has been downloaded browse to the folder the file is in and double click on the SetupWizard file to start the wizard After about 20 30 seconds the Setup Wizard will open which will guide you step by step through the installation process from connecting your hardware to configuring your camera and registering it with your mydlink account ...

Page 20: ...h Button Setup on page 22 If your router does not support WPS you will still be able to set up your camera s wireless settings in the camera s web interface Connect the Ethernet Cable and the Micro USB Plug Use the included Ethernet cable and plug it into the camera Plug the other end into an available LAN port on your router Plug one end of the included Micro USB power adapter to the back of the ...

Page 21: ...egree angle appears to be almost 1 meter 3 feet thick At a 2 degree angle it can appear over 14 meters 42 feet thick Position your devices so that the signal will travel straight through a wall or ceiling instead of at an angle for better reception 3 Building materials make a difference A solid metal door or aluminum studs may weaken the wireless signal Try to position your access points wireless ...

Page 22: ...ure If you are not sure where the WPS button is on your router please refer to your router s User Manual The DCS 5000L will automatically create a secure wireless connection to your router While connecting the blue LED will flash and your camera will reboot Note Youcanalsosetupawirelessconnectionmanually pleaseseeWireless Setup on page 34 WPS Push Button Setup WPS Button If your router supports Wi...

Page 23: ... the holes insert the plastic anchors to support the screws 2 If desired the power and Ethernet cables can be concealed behind the mounting bracket Run the cables through the back of the mounting bracket securing them with the built in guides Be sure to leave enough cable length protruding from the top to allow connection to the camera 1 To mount your camera on a wall or ceiling please follow the ...

Page 24: ...ing bracket Connect the power and Ethernet cables to the camera 5 Adjust the angle of the arm on the mounting bracket as required Tighten the thumbscrew to lock the arm in place 6 Fasten the mounting bracket to the wall using the screws provided 4 Do not overtighten the screws as this may crack the mounting bracket ...

Page 25: ... After registering your DCS 5000L camera with a mydlink account in the Camera InstallationWizard you will be able to remotely access your camera from the www mydlink comwebsite After signing in to your mydlink account you will see a screen similar to the following ...

Page 26: ...ount to access your camera s configuration interface You can also access the interface locally by entering the IP address of your camera into a web browser such as Internet Explorer To log in use the User name admin and the password you created in the Installation Wizard If you did not create a password leave the password field blank After entering your password click OK Note If you are directly c...

Page 27: ... set by going to the Camera Control section of the Setup menu Selecttheincrementofhorizontalmovementforeachpress of a pan up down arrow on the pan tilt wheel Select the increment of vertical movement for each press of a tilt left right arrow on the pan tilt wheel You can select the desired language for the web interface from this drop down menu Click on these buttons to adjust the level of digital...

Page 28: ...n audio playback on and off If you have set the night mode to manual the night mode feature can be toggled using these buttons Note If the live image is blurry or out of focus you can manually adjust the focus by rotating the manual focus bezel surrounding the camera lens Audio Night Mode ...

Page 29: ...nnectionSetupWizardthatincludesstep by stepinstructions Otherwise you may manually configure your connection using the Manual Internet Connection Setup Note To register your camera with mydlink and enable its mydlink related features you will need to use the Camera Installation Wizard Please refer to Camera Setup Wizard on page 18 for more details ...

Page 30: ...e which connection to use select DHCP Connection Static IP Address This will allow you to manually enter your network settings for the camera Select this option if your Internet Service Provider or network administrator has provided you with a set of predefined IP addresses If you are not sure what settings to enter check with your Internet Service Provider or network administrator PPPoE Connectio...

Page 31: ...d scheduled at the right time Click Next to continue This page displays your configured settings Click Apply to save and activate your changes or click Back to change your settings If you have a Dynamic DNS account and would like the camera to update your IP address automatically select Enable and enter your host information Otherwise simply select Disable Click Next to continue DCS 5000L ...

Page 32: ...button to activate this method IP Address The fixed IP address Subnet Mask The default value is 255 255 255 0 Used to determine if the destination is the same subnet Default Gateway The gateway used to forward data to destinations in a different subnet Invalid gateway settings may cause the failure of transmissions to a different subnet Primary DNS Primary domain name server that translates names ...

Page 33: ...ding port must be opened on the router For example if the port is changed to 1010 users must type http 192 168 0 100 1010 instead of only http 192 168 0 100 Enable this setting to configure your camera as a UPnP device in the network You can also enable UPnP port forwarding Enable this setting to allow your camera to be discovered by the Bonjour service You can also specify a Bonjour name for the ...

Page 34: ...our wireless network In most cases you should select Infrastructure Ad Hoc is only used if your camera is directly connecting to another PC or device without the use of a router or access point Clicking this button will allow you to select an available wireless network to connect to and will fill in the necessary settings for you Select the wireless security mode used by your wireless network If y...

Page 35: ...me or email used to connect to the DDNS Enter your password used to connect to the DDNS server This allows you to specify the periodic update time for the DDNS address Enable Server Address Host Name User Name Password Timeout Dynamic DNS DDNS This section allows you to configure the DDNS setting for your camera DDNS will allow all users to access your camera using a domain name instead of an IP a...

Page 36: ... camera is installed upside down Flip Image and Mirror should both be checked Allows you to adjust the brightness level Select a setting between 5 and 5 Allows you to adjust the contrast level Select a setting between 5 and 5 Allows you to adjust the saturation level Select a setting between 5 and 5 Enable Anti flicker Flip Image Mirror Brightness Control Contrast Control Saturation Control This s...

Page 37: ...hedesiredvideoresolutionfromthreeformats 640x 480 320 x 240 and 160 x 120 Higher settings offer better quality but will require more bandwidth to stream Select the frame rate FPS to use for the video stream Higher settings offer better quality but will require more bandwidth to stream Use Auto if you are unsure Select one of five levels of image quality Very High High Medium Low and Very Low Selec...

Page 38: ...section allows you to adjust the audio settings for your camera Note Please wait a few seconds for the camera to adjust the audio after making changes Audio Settings Volume Settings You may Enable or Disable the camera audio feed Select the desired volume percentage level ...

Page 39: ...age 44 for more details Motion Detection Time Sensitivity Detection Areas Select whether you want to enable or disable the motion detection feature of your camera SpecifywhetheryouwanttoAlwayshavemotiondetection enabled or according to a Schedule that you define Specify the amount of difference required to determine whether there was motion Use your mouse to click on the areas of the video that yo...

Page 40: ...s or recordings Refer to Mail on page 41 and FTP on page 44 for more details Sound Detection Time Detection Level Select whether you want to enable or disable the motion detection feature of your camera SpecifywhetheryouwanttoAlwayshavemotiondetection enabled or according to a Schedule that you define Specify the amount of decibels required to determine whether to trigger recording ...

Page 41: ...the SMTP Server The default value is 25 and should only be changed if advised by your e mail provider This is the e mail address listed as the sender for your notification e mails This is the e mail address that your notification e mails will be sent to If the SMTP server uses authentication enter your user name IftheSMTPserverusesauthentication enteryourpassword Forexample ifyouwanttouseGmailwith...

Page 42: ... or e mail 6 snapshots together with 3 frames before and after motion sound was detected You can also set the Frame interval time to specify how far apart the snapshots should be Step 4 Enter the destination e mail address in Receiver E mail Address Step 5 Enter the user name required to access the SMTP server Step 6 Enter the password required to access the SMTP server Step 7 Select SSL TLS and t...

Page 43: ... 3 Configuration E mail Interval Test E mail Account Thissetsthelimitforhowfrequentlye mailnotificationswill be sent This can be set from 1 to 65535 seconds This will send a test e mail according to the e mail settings you have specified above ...

Page 44: ...h folder to save files to on the FTP server Enabling passive mode may help you reach your FTP server if your camera is behind a router protected by a firewall Enabling this will allow snapshots to be uploaded in different ways Choosing Always will upload snapshots continuously based on the Image Frequency specified Choosing Schedule will allow you to schedule when to start and stop the uploading o...

Page 45: ...he new one This means you will only have one snapshot that is updated every time a new one is taken Date Time Suffix will add the date and time to the end of the snapshot file name You can also choose to make subfolders based on a period of time you specify to help you organize your snapshots Sequence Number Suffix will add a number to the end of the snapshot file name up to the number you specify...

Page 46: ...ts clock automatically from an NTP server Select the NTP server closest to you and select whether you want to apply daylight saving corrections If Synchronize NTP Server is disabled you can set the date and time manually You can also click on Copy Your Computer s Time Settings to automatically set the date and time based on your computer s settings This section allows you to configure the settings...

Page 47: ...LED illuminators to allow for clear black and white video in dark areas with little or no light Auto Manual Always Day Mode Always Night Mode Day Mode Schedule ThismodewillautomaticallyswitchbetweenDayandNight mode based on the amount of available lighting This mode allows you to manually switch between modes through the Live Video page This sets the camera to always use Day mode This sets the cam...

Page 48: ...ttontosetthecurrentlenslocationastheHome location Once set the camera will return to this location whenever the Home button in the center of the pan tilt wheel is clicked Clicking on this button returns the Home location to the factory default setting Select the increment of movement for each press of a pan up down arrow on the pan tilt wheel Select the increment of movement for each press of a ti...

Page 49: ... 49 Section 3 Configuration Enter a Preset Name to help you easily identify the preset Click on the Set button to save the preset Any pre saved positions can be cleared by selecting the desired preset and clicking on the Clear button ...

Page 50: ...r your camera SelectNormaltoenabletheLEDsonthefrontofthedevice or select Off to disable the LED Disabling the LED function may be useful if you want to make the camera less obvious Select Enable to enable user access control or Disable to allow only the administrator account to access the camera Select Enable to allow access to the current camera snapshot via the web address indicated You can crea...

Page 51: ...51 D Link DCS 5000L User Manual 51 Section 3 Configuration Displays the account names of authorized users You can modify or delete an account by clicking on its modify or delete icon User List ...

Page 52: ...Click the Save Configuration button to save the current camera configuration to your local PC Toloadapreviouslysaved configuration click theBrowse button select your saved configuration file then click the Restore Configuration From File button Click the Restore Factory Defaults button to reset all settings back to the factory defaults Please note that this will erase any changes you have made to ...

Page 53: ...wnload the latest firmware from the D Link Support Page to your local hard drive Click the Browse button and select the firmware file then click the Upload button to start the firmware upgrade Warning The firmware upgrade process must not be interrupted or the camera may be damaged When upgrading firmware do not unplug the cameraoryourPC orcloseyourwebbrowseruntiltheprocessiscomplete It isalsohigh...

Page 54: ...54 D Link DCS 5000L User Manual 54 Section 3 Configuration Status Device Info This section displays all the detailed information about your device and network settings ...

Page 55: ...55 D Link DCS 5000L User Manual 55 Section 3 Configuration Active User This page lists all the active users information including the User Name IP address and the time that camera access began ...

Page 56: ...56 D Link DCS 5000L User Manual 56 Section 3 Configuration Help This page lists all the topics and links to respective helpful instructions for each feature ...

Page 57: ...ections are working properly your router has UPnP enabled if your router does not support UPnP please refer to Appendix A your router can get a public IP address your router s firmware has been upgraded to the latest version you have tried rebooting your router by unplugging it then plugging it back in After checking the above items you can click the Retry button to refresh the summary screen to s...

Page 58: ... To confirm that the cables are working PING the address of a known device on the network If the cabling is OK and your network is reachable you should receive a reply similar to the following bytes 32 time 2 ms Another possible problem may be that the network device such as a hub or switch utilized by the Network Camera is not functioning properly Please confirm the power for the devices are well...

Page 59: ...ty You may also need to check your image settings to make sure the brightness contrast and other settings are set properly For more refer to Image Setup on page 36 9 Why are no images available through the Web browser ActiveX might be disabled If you are viewing the images from Internet Explorer make sure ActiveX has been enabled in the Internet Options menu You may also need to change the securit...

Page 60: ...Port Forwarding LLTD Built In Protocol 10 100 BASE TX Fast Ethernet 802 11n g b WLAN Wireless Connectivity 802 11n g b Wireless with WEP WPA WPA2 security WPS Wireless Transmit Output Power typical 802 11b 16 dbm 802 11g 802 11n 12 dbm Reset Button Reset to factory default Video Codecs MJPEG JPEG for still images Video Features Adjustable image size and quality Time stamp and text overlay Flip and...

Page 61: ...Auto Electronic Shutter Power Input 100 240 V AC 50 60 Hz Output 5 V DC 1 5 A Dimensions W x D x H Camera Only 116 4 x 10⁹ 1 x 133 6 mm 4 58 x 4 30 x 5 26 inches Camera Including Mounting Bracket 116 4 x 10⁹ 1 x 230 0 mm 4 58 x 4 30 x 9 06 inches Weight Device 292 8 grams 0 65 lbs Mounting Bracket 60 8 grams 0 13 lbs Max Power Consumption 4 8 W Operation Temperature 0 C to 40 C 32 F to 104 F Stora...

Page 62: ...ion between the equipment and receiver Connect the equipment into an outlet on a circuit different from that to which the receiver is connected Consult the dealer or an experienced radio TV technician for help Non modifications Statement Any changes or modifications not expressly approved by the party responsible for compliance could void the user s authority to operate this equipment Caution This...

Page 63: ... the following two conditions 1 this device may not cause interference and 2 this device must accept any interference including interference that may cause undesired operation of the device Le présent appareil est conforme aux CNR d Industrie Canada applicables aux appareils radio exempts de licence L exploitation est autorisée aux deux conditions suivantes 1 l appareil ne doit pas produire de bro...

Page 64: ...特性及功能 低功率射頻電機之使用不得影響飛航安全及干擾合法通信 經發現有干擾現象時 應立即停用 並改善 至無干擾時方得繼續使用 前項合法通信 指依電信法規定作業之無線電通信 低功率射頻電機須忍受合法通信或工 業 科學及醫療用電波輻射性電機設備之干擾 無線傳輸設備 UNII 在 5 25 5 35 秭赫頻帶內操作之無線資訊傳輸設備 限於室內使用 無線資訊傳輸設備忍受合法通信之干擾且不得干 擾合法通信 如造成干擾 應立即停用 俟無干擾之虞 始得繼續使用 無線資訊傳設備的製造廠商應確保頻率穩定 性 如依製造廠商使用手冊上所述正常操作 發射的信號應維持於操作頻帶中 NCC 警語 電磁波曝露量MPE標準值 MPE 1 mW cm2 送測產品實值為 0 mW cm2 ...

Page 65: ...nd EFTA countries except in France where restrictive use applies This device may not be used for setting up outdoor radio links in France and in some areas the RF output power may be limited to 10 mW EIRP in the frequency range of 2454 2483 5 MHz For detailed information the end user should contact the national spectrum authority in France This equipment may be operated in AL AD BE BG DK DE FI FR ...

Page 66: ...deloupe Martinique St Pierre et Miquelon Mayotte 2454 2483 5 MHz 100 mW indoor 10 mW outdoor Reunion et Guyane 2400 2483 5 MHz 100 mW Rest of EU community 2420 2483 5 MHz 100 mW R TTE 1999 5 EC WLAN 2 4 2 4835 GHz IEEE 802 11b g n Spectrum Regulation MHz Europa ETSI max EIRP Innenbereich max EIRP Außenbereich Europa 2400 2483 5 MHz 100 mW 100 mW Frankreich 2400 2454 MHz 100 mW 100 mW 2454 2483 5 M...

Page 67: ...o exigibles de la Directiva 1999 5 CE Ελληνική Greek ΜΕ ΤΗΝ ΠΑΡΟΥΣΑ D Link ΔΗΛΩΝΕΙ ΟΤΙ ΣΥΜΜΟΡΦΩΝΕΤΑΙ ΠΡΟΣ ΤΙΣ ΟΥΣΙΩΔΕΙΣ ΑΠΑΙΤΗΣΕΙΣ ΚΑΙ ΤΙΣ ΛΟΙΠΕΣ ΣΧΕΤΙΚΕΣ ΔΙΑΤΑΞΕΙΣ ΤΗΣ ΟΔΗΓΙΑΣ 1999 5 ΕΚ Français French Par la présente D Link déclare que l appareil est conforme aux exigences essentielles et aux autres dispositions pertinentes de la directive 1999 5 CE Italiano Italian Con la presente D Link dichia...

Page 68: ...es da Directiva 1999 5 CE Slovensko Slovenian D Link izjavlja da je ta v skladu z bistvenimi zahtevami in ostalimi relevantnimi določili direktive 1999 5 ES Slovensky Slovak D Link týmto vyhlasuje že spĺňa základné požiadavky a všetky príslušné ustanovenia Smernice 1999 5 ES Suomi Finnish D Link vakuuttaa täten että tyyppinen laite on direktiivin 1999 5 EY oleellisten vaatimusten ja sitä koskevien...

Page 69: ...e and damage to the device and other equipment observe the following precautions Power Sources Observe and follow service markings Do not push any objects into the openings of your device unless consistent with the authorized operation of the device Doing so can cause a fire or an electrical shock by shorting out interior components The powering of this device must adhere to the power specificatio...

Page 70: ...electrical power use a surge suppressor line conditioner or uninterruptible power supply UPS Do not modify power cables or plugs Consult a licensed electrician or your power company for site modifications Always follow your local national wiring rules When connecting or disconnecting power to hot pluggable power supplies if offered with your device observe the following guidelines Install the powe...

Page 71: ...scharge static electricity from your body before you touch any of the electronic components such as the microprocessor You can do so by periodically touching an unpainted metal surface on the chassis You can also take the following steps to help prevent damage from electrostatic discharge ESD 1 When unpacking a static sensitive component from its shipping carton do not remove the component from th...

Page 72: ...ses Symbol auf dem Produkt oder der Verpackung weist darauf hin dass dieses Produkt gemäß bestehender örtlicher Gesetze undVorschriftennichtüberdennormalenHausmüllentsorgtwerdensollte sonderneinerWiederverwertungzuzuführenist Bringen Sie es bitte zu einer von Ihrer Kommunalbehörde entsprechend amtlich ausgewiesenen Sammelstelle sobald das Produkt das Ende seiner Nutzungsdauer erreicht hat Für die ...

Page 73: ... en savoir plus sur les produits et emballages respectueux de l environnement veuillez consulter le www dlinkgreen com ESPAÑOL ES Este símbolo en el producto o el embalaje significa que de acuerdo con la legislación y la normativa local este producto no se debe desechar en la basura doméstica sino que se debe reciclar Llévelo a un punto de recogida designado por las autoridades locales una vez que...

Page 74: ... le emissioni di anidride carbonica Per ulteriori informazioni sui prodotti e sugli imballaggi D Link a ridotto impatto ambientale visitate il sito all indirizzo www dlinkgreen com NEDERLANDS NL Dit symbool op het product of de verpakking betekent dat dit product volgens de plaatselijke wetgeving niet mag worden weggegooid met het huishoudelijk afval maar voor recyclage moeten worden ingeleverd Zo...

Page 75: ...padku samych produktów jak i opakowań Firma D Link zaleca aby Państwo zawsze prawidłowo wyłączali z użytku swoje produkty D Link gdy nie są one wykorzystywane Postępując w ten sposób pozwalają Państwo oszczędzać energię i zmniejszać emisje CO2 Aby dowiedzieć się więcej na temat produktów i opakowań mających wpływ na środowisko prosimy zapoznać się ze stroną Internetową www dlinkgreen com ČESKY CZ ...

Page 76: ...a megtakarításában és a széndioxid kibocsátásának csökkentésében Környezetbarát termékeinkről és csomagolásainkról további információkat a www dlinkgreen com weboldalon tudhat meg NORSK NO Dette symbolet på produktet eller forpakningen betyr at dette produktet ifølge lokale lover og forskrifter ikke skal kastes sammen med husholdningsavfall men leveres inn til gjenvinning Vennligst ta det til et i...

Page 77: ...udledningerne Du kan finde flere oplysninger om vores miljømæssigt ansvarlige produkter og emballage på www dlinkgreen com SUOMI FI Tämä symboli tuotteen pakkauksessa tarkoittaa että paikallisten lakien ja säännösten mukaisesti tätä tuotetta ei pidä hävittää yleisen kotitalousjätteen seassa vaan se tulee toimittaa kierrätettäväksi Kun tuote on elinkaarensa päässä toimita se lähimpään viranomaisten...

Page 78: ...För mer information om våra miljöansvariga produkter och förpackningar www dlinkgreen com PORTUGUÊS PT Este símbolo no produto ou embalagem significa que de acordo com as leis e regulamentações locais este produto não deverá ser eliminadojuntamentecomolixodomésticomasenviadoparaareciclagem Transporte oparaumpontoderecolhadesignadopelas suas autoridades locais quando este tiver atingido o fim da su...

Reviews: