background image

Network

Security UTM Firewall

This Quick Guide will guide you through the installation Process. You are 

only moments away from using your new D-Link Network Security Product

Building Networks for People

DFL-860

Summary of Contents for NetDefend DFL-860

Page 1: ...ork Security UTM Firewall This Quick Guide will guide you through the installation Process You are only moments away from using your new D Link Network Security Product Building Networks for Peopl e DFL 860 ...

Page 2: ...efinition 3 3 Connecting the DFL 860 3 1 Setting up Firewall to your Network 4 4 Configure DFL 860 4 1 Configure your Computer s IP 5 4 2 Using the Setup Wizard 6 5 Appendix 5 1 How to Configure Static IP Manually on Microsoft Windows XP 14 5 2 How to Configure Static IP Manually on Apple MAC OS X 15 6 Statement DFL 860 Quick Installation Guide ...

Page 3: ...NetDefend Network Security UTM Firewall Power Cord 5V DC Power Adapter Console Cable RS 232 cable Ethernet CAT5 UTP Straight Through Cable Ethernet CAT5 UTP Cross over Cable CD ROM containing QIG Manual Rack Mount Brackets 2 x NetDefend UTM Subscription IPS Anti Virus DFL 860 Before You Begin 1 01 DFL 860 Power Cord Power Adapter Ethernet Cable Straight Through Console Cable CD ROM Ethernet Cable ...

Page 4: ...860 These are for the connection of an Ethernet cable to a Cable or DSL modem This is for the connection of an Ethernet cable to an DMZ network These are for the connection of Ethernet cables to the internal network Connects to RS 232 console cable that connects to PC The console port is hidden behind a protection coverlid that can be opened by pulling down the lid Note None of the WAN1 and WAN2 i...

Page 5: ...IP 192 168 120 254 24 Disable DMZ DMZ Static IP 172 17 100 254 24 Disable Ports 1 7 LAN Static IP 192 168 1 1 24 Disable 2 2 LED Indicators Status Solid green Light off Solid green Light off Blinking green Light off Solid Green Blinking Green Light off Solid green Description The device is powered on The device is powered off System is operating properly The device is not working System is defecti...

Page 6: ...60 to your Cable DSL modem and turn on the Cable DSL modem Some Cable DSL modems may not have an on off switch and will require you to unplug the power adapter Note The default management IP address of the DFL 860 is 192 168 1 1 If you have are using a router that uses DHCP there may be a conflict if the router uses the same IP address as the DFL 860 If this is the case either disconnect the DFL 8...

Page 7: ...default gateway and 255 255 255 0 as netmask Instructions on how to configure the network adapter can be found in the appendix When you have completed the steps in this Quick Installation Guide your connected network should look similar to this Configure DFL 860 4 05 Cable DSL Modem DFL 860 Switch Internal Network DMZ Network optional Computer1 Computer2 ...

Page 8: ...itiated with Configuration Version 1 Once you complete configuration and save activate the setting the Startup Wizard button will be removed automatically from the toolbar while you login WebGUI next time Now let s start on WebGUI login type the IP address of the DFL 860 e g https 192 168 1 1 in the Location for Netscape or Address for IE field and press Enter Log on to the DFL 860 web interface T...

Page 9: ...inistrator password First Enter the username that you want to use for the admin account Enter the password that you want to use for the admin account DFL 860 Quick Installation Guide This wizard will guide you through the setup of your DFL 860 Click Next 07 Click Next ...

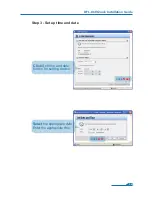
Page 10: ...2 Step 3 Set up time and date Click Set time and date button for setting device 08 Click Next Select the appropriate date Enter the appropriate time Click OK DFL 860 Quick Installation Guide ...

Page 11: ...zone Step 5 Select WAN interface Select the appropriate timezone Enter the appropriate dayligt saving time settings Select the WAN interface that you want to use 09 Click Next Click Next DFL 860 Quick Installation Guide ...

Page 12: ...re unsure of which setting to select please contact your Internet Service Provider Step 7 1 WAN Interface Type is Static IP If you selected Static IP you have to fill out the IP address information provided to you by your ISP You will need to complete all the required fields except for Secondary DNS Server 10 Click Next DFL 860 Quick Installation Guide ...

Page 13: ...ld be left blank unless your ISP informs you otherwise Enter Username Password and the PPTP Server IP address provided by your ISP DHCP If your ISProvider is using DHCP you should select the DHCP radio button Static IP If your Internet Service Provider is using Static IP you should select the Static IP radio button and enter IP Address choose a Subnet Mask and enter the Gateway IP address 11 Click...

Page 14: ...you want to use the built in DHCP Server in the DFL 860 choose Enable DHCP Server in this screen You then need to specify a range of IP addresses to hand out to the DHCP clients This range is entered in the format Start IP Stop IP i e 192 168 0 100 192 168 0 200 If you don t want to use the built in DHCP Server or configure it later choose Disable DHCP Server 12 Click Next Click Next DFL 860 Quick...

Page 15: ...led specify which NTP Servers that should be used to syncronize the firewall time Syslog Servers If enabled specify where the firewall should log you can specify up to two Syslog recievers Click Activate to complete your configuration 13 Click Next DFL 860 Quick Installation Guide ...

Page 16: ... configure the network adapter manually to the correct IP address Go to Start right click on My Network Places select Properties Right click on the Network Connection of the Ethernet adapter connecting to the DFL 860 and select Properties Click Internet Protocol TCP IP Click Properties 5 1 How to configure Static IP Manually on Microsoft Windows XP 14 ...

Page 17: ...et Select Use the following IP address Set IP address to 192 168 1 30 Subnet mask to 255 255 255 0 and Default gateway to 192 168 1 1 Click OK Go to the Apple Menu Click on Network and Select System Preferences Click on Network DFL 860 Quick Installation Guide 5 2 How to Configure Static IP Manually on Apple Mac OS X 15 ...

Page 18: ...92 168 1 30 Subnet Mask to 255 255 255 0 and Router to 192 168 1 1 Click on Apply Now DFL 860 Quick Installation Guide Select Built in Ethernet in the show pull down menu Select Manually in the Configure pull down menu 16 ...

Page 19: ...e the user will be required to correct the interference at his own expense CE Mark Warning This is a Class B product In a domestic environment this product may cause radio interference in which case the user may be required to take adequate measures Warnung Dies ist ein Produkt der Klasse B Im Wohnbereich kann dieses Produkt Funkstoerungen verursachen In diesem Fall kann vom Benutzer verlangt werd...

Page 20: ...zato in ambiente domestico il prodotto può causare interferenze radio nel cui caso è possibile che l utente debba assumere provvedimenti adeguati VCCI Warning BSMI Warning 警告使用表 這是乙類的資訊產品 在居住的環境中使用時 可能會造成射頻干擾 在這 種情況下使用者會被要求採取某些適當的對策 DFL 860 Quick Installation Guide 18 ...

Reviews: