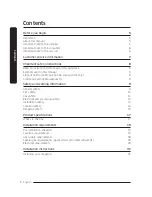
background image

Installation Instructions 

Modernist Rangetop

DTT36M974L*/DTT48M976L*

Summary of Contents for DTT36M974L Series

Page 1: ...Installation Instructions Modernist Rangetop DTT36M974L DTT48M976L...

Page 2: ...Proposition 65 warning US only 8 Commonwealth of Massachusetts 8 Safety and warning information 9 General safety 9 Fire safety 10 Gas safety 11 Electrical and grounding safety 12 Installation safety...

Page 3: ...e first check the Troubleshooting section of this manual for guidance It provides useful suggestions and remedies prior to calling for service Valuable customer input helps us to continuously improve...

Page 4: ...roducts near this appliance IF YOU SMELL GAS DO NOT light any appliances DO NOT touch any electrical switches DO NOT use any phone in your building Immediately call your gas supplier from a neighbor s...

Page 5: ...ersonnel etc About this manual READ THESE INSTRUCTIONS COMPLETELY AND CAREFULLY Important note to the installer Read all instructions contained in these installation instructions before installing the...

Page 6: ...y precautions you should follow Be sure your appliance is installed and grounded properly by a qualified installer or service technician Make sure the wall coverings around the cooktop can withstand t...

Page 7: ...Distinctive Service line Whenever you call have the model and serial number of the appliance ready The model and serial number are printed on a label Dacor Customer Service Phone 800 793 0093 ex 2813...

Page 8: ...age NOTE Useful tips and instructions These warning icons and symbols are intended to prevent property damage and personal injury Follow them explicitly State of California Proposition 65 warning US o...

Page 9: ...roperly dispose of packaging as soon as the appliance is unpacked Do not keep objects of interest to children on or around the appliance Do not operate the appliance if it is damaged in any way if it...

Page 10: ...fitting or hanging garments while using the appliance To avoid grease buildup regularly clean the vents Do not let pot holders or other flammable material touch a heating element Do not use a towel o...

Page 11: ...n a power cord Do not use any phone in your building Evacuate everyone from the building Immediately call your gas supplier from a neighbor s phone Follow the gas supplier s instructions If you cannot...

Page 12: ...ng lines gas lines or hot water pipes This appliance must be grounded If the appliance malfunctions or breaks down grounding reduces the risk of electric shock by providing a safe path for the current...

Page 13: ...kets are properly installed See the Installation Instructions for details Remove all tape and packaging materials After unpacking the appliance remove all accessories from inside and around it Cautiou...

Page 14: ...prong outlet Do not hang paper blinds on a window near the cooktop do not hand long curtains that could be blown over onto the appliance For proper ventilation the appliance needs sufficient space bel...

Page 15: ...ll surfaces have completely cooled before removing the grates and disassembling the burners After cleaning the burner head make sure it is completely dry before reassembling it To avoid carbon monoxid...

Page 16: ...let the oil fat in the cookware to cool to room temperature before moving the cookware To avoid delayed eruptive boiling let hot oil fat stand at least 20 seconds after turning off the burner so the...

Page 17: ...tes 3 Burner heads 6 and Brass caps 7 Porcelain caps 6 NOTE Make sure you have received all of the supplied parts shown above If your cooktop was damaged during shipping or some specified parts are mi...

Page 18: ...x 5 ft Flare union adapter in NPT x in ID Flare union adapter in NPT x in ID 135 degree elbow optional 90 degree elbow optional Tools needed Flat blade screwdriver Phillips screwdriver Open end or adj...

Page 19: ...s are present before beginning the installation Location requirements BEFORE YOU BEGIN installing the appliance see the information dimensions and clearances below These dimensions must be met for saf...

Page 20: ...erhead vent hood also check the hood specifications for minimum required clearances 2 See Cabinet Countertop Dimensions Top View 3 This specification not applicable for cabinets more than a horizontal...

Page 21: ...English 21 Installation requirements Overall cooktop dimensions DTT36M974L 28 3 16 71 6 cm 27 1 2 69 9 cm 25 11 16 65 3 cm 22 1 4 56 5 cm 36 91 1 cm...

Page 22: ...Installation requirements English 22 Installation requirements DTT48M976L 48 121 6 cm 28 3 16 71 6 cm 27 1 2 69 9 cm 25 11 16 65 3 cm 22 1 4 56 5 cm...

Page 23: ...s 1 2 1 3 cm overhang both sides 10 25 4 cm to combustible side wall min both sides Mounting platform 1 2 5 cm min thickness 36 91 4 cm typical 7 3 4 19 7 cm Recommended gas and electrical service loc...

Page 24: ...uted through bottom 24 61 0 cm min cabinet depth 10 11 16 27 2 cm Cabinet face below countertop overhang Increase countertop and overhang additional 2 1 2 6 4 cm min for combustible rear wall above co...

Page 25: ...ble wall above countertop both sides 1 2 1 3 cm countertop overhang 1 2 1 3 cm countertop overhang 26 5 8 67 6 cm min cabinet depth 2 5 8 6 7 cm 15 38 1 cm 10 11 16 27 2 cm Cabinet face below countert...

Page 26: ...etop Countertop 3 8 min 1 0 cm flat countertop overhang required behind cutout IMPORTANT See downdraft installation instructions for duct system layout planning Cabinet face Stiffener 3 8 min 1 0 cm s...

Page 27: ...ations and dimensions F D G E Rear side Power cord 393 8 100 0 cm long 3 8 18 NPT male gas inlet Dimension DTT36M974L DTT48M976L D 3 1 2 8 9 cm 4 10 1 cm E 4 11 16 11 9 cm 4 11 16 11 9 cm F 16 1 2 41...

Page 28: ...e operating manifold pressure as given The pressure regulator located at the inlet of the appliance manifold must remain in the supply line regardless of whether natural or LP gas is being used NOTE T...

Page 29: ...to make sure that the electrical service meets electrical requirements and that he electrical outlet has been properly installed by a licensed electrician To reduce the risk of fire electric shock or...

Page 30: ...ce Never cut modify remove or otherwise defeat the plug s grounding third prong If the plug and outlet do not match or you have any doubt have a qualified electrician check the wall receptacle and cir...

Page 31: ...ion you should hire a qualified professional Unpacking the rangetop 1 Remove all packaging material Failure to do so could damage the appliance 2 Inventory all loose parts against supplied components...

Page 32: ...quids near the appliance IF YOU SMELL GAS DO NOT light a match candle or cigarette DO NOT try to light any appliance DO NOT touch any electrical switch DO NOT use any phone in your building Clear the...

Page 33: ...between the shut off valve and the rangetop For best performance minimize gas pressure loss by attaching the regulator as close as possible to the gas inlet 2 Complete the connection by installing a f...

Page 34: ...to check for leaks in the system 3 Tighten all connections if necessary to prevent gas leakage in the rangetop or supply line Making the electrical connections WARNING Disconnect all electrical power...

Page 35: ...ical shock might result perhaps causing you to knock over hot cookware Do not risk electric shock by removing the top or touching the electrode of any burner while another burner is on 1 Place the bur...

Page 36: ...nt the burner head so the opening for the electrode aligns with the electrode 2 Install the burner head so the electrode passes through its opening in the head Ensure the burner head lies flat on the...

Page 37: ...he burner base 2 Turn the head until it drops into place Twist the head back and forth slightly to ensure it is properly seated 3 Put the burner caps brass or porcelain atop the burner heads The ridge...

Page 38: ...ngs on the burner heads as shown below Match the tabs on the bottom of the ring to the slots on the burner head Twist each ring back and forth slightly to make sure it is properly seated Ridge on bott...

Page 39: ...tional The burner ignites about 4 seconds later after the air is purged from the gas line 2 After the burner ignites turn the knob to the desired setting The clicking sound stops and the flame height...

Page 40: ...nt measure the flame take care to avoid burn injuries 2 3 1 1 Soft blue flames Normal for natural gas operation 2 Yellow tips on outer cones Normal for LP gas operation 3 Yellow flames Abnormal for an...

Page 41: ...k of the right grate is notched to help orient the grates correctly See the graphic below To correctly position the grates 1 Find the notch on the back of the right hand grate and orient the grate pro...

Page 42: ...g the rangetop ensure all control knobs are OFF Review this checklist to confirm the rangetop is properly installed and ready to operate The gas line was properly connected to the rangetop The gas was...

Page 43: ......

Page 44: ...Dacor 14425 Clark Avenue City of Industry CA 91745 Phone 800 793 0093 Fax 626 403 3130 www dacor com DG68 00942A 00...

Reviews: