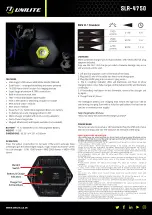
The Mightylite floodlight is an energy efficient,
high-powered outdoor LED floodlight.
The floodlight is suitable for installation on most
walls in a range of locations including entrances,
gardens, garages and outdoor parking areas.
Important Safety InStructIonS
This product should only be installed by a competent
individual who is familiar with all applicable codes and/
or regulations that may apply to the installation of this
product. In certain jurisdictions this product needs to
be installed by a licensed electrician.
Please follow these instructions carefully before
attempting to install and operate this light.
The risk of electric shock should be minimized by the
installation of appropriate safety devices including the
incorporation of a GFCI (Ground Fault Circuit Interrupt).
Cables should always be protected against short circuit
and overload.
Ensure the voltage marked on the product is the same
as the electrical power supply to be used.
DO NOT position the light near flammable, combustible
or explosive liquids, solids, gases or equipment.
DO NOT direct the light into a person’s eyes. The light
output is very intense and if used incorrectly could
cause eye damage.
ALWAYS maintain the light in good condition, with
repairs undertaken only by a qualified electrician.
partS Included
1 x Mightylite LED Floodlight
1 x Connection box
1 x Cable gland
1x “C” bracket
2 x screw knobs
4 x Connection box screws
4 x Connection box screw covers
4 x Connection box mounting screws
4 x Connection box mounting screw covers
chooSIng a
mountIng locatIon
Mount the floodlight onto a solid
structure, 10-15ft above the
ground (Fig. 1)
InStallatIon and WIrIng InStructIonS
Warning: Isolate the power supply before installation
and turn off the A/C power to the circuit.
The unit requires connection to a 120V 60Hz power
supply. It is recommended that the unit is connected to
the domestic lighting circuit using 2 conductor round
flexible cable of 14 AWG. If the cable is used outdoors,
you must use waterproof cable.
Position the unit on the wall and mark the position
for the connection box (which can be positioned
horizontal or vertical (Fig. 2, 3)
Ensure the wires can easily
enter the connection box
through either the knock-
out (KO) at the back of the
connection box, or through
those at the sides (Fig. 4)
Mark the 4 drill holes required to secure the box to the
wall (and mark the cable outlet location if required). Or
use the “C” bracket to mount to a wall. If using the “C”
bracket, use the knockouts on the side of the box to
attach the bracket with the screw knobs
Drill the wall and screw the connection box onto the
wall using the screws provided. Or mount the “C”
bracket to the wall using two screws. Once the screws
are attached, the screw covers (provided) should be
used to stop any water ingress through the mounting
holes.
32556 E Main St
Elk Point, SD 57025
ph: 605.356.2772
fax: 605.356.3662
www.DakotaAlert.com
dakota alert
®
WIRELESS SECURITY EQUIPMENT
Hylite Mightylite™
fIg 1
fIg 3
VertIcal
fIg 2
horIZontal
thIS end up
fIg 4
ko
hm-02


