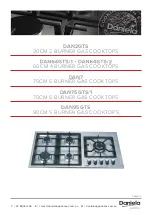
Daniela DAN2GTS, User Manual
Looking for a comprehensive User Manual for Daniela DAN2GTS? Look no further! Download our free manual from 88.208.23.73:8080 and unleash the full potential of your product. Our expertly crafted manual will guide you through every feature and function, ensuring a seamless user experience.
Share
Download


Reviews:
No comments
Related manuals for DAN2GTS

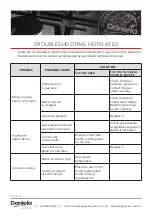
Electric Cooktops
Brand: Jenn-Air Pages: 28

5H10M0050
Brand: Blaupunkt Pages: 32

OG72XA
Brand: Omega Pages: 12

VGRT302-4B Series
Brand: Viking Pages: 5

WHP 3000
Brand: Weller Pages: 14

OCG60X
Brand: Omega Pages: 12

E36EC70FSS - 36" Drop-In Electric Cooktop
Brand: Electrolux Pages: 4

KN3E11A
Brand: Indesit Pages: 48

1100 Dual Fuel
Brand: Mercu Pages: 36

COMBI BCS-8G
Brand: Blodgett Pages: 77

JIC4530KB
Brand: Jenn-Air Pages: 24

EH4-50 GK5
Brand: Pkm Pages: 46

WLE620WC
Brand: Westinghouse Pages: 17

WFE647SA
Brand: Westinghouse Pages: 32

WLE620WA
Brand: Westinghouse Pages: 32

CT30I
Brand: Wolf Pages: 7

CLASSIC/1
Brand: Zanussi Electrolux Pages: 37
PL40
Brand: Candy Pages: 102


