background image

FR

GUIDE D'UTILISATION

DA

BRUGERVEJLEDNING

DE

BETRIEBSANLEITUNG

EN

USER GUIDE

ES

MANUAL DE UTILIZACIÓN

IT

MANUALE D'USO

NL

GEBRUIKSAANWIJZING

PT

MANUAL DE UTILIZAÇÃO

Four
Ovn
Backofen
Oven
Horno
Forno
Oven
Forno

Summary of Contents for DOP1199X

Page 1: ...IDE D UTILISATION DA BRUGERVEJLEDNING DE BETRIEBSANLEITUNG EN USER GUIDE ES MANUAL DE UTILIZACIÓN IT MANUALE D USO NL GEBRUIKSAANWIJZING PT MANUAL DE UTILIZAÇÃO Four Ovn Backofen Oven Horno Forno Oven Forno ...

Page 2: ...y materials D De e D Di ie et tr ri ic ch h produces beautifully crafted products to help you get the most from the culinary arts a passion shared by all lovers of cooking and fine food We hope that you enjoy using this new appliance and we would love to receive your suggestions and to answer any questions you may have Please feel free to contact our customer service department via our website To ...

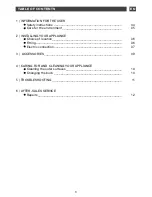
Page 3: ...__________________________________________ 06 Electric connection_________________________________________ 07 3 ACCESSORIES _______________________________________________ 09 4 CARING FOR AND CLEANING YOUR APPLIANCE Cleaning the outer surfaces__________________________________ 10 Changing the bulb _________________________________________ 10 5 TROUBLESHOOTING ______________________________________...

Page 4: ...door of your oven is completely closed so that the seal can do its job properly When in use the appliance becomes hot Do not touch the heating elements located inside the oven In doing so you would run the risk of suffering serious burns When placing dishes inside or removing them from the oven do not place your hands close to the upper heating elements use heat protective kitchen gloves At the en...

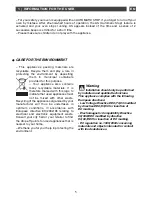
Page 5: ... nearest to your home We thank you for your help in protecting the environment Warning Installation should only be performed by installers and qualified technicians This appliance complies with the following European directives Low Voltage Directive EEC 73 23 modified by directive EEC 93 68 for insertion of EC marking Electromagnetic Compatibility Directive 89 336 EEC modified by directive 93 68 E...

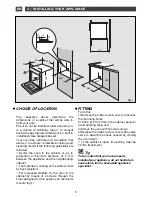
Page 6: ...ce specialist CHOICE OF LOCATION The diagrams above determine the dimensions of a cabinet that will be able to hold your oven The oven can be installed under a worktop or in a column of cabinetry open or closed having the appropriate dimensions for built in installation see diagram above Your oven has optimised air circulation that allows it to achieve remarkable cooking and cleaning results if th...

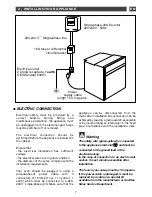
Page 7: ...lies with the installation requirements Your oven should be plugged in using a standardised power cable with 3 conductors of 1 5mm2 1 live 1 neutral 1 earth which must be connected to a 220 240V single phase grid Make sure that the appliance can be disconnected from the mains after installation Disconnection can be achieved by leaving a mains switch accessible or by incorporating an interrupter in...

Page 8: ...on existent defective or incorrect earthing If the electrical installation in your residence requires any changes in order to hook up your appliance call upon a professional electrician If the oven malfunctions in any way unplug the appliance or remove the fuse corresponding to the sector where the oven is hooked up ...

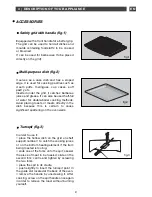
Page 9: ...iler cooking methods Avoid placing roasts or meats directly in the dish because this is certain to cause significant spattering on the oven walls Turnspit fig 3 In order to use it place the hollow dish on the grid on shelf support number 1 to catch the cooking juices or on the bottom heating element if the item being roasted is too big slide one of the forks onto the spit skewer the piece of meat ...

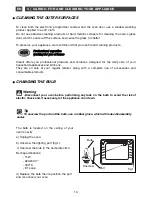
Page 10: ...mplete line of accessories and consumable products P Pr ro of fe es ss si io on na al l e ex xp pe er rt ti is se e w wo or rk ki in ng g f fo or r y yo ou u a at t h ho om me e 4 CARING FOR AND CLEANING YOUR APPLIANCE EN Bulb Unscrew Port The bulb is located on the ceiling of your oven s cavity a Unplug the oven b Unscrew the lighting port fig 1 c Unscrew the bulb in the same direction Bulb speci...

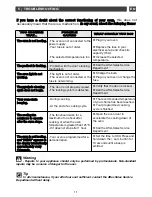
Page 11: ...t t w wo or rk ki in ng g The light is out of order The oven is not connected or the fuse is not working Change the bulb Plug in your oven or change the fuse T Th he e p py yr ro ol ly ys si is s c cl le ea an ni in ng g c cy yc cl le e d do oe es s n no ot t b be eg gi in n The door is not properly closed The locking system is defective Verify that the door is locked Call the After Sales Service ...

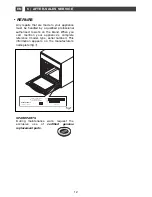
Page 12: ...hen you call mention your appliance s complete reference model type serial number This information appears on the manufacturer s nameplate fig 1 SPARE PARTS During maintenance work request the exclusive use of certified genuine replacement parts REPAIRS BRANDT APPLIANCES SAS 7 rue Henri Becquerel 92500 RUEIL MALMAISON 230V 50 Hz MADE IN FRANCE fig 1 ...

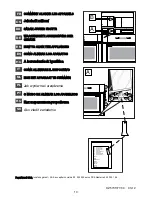
Page 13: ... AP PP PL LI IA AN NC CE ES S C CO OM MO O A AL LI IN NE EA AR R L LO OS S A AP PA AR RA AT TO OS S A A b be er re en nd de ez zé és se ek k i ig ga az zí ít tá ás sa a C CO OM ME E A AL LL LI IN NE EA AR RE E I IL L D DI IS SP PO OS SI IT TI IV VO O H HO OE E H HE ET T A AP PP PA AR RA AA AT T T TE E S ST TE EM MM ME EN N Jak wyrównać urządzenia O O M MO OD DO O D DE E A AL LI IN NH HA AR R L LO ...

Reviews: