background image

Unpacking Your Multi-Function Printer 

1.

Select a location for your printer.  


l

Leave enough room to open the printer tray, covers, doors, and options. It is also important to allow enough space around the printer for proper 
ventilation. 


l

Provide a proper environment: 
 

l

A firm, level surface  
 

l

Away from the direct airflow of air conditioners, heaters, or ventilators  
 

l

Away from sunlight, extreme humidity, or high fluctuations in temperature  
 

l

A clean, dry, and dust free location  

2.

In addition to the 

Dell

 Laser Multi-Function Printer 1815dn

, ensure that you have the following items in the box. 

If there is a missing item,

 contact 

Dell: 


a.


The appearance of the power cord and the telephone line cord may differ according to your country's specifications.  

b.


The Drivers and Utilities CD contains Dell printer drivers, Scan drivers, Printer Settings Utility, Set IP, Macintosh driver, Linux driver, Dell Toner 

Management System™, Dell ScanCenter™, PaperPort

®

 and an HTML User's Guide.  

c.


This item is only provided in some countries.  


3.

Save the carton and packing material in case the printer needs to be repacked. 


4.

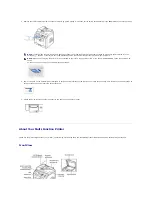
Remove the packing tape from the front, back and sides of the printer. 


CAUTION: 

The printer requires at least two people to lift it safely. 

NOTE: 

Leave the printer in the box until you are ready to install it.


toner cartridge 


power cord

a


owner's manual 


telephone line cord 


Drivers and Utilities CD

b


terminator

c


setup diagram 


quick reference guide (optional)  

NOTE: 

Use the telephone line cord supplied with your printer. 

If you choose to use a different cord,

 use an AWG #26 or lower gauge cord that is a 

maximum 250 cm in length.

NOTE: 

The power cord must be plugged into a grounded power socket.

Summary of Contents for 1815dn Multifunction Mono Laser Printer

Page 1: ...cations b The Drivers and Utilities CD contains Dell printer drivers Scan drivers Printer Settings Utility Set IP Macintosh driver Linux driver Dell Toner Management System Dell ScanCenter PaperPort and an HTML User s Guide c This item is only provided in some countries 3 Save the carton and packing material in case the printer needs to be repacked 4 Remove the packing tape from the front back and...

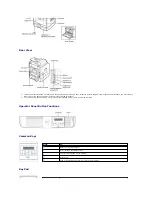
Page 2: ... Your Multi Function Printer These are the main components of your printer The following illustrations show the standard Dell Laser MFP 1815dn and an optional tray 2 attached Front View NOTE To confirm the scanner is unlocked open the scanner cover and look through the document glass to make sure the blue latch is in the unlocked position If the latch is not in the unlocked position reach under th...

Page 3: ...the Phone connector and insert the supplied terminator b You can buy and install a locking unit to prevent the installed memory card from being removed Operator Panel Button Functions Common Keys Key Pad Press To Return to the upper menu Scroll through available options Confirm the selection on the display Start a job Stop an operation at any time or return to main menu ...

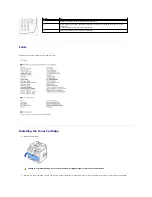
Page 4: ... side to distribute the toner evenly inside the cartridge Press To Dial Enter number or enter alphanumeric characters Store frequently used fax numbers in memory or search for stored fax numbers or email addresses It also enables you to print a Phonebook list Insert a pause into a fax number in edit mode CAUTION To prevent damage do not expose the toner cartridge to light for more than a few minut...

Page 5: ...r NOTE If toner comes into contact with your clothing wipe the toner off with a dry cloth and wash your clothing in cold water Hot water sets toner into fabric CAUTION Do not touch the green underside of the toner cartridge Use the handle on the cartridge to avoid touching this area NOTE Set the paper type and size after loading paper into the paper tray See Setting the Paper Type and Setting the ...

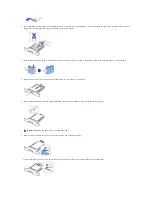
Page 6: ...ase the print media Align the edges on a level surface 4 Insert the paper stack into the paper tray with the side to be printed on facing down 5 Do not exceed the maximum stack height indicated by the paper limit marks on the both inside walls of the tray 6 Slide in the paper length guide until it lightly touches the end of the paper stack For paper smaller than Letter size adjust the front paper ...

Page 7: ...elephone line socket Line and the other end into an active wall jack To connect a telephone and or answering machine to your printer remove the plug from the extension telephone socket EXT and plug the telephone or answering machine into the extension telephone socket EXT If your printer is not blocked with the plug directly plug the telephone or answering machine into the extension telephone sock...

Page 8: ... powered off and unplugged 2 Connect a USB cable to the USB port on your printer 3 Connect the other end of the cable into an available USB port on the computer not the USB keyboard Connecting the Printer to the Network 1 Make sure the printer computer and any other attached devices are powered off and unplugged 2 Connect one end of a standard category 5 Unshielded Twisted Pair UTP network cable i...

Page 9: ... the inside of your printer becomes hot once the printer is powered on CAUTION Be careful of hot areas when accessing this area CAUTION Do not disassemble the printer when it is powered on If you do you may receive an electric shock 1 Paper Setup 2 Copy Defaults 3 Fax Defaults Paper Size Paper Type of copies Zoom Contrast Quality Select Tray Duplex Contrast Resolution Rings to Answr Receive Mode R...

Page 10: ...ress Cancel to return to Standby mode Select Country To change the country that appears on the operator panel follow these steps 1 Press Scroll or to highlight Menu and press Select 2 Press Scroll or to highlight Machine Setup and press Select 3 Press Scroll or to highlight Select Country and press Select 4 Press Scroll or to display the country you want and press Select 5 Press Cancel to return t...

Page 11: ...nd press Select 5 Press Scroll or to display the time settings you want The available options are 5 10 15 30 60 and 120 minutes 6 Press Select to save the selection 7 Press Cancel to return to Standby mode Charge Coupled Device CCD Power Save Mode The scan lamp under the document glass automatically turns off when it is not in actual use during a preset period to reduce power consumption and exten...

Page 12: ...selection 6 Press Cancel to return to Standby mode Protecting your Printer with a Passcode You can assign a passcode to your printer to protect it from an unauthorized user Assigning a Passcode 1 Press Scroll or to highlight Menu and press Select 2 Press Scroll or to highlight Machine Setup and press Select 3 Press Scroll or to highlight Global Access and press Select 4 Press Scroll or to highligh...

Page 13: ...el to return to Standby mode Preparing a Document You can use the document glass or the ADF to load an original document for copying scanning and sending a fax Using the ADF you can load up to 50 sheets of 75 g m2 20 lb documents for one job Using the document glass you can load one sheet at a time When you use the ADF l Do not load documents smaller than 5 59 by 5 83 in 142 by 148 mm or larger th...

Page 14: ... load one sheet at a time To load the document in the ADF 1 Place the document s face up on the ADF with the top edge of the documents in first 2 Adjust the document width guides to the correct document size Make sure that the bottom of the document stack matches the paper size marked on the document input tray For detailed guidelines for preparing an original document see Preparing a Document To ...

Page 15: ... Cancel button 3 If necessary you can use special copy features such as Auto Fit Clone Poster and ID copying referring to Using Special Copy Features 4 Press Start to begin copying The display shows the copy processing NOTE If you are copying a page from a book or magazine lift the cover until its hinges are caught by the stopper and then close the cover If the book or magazine is thicker than 30 ...

Page 16: ...he size setting you want and press Select To fine tune the size of copies 1 Press Scroll or to highlight Copy and press Select 2 Press Scroll or to highlight Zoom and press Select 3 Press Scroll or to display Other 25 400 from the document glass or Other 25 100 from the ADF and press Select 4 Enter the value you want using the number keypad Contrast Adjust the contrast to make the copy lighter or ...

Page 17: ...5 If necessary customize the copy settings including the number of copies contrast and image quality by using the Copy menus See Setting Copy Options 6 Press Start to begin copying Your printer begins scanning the front side 7 When Set Backside displays on the bottom line open the document cover and flip the document over with the second side facing down Close the document cover 8 Press Start agai...

Page 18: ... to highlight Layout and press Select 4 Press Scroll or to highlight Poster and press Select 5 If necessary customize the copy settings including the number of copies contrast and image quality by using the Copy menus See Setting Copy Options 6 Press Start to begin copying Your original document is divided into 9 portions Each portion is scanned and printed one by one in the following order NOTE Y...

Page 19: ...f paper automatically Changing the Default Settings The copy options including contrast image quality copy size and the number of copies can be set to the most frequently used modes When you copy a document the default settings are used unless changed using Copy menus To create your own default settings 1 Press Scroll or to highlight Copy and press Select OR Press Scroll or to highlight Menu and p...

Page 20: ... to return to Standby mode Using the Number Keypad to Enter Characters As you perform various tasks you may need to enter names and numbers For example when you set up your printer you enter your name or your company s name and telephone number When you store fax numbers in memory you may also enter the corresponding names l When prompted to enter a letter press the appropriate button until the co...

Page 21: ...ine Setup and press Select 3 Press Scroll or to highlight Date Time and press Select 4 Enter the correct time and date using the number keypad Month 01 12 Day 01 31 Year 1990 2089 Hour 01 12 12 hour mode 00 23 24 hour mode Minute 00 59 You can also use Scroll or to move the cursor under the digit you want to correct and enter a new number 5 To select AM or PM for 12 hour format press the or the bu...

Page 22: ...t for the option you have selected For the ringer volume you can select from Off Low Med and High Setting Off means that the ringer turns off The printer works normally even if the ringer is turned off 5 Press Select to save the selection 6 If necessary repeat steps 3 through 5 7 Press Cancel to return to the Standby mode Speaker Volume 1 Press Scroll or to highlight Fax and press Select 2 Press S...

Page 23: ...aults Options You can use the following setup options for configuring the fax system Option Description Contrast You can select the default contrast value to fax your documents lighter or darker Resolution You can select the default resolution setting to Standard fine or Super fine Rings to Answr You can specify the number of times the printer rings 1 7 before answering an incoming call Receive Mo...

Page 24: ...eport with detailed information about the previous 50 communications operations including time and dates The available options are On or Off Auto Reduction When receiving a document as long as or longer than the paper loaded in the paper tray the printer can reduce the size of the document to fit the size of paper loaded in the printer Select On if you want to automatically reduce the incoming doc...

Page 25: ...ing an Original Document 2 Press Scroll or to highlight Fax and press Select 3 Adjust the document contrast and resolution to suit your fax needs For details see Adjusting the Document Contrast and Adjusting the Document Resolution 4 Press Scroll or to highlight On Hook Dial and press Select 5 Press Select to select Yes 6 Enter the number of the remote fax machine using the keypad 7 When you hear ...

Page 26: ...ax About Receiving Modes When the memory is full the printer can no longer receive any incoming fax Secure free memory to resume by removing data stored in the memory Loading Paper for Receiving Faxes The instructions for loading paper in the paper tray are the same whether you are printing faxing or copying except that faxes can only be printed on Letter A4 or Legal sized paper For details about ...

Page 27: ...hoose The code should be one digit For details on changing the code see Available Fax Defaults Options Receiving Faxes Using the DRPD Mode Distinctive Ring is a telephone company service which enables you to use a single telephone line to answer several different telephone numbers The particular number someone uses to call you on is identified by different ringing patterns available in combination...

Page 28: ...r Since your printer is a multi tasking device it can receive faxes while performing other tasks If you receive a fax while you are copying printing or run out of paper or toner your printer stores incoming faxes in the memory As soon as you finish copying printing or resupply the consumables the printer automatically prints the fax Automatic Dialing Speed Dialing You can store up to 400 frequentl...

Page 29: ...suit your fax needs For details see Adjusting the Document Contrast and Adjusting the Document Resolution 4 Press Select to select Fax to 5 Enter the speed dial number l For a one digit speed dial number press and hold the appropriate digit button l For a two digit speed dial number press the first digit button and hold the last digit button l For a three digit speed dial number press the first an...

Page 30: ...te a specific speed dial number from a selected group or add a new number to the selected group 1 Press Directory on the operator panel OR Press Scroll or to highlight Fax and press Select OR Press Scroll or to highlight Menu and press Select Press Scroll or to highlight Directory and press Select 2 Press Scroll or to highlight PhoneBook and press Select 3 Press Scroll or to highlight Edit and pre...

Page 31: ... first into the ADF OR Place a single document face down on the document glass For details about loading a document see Loading an Original Document 2 Press Directory on the operator panel OR Press Scroll or to highlight Fax and press Select OR Press Scroll or to highlight Menu and press Select Press Scroll or to highlight Directory and press Select 3 Press Scroll or to highlight PhoneBook and pre...

Page 32: ...3 Press Scroll or to highlight Print and press Start or Select A list showing your speed dial and group dial entries prints out Other Ways to Fax Redialing To redial the number you last called 1 Load the document s face up with top edge in first into the ADF OR Place a single document face down on the document glass For details about loading a document see Loading an Original Document 2 Press Scro...

Page 33: ...x at a later time 1 Load the document s face up with top edge in first into the ADF OR Place a single document face down on the document glass For details about loading a document see Loading an Original Document 2 Press Scroll or to highlight Fax and press Select 3 Adjust the document contrast and resolution to suit your fax needs For details see Adjusting the Document Contrast and Adjusting the ...

Page 34: ... Features and press Select 5 Press Scroll or to highlight Priority Fax and press Select 6 Enter the number of the remote machine using the number keypad To enter the number you can use one two or three digit speed dial or group dial numbers 7 Press Select to confirm the number on the display The display asks you to enter another number 8 Press Select to enter the number Or press Scroll or to selec...

Page 35: ...ved faxes from being accessed by unauthorized people You can turn on the secure fax mode using the Secure Receive option to restrict printing out received faxes when the printer is unattended In the secure fax mode all incoming faxes may go into memory When the mode turns off any faxes stored may be printed To turn the secure receiving mode on 1 Press Scroll or to highlight Menu and press Select 2...

Page 36: ...ist shows the status of the user selectable options You may print this list to confirm your changes after changing any settings Scheduled Job Information This list shows the documents currently stored for Delayed faxes or Toll Save faxes The list shows the starting time and type of operation Message Confirmation This report shows the fax number number of pages elapsed time of the job communication...

Page 37: ...Printing a Report Changing Setting Options 1 Press Scroll or to highlight Menu and press Select 2 Press Scroll or to highlight Advanced Fax and press Select 3 Press Scroll or until you see the desired menu item and press Select 4 When the option you want displays choose the desired status by pressing Scroll or or enter the desired value using the number keypad 5 Press Select to save the selection ...

Page 38: ...is useful for blocking any unwanted faxes Select Off to turn the feature off Anybody can send you a fax Select On to turn the feature on You can set up to 10 fax numbers as junk fax numbers After storing the numbers you do not receive any faxes from the registered stations Secure Receive You can keep your received faxes from being accessed by unauthorized people For further details about setting t...

Page 39: ...er and Dell ScanDirect and send them using your fax application with the computer modem Sending a Fax from a PC You can send a fax from your PC without using the printer To send a fax from your PC install the PC Fax software and customize the software s settings Installing PC Fax Software Select Custom Installation when you install the Dell software and click the PC Fax box For details see Install...

Page 40: ...e Print window displays It may look slightly different depending on your application 3 Select Dell PC Fax from the Print window 4 Click OK 5 Compose the cover page and click Continue 6 Enter the recipients numbers and click Continue 7 Select the resolution and click Send Fax ...

Page 41: ...Your PC begins to send the fax data and printer sends the fax ...

Page 42: ...Service Code Express Service Code Identify your printer when you use support dell com or contact technical support Enter the Express Service Code to direct your call when contacting technical support The Express Service Code is not available in all countries Latest drivers for my printer Answers to technical service and support questions Documentation for my printer Dell Support Website The Dell S...

Page 43: ...driver package is supplied with a smart and flexible installation program You do not need to search for additional components that might be necessary for the MFP software all required packages will be carried onto your system and installed automatically this is possible on a wide set of the most popular Linux clones Installing the MFP Driver System Requirements Supported OS l Redhat 8 9 l Mandrake...

Page 44: ...erminal screen appears type in root localhost root cd mnt cdrom Linux root localhost root install sh 2 Click Install 3 When the welcome screen appears click Next 4 Installation is started When the installation is almost complete the Add printer wizard appears automatically Click Next 5 If you connect your printer using the USB cable the following window appears Select your printer from the drop do...

Page 45: ...om the drop down list Click Next 6 If you connect your printer using the USB cable choose a port you will use with your printer After choosing the port click Next OR If you connect your printer using the network cable skip to the next step 7 Select the driver and click Next 8 Enter your printer s name location description and click Next ...

Page 46: ...in window appears type in root in the Login field and enter the system password 2 Insert the Drivers and Utilities CD The Drivers and Utilities CD will automatically run If the Drivers and Utilities CD does not automatically run click the icon at the bottom of the desktop When the Terminal screen appears type in root localhost root cd mnt cdrom Linux root localhost root install sh 3 Click Uninstal...

Page 47: ...ll automatically be created on your desktop Opening the MFP Configurator 1 Double click MFP Configurator on the desktop You can also click the Startup Menu icon and select Dell MFP and then MFP Configurator 2 Press each button on the Modules pane to switch to the corresponding configuration window You can use the onscreen help by clicking Help 3 After changing the configuration click Exit to close...

Page 48: ...to check if the machine is working properly l Properties enables you to view and change the printer properties For details see Configuring Printer Properties Classes Tab The Classes tab shows a list of available printer classes l Refresh Renews the classes list l Add Class Enables you to add a new printer class l Remove Class Removes the selected printer class Scanners Configuration In this window...

Page 49: ...proper access of consumer applications to these devices via the single I O port The Dell MFP driver package provides an appropriate port sharing mechanism that is used by Dell printer and scanner drivers The drivers address their devices via so called MFP ports The current status of any MFP port can be viewed via the MFP Ports Configuration The port sharing prevents you from accessing one function...

Page 50: ...printer driver By clicking Options you can set the default device options l Jobs shows the list of print jobs Click Cancel Job to cancel the selected job and select the Show completed jobs check box to see previous jobs on the job list l Classes shows the class that your printer is in Click Add to Class to add your printer to a specific class or click Remove from Class to remove the printer from t...

Page 51: ...click Cancel Printing Files You can print many different types of files on the Dell MFP device using the standard CUPS way directly from the command line interface The CUPS lpr utility enables you do that But the drivers package replaces the standard lpr tool by a much more user friendly Dell LPR program To print any document file 1 Type lpr file_name from the Linux shell command line and press En...

Page 52: ... Change the scan options in the Image Quality and Scan Area sections l Image Quality enables you to select the color composition and the scan resolution for the image l Scan Area enables you to select the page size The Advanced button enables you to set the page size manually If you want to use one of the preset scan option settings select from the Job Type drop down list For details about the pre...

Page 53: ...rties window 2 Click Save as 3 Enter the name for your setting 4 Click OK Your setting is added to the Saved Settings drop down list To save a Job Type setting for the next scan job 1 Select the setting you want to use from the Job Type drop down list 2 Click Save The next time you open the Scanner Properties window the saved setting is automatically selected for the scan job To delete a Job Type ...

Page 54: ...you to scroll through the image Crops the selected image area Enables you to scale the image size you can enter the size manually or set the rate to scale proportionally vertically or horizontally Enables you to rotate the image you can select the number of degrees from the drop down list Enables you to flip the image vertically or horizontally Enables you to adjust the brightness or contrast of t...

Page 55: ...Dell Laser MFP Installer icon 7 After the installation is finished click Quit Setting Up the Printer Set up for your printer will be different depending on which cable you use to connect the printer to your computer the network cable or the USB cable For a Network connected Macintosh 1 Follow the instructions on Installing Software for Macintosh to install the PPD and Filter files on your computer...

Page 56: ...lect the file you want to print 2 Open the File menu and click Page Setup Document Setup in some applications 3 Choose your paper size orientation scaling and other options and click OK 4 Open the File menu and click Print 5 Choose the number of copies you want and indicate which pages you want to print 6 Click Print when you finish setting the options Changing Printer Settings You can use advance...

Page 57: ... in the duplex mode decide on which edge you will be binding your finished document The binding options are Long Edge Binding Conventional layout used in book binding Short Edge Binding Type often used with calendars 1 From your Macintosh application select Print from the File menu 2 Select the Layout CAUTION If you have selected duplex printing and then try to print multiple copies of a document ...

Page 58: ...vailable options are Normal and Text Enhance Fit to Page This printer feature enables you to scale your print job to any selected paper size regardless of the digital document size This can be useful when you want to check fine details on a small document Paper Type Make sure that Paper Type is set to Printer Default If you load a different type of print material select the corresponding paper typ...

Page 59: ...olves a number of steps 1 Load the document s face up with top edge in first into the ADF OR Place a single document face down on the document glass For details about loading a document see Loading an Original Document 2 Open an application such as PhotoDeluxe or Photoshop 3 Open the TWAIN window and set the scan options 4 Scan and save your scanned image NOTE You need to follow the program s inst...

Page 60: ...faxes l RCV Report Clears all records of your received faxes l Address Book Clears the Email entries stored in the memory l Phone Book Clears the speed dial or group dial numbers stored in the memory 5 Press Select The selected memory is cleared and the display asks you to continue clearing the next item 6 Repeat steps 4 and 5 to clear another item OR Press Cancel to return to Standby mode Backing...

Page 61: ...mulate inside the printer and cause print quality problems such as smearing or toner specks Clean inside the printer to prevent these problems 1 Power the printer off and unplug the power cord Allow a reasonable amount of time for the printer to cool down 2 Open the front cover and pull the toner cartridge straight out Set it on a clean flat surface 3 With a dry and lint free cloth wipe away any d...

Page 62: ...rt of each day and during the day as needed 1 Slightly dampen a soft lint free cloth or paper towel with water 2 Open the document cover 3 Wipe the surface of the document glass and ADF glass until it is clean and dry 4 Wipe the underside of the white document cover and white sheet until it is clean and dry 5 Close the document cover CAUTION Do not touch the transfer roller inside the printer Oil ...

Page 63: ...CD displays the warning message Toner Low Thoroughly shake the cartridge from side to side 5 or 6 times to distribute the toner evenly inside the cartridge and temporarily improve print quality 1 Open the front cover 2 Pull the toner cartridge out 3 Thoroughly shake the cartridge from side to side 5 or 6 times to distribute the toner evenly inside the cartridge 4 Holding the toner cartridge by the...

Page 64: ...e front cover 2 Pull the toner cartridge out 3 Remove the new toner cartridge from its bag 4 Remove the packing tape and thoroughly shake the cartridge from side to side to distribute the toner Save the box and the cover for shipping 5 Holding the toner cartridge by the handle and slowly insert the cartridge into the opening in the printer NOTE The Dell Laser printer 1815 can print received faxes ...

Page 65: ...u want to print the fax when toner is low you can set the printer to continue printing incoming faxes from the memory even though the print quality is not as good 1 Press Scroll or to highlight Fax and press Select 2 Press Scroll or to highlight Fax Features and press Select 3 Press Scroll or to highlight Ignore Toner and press Select 4 Press Scroll or to select the desired status and press Select...

Page 66: ...t Rotate the bushing on the right end of the roller toward the ADF 6 Close the ADF cover Ordering Supplies You can order supplies using the DellTM Toner Management System or the Dell Printer Configuration Web Tool If your printer is connected to a network type your printer s IP address in your Web browser or open the Network Status Monitor Center see Network Status Monitor Center to launch the Del...

Page 67: ...in your Web browser to launch the Dell Printer Configuration Web Tool and click the supplies link a Dell Standard Capacity Toner Cartridge life is 3 000 pages and Dell High Capacity Toner Cartridge life is 5 000 pages The Order Toner Cartridges window appears NOTE premier dell com is Dell s secure customizable procurement and support site for its larger relationship customers NOTE Refer to the fol...

Page 68: ......

Page 69: ...s on the network through a Windows 98 Me 2000 XP Server 2003 Vista or NT 4 0 network printer connection In Windows 98 Me Setting Up the Host Computer 1 Start Windows 2 Click the Start button and point to Control Panel and double click the Network icon 3 Click the File and Print Sharing box check the box next to I want to be able to allow others to print to my printer and click OK 4 Click Start and...

Page 70: ...dows NT 4 0 2000 from the Start button Click Settings and point to Printers For Windows XP Server 2003 from the Start button click and point to Printers and Faxes For Windows Vista from the Start button click Control Panel Hardware and Sound Printers 5 Double click your printer icon 6 Click the Printer menu and point to Properties 7 Click the Ports tab and point to Add Port 8 Click Local Port and ...

Page 71: ...l supported network protocols are enabled If a network protocol is enabled the printer may actively transmit on the network even when the protocol is not in use This may slightly increase network traffic To eliminate unnecessary traffic you may disable unused protocols 1 Press Scroll or to highlight Menu and press Select 2 Press Scroll or to highlight Network CFG and press Select 3 Press Scroll or...

Page 72: ...s consists of 4 bytes Dynamic Addressing BOOTP DHCP To assign the TCP IP address automatically using a DHCP or BOOTP server on your network 1 Press Scroll or to highlight Menu and press Select 2 Press Scroll or to highlight Network CFG and press Select 3 Press Scroll or to highlight Configuration and press Select 4 Press Scroll or to highlight TCP IP and press Select 5 Press Scroll or to highlight...

Page 73: ...any device plugged into a grounded power source If you walk around before finishing installation discharge any static electricity once again Installing Printer Memory Additional printer memory is provided on a Dual In line Memory Module DIMM Your printer has 92 MB of memory It can be expanded to 192 MB Remove the preinstalled memory DIMM before upgrading the memory 1 Power the printer off and unpl...

Page 74: ...n your computer For details about installing the PS printer driver see Installing Software in Windows 2 Click the Windows Start menu 3 For Windows 98 Me NT 4 0 2000 select Settings and then Printers For Windows XP Server 2003 select Printers and Faxes For Windows Vista click Control Panel Hardware and Sound Printers 4 Select the Dell Laser MFP 1815 PS printer 5 Right click the printer icon and In ...

Page 75: ...3 Find the location of the connector and the optional tray positioners 4 Place the printer over the tray aligning the feet on the printer with the positioners in the optional tray 2 5 Connect the cable into the connector on the back of the printer 6 Load paper in the optional tray 2 For information about loading paper in this tray see Loading Paper 7 Reconnect the power cord and cables and then po...

Page 76: ...e Printer tab and select Tray 2 from the Optional Tray drop down list 6 Click OK and print the document To set the tray in the printer properties of the PostScript printer driver 1 Click the Windows Start button 2 For Windows 98 Me NT4 0 2000 select Settings and then Printers For Windows XP Server 2003 select Printers and Faxes For Windows Vista click Control Panel Hardware and Sound Printers 3 Se...

Page 77: ...6 Click OK ...

Page 78: ...feed properly causing jams For best performance use 75 g m2 20 lb bond long grain paper For duplex printing use 75 to 90 g m2 20 to 24 lb bond paper Curl Curl is the tendency of print media to curve at its edges Excessive curl can cause paper feeding problems Curl usually occurs after the paper passes through the printer where it is exposed to high temperatures Storing paper unwrapped in humid con...

Page 79: ...thout discoloring bleeding or releasing hazardous emissions Check with the paper manufacturer or vendor to determine whether the paper you have chosen is acceptable for laser printers Unacceptable Paper The following papers are not recommended for use with the printer l Chemically treated papers used to make copies without carbon paper also known as carbonless papers carbonless copy paper CCP or n...

Page 80: ...heavily textured surfaces Use papers printed with heat resistant inks designed for use in xerographic copiers The ink must withstand temperatures of 180 C 356 F without melting or releasing hazardous emissions Use inks that are not affected by the resin in toner or the silicone in the fuser Inks that are oxidation set or oil based should meet these requirements latex inks might not If you are in d...

Page 81: ...gether l Load one transparency in the bypass tray Selecting Transparencies The printer can print directly on transparencies designed for use in laser printers Print quality and durability depend on the transparency used Always print samples on the transparencies you are considering before buying large quantities Check with the manufacturer or vendor to determine whether your transparencies are com...

Page 82: ... be able to withstand temperatures of 180 C 356 F and pressure of 25 pounds per square inch psi You can load one label sheet at a time in the bypass tray Try a sample of any label you are considering using with the printer before purchasing a large quantity l Use full label sheets Partial sheets may cause labels to peel off during printing resulting in a jam Partial sheets also contaminate your pr...

Page 83: ... l For best results store print media in an environment where the temperature is approximately 21 C 70 F and the relative humidity is 40 l Store cartons of print media on a pallet or shelf rather than directly on the floor l If you store individual packages of print media out of the original carton make sure they rest on a flat surface so the edges do not buckle or curl l Do not place anything on ...

Page 84: ...Y Print Media Type Print Media Weight Tray 1 and Optional Tray 2 Bypass Tray Paper Xerographic or business paper 60 90 g m2 grain long 16 24 lb bond 60 135 g m2 grain long 16 to 36 lb bond Card stock maximum grain long a Index Bristol 120 g m2 31 lb Tag 120 g m2 31 lb Cover 135 g m2 35 lb Card stock maximum grain short a Index Bristol 163 g m2 43 lb Tag 163 g m2 43 lb Cover 163 g m2 43 lb Transpar...

Page 85: ... while the printer is printing Printing to the Output Tray Face down The output tray collects printed paper face down in correct order The tray should be used for most print jobs If necessary expand the paper output extension to keep print media from falling off the output tray Printing to the Rear Cover Face up Using the rear cover paper comes out of the printer face up Printing from the bypass t...

Page 86: ...he Bypass Tray Use the bypass tray to print transparencies labels envelopes or postcards in addition to making quick runs of paper types or sizes that are not currently loaded in the paper tray Postcards 3 5 by 5 83 in index cards and other custom sized materials can be printed with this printer The minimum size is 3 0 by 5 0 in 76 by 127 mm and the maximum size is 8 5 by 14 in 216 by 356 mm Accep...

Page 87: ...ntering the printer first l Preprinted paper load with the design face up top edge toward the printer l Card stock load them with the print side up and the short edge entering the printer first l Pre printed paper the printed side should be facing down with an uncurled edge toward the printer 4 Squeeze the width guide and adjust it to the width of the print material Do not force too much or the pa...

Page 88: ...er size using the operator panel buttons This setting will apply to Fax and Copy modes For PC printing you need to select the paper type in the application program you use 1 Press Scroll or to highlight Menu and press Select 2 Press Select to access Paper Setup 3 Press Select to access Paper Size 4 Press Scroll or to select the paper tray you want to use and press Select 5 Press Scroll or to find ...

Page 89: ......

Page 90: ...the document you want to print 2 Select Print from the File menu The Print window displays It may look slightly different depending on your application The basic print settings are selected within the Print window These settings include the number of copies and print range 3 Select the printer driver you want to use from the Print window 4 To take advantage of the printer features provided by your...

Page 91: ...ver 2003 Vista or Cancel Printing Windows 98 Me Printer Settings You can use the printer properties window which enables you to access all the printer options you may need when using your printer When the printer properties are displayed you can review and change any settings needed for your print job The printer properties window may differ depending on the printer driver you select and your oper...

Page 92: ...des advanced printing options such as Multiple Pages per Side and Poster Printing Paper Tab Use the following options to set the paper handling needs when you access the printer properties Click the Paper tab to access the paper properties Property Description Paper Orientation Paper Orientation enables you to select the direction in which information is printed on a page If you want to rotate the...

Page 93: ...ally picks up print materials from the bypass tray first and then the paper tray Type Make sure that Type is set to Printer Default If you load a different type of print material select the corresponding paper type For more information about print materials refer to Print Media Guidelines First Page This property allows you to print the first page using a different paper type from the rest of the ...

Page 94: ...arkness Use this option to lighten or darken the image appearance in your print TrueType Options This option determines what the driver tells the printer about how to image the text in your document Select the appropriate setting according to the status of your document Print All Text To Black When the Print All Text To Black option is checked all text in your document prints solid black regardles...

Page 95: ...ctivated by the Help button in the printer s properties window These help screens give detailed information about the printer features provided by the printer driver You can also click from the upper right hand corner and then click on any setting Property Description Watermark You can create a background image of text to print on each page of your document See Using Watermarks This feature is not...

Page 96: ...u want to print per sheet 1 2 4 6 9 or 16 on the Pages per Side drop down list 4 If necessary select the page order on the Pages Order drop down list Check Print Page Border to print a border around each page on the sheet Print Page Border is enabled only if the Pages per Side setting is set to a number greater than one 5 Click the Paper tab and select the paper source size and type 6 Click OK to ...

Page 97: ...ation access the printer properties 2 From the Paper tab select Fit to Page on the Printing Type drop down list 3 Select the correct size from the Output size drop down list 4 Select the paper source size and type 5 Click OK to print the document You can print a single page document onto 4 9 or 16 sheets of paper for the purpose of pasting the sheets together to form one poster size document 1 Whe...

Page 98: ...to reconstruct the resulting poster 4 Click the Paper tab and select the paper source size and type 5 Click OK to print the document You can complete the poster by reconstructing the results Your printer prints on both sides of paper automatically Before printing decide on which edge you will be binding your finished document The binding options are l Long Edge which is the conventional layout use...

Page 99: ...age window 3 Click OK and start printing Creating a Watermark 1 When you change the print settings from your software application access the printer properties 2 Click the Other Options tab and click Edit in the Watermark section The Edit Watermarks window appears The Watermark option enables you to print text over an existing document For example you may want to have large gray letters reading DR...

Page 100: ...ars 3 Select the watermark you want to edit on the Current Watermarks list and change the watermark message and the options 4 Click Update to save the changes 5 Click OK Deleting a Watermark 1 When you change the print settings from your software application access the printer properties 2 From the Other Options tab click Edit in the Watermark section The Edit Watermarks window appears 3 Select th...

Page 101: ...ems exactly as you wish them to appear when printed as an overlay If needed save the file for later use 2 When you change the print settings from your software application access the printer properties 3 Click the Other Options tab and click Edit in the Overlay section 4 In the Edit Overlays window click Create Overlay 5 In the Create Overlay window type a name of up to eight characters in the Fil...

Page 102: ... Answering Yes to the window means that the selected overlay will be printed with your document Answering No to the window cancels the use of the overlay page If this box is empty and an overlay has been selected the overlay will be automatically printed with your document 7 Click OK or Yes until the printing starts The overlay is downloaded with your print job and printed on your document Deletin...

Page 103: ...ges for an inkjet printer 150 dpi to 300 dpi Images for a high resolution printer 300 dpi to 600 dpi Scanning above these recommended resolutions may exceed the capabilities of the application If you require a resolution above those recommended in the above table you should reduce the size of the image by previewing or pre scan and cropping before scanning the image If you prefer to use another ap...

Page 104: ... you must install Network Scan on your computer Adding a User To register yourself as an authorized Network Scan user follow the instructions in the Dell Network Scan Manager screens 1 Click the Add Device button 2 Click Next 3 Specify the network scanner you want to use by browsing or by providing an IP address to connect directly to a scanner For more information on using an IP address see Addin...

Page 105: ... when Network Scan is running If your file type is TIFF or PDF the display asks if you want to scan another page Select Yes using Scroll or and press Select The next page is scanned and stored as the second page of the document Repeat this until all pages are scanned then select No Adding a Scanner To register your scanner as an authorized network scanner use the Dell Network Scan Manager window 1...

Page 106: ...ppears on the Dell Network Scan Manager window and you can now scan through the network Setting the properties 1 In the Dell Network Scan Manager window double click the scanner icon or click the Properties button 2 After setting the properties click OK General Page Server Page ...

Page 107: ...scanner settings See Setting the properties 3 Load the document you want to scan 4 Start scanning according to the recommendations on Scanning Using Network Scan 5 Scanning is started and the scanned document is sent to the location you specified The location can be changed in the Advanced Page in the Network Scan Properties screen See Advanced Page Scanner Icons ...

Page 108: ...ct a file format and destination to save the picture 6 Follow the on screen instructions to edit the picture after it is copied to your computer Scanning to a USB Memory Key You can scan a document and save the scanned image on a USB memory key There are two ways of doing this you can scan to the USB memory key using the default settings or you can manually select your own settings About USB Memor...

Page 109: ...nt and save it to your USB memory key For the document loaded on the document glass the display asks if you want to load another page Select Yes to add Otherwise select No The scanned documents are saved on the USB memory key Scanning Using My Settings The following table shows the options you can select 1 Insert the USB memory key into the USB memory port on your printer 2 Load the document s fac...

Page 110: ...ghlight the image size Letter A4 Legal Folio Executive A5 B5 or A6 and press Select 6 Press Scroll or to highlight Version and press Select 7 Press Scroll or to highlight the file format BMP TIFF PDF or JPEG and press Select 8 If you select JPEG skip to step 11 If you select TIFF or PDF press Scroll or to select multi page option and press Select If you select BMP press Scroll or to select the col...

Page 111: ...sert the USB memory key into the USB memory port on your printer 2 Press Scroll or to highlight Scan and press Select 3 Press Select to access USB key 4 Press Scroll or to highlight PRINT from and press Select 5 Press Scroll or to select the folder or file you want and press Select 6 If you selected a file in step 5 go to the next step If you selected a folder press Scroll or to select the file yo...

Page 112: ... login password and press Select 8 Enter the recipient s email address and press Select Option Description SMTP Server You can set the printer to access an SMTP server for outgoing mail SMTP Server IP Enables you to enter the IP address or host name of the SMTP server This can be given in dotted decimal notation or as a domain name e g 111 222 333 444 or smtp xyz com Max Mail Size Enables you to s...

Page 113: ...can set up Address Book with the email addresses you use frequently You can then easily and quickly enter email addresses by entering the name you have assigned in Address Book Adding an E mail Address to Address Book 1 Press Directory in the operator panel OR Press Scroll or to highlight Menu and press Select Press Scroll or to highlight Directory and press Select 2 Press Scroll or to highlight E...

Page 114: ...The printer begins scanning and then sends the e mail 17 Press Select when the display shows Logoff Now Your printer returns to Standby mode Editing or Deleting an E mail Address 1 Press Directory in the operator panel OR Press Scroll or to highlight Menu and press Select Press Scroll or to highlight Directory and press Select 2 Press Scroll or to highlight Email and press Select 3 Press Scroll or...

Page 115: ... 4 Press Scroll or to select Delete and press Select 5 Enter a group location number you want to delete and press Select 6 Press Select when Yes appears 7 Press Cancel to return to Standby mode Editing Group Numbers 1 Press Directory in the operator panel OR Press Scroll or to highlight Menu and press Select Press Scroll or to highlight Directory and press Select 2 Press Scroll or to highlight Ema...

Page 116: ...ress es you have entered To continue the next step press Scroll or to select No and press Select 11 Enter the e mail subject and press Select 12 Press Scroll or to select the file type to which the scanned image may be converted and press Select 13 Press Scroll or to select the resolution you want and press press Select 14 Press Start or Select The printer begins scanning and then sends the e mail...

Page 117: ...desired time value and press Select 11 Press Cancel to return to Standby mode Fax Forward to E mail addresses You can set the printer to forward all outgoing or incoming faxes to the e mail addresses 1 Press Scroll or to highlight Menu and press Select 2 Press Scroll or to highlight Email setup and press Select 3 Press Scroll or to highlight Email Forward and press Select 4 Select the desired stat...

Page 118: ...ivers are available for scanning documents on your printer l User s Guide HTML documentation provides detailed information about using your printer l Set IP Use this program to set your printer s TCP IP addresses For details about this program see the Network Printer User s Guide on the network utilities CD l PS driver Postscript Printer Description PPD file You can use the PostScript driver to pr...

Page 119: ...cover protocol phone book and receive mode Email Settings Configure e mail settings such as SMTP server e mail alert and address Copy Printer Settings Quickly clone the printer s settings to another printer or printers on the network by typing each printer s IP address Printing Statistics Keep track of printing trends such as paper usage and the types of print jobs Printer Information Get the info...

Page 120: ...inter is attached to a network instead of your computer skip this step and go on to Installing Dell Software for Network Printing A printer driver is software that lets your computer communicate with your printer The procedure to install drivers depends on the operating system you are using 1 Make sure that the printer is connected to your computer and powered on Close all unnecessary programs NOT...

Page 121: ...ess subnet mask and gateway for the printer To automatically set the IP address a DHCP or BOOTP server must exist on the network To configure the IP address manually you can use the supplied Drivers and Utilities CD Print the Configuration page of the printer to see the current network configuration and MAC address You will need this information to configure the printer for the network 1 Make sure...

Page 122: ...guage 4 Select Network Installation and click Next 5 If you want to install the drivers on this computer for network operation select Local Installation and click Next If you want to install the Dell software on remote computers or network servers on the same network select Remote Installation The domain administrator s ID and password are required Select the client computer s in the same domain o...

Page 123: ...r you want to install and click Next If you do not see your printer in the list click Update to refresh the list or click Add Printer to add your printer to the network To add the printer to the network enter the port name and an existing IP address for the printer 9 The screen displays the printer drivers installed on your computer You can change the printer name set the printer as a default to b...

Page 124: ...or screen launches when you send a print job to the printer This only appears on the computer screen Depending on the remaining toner level the launched Local Status Monitor screen is different Network Status Monitor Center If your printer is connected to a network you can use the Network Status Monitor Center Using the Network Status Monitor Center you can launch the Dell Printer Configuration We...

Page 125: ... Printer Settings Utility 1 Click Start Programs DELL DELL Printers DELL Laser MFP 1815 Printer Settings Utility The Printer Settings Utility window opens 2 The Printer Settings Utility window provides several features Directory Phone Book Address Book Fax Setting Fax Cover Sheet and Scan Destination Resolution Scan Color Show Preview For further details click the button To use the default setting...

Page 126: ... when you access Scan and then PC click Destination and the Setting button Using the destination list you can select a software program that an image can be scanned to The Resolution Section Click the Resolution section and select the default scan resolution from the drop down list You can select 75dpi Draft 150dpi 200dpi 300dpi Normal or 600dpi The Scan Color Section Click the Scan Color section ...

Page 127: ...Consumables 1 piece toner cartridge system Power requirements 110 127 VAC 50 60 Hz 5 4 A 220 240 VAC 50 60 Hz 3 0 A Power consumption Average Less than 450 W Sleep mode Less than 30 W Noise Copy 55 dBA Standby mode 33 dBA Printing 54 dBA Warm up time Less than 42 seconds Operating conditions Temperature 50o F 89o F 10o C 32o C Humidity 20 80 RH LCD 16 characters x 2 lines Toner cartridge life Dell...

Page 128: ... Envelope B5 JIS B5 ISO B5 Min 3 x 5 in 76 x 127 mm Max 8 5 x 14 in 216 x 356 mm Duplex printing Letter A4 Legal Oficio Folio Print resolution Up to 1200 dpi effective output Emulation GDI PCL6 PCL5e PostScript Level3 PC Interface USB 2 0 Network Interface 10 100 Base TX Compatibility Windows 98 Me NT 4 0 2000 XP Server 2003 Vista Various Linux OS including Red Hat 8 0 9 0 Fedora Core 1 3 Mandrake...

Page 129: ...trol NOTE Before purchasing large quantities of paper ensure the paper meets the requirements specified in this User s Guide CAUTION Using paper that does not meet these specifications may cause problems requiring repairs These repairs are not covered by the Dell warranty or service agreements Paper Dimensionsa Weight Capacityb Letter 8 5 X 11 in 216 X 279 mm 60 90 g m2 16 24 lb bond for the paper...

Page 130: ...r environment damage especially if they are not wrapped with a moisture proof barrier Symptom Problem with paper Solution Poor print quality or toner adhesion problems with feeding Too moist too rough too smooth or embossed faulty paper lot Try another kind of paper between 100 400 Sheffield 4 5 moisture content Dropout jamming curl Stored improperly Store paper flat in its moisture proof wrapping...

Page 131: ...uld be considered when evaluating the paper s storage environment l Paper should be stored at or near room temperature l The air should not be too dry or too humid l The best way to store an opened ream of paper is to rewrap it tightly in its moisture proof wrapping If the printer environment is subject to extremes unwrap only the amount of paper to be used during the day s operation to prevent un...

Page 132: ... EMC Corporation ENERGY STAR and the ENERGY STAR logo are registered trademarks of the U S Environmental Protection Agency As an ENERGY STAR PARTNER Dell Computer Corporation has determined that this product meets the Energy Star guidelines for energy efficiency Trademarks used in this text Dell the DELL logo Dell Precision PowerEdge PowerConnect PowerVault XPS Dimension Optiplex Latitude and Dell...

Page 133: ...he document by gently pulling it out c Close the ADF cover Then reload the document into the ADF If the document is jammed in the paper exit area a Open the document cover and turn the release knob to remove the misfed documents from the document document output tray Clearing Jams in the ADF Clearing Jams in the Paper Paths Clearing LCD Error Messages Solving Problems NOTE To prevent document jams...

Page 134: ...d tearing the paper pull the jammed paper out gently and slowly Follow the steps below to clear the jam Paper Feed Jam tray 1 1 Open and close the front cover The jammed paper automatically exits the printer If the paper does not exit go to the next step 2 Pull the paper tray open 3 Remove the paper by gently pulling it straight out Operator Panel Message Location of Jam Go to Paper Jam 0 Open Fro...

Page 135: ...er Feed Jam optional tray 2 1 Pull the optional tray 2 open 2 Remove the jammed paper from the printer If you cannot see the paper in this area or the paper does not move when pulled go to the next step 3 Pull the tray 1 half way out 4 Pull the paper straight up and out 5 Insert the trays back into the printer Printing automatically resumes Bypass tray Jam 1 If the paper is not feeding properly pu...

Page 136: ...ling it straight out 3 Replace the toner cartridge and close the front cover Printing automatically resumes Paper Exit Jam 1 Open and close the front cover The jammed paper automatically exits the printer If the paper does not exit go to the next step 2 Gently pull the paper out of the output tray NOTICE The fuser area is hot Take care when removing paper from the printer ...

Page 137: ...ext step 5 Release the blue strap the rear cover stopper and fully open the rear cover as shown 6 Unfold the duplex guide fully 7 While pushing the fuser lever to the right open the fuser door 8 Pull the jammed paper out If the jammed paper does not move when you pull push the two blue pressure levers up to loosen the paper and then remove it NOTICE Make sure to unfold the duplex guide before open...

Page 138: ... Duplex Jam 0 1 Pull the duplex unit out of the printer 2 Remove the jammed paper from the duplex unit If the paper does not come out with the duplex unit remove the paper from the bottom of the printer 3 Push the duplex unit to the printer 4 Open and close the front cover Printing automatically resumes Duplex Jam 1 CAUTION If you do not push the duplex unit in correctly a paper jam may occur ...

Page 139: ...sure that the paper is below the paper capacity mark on the inside wall of the paper tray l Do not remove the paper from the tray while your printer is printing l Flex fan and straighten the paper before loading l Do not use creased damp or curled paper l Do not mix paper types in the paper tray l Use only recommended print materials See Paper Specifications l Ensure that the recommended print sid...

Page 140: ...eration Use a speed dial number or dial the number manually using the number keypad Hsync Error A problem has occurred in the Laser Scanning Unit LSU Unplug the power cord and plug it back in If the problem persists call for service JAM 2 OPEN REAR FRONT DOOR Paper has jammed in the paper exit area Clear the jam See Paper Exit Jam Job cancelled by user Cancel is pressed during transmission Try aga...

Page 141: ...d over Printer Error Cycle Power A problem has occurred in the Laser Scanning Unit LSU Unplug the power cord and plug it back in If the problem persists call for service Ready toner 0 TONER EMPTY The toner cartridge is empty Replace the toner cartridge with a new one See Replacing the Toner Cartridge Ready toner 7 TONER LOW The toner cartridge is almost empty Take out the toner cartridge and thoro...

Page 142: ...inter icon and select Set as Default Printer Check the printer for the following If a printer system error occurs contact your service representative The front or rear cover is not closed Paper is jammed No paper is loaded The toner cartridge is not installed The connection cable between the computer and the printer is not connected properly Disconnect the printer cable and reconnect it The connec...

Page 143: ...ve mode is on Adjust the print resolution and turn the toner save mode off See Graphics Tab A combination of faded or smeared defects may indicate that the toner cartridge needs cleaning See Cleaning the Interior The surface of the LSU part inside the printer may be dirty Clean the LSU see Cleaning the Interior Toner specks The paper may not meet specifications for example the paper is too moist o...

Page 144: ...e reverse side Printing on seams can cause problems If background scatter covers the entire surface area of a printed page adjust the print resolution through your software application or the printer properties Misformed characters If characters are improperly formed and produce hollow images the paper stock may be too slick Try a different paper See Paper Specifications If characters are improper...

Page 145: ... rear cover Condition Suggested solutions The printer is not working there is no display and the buttons are not working Unplug the power cord and plug it in again Ensure that there is power to the electrical receptacle No dial tone sounds Check that the phone line is connected properly See Connecting the Telephone Line Check that the phone socket in the wall is working by plugging in another phon...

Page 146: ...ore toner The printer may frequently be powered on and off The document cover may be left open while copies are being made Condition Suggested solutions The scanner does not work Make sure that you place the document to be scanned face down from the document glass or face up in the ADF There may not be enough available memory to hold the document you want to scan Try the Prescan function to see if...

Page 147: ...if your application has special print option such as oraw If oraw is specified in the command line parameter then remove it to print properly For Gimp front end select print Setup printer and edit command line parameter in the command item The printer does not appear on the scanners list Check if your printer is attached to your computer Make sure that it is connected properly via the USB port and...

Page 148: ...driver locks MFP port while printing the abrupt termination of the driver keeps the port locked and therefore unavailable for subsequent print jobs If this situation occurred try to release the MFP port Condition Suggested solutions The printer does not print a document from Acrobat Reader Change the Print Method option to Print as Image when you print from Acrobat Reader The document has printed ...

Reviews: