1
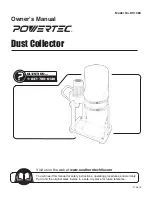
50-766 Dust Canister
Part No. DPEC004410 Dated: 03-21-2017
50-766 DUST CANISTER
(FITS 50-767 T2 DUST COLLECTOR)
Delta Power Equipment Corporation • 2651 New Cut Road, Spartanburg, SC 29303 • 1-800-223-7278
www.DeltaMachinery.com • Copyright © 2016 DELTA®
IF YOU HAVE ANY QUESTIONS OR COMMENTS
ABOUT THIS OR ANY DELTA® POWER EQUIPMENT
CORPORATION ACCESSORY, CALL US TOLL FREE
AT 1-800-223-7278.
To reduce the risk of injury, read the
tool instruction manual before using
any accessory. Failure to heed these warnings may
result in personal injury and serious damage to the
tool and the accessory. When servicing this tool, use
only identical replacement parts.
To reduce the risk of injury, turn unit
off and disconnect it from power
source before installing and removing accessories,
before adjusting or when making repairs. An
accidental start-up can cause injury.
Always
wear
certified
safety
equipment: ANSI Z87.1 eye protection
(CAN/CSA Z94.3) with side shields.
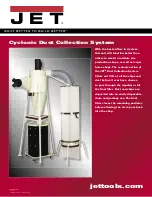
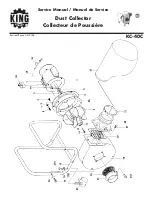
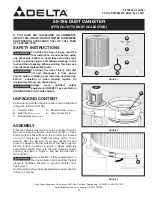
After unpacking carton check for parts contents illustrated
in Figure1. (Service Part No.)
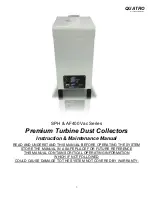
Place the handle crank (D) on top of the canister filter (A).
Be sure to align the handle crank (D) and M6 x 16 hex
bolt (E) with the flat surface on the canister rod, located
on top of canister (A). Tighten securely with a 10mm
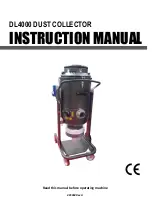
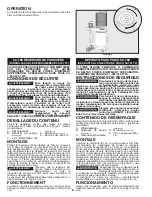
wrench. Peel the backing off air seal gasket (C) and
press the gasket onto the outside of the dust collector
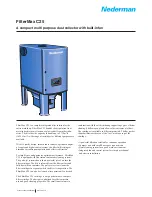
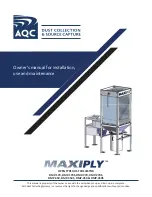
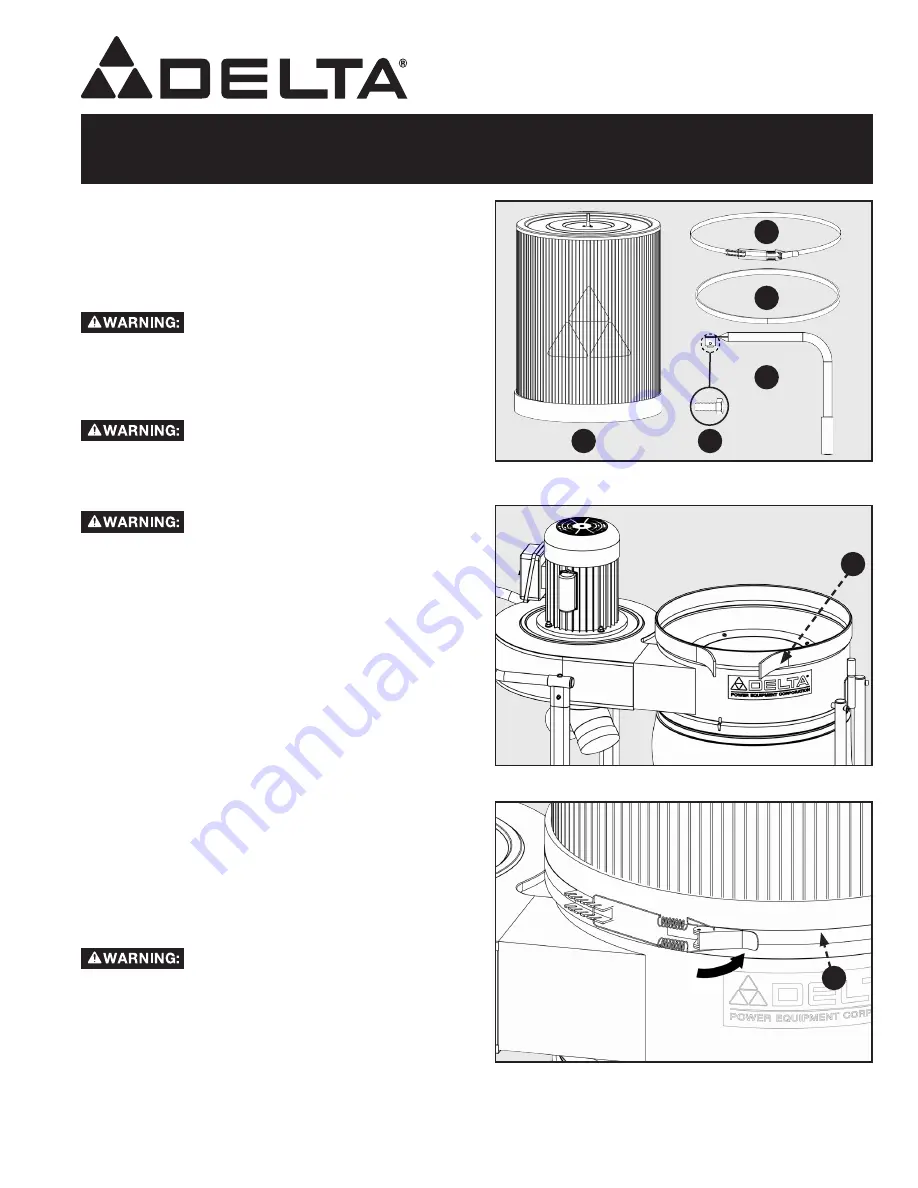
blower housing, as shown in Figure 2. Gently place the
assembled canister filter onto the dust collector blower
housing, as shown in Figure 3, and use the belt clamp
(B) to tighten.
Be sure canister is fully seated down on
the dust collector drum and that the belt
clamp is tightened securely to prevent canister from
tipping over.
Dust canister is shown fully assembled to a dust collector
in Figure 4 and 4a.
A. Canister Filter
B. Belt Clamp
(DPEC004473)
C. Air Seal Gasket
(DPEC004474)
D. Handle Crank
(DPEC004472)
E. M6 x 16 Hex Bolt
SAFETY INSTRUCTIONS
UNPACKING CONTENT
ASSEMBLY
FIGURE 1
FIGURE 2
FIGURE 3
A
B
C
D
E
C
B