
IMPORTANT SAFETY INFORMATION:
Please take time to read and understand all of the steps needed to finish the assemly before installing the
unit. D2G is not responsible for any personal injury or product damage due to mishandling, incorrect
mounting, incorrect assembly or incorrect use of this product.
2 people are needed for assembly. 3 people are recommended.
if you have any questions regarding our products, please contact D2G customer service.
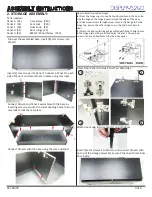
Phillips Screwdriver
Rubber Mallet
T20 Torx Screwdriver
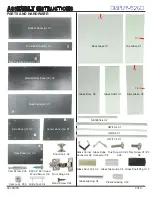
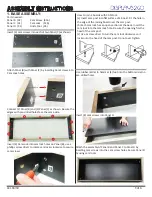
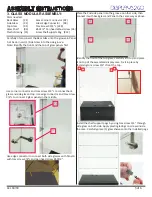
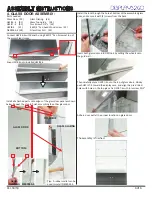
ASSEMBLY INSTRUCTIONS
HALF VISION WALL CASE - FRCHVWBK
1 of 6
Ver. 04/18
TOOLS NEEDED
: