background image

WATER DISPENSER

Instruction Manual

Model: DO-1662S-White 

The diagram above is just for reference. Please take the

appearance of the actual product as the standard. 

Please read the manual carefully before operating

your water dispenser. Retain it for future reference

Summary of Contents for DO-1662S-White

Page 1: ...nual Model DO 1662S White The diagram above is just for reference Please take the appearance of the actual product as the standard Please read the manual carefully before operating your water dispenser Retain it for future reference ...

Page 2: ...gent or similarly qualified persons in order to avoid a hazard 4 This appliance is intended to be used in household and similar applications such as staff kitchen areas in shops offices and other working environments farm houses and by clients in hotels motels and other residential type environments bed and breakfast type environments catering and similar non retail applications 5 The appliance mu...

Page 3: ...3 4 5 6 7 8 9 10 11 12 13 14 15 16 PART NAME Bottle supporter No PART NAME Top cover Heating pilot lamp Power pilot lamp Cooling pilot lamp spout Water collector Heating switch Cooling switch Power supply cord Outlet of hot water Outlet of cold water Condenser Button of cold water Button of hot water Button of normal water ...

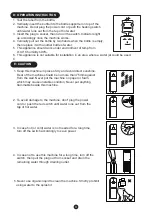
Page 4: ... then pull the plug out from socket and drain the remaining water through draining outlet 5 Never use organic liquid to clean the machine Strictly prohibit using water to the splash it 1 Tear the label from the bottle 2 Vertically insert the bottle into the bottle supporter on top of the machine Do not plug the power cord or push the heating switch until water runs out from the tap of hot water 3 ...

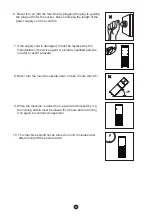
Page 5: ...by the manufacturer its service agent or similarly qualified persons in order to avoid a hazard 8 Never turn the machine upside down or lean it more than 45 9 When the machine is under the ice point and blocked by ice the cooling switch must be closed for 4 hours before turning it on again to continue its operation 10 This machine should not be turned on until 3 minutes later after turning off the...

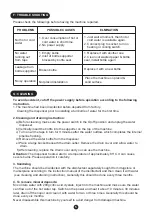
Page 6: ...er dispenser b Vertically insert the bottle into the supporter on the top of the machine c Turn on all the taps in turn for 3 minutes after the water outflow which completes the internal pipeline flushing d Removed the water bottle from the dispenser e Place a large bucket beneath the drain outlet Remove the drain cover and allow water to drain f After cleaning replace the drain cover and you can ...

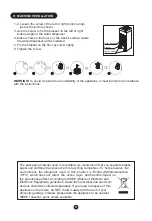
Page 7: ...you need to dispose of this appliance in the future do NOT throw it away with the rest of your domestic garbage Instead please take the appliance to he nearest WEEE collection point where available WARNING To avoid a hazard due to instability of the appliance it must be fixed in accordance with the instructions Water dispenser Bracket The hole for tighten screw 1 2 Loosen the screw of the left or ...

Page 8: ...The product is subject to change without notice Please keep this manual properly ...

Reviews: