Laptop System Setup Guide
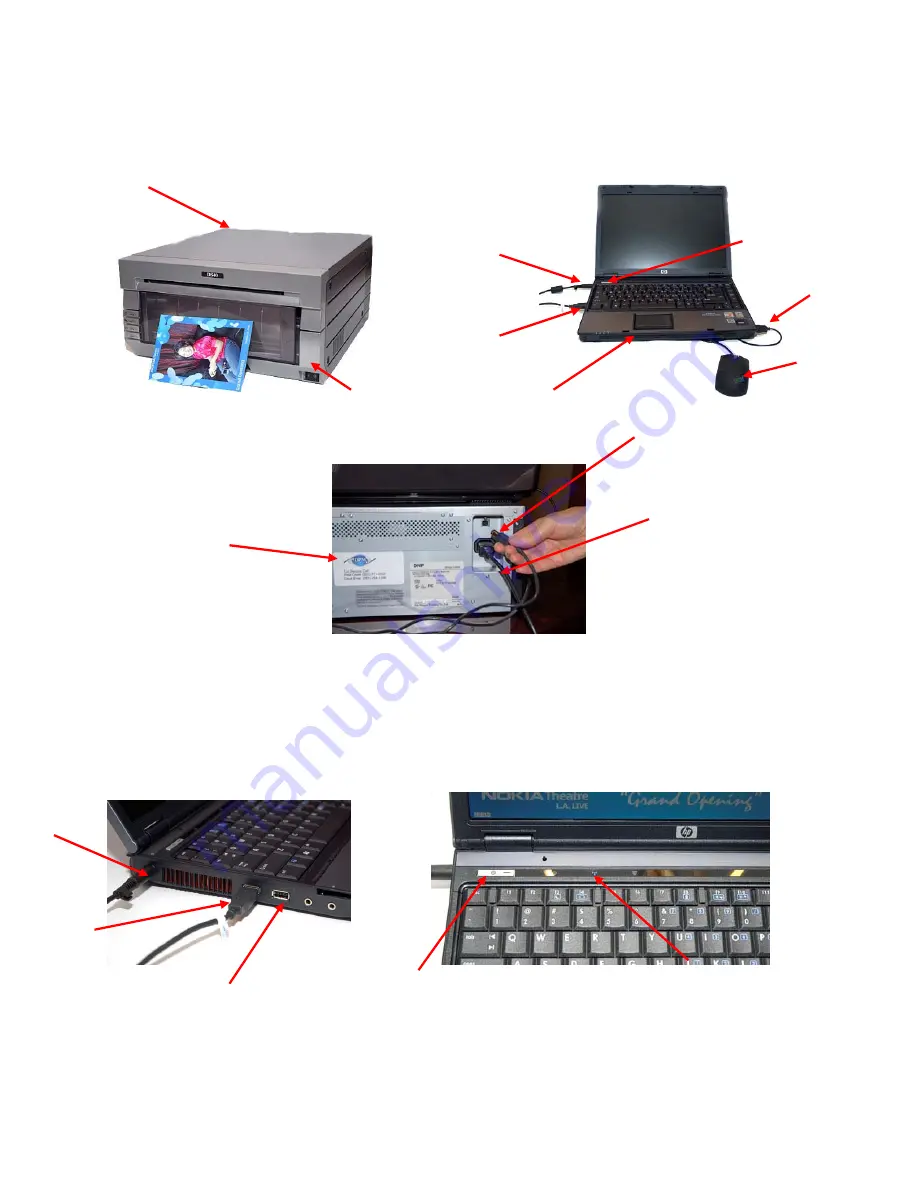
Imaging System: Laptop Computer with DS40 Printer
DS40 Printer
On/Off Button
Power cord input
USB Printer Port
Mouse
Touchpad
USB mouse port
DS40 Power and USB Connection
USB Port - printer to
laptop connection
DPMS Tech
Support Nos.
Power from
Power strip
Remove Printer from the travel case and place on level surface with adequate space for ventilation on each
side (at least 2 inches). Plug the power cord into the provided power strip and the other end into the back of
the DS40. Turn on the printer switch (front bottom right) and setup printer with paper and ribbon according
to the instructions provided. Connect the USB cable (small end) into the printer. Connect the other end into
the laptop USB port on the left side.
Connect the laptop power cord to the back right side of the laptop. If you
prefer to use the mouse rather than the touchpad, connect the mouse USB cable to the right side as shown.
Please make sure the Blue Light is on in the front to indicate that Bluetooth is enabled!
Laptop
power cord
USB Port
Printer 1
On/Off
button
Blue Light ON (Bluetooth)
2
nd
USB Port for 2
nd
printer
–
MPORTANT to note that “French Fries” can cause jams if allowed to stack up.
-NEVER leave paper, ribbon or French fries in the printer when it is to be moved!
Summary of Contents for DS40
Page 2: ......


