background image


DT 250 USB 

DJ record player  

with USB port 


Operating manual 

DT 250 USB V2-GB_1903 

Summary of Contents for DT 250 USB

Page 1: ...DT 250 USB DJ record player with USB port Operating manual DT 250 USB V2 GB_1903 ...

Page 2: ...s of the record player All brand and product names are trademarks or registered trademarks of their respective manufacturer Layout features of this operating manual Various items in the operating manual are provided with set layout features This ensures you can easily determine whether you are dealing with normal text lists è steps to be carried out information on hearing loss caused by loud music...

Page 3: ...over 14 Adjustable feet 14 Connecting the record player 15 How to set the PHONO LINE switch 16 Connection to the amplifier 16 Connection to the computer 16 Mains connection 16 Removing attaching the stylus protection cap 16 Playing a record 17 Procedure 17 Interrupting playback 17 Playing back a 45 rpm record with large centre hole 18 Speed fine adjustment PITCH ADJ 18 USB port 19 System requireme...

Page 4: ...esult in damage to property or even personal injury The manufacturer accepts no liability whatsoever for loss or damage arising from use of the unit in a manner other than intended Before using the unit for the first time please carefully read through the safety instructions and installation instructions Only by doing so will you be able to use all functions safely and reliably Keep the instructio...

Page 5: ...ugging the mains plug from the socket always pull on the mains plug never on the cable In order to avoid fire hazards and the risk of electric shock do not expose the unit to rain or moisture Do not touch the mains plug with wet hands risk of electric shock In the event of malfunctions or smoke and odour coming from the housing remove the mains plug from the socket immediately Before a thunderstor...

Page 6: ...ply Do not listen to loud music Doing so can cause lasting damage to your hearing This unit is not intended for use by persons including children with limited physical sensory or mental capabilities or who lack the necessary experience and or knowledge unless they are supervised by a person responsible for their safety or have been instructed by such a person on how to use the unit Children are no...

Page 7: ...ht and excessively dusty places You should only operate the unit when it is positioned horizontally Do not place any heavy objects on the unit or only use records on the turntable Not to be used in the open air Please note that the unit feet may under certain circumstances leave coloured marks on certain furniture surfaces Place something between the item of furniture and the unit to protect the s...

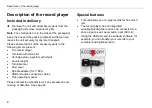
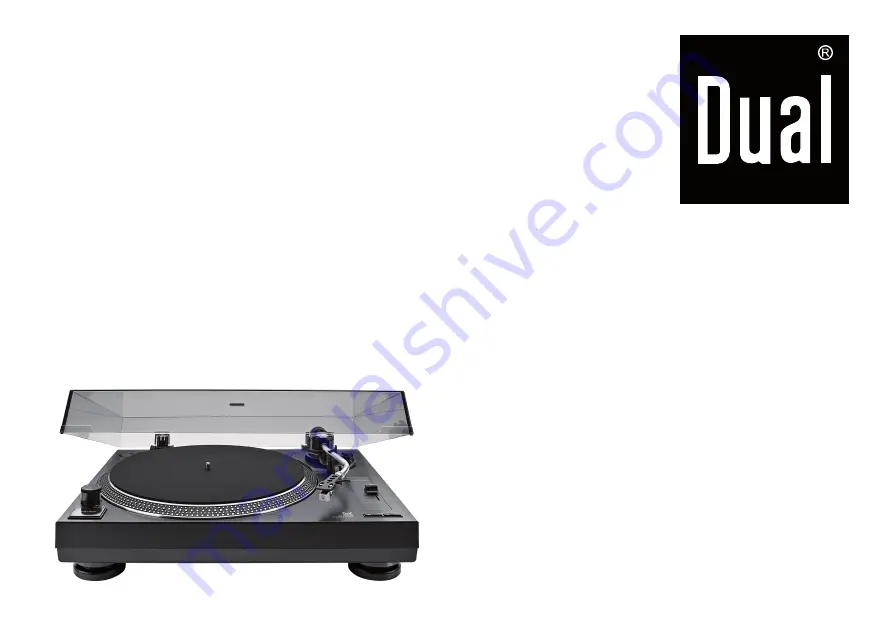
Page 8: ...t The record player Turntable with drive belt Cartridge pick up system with stylus Counterweight Turntable mat Dust cover Spindle adapter for 7 EPs USB and audio connection cables This operating manual Please contact the manufacturer if any accessories are missing or defective See page 24 Special features This unit allows you to play records for 33 and 45 rpm The record player has an integrated eq...

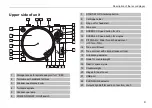
Page 9: ...op button 8 Cartridge holder 9 Ring nut for headshell 10 Tone arm 11 SPEED 33 Speed button for LPs 12 SPEED 45 Speed button for singles 13 PITCH ADJ Slider for pitch adjustment 10 to 10 14 Tone arm lift lever 15 Tone arm rest with clip as transport lock 16 Anti skating adjuster 17 Scale for counterweight 18 Rest for spare stylus 19 Counterweight 20 Hinges for dust cover 21 USB port 22 PHONO LINE s...

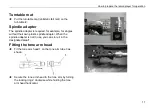
Page 10: ...und they produce to minimise vibrations Belt and turntable Turntable è Carefully set the turntable onto the turntable spindle 4 The drive belt A is delivered already seated on the belt contact surface of the turntable 2 The belt is equipped with a clip B with which the belt is laid onto the drive axle C of the motor pulley è Set the turntable onto the axle è Turn the turntable until the cut out st...

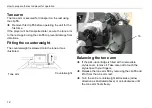
Page 11: ... required for example for singles without their own plastic spindle adapter When the spindle adapter is not in use you can store it in the designated area 1 Fitting the tone arm head è Fit the tone arm head 1 on the tone arm tube 3 as shown è Secure the tone arm head to the tone arm by turning the locking ring 2 clockwise while holding the tone arm head horizontal ...

Page 12: ...ge from vibrations Fitting the counterweight The counterweight is screwed onto the tone arm as illustrated Balancing the tone arm è If the pick up cartridge is fitted with a removable stylus cover remove it Take care not to touch the stylus tip with your fingers è Release the tone arm 10 by removing the clip 15 and lift it from the tone arm rest è Turn the entire counterweight A clockwise arrow di...

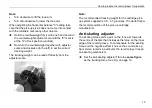
Page 13: ...left to set the correct tracking weight The tracking weight can be read off directly from the adjuster scale Note The recommended tracking weight for the cartridge pick up system supplied is 3 0 3 5 grammes If in doubt follow the recommendation of the pick up cartridge manufacturer Anti skating adjuster The skating force exerts a pull on the tone arm towards the centre of the disc that increases t...

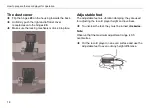
Page 14: ... Make sure the locking mechanism clicks into place Adjustable feet The adjustable feet are vibration damping they are used for adjusting the record player height and levelness è To unscrew the feet they must be turned clockwise Note Observe that the maximum adjustment range is 0 5 centimetres è Put the record player on an even surface and use the adjustable feet to even out any height difference ...

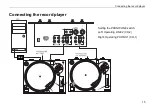
Page 15: ...Connecting the record player 15 Connecting the record player Setting the PHONO LINE switch Left Operating LINE 2 CH 2 Right Operating PHONO 1 CH 1 USB ...

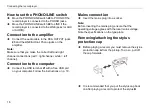
Page 16: ...nnel connections red right channel white left channel Connection to the computer è Connect the USB terminal 21 with a free USB port on your computer Follow the instructions on p 19 Mains connection è Insert the mains plug into a socket Note Before inserting the mains plug ensure that the operating voltage agrees with the local mains voltage Note the specifications on the type plate Removing attach...

Page 17: ...button 7 The turntable 2 starts to turn è Lift the lift lever 14 è Swing the tone arm 10 over the desired groove è Place the lift lever 14 downwards The tone arm lowers onto the record slowly and playback begins è Place the lift lever 14 upwards and place the tone arm back onto the tone arm rest after playback is finished Secure it with the clip è Press the start stop button 7 è Put the On Off swi...

Page 18: ...upwards to reduce the speed or downwards to increase the speed The numbers on the scale indicate approximate percentage figures for the speed control There are 4 different dot matrices on the turntable The top two rows are for 50 Hz the usual mains frequency in Germany the bottom two rows are for 60 Hz è If the speed is increased with the pitch controller the lines run to the left è The lines run ...

Page 19: ...e for digitalising your music Note The Audacity software is a free open source application distributed under the GNU General Public Licence GPL Please check their website to see if an update is available Newer versions or updates are available from http audacity sourceforge net as needed You can also use any other PC audio recording software Note Read the instructions for the Sequenzer software be...

Page 20: ...aning the stylus and the record Always clean the stylus and record before playback to prevent premature wear è Use a cleaning brush to wipe from back to front over the stylus è To clean a record use a record cloth to wipe lightly and diagonally over the record Replacing the stylus The stylus is naturally exposed to wear by the playback process Therefore we recommend regular inspection which for di...

Page 21: ...of the pickup system è The connections of most systems are colour coded Connect each connection wire to the connecting pin of the same colour White L left channel positive pole Blue L left channel negative pole Red R right channel positive pole Green R right channel negative pole è Fasten the pickup system to the tone arm head using the screws provided Storage Store the unit in a dry location prot...

Page 22: ... of the tone arm may be too low Adjust the stylus pressure The stylus may be defective If necessary change the stylus Check the anti skating and readjust it if necessary Symptom Possible cause remedy Poor tone quality loud static noise sound dropouts etc The stylus is dirty or worn Clean the stylus with a brush or replace it The record is dirty or dusty Clean the record with a record cleaner The m...

Page 23: ...25 WRMS JIS WTD at 3 kHz Stylus tip Magnetic stylus AT 3600 Speeds 331 3 45 rpm Frequency range 20 Hz 20 kHz 1 3 dB at 1 kHz Phono output level 1 5 3 6 mV at 1 kHz 5 cm s Signal noise ratio SNR 50 dB Other connections USB 1 1 or higher version We reserve the right to make technical modifications and correct errors The dimensions are approximate values Directives and standards This product conforms...

Page 24: ...n be regained Enquire at your city or municipal administration about possibilities for disposing of the unit properly and in an environmentally sound manner Risk of fatal injury Pull out the mains plug of worn out units Cut through the mains cable and remove it with the plug This unit is labelled according to 2012 19 EU the Waste Electrical and Electronic Equipment Directive WEEE This product must...

Reviews: