background image


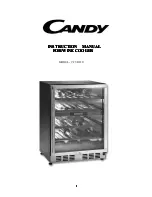
WINE CABINET INSTRUCTION MANUAL 

2017.V.8. 

Model:


DX-7.20BK/DP


DX-7.20SSK/DP


DAU-17.57DB


DAU-17.57DSS


DAU-20.58B


DAU-20.58SS


DX-53.130DBK/DP


DX-53.130SDSK/DP


DAB-26.60B.TI 

DAB-28.65B


DAB-28.65SS


DAB-36.80DB


DAB-36.80DSS


DX-57.146DBK


DX-57.146DSK


DAB-89.215DB


DAB-89.215DSS


NEW!    DAB-26.60B.TO   PUSH-AND-OPEN DOOR FUNCTION 


DOOR OPENING MECHANISM   


The  push-and-open  door  function  is  activated  when  the  unit  is  powered.  To  open  the  door,  push  the  door  slightly 
inwards on the top center position and release again. The door will be opened approx. 5~7cm by the push rod. Then 
the door can be fully open manually.  

 
NOTE:


Do not block the door or hold on it while it is opening. If the door is blocked or held during opening, the door opening 
mechanism and the door will be damaged. The loud and repeated cracking noises will be heard. 
Do not push the push rod in or hold on to it during closing. If the push rod is blocked during closing, it will no longer 
be able to reach its initial position. In the initial position, the push rod is flush with the front of control panel. In order 
to set the push rod back in its initial position, disconnect the appliance from the mains, wait for approx. 10 seconds 
and plug it back in again. The push rod will return to its initial position.  


Summary of Contents for DAB-26.60B.TI

Page 1: ...ned approx 5 7cm by the push rod Then the door can be fully open manually NOTE Do not block the door or hold on it while it is opening If the door is blocked or held during opening the door opening mechanism and the door will be damaged The loud and repeated cracking noises will be heard Do not push the push rod in or hold on to it during closing If the push rod is blocked during closing it will n...

Page 2: ... ignition Do not operate the appliance in the presence of explosive and or flammable fumes Do not place the appliance or any of its part near an open flame cooking or other heating appliance Do not operate the appliance with a damaged cord or plug if the product malfunctions or if it is dropped or damaged in any manner If the supply cord is damaged it must be replaced by the manufacturer or an autho...

Page 3: ... result in back or other injury Never clean appliance parts with flammable fluids These fumes can create a fire hazard or explosion And do not store or use gasoline or other flammable vapors and liquids in the vicinity of this or any other appliance The fumes can create a fire hazard or explosion Do not connect or disconnect the electric plug when your hands are wet It is recommended that a separa...

Page 4: ...helves allow for maximum convenience and flexibility to accommodate various size bottles except DX 7 20 models Security lock system with keys for particular items only Passive humidity control system Humidity Box Active charcoal air filter for particular items only NOTE Features and specifications are subject to change without notice INSTALLATION BEFORE USING YOUR APPLIANCE Remove all exterior and...

Page 5: ...oper functioning of the appliance air vents should never be blocked or covered BUILT IN CABINET INSTRUCTIONS Make sure your installation does not block the front ventilation grille And be sure the door will open and close properly in the chosen location YOU CAN FIND THE DETAILED INSTALLATION DRAWING IN THE ATTACHMENT ELECTRICAL CONNECTION WARNING Improper use of the grounded plug can result in the...

Page 6: ...fter removing the screws Fig 2 3 Gently pull down to remove the glass door from the right top hinge and place it on a padded surface to avoid the risk of damage Then remove the right top hinge 9 Fig 4 4 Unscrew and transfer hinge pin 7 and or door stopper 8of the bottom hinge to the opposite side Fig 3 5 Pop out the cover caps on the left side of cabinet and use them to cover the screw holes on th...

Page 7: ...the opposite designated position or unscrew and transfer the hinge pin 7a of bottom hinge to the opposite designated position Fig 5 3 6 Unscrew and transfer the door adapter 5 and lock catch 4 to the top designated position of glass door Fig 2 7 Rotate the door 180 and relocate the glass door to the designated position Then screw the bottom hinge on the left designated position and tighten it Fig ...

Page 8: ...their internal temperature if the ambient temperature where the unit is located is lower than the set temperature USE AND CONTROL SINGLE ZONE The Controls of Your Unit POWER To turn the appliance on off press and hold the key for 5 seconds until themperature display lights up or goes out NOTE Pressing the key once can switch off the audible alarm when the alarm is on LIGHT Used to turn the inner l...

Page 9: ...perature zone and is for RIGHT temperature zone Indicator Light The indicator light is located at the right lower corner of the display The indicator light will be on when the multi key function is selected To perform the multi key function press and hold the first key then press the rest key for at least 5 seconds and then release all the keys ºF ºC Selector Select the temperature display setting...

Page 10: ... to Fahrenheit press and hold the LIGHT key for 5 seconds Setting the Temperature Control The unit has three temperature zones The temperature of all zones can be set separately The temperature settings of UPPER temperature zone are adjustable with the range 11º to 22ºC 52º 72ºF The preset temperature at the factory is 18ºC 65ºF The temperature settings of MIDDLE temperature zone are adjustable wi...

Page 11: ...WARNING Do not pull out more than one loaded shelf at a time as this may cause the unit to tilt forward Some shelves are designed to store more than 1 layer of bottles Such shelves are not allowed to slide if more than 1 layer of bottles loaded on them WARNING Do not try to slide the shelves outwards beyond the fixed position to prevent the bottles from falling WARNING To prevent damaging the door...

Page 12: ...from time to time Gurgling sound caused by the refrigerant flowing through the appliance s coils Humming noise made by the motor compressor This noise can get louder for brief periods when the motor is switching on Cracking popping sounds resulting from the materials contraction and expansion due to temperature variations Fan operating sound to circulate the air within the wine cabinet Unusual noi...

Page 13: ...tains the Owner s Manual Insert the key into the lock push in and turn it counterclockwise to unlock the door To lock the door do the reverse operation making sure metal pin is engaged completely Remove the key and place it in a secure place for safekeeping CLEANING YOUR APPLIANCE Turn off the power unplug the appliance and remove all items including shelves and rack Wash the inside surfaces with ...

Page 14: ...ill the appliance to allow air to circulate TROUBLESHOOTING GUIDE ALL MODELS PROBLEM POSSIBLE CAUSE REMEDY Appliance does not operate Appliance is not connected to a power supply The appliance is turned off The circuit breaker tripped or a blown fuse Connect the appliance Switch on the appliance Switch on circuit breaker or replace fuse Appliance is not cold enough The temperature is not set corre...

Page 15: ...the temperature that has been set This could be due to The appliance door being opened too often The ventilation opening being covered or too dusty A lengthy interruption to the power supply A large amount of bottles has been added to the unit If yes close the door Do not open the door more often than necessary Clear the obstructions and clean the dust Leave the appliance to work for a while until...

Reviews: