background image

52Xi

52Xi-75

Service Instructions

Summary of Contents for 52 i Series

Page 1: ...52Xi 52Xi 75 Service Instructions ...

Page 2: ... GmbH and protected by copyright Any reuse of these contents including extracts is prohibited without the prior written approval of Dürkopp Adler GmbH Copyright Dürkopp Adler GmbH 2021 IMPORTANT READ CAREFULLY BEFORE USE KEEP FOR FUTURE REFERENCE ...

Page 3: ... setting of zigzag stitch gear 19 4 2 Straight stitch alignment 20 4 3 Zigzag stitch width 21 4 4 Needle stab position setting in feeding direction 22 4 5 Lateral setting of needle stab position 23 4 6 Lateral setting of central straight stitch position 24 4 7 Lateral setting of straight stitches on throat plate needle hole edges arresting of zigzag stitch setting mechanism 25 5 Form stitch mechan...

Page 4: ...0 2 Distance from puller to needle 53 10 3 Puller lifting 54 10 4 Toothed belt tensioning 56 10 5 Puller pressure 57 10 6 Feeding wheel replacement 58 10 7 Setting of cam torsion spring pressure on step length setting wheel screw 60 10 8 Disk brake pressure setting 61 11 Electronic control and sewing machine drive 62 12 Maintenance 65 12 1 Cleaning 66 12 2 Lubricating 68 12 2 1 Lubricating the mac...

Page 5: ...ical training for performing maintenance or repairing malfunctions With regard to minimum qualification and other requirements to be met by personnel please also follow the chapter Safety p 7 1 2 Representation conventions symbols and characters Various information in these instructions is represented or highlighted by the following characters in order to facilitate easy and quick understanding Pr...

Page 6: ...ep Information Additional information e g on alternative operating options Order Specifies the work to be performed before or after an adjustment References Reference to another section in these instructions Safety Important warnings for the user of the machine are specifically marked Since safety is of particular importance hazard symbols levels of danger and their signal words are described sepa...

Page 7: ...le standards and regulations Dürkopp Adler cannot be held liable for any damage resulting from Breakage and transport damages Failure to observe these instructions Improper use Unauthorized modifications to the machine Use of untrained personnel Use of unapproved parts Transport Dürkopp Adler cannot be held liable for breakage and transport damages Inspect the delivery immediately upon receiving i...

Page 8: ...About these instructions 6 Service Instructions 52Xi 52Xi 75 00 0 11 2021 ...

Page 9: ... machine Only use original parts from the manufacturer Transport Use a lifting carriage or stacker to transport the machine Raise the machine max 20 mm and secure it to prevent it from slipping off Setup The connecting cable must have a power plug approved in the relevant country The power plug may only be assembled to the power cable by qualified specialists Obligations of the operator Follow the...

Page 10: ...mbols used in warnings Warnings in the text are distinguished by color bars The color scheme is based on the severity of the danger Signal words indicate the severity of the danger Signal words Signal words and the hazard they describe Symbols The following symbols indicate the type of danger to personnel Signal word Meaning DANGER with hazard symbol If ignored fatal or serious injury will result ...

Page 11: ...even fatal injury if ignored This is what a warning looks like for a hazard that could result in moderate or minor injury if the warning is ignored Puncture Crushing Environmental damage Symbol Type of danger DANGER Type and source of danger Consequences of non compliance Measures for avoiding the danger WARNING Type and source of danger Consequences of non compliance Measures for avoiding the dan...

Page 12: ...in environmental damage if ignored This is what a warning looks like for a hazard that could result in property damage if ignored CAUTION Type and source of danger Consequences of non compliance Measures for avoiding the danger NOTICE Type and source of danger Consequences of non compliance Measures for avoiding the danger ...

Page 13: ...chine such that the function of moving parts is not hampered To lay the cable guide 1 Lay any excess cable neatly in proper cable snakes 2 Bind together the cable loops with cable ties Important Tie loops wherever possible to fixed parts The cables must be secured firmly 3 Cut off any overlapping cable ties NOTICE Property damage may occur Risk of machine damage from incorrect order It is essentia...

Page 14: ... only the cover that needs to be removed at that particular time 3 3 1 Access to the underside of the machine Cover In order to access the components on the underside of the machine you must first swivel up the machine head Pic 1 Access to the underside of the machine WARNING Risk of injury from moving parts Crushing possible Move the machine into the service position or switch the machine off bef...

Page 15: ... as far as it will go Erecting the machine head 1 Erect the machine head 3 3 2 Removing and placing the arm cover Pic 2 Removing and placing the arm cover Removing the arm cover 1 Loosen the screws 2 2 Remove the arm cover 1 Placing the arm cover 1 Place the arm cover 1 2 Tighten the screws 2 1 Arm cover 2 Screws ...

Page 16: ... 11 2021 3 3 3 Removing and placing the head cover Pic 3 Removing and placing the head cover Removing the head cover 1 Loosen the screws 2 2 Remove the head cover 1 Placing the head cover 1 Place the head cover 1 2 Tighten the screws 2 1 Head cover 2 Screws ...

Page 17: ...n the screws 2 2 Remove the throat plate 1 Assembling the throat plate 1 Insert the throat plate 1 2 Tighten screws 2 3 3 5 Disassembling and assembling the slide plate Pic 5 Disassembling and assembling the slide plate Disassembling the slide plate 1 Loosen screws 2 2 Remove the slide plate 1 Montáž zásuvné desky 1 Insert the slide plate 1 2 Tighten screws 2 1 Throat plate 2 Screws 1 Slide plate ...

Page 18: ...nsert the feed dog 1 2 Tighten the screws 2 Important Check the feed dog settings p 33 3 4 Flats on shafts Pic 7 Flats on shafts Some shafts have flat surfaces at the points where the components are screwed on This stabilizes the connection and makes setting easier The first screw in the direction of rotation is always screwed on to a flat surface Important Always ensure that the screws are comple...

Page 19: ...t crank 1 blocking arm shaft Pic 9 Locking the machine in place 2 Locking the machine in place 1 Remove the plug from the locking opening 4 2 Turn the handwheel until the arresting groove 2 is in front of the lock ing opening 4 3 Insert the locking pin 3 with end ø 5 mm into arresting groove 2 Removing the lock 1 Pull the locking pin 3 out from arresting groove 2 2 Insert the plug into the locking...

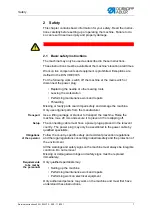
Page 20: ...Working basis 18 Service Instructions 52Xi 52Xi 75 00 0 11 2021 ...

Page 21: ...10 Tooth clearance setting of zigzag stitch gear 1 Dismantle the machine arm cover p 13 2 Loosen screw 1 3 Turn the eccentric bolt 2 until the gear fitted on it strikes the gear 3 With regard of the gear runout caused by manufacturing inaccuracy turn the handwheel by 1 4 revolution and set the clearance again Repeat this 8 times 2 revolutions of the main shaft until the eccentric bolt 2 position w...

Page 22: ... Loosen the screw 7 4 Place the stop pin 4 to the stop onto the casing 5 5 Place a piece of paper onto the throat plate and turn the hand wheel there and back until the needle point makes 2 holes in the paper 6 Loosen 3 screws 3 and try to set the casing 5 angle position until the needle when being turned stabs there and back in the same hole in the paper 7 Tighten the screws 3 8 Fix the lever 6 w...

Page 23: ...Zigzag stitch width 1 Set the zero stitch length on the knob 2 Place a piece of paper onto the throat plate 3 Dismantle the cover 4 Loosen the screw 2 5 Try to set the lever 1 in the position corresponding with the required zigzag stitch width 6 Turn the hand wheel there and back until the needle makes 2 holes in the paper Measure their distance 7 Change the lever position 1 until the distance of ...

Page 24: ... as small as possible Pic 13 Needle stab position setting in feeding direction 1 Place the needle in the bottom dead center 2 Loosen the arresting screws 3 4 and the regulating screw 2 3 Adjust the regulating screw 1 so that the proper setting is complied with and arrest it with the screw 3 4 Adjust the regulating screw 2 so that the lost motion play of the needle bar holder in the arrow direction...

Page 25: ...ing should be at the same distance from the throat plate needle hole edges Pic 14 Lateral setting of needle stab position 6 Dismantle the cover 1 and the hole stop 3 from the rear side 7 Loosen both screws 2 8 Set the maximum zigzag stitch width and adjust the positions of the needle lateral motion dead centers as per proper setting 9 Tighten both screws 2 properly 10 Replace the cover 1 and hole ...

Page 26: ...position should be approxi mately in the center of the presser foot or in the middle of the throat plate needle hole center Pic 15 Lateral setting of central straight stitch position 1 Set the zero width of the zigzag stitch with the lever 1 2 Loosen the screws 3 3 Shift the lever 2 until the needle shifts in the lateral direction to the throat plate needle hole center 4 Tighten the screws 3 1 Lev...

Page 27: ...h width of the particular sewing machine type the lever for the position setting of the border stitch must be fixed in the central position Pic 16 Lateral setting of straight stitches 1 Loosen the screw 3 and turn the lever 1 to the position in which the needle will perform no lateral motion when turning the lever 4 2 Locate the stop 2 to the lever 1 and fix it with the screw 3 3 Loosen the screw ...

Page 28: ...en the arresting nut 8 invisible 7 Loosen the screw 7 8 Turn the arresting lever 5 to 1 mm space from the casing 6 9 Tighten the screw 7 Information If the sewing equipment does not allow using the maximum zigzag stitch width screw the regulating screw 11 into the lever 1 and fix it in the central position ...

Page 29: ... clearance of the form stitch gear should be as small as possible No overlap instead of clearance however may arise in any mutual posi tion of the gears Pic 17 Tooth clearance setting of form stitch gear 1 Dismantle the arm cover p 13 2 Loosen 2 screws 3 of the regulating ring 2 3 Loosen 4 screws 4 on the conical worm 1 WARNING Risk of injury from moving parts Crushing possible Switch off the mach...

Page 30: ...ircumference of the conical worm 1 Shift the conical worm 1 to the thread lever mechanism Reduce the tooth clearance Conical worm 1 shifting to the hand wheel Increase the tooth clearance 5 Tighten 4 screws 4 on the conical worm 1 6 Move the regulating ring 2 on touch with the conical worm 1 7 Tighten 2 screws 3 8 Check the toot clearance ...

Page 31: ...from the machine rear side 2 Dismantle the cover of the form stitch width setting mechanism 3 Release the bolt 2 position by tilting the lever 1 in yourself direction 4 Move the bolt 2 in the arrow direction and watch whether the needle is moving laterally If yes dismantle the steering cam loosen the screw 3 and try to turn the eccentric bolt 4 to a different position and test whether the needle i...

Page 32: ... stitch steering cam to needle motion Proper setting When sewing the form stitch the needle should shift in the lateral direction at the time when it is over the sewn material Pic 19 Timing of form stitch steering cam to needle motion 1 Dismantle the arm cover p 13 2 Mount any form stitch cam 1 3 Loosen 4 screws 4 4 Turn the conical worm 2 to the position where the proper setting is complied with ...

Page 33: ...mechanism 1 Loosen the screws 3 2 Set the knob 1 on the zero stitch length 3 Shift the lever 2 in the arrow direction until its fork is in bilateral contact with the screw spherical end on the knob 1 axis 4 Tighten the screws 3 5 Check whether the backtacking lever 4 performs any lost motion in this position WARNING Risk of injury from moving parts Crushing possible Switch off the machine before c...

Page 34: ...itch length is set the connecting rod 3 should perform no motion Pic 21 Zero stitch length 1 Set the stitch length knob on the zero cipher 2 Tilt the machine p 12 3 Loosen the screw 2 4 Shift the sleeve 1 until the position is found where the connecting rod 3 stops moving 5 Tighten the screw 2 1 Sleeve 2 Screw 3 Connecting rod ...

Page 35: ... dog position in throat plate recess and its height 1 Set the stitch length knob on the zero cipher 2 Loosen the screws 5 and 2 Shift the whole mechanism laterally so that the feed dog does not touch the throat plate 3 Shift the feed dog so that the spaces 6 and 7 are the same and tighten the screw 5 4 Loosen the screws 4 turn the eccentric bolt 3 and the lever 1 until the feed dog protrudes from ...

Page 36: ...g of the material should start the feed dog teeth approximately at the throat plate level Pic 23 Timing of feed dog motion eccentric 1 1 Locking the machine in place p 17 2 Set the maximum stitch length on the knob 3 Loosen 2 screws 3 4 Turn the eccentric bolt 2 Mark on the connecting rod 1 coincides with the hole on the eccen tric bolt 2 5 Tighten gradually the 2 screws 3 6 Loosen 2 screws 7 7 Tu...

Page 37: ...Feeding and presser foot Service Instructions 52Xi 52Xi 75 00 0 11 2021 35 Pic 24 Timing of feed dog motion eccentric 2 8 Tighten 2 screws 7 of the pulley 8 7 Screws 8 Pulley ...

Page 38: ...le core should not strike the fixed one Pic 25 Backtacking with solenoid 1 Set the maximum stitch length on the knob 2 Press the backtacking lever down to the stop and hold it in this position 3 Loosen the screw 2 press the lever 1 down to the stop and put it back by approximately 1 mm 4 Tighten the screw 2 5 Test whether its movable core does not strike the fixed one when the solenoid is switched...

Page 39: ...e with the hand lever should be 5 5 mm Pic 26 Manual foot lifting 1 Place to bottom feed dog under the level of the throat plate top surface 2 Place am object of thickness 5 5 mm under the foot 3 Loosen the screw 3 4 Lift the hand lever 1 press the driver 2 down to the lever 1 5 Tighten the screw 3 1 Hand lever 2 Driver 3 Screw ...

Page 40: ... mm if the knee lever is in the initial position Pic 27 Foot lifting with knee lever 1 Lower the presser foot on the throat plate 2 Loosen the screw 1 3 Turn the lever 2 so that there is the prescribed space A 4 Tighten the screw 1 5 Try to adjust the ring 3 position and test how big the foot stroke with the knee lever is Repeat this until the prescribed foot lifting is achieved 1 Screw 2 Lever 3 ...

Page 41: ... the solenoid cover 1 3 Loosen the screw 2 4 Turn the lever 5 with the roller 4 almost on touch with the arm side 5 Tighten the screw 2 6 Remove the solenoid core 3 7 Loosen the screw 6 and try to turn the screw 7 to any position 8 Insert the core 5 back in the solenoid press it down and find out how big the solenoid stroke is Repeat the procedure until the prescribed value is achieved 9 Lock the ...

Page 42: ...nd the hook point is A 0 2 mm Pic 29 Needle bar height needle and hook point clearance 1 Dismount the throat plate p 15 2 Set the needle stab to the left and the hook point onto the needle axis 3 Loosen the needle bar driver screw 3 and shift the needle bar verti cally so that the gook point bottom edge 2 is at the level of the needle eye top edge 4 Tighten the screw 3 5 Loosen two screws 1 and sh...

Page 43: ...er setting The distance between the bobbin case driver and the bobbin case groove bottom should be A 0 7 mm Pic 30 Bobbin case driver 1 Dismount the throat plate p 15 2 Tilt the machine p 12 3 Loosen the screw 1 4 Shift the driver 2 to the distance A 0 7 mm 5 Tighten the screw 1 1 Screw 2 Driver A ...

Page 44: ... a smooth passage of the thread between the bobbin case and the bobbin case lifter C 1 mm Pic 31 Hook lifting 1 Dismount the throat plate p 15 2 Tilt the machine p 12 3 Loosen the screw 4 and shift the case 2 to obtain the space A 0 8 mm and tighten the screw 4 4 Turn the hand wheel until the bobbin case lifter 5 is in the maximum lifting position left position Loosen the screw 3 and turn the bobb...

Page 45: ...0 11 2021 43 5 Tighten the screw 3 6 Loosen two screws 1 try to set the timing of the feeding eccentric and tighten the screws 1 Sew and watch the size of the space C at the moment when the thread is passing through the space Correct the timing so that C 1 mm ...

Page 46: ...nd 3 is in the same height as the thread guide top edge 4 In the initial position the spring 3 should be pre tensioned by 80 90 according to the thread thickness Pic 32 Thread limiter and check spring 1 Set the thread limiter position 1 as shown in the picture and in com pliance with the proper setting 2 Loosen the screw 6 and dismantle the tensioner 5 WARNING Risk of injury from moving parts Crus...

Page 47: ...he spring hits the stop 8 then continue turn approximately 80 90 according to the thread to achieve the prescribed pre tension 5 Tighten the screw 9 6 Mount the tensioner 5 7 Turn the whole tensioner 5 so that the spring end 3 is in the same height as the guide top edge 4 8 Tighten the screw 6 9 Sew several stitch and check the spring proper setting 7 Bolt 8 Stop 9 Screw ...

Page 48: ...Dismantle the arm cover p 13 2 Shift the indented belt 1 with a screwdriver so that two regulating screws 2 are accessible and loosen them 3 Mount the arm cover p 13 4 Switch off the bobbin winder with the lever 5 5 Insertahexagonalkeythroughthehole 4 intotheregulatingscrew 2 and shift theindented belt pulley 3 to the left up to the stop Afterwards shift it by 0 5 mm to the right and tighten the s...

Page 49: ... between knives 1 Tilt the machine p 12 2 Loosen the screw 1 and remove the bolt 2 3 Set a high pressure between the trimming knives with the screw 3 so that the resistance against the knife motion is high within the whole motion path 4 Gradually reduce the knife pressure with the screw 3 until compliance with the proper setting is achieved 5 Mount the bolt 2 back again WARNING Risk of injury from...

Page 50: ...be in horizontal position Pic 36 Trimming lever 1 Tilt the machine p 12 2 Loosen the screw 3 3 Turntheeccentricbolt 4 sothatthelever 2 doesnotrubtheplate 1 however it should be positioned as high as possible 4 Tighten the screw 3 5 Loosen the screw 5 6 Turn the eccentric bolt 6 so that its groove is almost horizontally posi tioned 7 Tighten the screw 5 1 Plate 2 Trimming lever 3 Screw 4 Eccentric ...

Page 51: ... driver 4 touches the casing 5 the knife 2 should be on the plate edge 1 Pic 37 Driver 1 Tilt the machine p 12 2 Loosen the screw 3 3 Shift the trimming knife 2 as per proper setting 4 place the driver 4 on touch with casing 5 5 Tighten the screw 3 1 Plate 2 Trimming knife 3 Screw 4 Driver 5 Casing ...

Page 52: ...3 should be A 0 2 mm Pic 38 Trimming cam 1 Tilt the machine p 12 2 Locking the machine in place p 17 3 Loosen the 2 ring screws 2 4 Loosen the 2 cam screws 1 5 Shift the cam 1 to the roller 3 to the distance A 0 2 mm from the straight face of the cam 1 6 Tighten the 2 ring screws 2 7 Turn the cam 1 by slot 4 to the roller 3 8 Tighten the 2 cam screws 1 1 Cam 2 Ring 3 Roller 4 lot A ...

Page 53: ... 2 The maximum length of the upper puller intermittent feeding is 7 mm The feeding length is to be set by the setting wheel 1 independent of the bot tom feeding The hand lever 2 lifts lowers the puller The press button 4 activates the mode to lift the puller automatically the function will be set on the control panel Pic 39 Puller WARNING Risk of injury Switch off the machine before the Puller set...

Page 54: ...m cover p 13 2 Loosen 2 fastening screws 2 on the eccentric 1 The eccentric 1 should turn on the shaft with little force 3 Turn the hand wheel in the turning direction so that the needle is in front of the upper dead point The feed dog will come up over the throat plate 4 Put a sheet of paper under the presser foot and turn in the turning direction until the machine starts feeding it 5 At that mom...

Page 55: ... and the needle axis is 29 mm Important If the distance is set anew then the upper as well as bottom end position also must be set anew p 54 Pic 41 Distance from puller to needle 1 Loosen the screw 1 2 Turn the frame 2 on the axis The distance between the feeding wheel center and the needle axis must be 29 mm 3 Tighten the screw 1 1 Screw 2 Frame 29 mm ...

Page 56: ...ing on the throat plate the frame 1 must deflect by approximately another 0 5 mm before the hand lever stop reaches its end position If a toothed feeding wheel is used there must be a gap at the bottom end position between the wheel and the throat plate not to damage the throat plate Pic 42 Puller lifting 1 Frame 2 Pin 3 Setting screw 4 Safety nut 5 Pneumatic cylinder 6 Clearance for setting screw...

Page 57: ... parallel with the cylinder 5 axis 2 Set a limit to the cylinder stroke 3 Set the adjusting screw by means of a hexagonal key 2 5 mm according to the correct setting Correction of bottom end position 1 Loosen the safety nut 4 2 Turn the adjusting screw 3 Lifting turn clockwise Lowering turn anti clockwise 3 Tighten the safety nut 4 ...

Page 58: ...he belt can result in an exceeding wear and a faulty function Pic 43 Toothed belt tensioning Upper toothed belt correction 1 Loosen the screw 1 2 Shift the lever 2 Tighten the toothed belt 3 according to the correct setting Bottom toothed belt correction 1 Loosen the screw 5 2 Shift the lever 4 Tighten the toothed belt 6 according to the correct setting 1 Screw 2 Lever 3 Toothed belt 4 Lever 5 Scr...

Page 59: ...he sewn material Important If the pressure was re set then the upper end position must be set anew p 54 Pic 44 Puller pressure 1 Loosen the screw 2 2 Shift the pneumatic cylinder 1 In the arrow direction A the pressure is reduced In the arrow direction B the pressure is increased 3 Tighten the screw 2 1 Pneumatic cylinder 2 Screw A B ...

Page 60: ... then the bottom end position must be set anew p 54 Pic 45 Feeding wheel replacement 1 1 Dismantle the nut 1 Beware of the left handed threading 2 Fix the shaft 3 at the other end with a screwdriver 3 Replace the feeding wheel 2 4 Mount and tighten the nut 1 Pic 46 Feeding wheel replacement 2 1 Nut 2 Feeding wheel 3 Shaft 1 Screw 2 Washer 3 Lever 4 Nut 5 Feeding wheels 6 Shaft ...

Page 61: ...the feeding wheels 5 6 Mount and tighten the nut 4 7 Fit the lever 3 8 Screw in the screw 1 with the washer 2 Pic 47 Feeding wheels Pos Order number Description 1 0933 005725 Rubber coated feeding wheel width 9 mm 2 0933 005737 A Rubber coated feeding wheel width 15 mm 3 0933 005738 A Toothed feeding wheel 44 teeth width 15 mm 4 0933 005737 Toothed feeding wheel 88 teeth width 15 mm 5 0933 005736 ...

Page 62: ...tting ring 8 2 Set the maximum value of 7 mm on the setting wheel 1 3 Insert the hexagonal key 3 mm 6 into the other hole in the turning direction of the setting ring 8 4 Turn the setting ring 8 in the direction of the spring winding and lean it against the rod 7 5 Tighten two setting screws 7 1 Setting wheel 2 Setting wheel screw 3 Cam 4 Torsion spring 5 Rod 6 Hexagonal key 3 mm 7 Setting screws ...

Page 63: ...lue of 17 mm Pic 49 Disk brake pressure setting 1 Loosen two fastening screws 1 of the setting ring 2 2 The setting ring should be able to freely move on the shaft 3 Press the spring 3 with the setting ring 2 to the brake disc 4 to the value of 7 mm 4 Tighten two fastening screws 1 1 Fastening screws 2 Setting ring 3 Spring 4 Brake disc 17 mm ...

Page 64: ...rotection by wearing anti static gloves or wrist wraps that you can connect for grounding on the mass of any un painted metal piece of the machine head or on the switch cabinet Handle the PCBs with utmost caution They are very sensitive towards electrostatic discharges Hold the PCBs only at their edges Put the PCBs after unwrapping or after dismounting with their components upside onto a grounded ...

Page 65: ...ic 50 PCB Description of connectors R1autoselect resistor X11machine interface X12button panel X13NK needle cooling 24V power supply VR backtackingFL foot lifting FA thread trimmingFSPL tread tension FW thread wiperTWA Puller X14light barrier Solenoids and ventils of the socket X13 are always connected against 24V 1 PCB S373 020002 ...

Page 66: ...machine drive 64 Service Instructions 52Xi 52Xi 75 00 0 11 2021 Example of puller connection Power supply for the ventil of pullerlifting is connected to the pins 24V and TWA on the socket X13 Pic 51 Puller connection Puller ventil ...

Page 67: ...ls WARNING Risk of injury from sharp parts Punctures and cutting possible Prior to any maintenance work switch off the machine WARNING Risk of injury from moving parts Crushing possible Prior to any maintenance work switch off the machine Work to be carried out Operating hours 8 40 160 500 Check the bobbins for wear and damage and replace them if necessary Cleaning Removing lint and threads remnan...

Page 68: ...injury from flying particles Flying particles can enter the eyes causing injury Wear safety goggles Hold the compressed air gun so that the particles do not fly close to people Make sure no particles fly into the oil pan NOTICE Property damage from soiling Sawing dust and thread residues can impair the operation of the machine Clean the machine as described NOTICE Property damage from solvent base...

Page 69: ...larly susceptible to soiling Area around the needle 1 Area under the throat plate 2 Hook 3 Knife on the winder for the hook thread 4 1 Remove any dust and thread residues using a compressed air gun or a brush 1 Area around the needle 2 Area under the throat plate 3 Hook 4 Knife on the winder ...

Page 70: ...sk of injury from contact with oil Oil can cause a rash if it comes into contact with skin Avoid skin contact with oil If oil has come into contact with your skin wash the affected areas thoroughly NOTICE Property damage from incorrect oil Incorrect oil types can result in damage to the machine Only use oil that complies with the data in the instructions CAUTION Risk of environmental damage from o...

Page 71: ...cating the machine head Pic 53 Lubricating the machine head Proper setting The oil level must not raise above the MAX marking 2 or drop below the MIN marking 3 1 Fill oil through the oil filler opening 1 up to the MAX marking 2 1 Oil filler opening 2 MAX marking 3 MIN marking ...

Page 72: ...r is evenly sprayed with a thin layer of oil 3 The oil level must not raise above the MAX marking 5 or drop below the MIN marking 6 Pic 54 Hook lubrication 1 Tilt the machine p 12 2 Turn the regulating screw 1 Releasing more oil turn counterclockwise Releasing less oil turn clockwise Fill oil through the oil filler opening 4 up to the MAX marking 5 Important The released amount of oil does not cha...

Page 73: ...enance Service Instructions 52Xi 52Xi 75 00 0 11 2021 71 12 3 Parts list A parts list can be ordered from Dürkopp Adler For more information visit our website www minerva boskovice cz www duerkopp adler com ...

Page 74: ...Maintenance 72 Service Instructions 52Xi 52Xi 75 00 0 11 2021 ...

Page 75: ...t from soiling 6 Cover the control to protect it from soiling 7 Cover the entire machine if possible to protect it from contamination and damage WARNING Risk of injury from a lack of care Serious injuries may occur ONLY clean the machine when it is switched off Allow ONLY trained personnel to disconnect the machine CAUTION Risk of injury from contact with oil Oil can cause a rash if it comes into ...

Page 76: ...Decommissioning 74 Service Instructions 52Xi 52Xi 75 00 0 11 2021 ...

Page 77: ...icable national regulations When disposing of the machine be aware that it consists of a range of different materials steel plastic electronic components etc Follow the national regulations when disposing these materials CAUTION Risk of environmental damage from improper disposal Improper disposal of the machine can result in serious environmental damage ALWAYS comply with the national regulations...

Page 78: ...Disposal 76 Service Instructions 52Xi 52Xi 75 00 0 11 2021 ...

Page 79: ... the thread tensions Thread guiding parts such as the thread tube thread guide or thread take up disk are sharp edged Check the threading path Throat plate hook or spread have been damaged by the needle Have parts reworked by qualified specialists Missing stitches Needle thread and hook thread have not been threaded correctly Check the threading path Needle is blunt or bent Replace the needle Need...

Page 80: ...sewing material the sewing material thickness or the thread used Check the thread tensions Needle thread and hook thread have not been threaded correctly Check the threading path Needle breakage Needle strength is unsuitable for the sewing material or the thread Use the recommended needle strength Error Possible causes Remedial action ...

Page 81: ...e according to use thread needle and sewn material Technical parameters Unit 523i 411001 523i 447001 524i 811001 524i 847001 525i 811001 525i 811201 525i 811202 525i 847001 525i 847201 525i 847202 525i 911001 525i 947001 527i 811001 527i 847001 Zig zag stitch max width mm 6 10 Maximum sewing speed for stitch width 6 mm RPM 5000 4400 according to cams used 3400 Maximum sewing speed for stitch width...

Page 82: ... kg 525i 75 66 Sewing machine cpl weight including stand 78 kg 133 kg 525i 75 140 kg 525i 75 66 Thread length after trimming maximum 20 mm Machine head clear workspace 267 x 117 mm 750 x 117 mm 525i 75 750 x 183 mm 525i 75 66 Machine bed plate dimensions 178 x 476 mm 186 x 960 mm 525i 75 525i 75 66 Rated standby power 12 W Rated power when sewing 3000 rpm 250 W Short term power 1500 VA Machine flo...

Page 83: ......

Page 84: ...any Telefon 49 0 521 925 00 e mail service duerkopp adler com www duerkopp adler com Subject to design changes Part of the machines shown with additional equipment Printed in Czech Republic Dürkopp Adler GmbH Original Instructions S735 000805 EN 00 0 11 2021 ...

Reviews: