background image

 "Tahoe" 

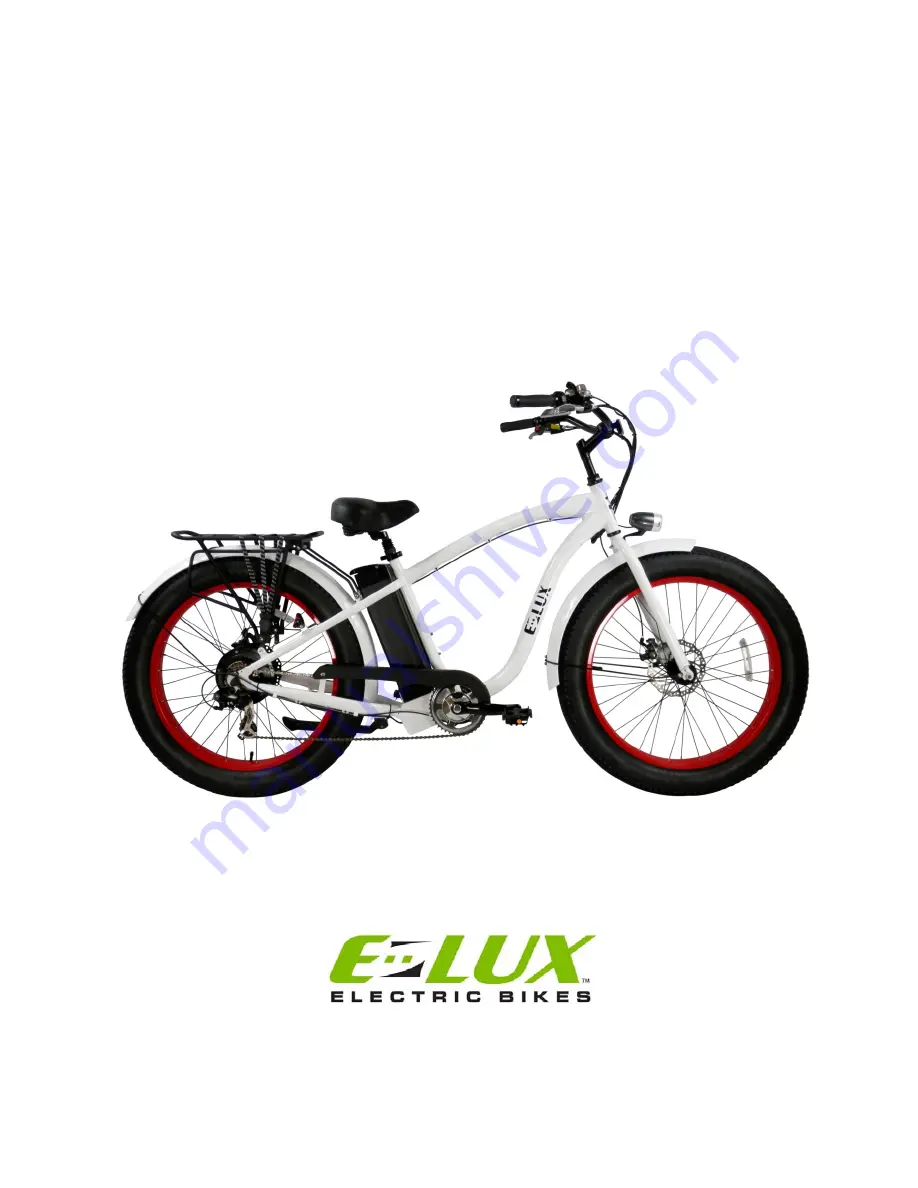
E-Lux Fat Tire Electric Beach Cruiser 

Owner’s Manual 


1760 Monrovia, Ste. A11 

Costa Mesa, CA 92627 

www.EluxBikes.com 


Summary of Contents for Tahoe

Page 1: ...Tahoe E Lux Fat Tire Electric Beach Cruiser Owner s Manual 1760 Monrovia Ste A11 Costa Mesa CA 92627 www EluxBikes com...

Page 2: ...able ride further faster and easier than ever before on a bicycle which equates to Fun Fun and more Fun All while travelling for less than half a cent a mile it s not only good for your wallet but it...

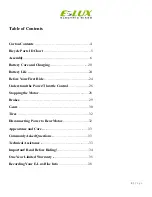
Page 3: ...4 Before Your First Ride 24 Understand the Power Throttle Control 26 Stopping the Motor 28 Brakes 29 Gears 30 Tires 32 Disconnecting Power to Rear Motor 32 Appearance and Care 33 Commonly Asked Questi...

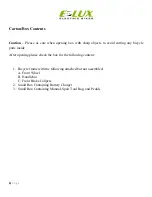
Page 4: ...utting any bicycle parts inside After opening please check the box for the following content 1 Bicycle frame with the following attached but not assembled A Front Wheel B Handlebar C Front Brake Calip...

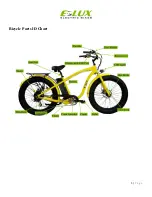
Page 5: ...5 P a g e Bicycle Parts ID Chart...

Page 6: ...n your own then please refer to the directions below Warning When removing packaging and zip ties do not use box cutters or knives as you may damage paint or tires We suggest a pair of scissors 1 Care...

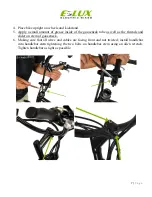
Page 7: ...e of the gooseneck tube as well as the threads and slider on stem of gooseneck 6 Making sure that all wires and cables are facing front and not twisted install handlebar into handlebar stem tightening...

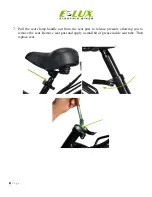
Page 8: ...8 P a g e 7 Pull the seat clamp handle out from the seat post to release pressure allowing you to remove the seat Remove seat post and apply a small bit of grease inside seat tube Then replace seat...

Page 9: ...ike to avoid stripping the threads The following procedure is performed so that when the bike is pedaled it tightens the pedals 9 Apply small amount of grease on pedal threads 10 Right Pedal Facing th...

Page 10: ...remaining pedal on the kickstand side of bike and tighten by turning counter clockwise top of wrench turning towards the front of bike as noted in the picture below Tighten pedal very tight 12 Slide...

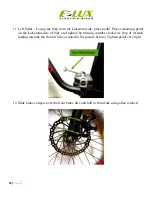
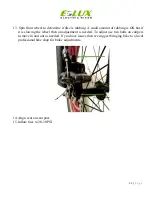
Page 11: ...OK but if it is slowing the wheel then an adjustment is needed To adjust use two bolts on calipers to move in and out as needed If you have issues then we suggest bringing bike to a local professiona...

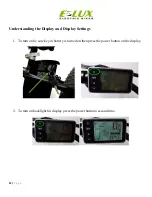
Page 12: ...Understanding the Display and Display Settings 1 To turn on be sure key in battery is turned on then press the power button on the display 2 To turn on backlight for display press the power button a s...

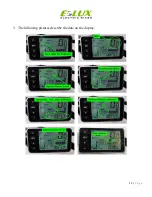
Page 13: ...13 P a g e 3 The following pictures describe the data on the display...

Page 14: ...bike into walk mode The motor will turn on and the bike will move forward at 6 mph until you release the minus button or apply the brakes 5 Briefly pressing the set button will alter the data displaye...

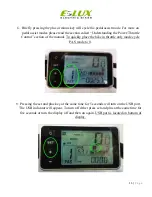
Page 15: ...tle Control section of the manual To quickly place the bike in throttle only mode cycle PAS mode to 0 7 Pressing the set and plus key at the same time for 5 seconds will turn on the USB port The USB i...

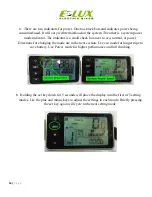
Page 16: ...box next to eco normal or power Directions for changing the mode are in the next section Use eco mode for longer trips to save battery Use Power mode for higher performance and hill climbing 9 Holdin...

Page 17: ...r mode using plus and minus keys 11 Set Mode 1 Allows you to reset the trip odometer by briefly pressing minus key WARNING Holding minus key for 5 seconds will put bike into walk mode and bike will be...

Page 18: ...18 P a g e 12 Set Mode 2 Indicates bike top speed 13 Set Mode 3 Indicates wheel size 14 Set Mode 4 Allows you to change the from MPH to KPH using plus and minus keys...

Page 19: ...or 5 seconds to return to operating mode 16 In operating mode the volt indicator will display 54 volts when the battery is fully charged At 42 volts you will be out of power 17 To turn on headlight pr...

Page 20: ...he following 1 Only use the charger provided with your battery Using a different charger may result in overheating fire or an explosion damaging your battery and everything around it 2 You should rech...

Page 21: ...21 P a g e 3 Battery may be charged while attached to bike or separately The battery may be removed by turning the key to the unlocked position pulling the handle up and lifting the battery...

Page 22: ...22 P a g e 4 To charge the battery plug the charger into the port located on the side of the battery and then plug the charger into the wall...

Page 23: ...It is ok to charge the battery after every ride 8 Never store the battery in a discharged state 9 If you need to store your battery for an extended time charge it fully store it in a cool dry place a...

Page 24: ...d contact E Lux Bikes or your dealer to order a new battery Before Your First Ride There are a few things you will need to know before your first ride Follow these quick steps and you will be on the r...

Page 25: ...or bolts Check that the brakes are operating properly Be sure the tires are at 20 30 psi and have no cracks or other excessive wear before riding 3 Safe Location your new E Lux bike is a powerful mac...

Page 26: ...f the bike is in pedal only mode and operates as a standard bicycle B When the power is turned on the assist level will be at 1 Press the key to set PAS to 0 The bike is now in throttle only mode You...

Page 27: ...eature D When in Pedal Assist Mode the throttle will override the pedal assist speed limit E Caution You E Lux bike is a powerful machine When starting in pedal assist mode with the power level at 5 t...

Page 28: ...as well C While in pedal assist mode stop pedaling and release the throttle or squeeze the brake handle to stop the motor D If you keep pedaling after the brake lever is released the assist will start...

Page 29: ...the front hadlebars Slow down then start your turn 3 Always apply pressure to the front brake grdually and use both front and rear brakes at the same time 4 Occasionally the disc brakes may make a sl...

Page 30: ...ide of the handlebars Lower gear numbers are used for climbing hills and slower speeds Upper gears are used for flatter surfaces and faster speeds Be sure you are pedaling while changing gears To shif...

Page 31: ...hain is on the largest sprocket When the shifter is in the 7th position the sprocket should be on the smallest sprocket Occasionally the shifter gear number and sprocket locations may not match If thi...

Page 32: ...ic motor that is located in the rear hub of the bicycle If removal of the rear tire is necessary you must first disconnect the power cable that runs to the hub This can be done by pulling both ends of...

Page 33: ...ffect the range you can travel such as wind terrain etc On average you can travel at least 20 miles Up to 30 if you help by pedaling and slow down to 15 mph How much does it cost to charge the battery...

Page 34: ...ot intended as a detailed user service repair or maintenance manual Please seek assistance from qualified technician for service repairs or maintenance 6 Your insurance policy may not cover cover acci...

Page 35: ...h herein whether express or implied by operation of law or otherwise including but not limited to any warranties of merchantability or fitness for a particular purpose In no event shall ELUX be liable...

Page 36: ...by ELUX or an authorized agent of ELUX Proof of purchase must be provided To qualify for warranty services a Warranty Product Return Authorization Number WPRAN must be obtained by the original retail...

Page 37: ...do not allow the exclusion or limitation of incidental or consequential damages or warranties so some of the above limitations or exclusions may not apply to you If it is determined by a court of com...

Page 38: ...________________________ Color ___________________________________________ Date of Purchase __________________________________ Dealer s Name ____________________________________ Dealer s Phone _______...

Page 39: ...39 P a g e Notes...

Page 40: ...40 P a g e Notes...

Reviews: