


Proteus 2000 Operation Manual
21
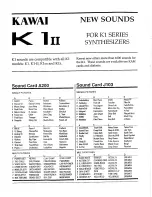
A/E
VOLUME
B/F
C/G
D/H
AUDITION
MULTI
SAVE/COPY
HOME/ENTER
MIDI
POWER
TONE
ATTACK
DYNAMIC 1
A-D
E-H
I-L
PRESENCE
DECAY/RLS
DYNAMIC 2
SHAPE
MOVEMENT
FX A
IMAGE
RATE
FX B
MASTER
EDIT
Volume
Control
Master
Menu
Edit
Menu
Cursor
Controls
Power
Switch
Control
Button
Headphone
Jack
Realtime
Control Knobs
Display
Audition
Button
Multimode
Button
Save/
Copy
Home/
Enter
Data
Entry
CO 1 A Vo l 1 27 Pan0 1
R
P
M
C
SR
022
3
s t r : B a r o queQua
t e t
r
Basic Operations
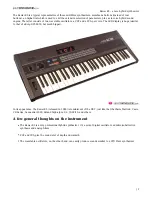
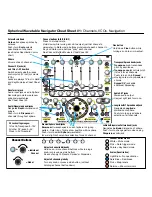
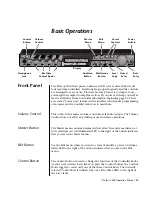
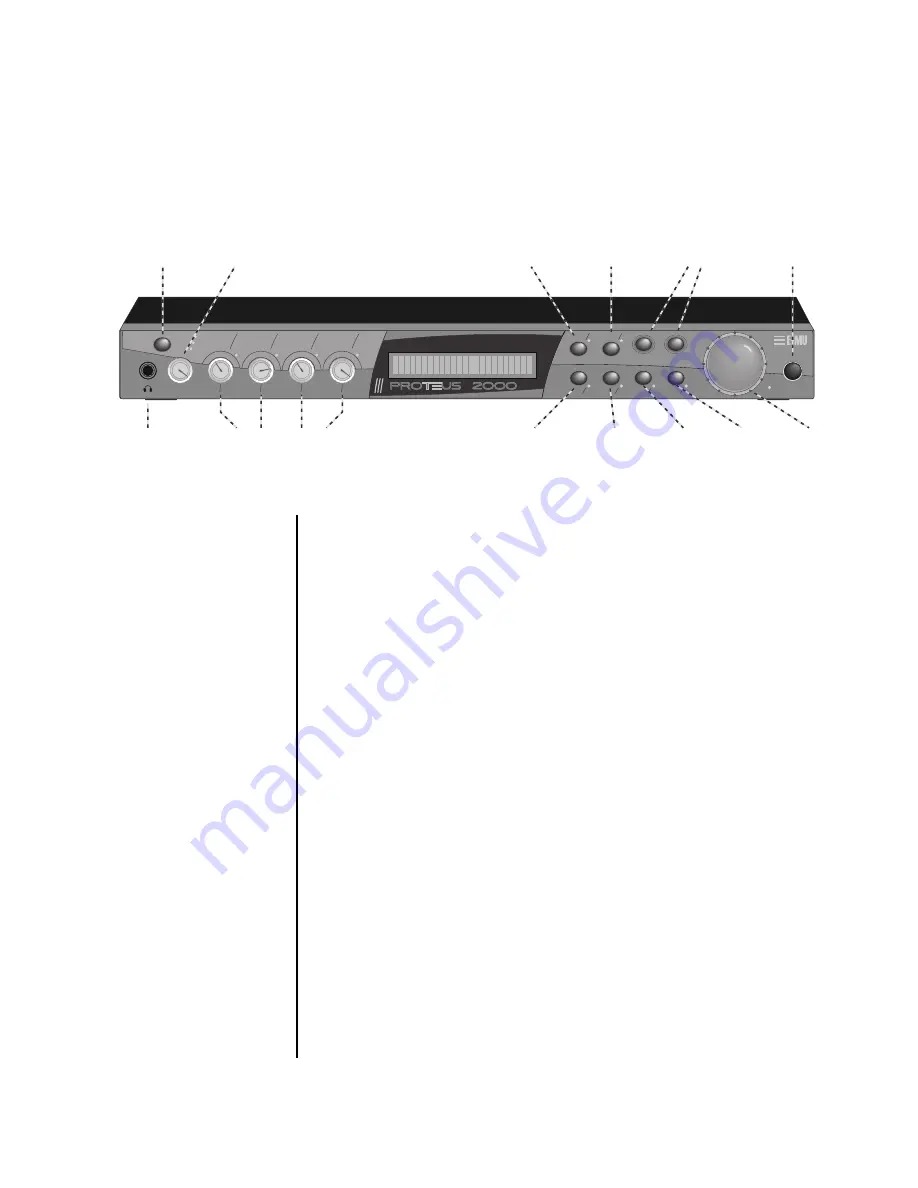
Front Panel
The Proteus 2000 front panel contains an LCD screen, nine buttons and
four real-time controllers. Functions are grouped logically and the controls
are arranged for ease of use. Precisely because Proteus is so simple to use,
you might be tempted to skip this section. If you just can’t help yourself, at
least read the Real-time Controller information beginning page 23. There
are several “power user” features in the interface which make programming
even easier and we wouldn’t want you to miss them.
Volume Control
This control is the master volume control for all audio outputs. The Volume
Control does not affect any editing or user interface operations.
Master Button
The Master menu contains parameters that affect the entire machine, not
just certain presets. An illuminated LED to the right of the button indicates
that you are in the Master menu.
Edit Button
Use the Edit menu when you want to create or modify a preset. An illumi-
nated LED to the right of the button indicates that you are in the Edit
menu.
Control Button
The Control button is used to change the function of the Controller knobs
(see the next section). Each time you press the Control button, the Control
Mode toggles to select only one of the three Control Rows. The currently
selected Control Row is indicated by one of the three LEDs to the right of
the row’s label.