background image

Pub. 988-0143-672

                www.eaglesonar.com

FishElite  320 and

SeaCharter  320DF

Fish-finding Sonars & Mapping GPS

Installation and Operation

Instructions

Summary of Contents for FishElite 320

Page 1: ...Pub 988 0143 672 www eaglesonar com FishElite 320 and SeaCharter 320DF Fish finding Sonars Mapping GPS Installation and Operation Instructions ...

Page 2: ...thority and eXitSource are trademarks of Zenrin Co Ltd Eagle Electronics may find it necessary to change or end our policies regulations and special offers at any time We reserve the right to do so without notice All features and specifications subject to change without notice All screens in this manual are simulated On the cover SeaCharter 320DF shown Other models covered in the manual are simila...

Page 3: ...ensor Charts 27 GPS Antenna Receiver Module 30 Power Connections 31 NMEA DGPS Cable Connections Seacharter 320DF only 32 Mounting the Unit Bracket In Dash or Portable 35 Bracket Installation 35 In Dash Installation 37 Portable Installation 37 Other Accessories 39 Section 3 Basic Sonar Operation 41 Keyboard 41 Power Lights On and Off 42 Main Menu 42 Pages 44 Satellite Status Page 44 Navigation Page...

Page 4: ...t Keel Offset 74 Sensitivity Auto Sensitivity 75 Sonar Color Mode 77 Sonar Page Sonar Chart Display Options 77 Full Sonar Chart 77 Split Zoom Sonar Chart 78 Split Frequency Sonar Chart 320DF only 79 Digital Data Chart 80 Map With Sonar Split Screen 81 Sonar Simulator 82 Stop Chart 84 Surface Clarity 84 Zoom Zoom Bar 85 Zoom Pan 86 Section 5 Sonar Troubleshooting 87 Section 6 Basic GPS Operations 9...

Page 5: ...PS Data Files 118 Cancel Navigation 120 Section 7 Advanced GPS Operations 121 Find Distance From Current Position To Another Location 121 Find Distance From Point To Point 121 Icons 122 Create Icon On Map 122 Create Icon At Current Position 122 Delete an Icon 122 Navigate To an Icon 123 Routes 123 Create and Save a Route 124 Delete a Route 127 Edit a Route 127 Navigate a Route 128 Navigate a Route...

Page 6: ...lays 142 DGPS Status 320DF only 142 GPS Simulator 142 Hide GPS Features 144 Initialize GPS 144 Map Auto Zoom 145 Map Data 145 Show Map Data 145 Pop Up Map Info 145 Map Boundaries 146 Fill Land Gray 146 Map Overlays Range Rings Lat Long Grid 146 Map Datum Selection 146 Map Detail Category Selection 147 Map Orientation 148 Navionics Charts 149 Pop Up Help 154 Position Pinning 155 Reset Options 155 R...

Page 7: ...ind Addresses 165 Find Any Item Selected By Map Cursor 168 Find Interstate Highway Exits 169 Find Map Places or Points of Interest POI 171 Find Streets or Intersections 172 Find Waypoints 176 Section 10 Supplemental Material 179 ...

Page 8: ...ing to a waypoint but will also visually check to make sure a clear safe path to the waypoint is always available WARNING When a GPS unit is used in a vehicle the vehicle operator is solely responsible for operating the vehicle in a safe manner Vehicle operators must maintain full surveillance of all pertinent driving boating or flying conditions at all times An accident or collision resulting in ...

Page 9: ...So we designed our book so that you don t have to read the whole thing from front to back for the information you want At the start or end of each segment we ll tell you what content is coming up next If it s a concept you re already familiar with we ll show you how and where to skip ahead for the next important topic We ve also made it easy to look up any tips you may need from time to time Here ...

Page 10: ...t s GPS command func tions organized in alphabetical order When you come to a GPS menu command on the unit s screen you can look it up in the manual by skimming over the table of contents just flipping through Section 6 or scanning through the command portion of Section 7 This unit is ready to use right out of the box but you can fine tune and customize it s operation with dozens of options Since ...

Page 11: ...backlit screen with multiple lighting levels backlit keypad Input power 10 to 15 volts DC Case size 5 4 H x 6 9 W x 3 4 D 13 8 x 17 6 x 8 6 cm sealed and waterproof suitable for saltwater use MMC slots One with waterproof door SD card compati ble Back up memory Built in memory stores sonar records and GPS data for decades User settings are stored when unit is turned off Languages 10 menu languages...

Page 12: ...nal speed sensor sensor in cluded with SeaCharter 320DF GPS Receiver antenna External EGC 12w 12 parallel channel GPS WAAS DGPS beacon receiver optional for SeaCharter 320DF only Recording MMC SD cards for recording GPS trip de tails and displaying charts or custom maps Background map Built in custom detailed Eagle map Con tains enhanced detail of continental U S and Hawaii Includes more than 60 0...

Page 13: ...wn to read about the relatively new technology of GPS But if you ve never owned a sonar fish finder this segment will tell you the under water basics Sonar is an abbreviation for SOund NAvigation and Ranging a technol ogy developed during World War II for tracking enemy submarines Lowrance developed the world s first transistorized sportfishing sonar in 1957 A sonar consists of a transmitter trans...

Page 14: ... way The unit includes a keypad and a screen with menus so you can tell it what to do The screen also lets the unit show your location on a moving map as well as point the way to your destination This gimbal mounted unit uses an external antenna receiver module which makes the whole system work something like your car radio But instead of your favorite dance tunes this receiver tunes in to a coupl...

Page 15: ...8 MB in size Compare that to a floppy disk s 1 44 MB capacity This unit uses all that MMC space for two key GPS purposes The MMC is also used to record sonar logs see page 6 First you can backup your onboard GPS Data Files by copying them to the MMC Since the MMC is removable like a floppy disk or a cassette tape you can store these GPS Data Files on a personal computer equipped with an MMC card r...

Page 16: ...te because the military scrambled the signal somewhat using a process called Selective Availability SA GPS proved so useful for civilian navigation that the federal govern ment discontinued SA on May 2 2000 after the military developed other methods to deny GPS service to enemy forces Reliable accuracy for civilian users jumped from 100 meters 330 feet under SA to the present level of 10 to 20 met...

Page 17: ...n further with its Wide Area Augmentation System or WAAS This GPS add on will include a time control element that will help airliners fly closer together while avoiding collisions In addition to carefully spacing airplanes along travel corridors WAAS will eventu ally make instrument landings and takeoffs more accurate as it re places existing aviation navigation systems Non aviators can use WAAS s...

Page 18: ...creen called the cursor The arrow keys also control a hori zontal line depth cursor on the sonar screen The arrow keys help you move around the menus so you can execute different commands They are represented by symbols like these which denote the down arrow key the up arrow the left arrow and the right arrow Keyboard The other keys perform a variety of functions When the text refers to a key to p...

Page 19: ...our unit Translated into complete English step 1 above would mean Start on the Map Page Press the Menu key twice Next repeatedly press or press and hold the down arrow key to scroll down the menu and select highlight the My Trails menu command Finally press the Enter key Step 2 would mean Press the down arrow key repeatedly to scroll to the trail named Trail 1 and press Enter Next press the right ...

Page 20: ...12 Notes ...

Page 21: ...ansducer and route the transducer cable to the so nar GPS unit 6 Install the GPS antenna and route the antenna cable to the so nar GPS unit 7 Install the power cable and route it to the sonar GPS unit 8 Mount the sonar GPS unit Transducer Installation These instructions will help you install your Skimmer transducer on a transom on a trolling motor or inside a hull These instructions cover both sin...

Page 22: ...able wrenches drill 20 0 161 drill bit flat head screwdriver Supplies four 1 long 12 stainless steel slotted wood screws Single frequency trolling motor installations Tools two adjustable wrenches flat head screwdriver Supplies plastic cable ties Shoot through hull installations Tools these will vary depending on your hull s composition Consult your boat dealer or manufacturer Supplies 100 grit sa...

Page 23: ...be displayed on the sonar s screen Use caution when routing the transducer cable around these wires Good and poor transducer locations How low should you go For most situations you should install your Skimmer transducer so that its centerline is level with the bottom of the boat hull This will usually give you the best combination of smooth water flow and protec tion from bangs and bumps Align tra...

Page 24: ...ccur even on the best hulls This varies from hull to hull even from different installations on the same hull This is caused by differences in hull lay up and construction Second the transducer angle cannot be adjusted for the best fish arches This can be a problem on some hulls that sit with the bow high when at rest or at slow trolling speeds Follow the procedure listed in the shoot thru hull ins...

Page 25: ...ransducer as shown in the fol lowing illustrations Notice there are letters molded into each ratchet Place the ratchets into the bracket with the letter A aligned with the alignment mark molded into the bracket Place the ratchets onto the transducer with the letter A aligned with the 12 o clock position on the transducer stem These positions set the transducer s coarse angle adjustment for a 14 tr...

Page 26: ...ucer s face isn t parallel with the ground remove the transducer and ratchets from the bracket Place the ratchets into the holes in the bracket with the letter B aligned with the dot stamped in the bracket Reassemble the transducer and bracket and place them against the transom Again check to see if you can move the transducer so it s parallel with the ground If you can then go to step 3A If it do...

Page 27: ...d with the bracket alignment mark Place them on the transducer aligned with the 12 o clock posi tion on the transducer stem Reassemble the transducer and bracket and place them against the transom Again check to see if you can move the transducer so it s parallel with the ground If you can then go to step 3B If it doesn t repeat step 2B but use a different alignment letter until you can place the ...

Page 28: ... the mounting screw pilot holes You will drill one hole in the center of each slot Drill the holes For the one piece bracket use the 29 bit for the 10 screws For the two piece bracket use the 20 bit for the 12 screws Position transducer mount on transom and mark mounting holes Side view shown at left and seen from above at right 5 Attaching transducer to transom A One piece bracket Remove the tran...

Page 29: ...som to the sonar unit Make sure to leave some slack in the cable at the transducer If possible route the transducer cable away from other wiring on the boat Electrical noise from the engine s wiring bilge pumps VHF radio wires and cables and aerators can be picked up by the sonar Use cau tion when routing the transducer cable around these wires WARNING Clamp the transducer cable to the transom clo...

Page 30: ...R BRACKET INSTALLATION single frequency only 1 Attach the optional TMB S bracket to the transducer as shown in the following figure using the hardware supplied with the transducer Note The internal tooth washer is supplied with the TMB S Attach motor mounting bracket to transducer 2 Slide the adjustable strap supplied with the TMB S through the slot in the transducer bracket and wrap it around the...

Page 31: ... water or at slow trolling speeds Transducer angles and their effects on fish arches If the arch slopes up but not back down then the front of the trans ducer is too high and needs to be lowered If only the back half of the arch is printed then the nose of the transducer is angled too far down and needs to be raised Transducer aimed too far back Transducer aimed too far forward Proper transducer a...

Page 32: ...er of fiberglass The transducer can then be epoxied di rectly to the outer layer of fiberglass After the epoxy cures the hull is watertight and structurally sound Remember the sonar signal must pass through solid fiberglass Any air bubbles in the fiberglass or the epoxy will reduce or eliminate the sonar signals WARNING Do not remove any material from your inner hull unless you know the hull s com...

Page 33: ...not then mark the lo cation that shot through the hull the best and follow the instructions on the following pages for a shoot thru hull mounting Shoot thru hull transducer locations for high speed or trolling speed operation Shoot thru hull Installation 1 Make sure the area is clean dry and free of oil or grease then sand both the inside surface of the hull and the face of the transducer with 100...

Page 34: ...would like to use a speed sensor and a second temperature sensor at the same time you will need a combination device If you own a SeaCharter 320DF and would like to use a speed sensor and a second temperature sensor at the same time you will need an optional MY 4X cable NOTE These units are packed with a transducer containing a built in temp sensor The SeaCharter 320DF package also includes a spee...

Page 35: ...perature sensor installation Three temperature sensor installation TS 3X temperature sensor optional SP X speed sensor MY 4X Cable TS 2X temperature sensor optional Temperature sensor built into transducer SeaCharter 320DF rear view Two temperature sensor installation ...

Page 36: ...xternal speed sensor or combo speed temp sensor The primary temperature sensor is built into the transducer FishElite 320 rear view FishElite 320 rear view TS 2U temperature sensor Temperature sensor built into transducer Power transducer cable Power transducer cable Temperature sensor built into transducer Combo speed temp sensor or SP U speed only sensor ...

Page 37: ...hind strakes or ribs These will disturb the water flow to the speed sensor Make sure the sensor will remain in the water when the boat is on plane Also make sure the location doesn t inter fere with the boat s trailer Typically the sensor is mounted about one foot to the side of the transom s centerline Once you ve determined the proper location for the unit place the sen sor on the transom The bo...

Page 38: ...in the transom for the cable make sure it is lo cated above the waterline After installation be sure to seal the hole with the same marine grade above or below waterline seal ant used for the screws The sensor is now ready for use Connect the sensor to the in line con nector on the MY 4X adapter cable or to the accessory plug on the back of the unit If you have any questions concerning the install...

Page 39: ...rectly to the battery CAUTION When using the unit in a saltwater environment we strongly rec ommend that you shut off the power supply to the power cable when the unit is not in use When the unit is turned off but still connected to a power supply electrolysis can occur in the power cable plug This may result in corrosion of the plug body along with the electri cal contacts in the cable and the un...

Page 40: ...y NMEA DGPS Cable Connections SeaCharter 320DF only NMEA is a standard communications format for marine electronic equipment For example an autopilot can connect to the NMEA inter face on the SeaCharter 320DF and receive positioning information The SeaCharter 320DF can exchange information with any device that transmits or receives NMEA 0183 data DGPS is an acronym for the Differential Global Posi...

Page 41: ...the com port are combined with the two power wires to form the power data cable see the drawing on the following page Com 1 uses the yellow wire to transmit the orange wire to re ceive and the shield wire for signal ground Com 1 wiring to receive DGPS position information from a DGPS receiver Com 1 wiring to receive NMEA position information from some other GPS receiver Com 1 wiring to transmit NM...

Page 42: ...nections SeaCharter 320DF rear view GPS antenna module GPS socket Power Data socket Power wires two Com port data wires three Sonar socket Transducer Sonar Power socket GPS antenna module Transducer Power wires GPS socket Accessory socket FishElite 320 rear view ...

Page 43: ...ional R A M mounting system Bracket Installation Mount the unit in any convenient location provided there is clearance behind the unit when it s tilted for the best viewing angle You should also make sure there is enough room behind the unit to attach the power transducer and GPS antenna receiver module cables A drawing on the next page shows the dimensions of a gimbal mounted unit Holes in the br...

Page 44: ...ough the hole from the top If you wish you can fill in the hole around the cables with a good ma rine caulking compound Some marine dealers stock cable hole covers to conceal the opening No matter what type of installation you prefer be sure to leave enough slack in the cables to allow tilting or swiveling the unit If you choose to fill in the hole be sure to position the cables against the rear e...

Page 45: ...Charter 320DF The power pack the magnet equipped antenna module and an optional portable transducer expand the uses for your sonar GPS unit The portable power pack makes it easy to transfer your unit from a boat to a car recreational vehicle airplane or other vehicle without drilling and mounting a second bracket You can use your unit in your own car or boat then take it along when riding in a fri...

Page 46: ...ices are about the size of a postage stamp An SD card is slightly thicker than an MMC As this manual went to press MMCs were available in storage capacities of 8 MB 16 MB 32 MB and 64 MB SD cards were available in capacities of 8 MB 16 MB 32 MB 64 MB and 128 MB Additional MMC cards are available from LEI Extras see ordering in formation inside the back cover of this manual MMCs and SD cards are al...

Page 47: ... to the left until it is firmly seated in the slot 3 Close the compartment door and fasten the thumb screw finger tight Other Accessories Other accessories include MMC cards MMC card readers and MapCre ate 6 custom mapping software for your computer MMC card readers are available in USB and parallel port versions Two switch boxes are available for the SeaCharter 320DF The SB 7X transducer switch b...

Page 48: ... of step by step tutorials to teach you the basics of sonar operation NOTE When you first turn the unit on the Map Page appears If you d rather start learning about GPS operation first turn over to Sec tion 6 Basic GPS Operations Remember you don t need to read this manual from cover to cover to get going We designed it so you can skip around to the section you want to read ...

Page 49: ... one page Quick Reference on page 49 Keyboard SeaCharter 320DF sonar GPS unit front view showing map with so nar split screen keyboard and access door for the MMC slot 1 PWR LIGHT Power Light The PWR key turns the unit on and off and activates the backlight 2 PAGES Pressing this and the arrow keys switches the unit between the four different page screens Satellite Status Page Naviga tion Page Map ...

Page 50: ...oom the screen in On the Sonar Page this key enlarges fish signals and bottom detail On the Map Page zooming in lets you see greater detail in a smaller geographic area on the map Power lights on and off To turn on the unit press PWR As the unit powers up the Map Page is displayed first To switch to the Sonar Page press PAGES EXIT To turn on the backlight press PWR again The unit has three backlig...

Page 51: ... command turns GPS alarms on or off and changes alarm thresholds Route Planning command used to plan view or navigate a route My Trails command shows creates and deletes plot trails Also used to navigate or backtrack a trail Cancel Navigation command turns off the various navigation com mands Used to stop navigating after you have reached your destina tion waypoint Point of Interest or map cursor ...

Page 52: ...ome Sonar display options Satellite Status Page The Satellite Status Page provides detailed information on the status of the unit s satellite lock on and position acquisition To get to the Satel lite Status Page Press the PAGES key then use or to select STATUS Clear the Pages Menu by pressing EXIT This page represents a GPS function so it is discussed in much greater detail in Section 6 No matter ...

Page 53: ...to the Navi gation Page Press PAGES or to NAVIGATION EXIT This page represents a GPS function so it is discussed in much greater detail in Section 6 Navigation Page recording a trail traveling southwest Map Page The Map Page screens show your course and track from a bird s eye view on a moving map By default this unit shows the map with north always at the top of the screen The arrow in the center...

Page 54: ...onar Page The Sonar Page displays the sonar chart This is a cross section view of the water column beneath the boat The chart moves across the screen displaying sonar signal echoes that represent fish structure and the bottom To get to the Sonar Page Press the PAGES key then use or to se lect SONAR Clear the Pages Menu by pressing EXIT The Pages Menu also offers four chart display options under th...

Page 55: ...ion commands At right Sonar Page in full sonar chart display mode Sonar chart display options from left split zoom and split frequency At left digital data sonar chart display options At right Sonar Page Menu Most of these functions are discussed in Sec 4 ...

Page 56: ...n Section 4 but to show you how easy this unit is to operate the following page contains a sim plified 10 step quick reference that will cover most fish finding situa tions The quick reference describes how your unit will operate with all the sonar features in their automatic modes which are set at the fac tory Surface clutter Structure Bottom signal Fish arches In FasTrack fish arches show as hor...

Page 57: ...n of the screen The full sonar chart will scroll from right to left showing you what s under the boat as you cruise across the water You can change the display by Zoom in to enlarge the chart for more detail press ZIN Zoom out to return to full chart mode press ZOUT 7 Watch the display for the appearance of fish arches When you see arches you ve found fish Stop the boat and get your lure or bait i...

Page 58: ...o see more detail try increasing the sensitivity a little at a time There are situa tions when too much clutter appears on the screen Decreasing the sensitivity can reduce the clutter and show the strongest fish echoes if fish are present As you change the sensitivity setting you can see the difference on the chart as it scrolls These figures show results of different sensitivity levels on the sam...

Page 59: ... turned on the unit will continue to track the bottom and make minor adjustments to the sensitivity level with a bias toward the setting you selected Adjusting sensitivity in Manual Sensitivity Mode is similar to driving a car without cruise control you have complete manual control of the car s speed In the unit manual mode allows you to set sensitivity at 100 percent maximum or zero percent minim...

Page 60: ...for our example and not the popular Fish I D fish symbol feature Here s why Fish I D is an easier way for a sonar novice to recognize a fishy signal return when he sees it However locating fish by symbol only has some limitations Your sonar unit s microprocessor is remarkably powerful but it can be fooled Some of the echoes calculated to be fish could be tree limbs or tur tles To see what s under ...

Page 61: ...e noise rejection surface clarity etc of the recorded file Color interpretation of sonar signals can be user defined Operates like a Windows Multimedia Player with forward re verse pause fast forward fast reverse and scroll buttons Adjustments update the entire record displayed Can print in full color Window can dynamically be sized on your monitor Mouse cursor shows GPS position depth and soundin...

Page 62: ...actly like your real sonar GPS unit Using the Sonar Simulator and GPS Simulator features it allows you to play back sonar logs run GPS routes and trails even create real waypoints you can use in the field You can even take snapshots of the Sonar Chart and print them or e mail them to friends ...

Page 63: ...e unwanted marks on the display The ASP feature has four settings Off Low Medium and High If you have high noise levels try using the High ASP setting However if you are having trouble with noise we suggest that you take steps to find the interference source and fix it rather than continually using the unit with the high ASP setting There are times when you may want to turn the ASP feature off Thi...

Page 64: ... For example if you set the shallow alarm to 10 feet the alarm will sound a tone if the bottom signal is less than 10 feet It will continue to sound until the bottom goes deeper than 10 feet The deep alarm works just the opposite It sounds a warning tone if the bottom depth goes deeper than the alarm s setting Both depth alarms work only off the digital bottom depth signals No other targets will t...

Page 65: ...MS ENT to DEEP ALARM ENABLED ENT EXIT EXIT EXIT To switch to a different depth setting open the Sonar Alarms menu and repeat the instructions in step 3 above Zone Alarm The zone alarm is triggered when any echo passes inside the zone alarm bar shown on the right side of the screen To adjust and turn on the zone alarm 1 Press MENU MENU to ALARMS ENT to SONAR ALARMS ENT 2 Press to ZONE ALARM ENABLED...

Page 66: ...h Alarm selected The check box to the left is blank indicating the alarm is turned off To turn the fish alarm on 1 Press MENU MENU to ALARMS ENT to SONAR ALARMS ENT 2 Press to FISH ALARM ENT EXIT EXIT EXIT 3 To turn off the alarm press MENU MENU to ALARMS ENT to SONAR ALARMS ENT to FISH ALARM ENT EXIT EXIT EXIT Calibrate Speed The speed sensor can be calibrated to compensate for inaccuracies Be fo...

Page 67: ...tually all fishing conditions However you might consider experimenting with chart speed when you are stationary or drifting very slowly You may sometimes achieve bet ter images as you slow down the chart speed to match how fast you are moving across the bottom If you are at anchor ice fishing or fishing from a dock experiment with a chart speed around 50 percent If you are drifting slowly try a ch...

Page 68: ...rge fish is 34 64 feet deep The cursor can be moved to any location on the screen letting you pin point the depth of a target 1 From the Sonar Page press MENU to DEPTH CURSOR ENT 2 The depth cursor appears Press to lower the cursor line press to raise the cursor line 3 To clear the depth cursor press EXIT Depth Range Automatic When turned on for the first time the bottom signal is automatically pl...

Page 69: ...ifferent depth range A horizontal black bar highlights the selected range 4 When the new range is selected press EXIT to clear the menu To turn Auto Depth Range on again From the Sonar Page press MENU to AUTO DEPTH RANGE ENT EXIT NOTE The sonar s depth capability depends on the transducer installa tion water and bottom conditions and other factors FasTrack This feature automatically converts all e...

Page 70: ...air bubbles etc Individual tree limbs ex tending outwards from a group of limbs is the hardest object for the Fish I D feature to distinguish from fish You may see fish symbols on the screen when actually there are no fish The reverse is also true The illustrations on the next page show how Fish I D can actually miss fish that are present Does that mean Fish I D is broken No the feature is simply ...

Page 71: ...re is on At left figures 1A and 2A show Sonar Page in normal chart mode At right figures 1B and 2B show the same underwater scene with Fish I D turned on Note how arches are replaced with symbols Fish arches above structure No fish shown FasTrack graph confirms fish above structure Fig 1 A Fig 1 B Fig 2 A Fig 2 B Many fish arches visible Fewer fish symbols visible ...

Page 72: ... off FishTrack repeat the instructions in step 1 Turning off FishTrack in this manner will not turn off Fish I D symbols Sonar Features menu with Fish I D Depths selected at left dual frequency menu center single frequency menu When the check box to the left is checked the feature is on At right Sonar Page showing Fish I D symbols and FishTrack depths turned on FishReveal When displaying actual so...

Page 73: ...maximum Sonar Color Mode command with FishReveal selected at left dual frequency menu at right single frequency menu To turn FishReveal on 1 From the Sonar Page press MENU to SONAR FEATURES ENT 2 Press to SONAR COLOR MODE ENT to FISHREVEAL ENT 3 Press EXIT to AUTO SENSITIVITY ENT to SENSITIVITY ENT 4 Press until the Sensitivity Control Bar reads 100 or close to it then press EXIT If you reach the ...

Page 74: ... feet or less This frequency is the best choice for about 80 percent of the fresh and salt water sport fishing applications When you get into very deep salt water 300 to 500 feet or deeper the 50 kHz fre quency is the best choice The 200 kHz transducer will give you better detail and definition but less depth penetration The 50 kHz transducer will give you greater depth penetration but a little le...

Page 75: ...m returns a weaker signal which is shown with a narrow or no gray line A hard bottom returns a strong signal which causes a wide gray line If you have two signals of equal size one with gray and the other with out then the target with gray is the stronger signal This helps distin guish weeds from trees on the bottom or fish from structure Grayline is adjustable Experiment with your unit to find th...

Page 76: ...o 84 percent In Figure 1B no fish are near the left structure but the right structure shows fish holding next to the structure Notice in figures 2B and 3B how Grayline displays a hard rocky bottom the drop offs with a wider gray line The muddier bottom below those drop offs appears as a narrower gray line Grayline Muddy bottom Hard bottom Muddy bottom Fish near structure Hard bottom Hard structure...

Page 77: ...ht Sonar Chart Logging menu with the Start Logging command selected The menu says the MMC has 5 42 MB of free space which will record the scrolling chart for 28 minutes and 44 seconds To record or log chart data 1 Press MENU to LOG SONAR CHART DATA ENT 2 To record data using the default settings press ENT The menu clears and the Sonar Page title bar shows the name of the file you are record ing Wa...

Page 78: ...ar Menu at left Overlay Data Shown selection menu right In this example we scrolled down the data list to highlight Ground Speed When selected the data type shifts to the top of the data list and a check mark appears beside the data type If you wish you may now use or to select other Data Types for display Data list showing Ground Speed selected to display on Sonar Page 3 To return to the previous...

Page 79: ...ou select a data type 1 From the Map or Sonar page press MENU to OVERLAY DATA ENT 2 Press or to select Data Type press or to select Data Size ENT The data will be shown in the new font size To return to the previ ous page press EXIT EXIT At left Map Page showing boat cruising Puget Sound Washington with Overlay Data turned on This example shows Depth Ground Speed and the Steering Arrow Note that t...

Page 80: ...aintain a high detail picture on the screen and the screen refresh rate and chart scroll speed can keep pace with the boat as it moves quickly over the bottom terrain When using HyperScroll you may also need to manually decrease the sensitivity for optimum performance Depending on water depth and other conditions HyperScroll may cause a second bottom echo to return to the transducer during the nex...

Page 81: ...e screen The allows you to better see the virtually instantaneous sonar returns just as you would on a flasher sonar unit For more informa tion on FasTrack see it s entry in this section Reset Options This command is used to reset all features options and settings to their original factory defaults This is useful when you have changed several settings and want to return the unit to basic automatic...

Page 82: ...ance be tween the transducer installation and the keel or lower engine unit can be several feet In those cases an inexact depth reading could result in grounding or striking underwater structure The Keel Offset feature eliminates the need for the navigator to mentally calculate how much water is under his keel Keel Offset lets you calibrate the digital depth chart depth scale chart cursor depth an...

Page 83: ...other target information High sensitivity levels let you see this detail but it can also clutter the screen with many undesired signals Typically the best sensitivity level shows a good solid bottom signal with Grayline and some surface clutter Automatic Sensitivity The default sensitivity mode is automatic The unit bases the sensitiv ity level on water depth and conditions When the unit is in the...

Page 84: ...nar Menu with Sensitivity command selected At right the Sensitivity Control Bar To adjust sensitivity in manual mode 1 First turn off Auto Sensitivity from the Sonar Page press MENU to AUTO SENSITIVITY ENT 2 Press to SENSITIVITY ENT and the Sensitivity Control Bar appears Press or to pick a different sensitivity setting When it s set at the desired level press EXIT To turn Auto Sensitivity back on...

Page 85: ...onar Page press MENU to SONAR FEATURES ENT 2 Press to SONAR COLOR MODE ENT 3 Press or to Mode Name ENT 4 Press EXIT EXIT to return to the Sonar Page Sonar Page Sonar Chart Display Options The Pages Menu offers four chart display options for dual frequency models and three options for single frequency models To access them press PAGES or to SONAR to Option Name EXIT Pages Menu showing sonar chart d...

Page 86: ...use See the Zoom section for more information Full Sonar Chart The Overlay Data depth and water temperature are both set to the small text size Split Zoom Sonar Chart A split chart shows the underwater world from the surface to the bot tom on the right side of the screen The left side shows an enlarged ver sion of the right side The zoom range shows at the bottom left corner of the screen Split Zo...

Page 87: ...view at left and 200 kHz view at right You can adjust the sensitivity in each window To adjust sensitivity in auto mode 1 Press MENU ENT 2 The unit asks which you wish to adjust Press or to select the one you want ENT 3 The Sensitivity Control Bar appears Press to decrease sensitivity press to increase sensitivity When it s set at the desired level press EXIT When you reach the maximum or minimum ...

Page 88: ...mperature 3 Note Temperature 2 and 3 require additional optional temperature sensors Digital Data Chart Customizing the Digital Data Chart Screen The Digital Data Chart screen can be customized to show digital data different from the defaults first shown To customize this screen 1 From the Sonar Page in Digital Data mode press MENU to CUSTOMIZE ENT The Customize command on the Sonar Menu 2 The W S...

Page 89: ...inished cus tomizing then press EXIT to return to the Sonar Page Map With Sonar Split Screen There is a page mode that splits the screen in half with the map on the left and the sonar on the right This screen option can be found on the Pages Menu under the Map Page category Map With Sonar split screen option At far right the full Map Page is shown The Pages Menu with the Map option list is shown i...

Page 90: ...ected Center sub menu with Sonar Simulator command selected At right Sonar Simu lator menu with simulator turned off check box is unchecked NOTE With Simulate Position checked the simulator will also automatically run the GPS simulator if GPS data was recorded with the sonar log 2 To use the default sonar chart log stored in the unit press ENT EXIT The recorded chart begins scrolling across the sc...

Page 91: ...ng you can switch from one chart log to another by opening the Sonar Simulator menu and using the in structions in step 2 to select a different chart Tip There s more than one way to play a recorded sonar chart You can also turn on the simulator from the MMC files list Here s how 1 Press MENU MENU to BROWSE MMC FILES ENT ENT 2 Press or to chart name ENT to PLAY ENT EXIT Menu sequence for playing a...

Page 92: ...art command selected The box is unchecked indicating that the chart is scrolling across the screen Surface Clarity The markings extending downward from the zero line on the chart are called surface clutter These markings are caused by wave action boat wakes temperature inversion and more The surface clarity control reduces or eliminates surface clutter signals from the display It does this by chan...

Page 93: ...arity set at High Zoom Zoom Bar Zooming the display is a common fast and easy method used to en large small detail fish signals and the bottom with its associated struc ture This unit lets you zoom the display quickly and easily by pressing the Zoom In key ZIN Pressing ZIN once doubles the size 2X of all echoes on the screen Pressing it again quadruples the size of the echoes 4X The zoom bar on th...

Page 94: ...w Center same view zoomed to 2X Right same view zoomed to 4X Zoom Zoom Bar Your unit has the handy ability to quickly zoom in on any portion of the water column with just the touch of an arrow key The Zoom Pan feature lets you rapidly move the zoomed area up and down to different depths By pointing your zoom at different portions of the chart as it scrolls you can get a good close up look at struc...

Page 95: ...is securely connected before turning the unit on Unit freezes locks up or operates erratically 1 Electrical noise from the boat s motor trolling motor or an accessory may be interfering with the sonar unit Rerouting the power and transducer cables away from other electrical wiring on the boat may help Route the sonar unit s power cable directly to the battery instead of through a fuse block or ign...

Page 96: ...vitation 2 Electrical noise from the boat s motor can interfere with the sonar This causes the sonar to automatically increase its Discrimination or noise rejection feature This can cause the unit to eliminate weaker signals such as fish or even structure from the display Try using resistor spark plugs or routing the sonar unit s power and transducer cables away from other electrical wiring on the...

Page 97: ...ransducer cable away from the wiring that is causing the interference VHF radio antenna cables radiate noise when transmitting so be certain to keep the sonar s wires away from it You may need to route the sonar unit s power cable directly to the battery to isolate it from other wiring on the boat If no noise displays on the sonar unit from electrical equipment then make certain everything except ...

Page 98: ...90 Notes ...

Page 99: ...e screens and how they all work together BUT if you just can t wait to get outside turn to the one page Quick Reference on page 103 Keyboard SeaCharter 320 sonar GPS unit front view showing map with sonar split screen keyboard and access door for the MMC slot 1 PWR LIGHT Power Light The PWR key turns the unit on and off and activates the backlight 2 PAGES Pressing this and the arrow keys 4 switche...

Page 100: ...sonar chart display showing the entire water column from surface to bottom On the Map Page this lets you see a larger geographic area on the map Less detail is seen as you zoom out 9 ZIN Zoom In This key lets you zoom the screen in On the Sonar Page this key enlarges fish signals and bottom detail On the Map Page zooming in lets you see greater detail in a smaller geographic area on the map Power ...

Page 101: ...trokes and alarms and sets the alarm style Alarms command turns GPS or sonar alarms on or off and changes alarm thresholds Route Planning command used to plan view or navigate a route My Trails command shows hides creates and deletes plot trails Also used to navigate or backtrack a trail Cancel Navigation command turns off the various navigation com mands Used to stop navigating after you have rea...

Page 102: ...ge Clear the Pages Menu by pressing EXIT Pages Menu showing some Map display options Sonar Page The Sonar Page displays the sonar chart a view of the water column from the surface to the bottom The chart scrolls across the screen from right to left displaying signal echoes that represent fish structure and the bottom The Sonar Page is discussed in detail in Section 3 To get to the Sonar Page Press...

Page 103: ...sents the horizon North is at the top of the screen You can use this to see which satellites are obstructed by obstacles in your immediate area if the unit is facing north The GPS receiver is tracking satellites that are in bold type The re ceiver hasn t locked onto a satellite if the number is grayed out there fore it isn t being used to solve the position Beneath the circular graph are the bar g...

Page 104: ...e top of the compass rose indicates the cur rent track direction of travel you are taking Navigation Page recording a trail traveling southwest Page looks like this when the unit is not navigating to a waypoint following a route or backtracking a trail When navigating to a waypoint the Navigation screen looks like the following figure Your ground speed track distance and bearing to waypoint and co...

Page 105: ...ourse line The outer edges of this white corridor represent lines that show the current cross track error range The default for the cross track error range is 0 20 miles For example if the present position symbol touches the right cross track error line then you are 20 miles to the right of the desired course You need to steer left to return to the desired course You can use the ZIN or ZOUT keys t...

Page 106: ...om another page Press PAGES or to MAP EXIT When the Map Page is displayed a screen similar to the fol lowing figures appears The arrow in the center of the screen is your present position It points in the direction you re traveling The solid line extending from the back of the arrow is your plot trail or path you ve taken The map zoom range is the distance across the screen This number shows in th...

Page 107: ...city streets Load your own high detail custom map made with MapCreate and you can zoom in to 0 05 miles with massive amounts of accurate map detail Map Pages with high detail MapCreate map of an urban area loaded on the MMC At left arterial streets appear at the 4 mile zoom range with a few Point of Interest icons visible Center numerous dots rep resenting Points of Interest become visible at the ...

Page 108: ...er lakes and ponds and their names What s more important is the large scale map detail that allows your GPS unit to show a higher level of position accuracy For example the background map would show you the general outline and approximate shape of a coastline or water body but the higher detail in MapCreate shows the shoreline completely and accurately finer detail Many smaller islands would not b...

Page 109: ... is turned off you can still search for POIs and their icons will pop up when your unit finds them for you The Map Page has its own menu which is used for several functions and for setting various options To access the Map Page Menu from the Map Page press MENU The Pages Menu also offers several map display options under the Map Page category To access them press PAGES or to MAP to Op tion EXIT At...

Page 110: ...ne dividing the two windows Press or to adjust the window widths Press EXIT to clear the menu 3 To change the window size again or revert back to the original dis play just follow the steps above Most dual window displays use half the screen for each window by default You can also use the Reset Op tions command to revert to the factory default The following page contains a 12 step quick reference ...

Page 111: ...e map by Zoom in closer to see greater detail press ZIN zoom in key Zoom out to see more area less detail press ZOUT zoom out key Scroll map north south east or west using arrow keys To stop scrolling and return to current position on map press EXIT key 6 Set a waypoint Wpt 001 at your current position so you can navigate back here press WPT WPT Waypoint symbol and 001 appears 7 Zoom scroll map to...

Page 112: ...corner of the screen 1 Press the ZIN key zoom in to move in closer and see greater detail in a smaller geographic area 2 Press the ZOUT key zoom out to move farther away and see less map detail but a larger geographic area When you are traveling the map will automatically move as you move This keeps your current location roughly centered on the screen You can manually pan or scroll the map northwa...

Page 113: ...arching is one of the most powerful features in the Eagle GPS product line In this example we ll look for the nearest fast food restaurant For more information on different types of searches refer to Section 9 Searching NOTE This example requires the Point of Interest POI database included with a high detail MapCreate 6 custom map After the unit has acquired a position 1 Press WPT to POI RESTAURAN...

Page 114: ... business phone directory If you wanted to navigate there you could press Enter since the Go To command is highlighted But we just want to see it on the map so press to FIND ENT POI information screen on fast food restaurant nearest this position Screen shows name street address phone number latitude longitude distance to restaurant and its compass bearing Figure at left shows Go To command right ...

Page 115: ...ed on the latitude and longitude of a position on the earth A waypoint represents a location spot or destination that can be stored in memory then be recalled and used later on for navigation purposes You can create a waypoint at the cursor position on the map or at your current position while you are navigating You can create a waypoint at any location by manually entering the position s latitude...

Page 116: ...as way point 003 The waypoint symbol and number appear on the map Sequence for setting a waypoint Step 1 while traveling quickly press WPT twice to call up Find Waypoint screen seen in Step 2 and set a point Step 3 a message says the waypoint has been saved Step 4 ve hicle continues on its way number waypoint symbol is visible on map Step 1 Step 2 Step 3 Step 4 ...

Page 117: ...s to the next character and re peat until the latitude is correct Press ENT 4 Press to LONGITUDE ENT Enter the longitude by pressing or to change the first character then press to the next character and re peat until the longitude is correct Press ENT then EXIT EXIT to return to the previous page display The waypoint is saved and automatically given a name with a sequential number such as waypoint...

Page 118: ...if you re out of sight of land Of course the first thing to do is remain calm and then use all standard safety procedures to rescue the person This unit has a man overboard feature that shows navigation data to the location where the feature was activated To activate it press the ZOUT and ZIN keys at the same time Your position at the time these keys are pressed is used as the man overboard positi...

Page 119: ...l navigation to MOB press MENU MENU to CANCEL NAVIGA TION ENT to YES ENT The unit stops showing navigation information Navigate to Cursor Position on Map The GO TO CURSOR command navigates to the current cursor position on the map It s a quick and handy way to navigate to anything you can see on the map display 1 Use the cursor controlled by the arrow keys with the zoom in and zoom out keys to man...

Page 120: ...howing navigation information to your destination See the following examples The 15 mile zoom figure at left clearly shows the dotted course line connecting your current position to your destination The 40 mile zoom center shows both current position and destination on screen The Navigation Page right will also show navigation information To stop navigating to the cursor use the Cancel Navigation ...

Page 121: ...handy when you are trying to retrace your trip and go back the way you came On the screen trails are represented by a solid line extending from the back of the current position arrow The unit is set at the factory to automatically create and record a trail while the unit is turned on The unit will continue recording the trail until the length reaches the maximum trail point setting default is 2 00...

Page 122: ...e press EXIT EXIT EXIT EXIT As you leave the Edit Trail menu you will notice that a new trail starts with a new sequential number In the example figure below the new trail is number 15 showing zero points Note that Trail 14 is inactive but it is still visible on the map New trail named Trail 15 is created when Trail 14 is made inactive Any new travel will be recorded in this trail which is active ...

Page 123: ...ired Trail Name ENT 3 Press to ACTIVE to VISIBLE ENT To return to the previous page press EXIT EXIT EXIT EXIT To turn on trail display 1 Press MENU MENU to MY TRAILS ENT 2 Press to enter the Saved Trail list then use or to select the desired Trail Name ENT 3 Press to ACTIVE to VISIBLE ENT To return to the previous page press EXIT EXIT EXIT EXIT Navigating Trails There are three methods for followi...

Page 124: ...e Tip Generally when using this method the smaller the zoom range the more accurately you will be able to steer along the trail Navigate a Trail forward The following figures illustrate the menu sequence for navigating a trail 1 Press MENU MENU to MY TRAILS ENT 2 Press to enter the Saved Trail list then use or to select the desired Trail Name ENT 3 Press to DELETE TRAIL to NAVIGATE ENT 4 Press to ...

Page 125: ...w the navigated trail as a dotted line The bearing arrow on the compass rose points to the next waypoint on the trail As you travel the arrival alarm will go off when you near a trail way point and the bearing arrow on the compass rose will swing around and point to the next trail waypoint Press EXIT to clear the alarm Navigate trail map views at left driver is northbound heading straight toward t...

Page 126: ...NOTE If you are already located at or near the end of your trail the arri val alarm will go off as soon as you hit Enter Just press EXIT to clear the alarm and proceed 5 Now begin moving and follow your unit 6 When you reach your destination be sure to cancel your navigation press MENU MENU to CANCEL NAVIGATION ENT The unit asks if you re sure press ENT Transfer Custom Maps and GPS Data Files Cust...

Page 127: ...s The Transfer My Data submenu asks if you want to save data to the MMC or load data from the MMC into the unit s memory 2 The Transfer My Data menu includes a message which tells you if an MMC is present or not If no MMC is present you must first insert a card into the unit in order to activate the Load or Save commands To transfer data from the unit to the MMC press ENT for SAVE To transfer data...

Page 128: ...ccept the selection Next press to LOAD ENT The unit will display a completion message when the data transfer is finished To return to the Page view press EXIT EXIT EXIT EXIT These figures show the menu sequence for loading a GPS Data File from an MMC into the unit s memory Cancel Navigation You can turn off any of the navigation commands after you reach your destination or at any other time by usi...

Page 129: ...k is 292 2 miles At right the distance from the boat s current position to the boat ramp is 0 52 miles Find Distance From Point to Point You can also measure distance between two other points on the map 1 While on the Map Page press MENU to FIND DISTANCE ENT 2 Center your cursor over the first position A rubber band line ap pears connecting your current position to the cursor s location Press ENT ...

Page 130: ... at your current position while you are navigating Create Icon on Map 1 Use the arrow keys to move the cursor to the place where you want to make an icon 2 Press ENT and the screen shows a Select Icon Symbol menu 3 Press or or or to select your icon symbol then press ENT The icon appears on the map Cursor selects icon location left Select Icon Symbol menu center Boat Ramp icon on map right Cursor ...

Page 131: ... disap pears from the map Navigate to an Icon Use the Navigate to Cursor command and use the cursor to select the desired icon on the map 1 Use arrow keys to center cursor cross hair over the icon 2 To navigate to the selected icon location press MENU ENT EXIT Follow course line on the Map Page or the compass bearing arrow on the Navigation Page Routes A route is a series of waypoints linked toget...

Page 132: ... the unit follow instructions in Map Create s manual for creating a route and saving it as part of a GPS Data File file format usr Copy the GPS Data File to an MMC and insert the MMC in the unit See Section 2 for instructions on installing MMCs To load the GPS Data File into the unit s memory see the entry on Transfer Custom Maps GPS Data Files in Sec 6 Basic GPS Op erations Routes Created in the ...

Page 133: ... where you want your route to begin If you are starting at your current position or the current cursor posi tion you are already at the starting spot 4 Set the first route waypoint press ENT In this example we moved to the intersection of 11th Street and 145th E Ave to start our route to a public hunting area next to a river Creating this example route is il lustrated in the following figures ...

Page 134: ...nt 5 ends the route at a tree stand in the hunting area Fig 6 Press EXIT to save the route and you return to this screen 5 Move the cursor to the next point in the route a spot where you need to turn or change direction and press ENT to set the next waypoint 6 Repeat step five until the route reaches your destination 7 To save your route press EXIT The unit reverts to the Edit Route screen with th...

Page 135: ...MAP PAGE press MENU MENU to ROUTE PLANNING ENT 2 Press to route name ENT ENT 3 Press or to change the first character then press to move the cursor to the next character and repeat until the name is correct then press ENT Return to the previous page by pressing EXIT EXIT EXIT EXIT You can edit the route by adding and removing waypoints 1 From the NAVIGATION PAGE press MENU ENT or from the MAP PAGE...

Page 136: ... is selected in the Action box 2 Press to select route name ENT to NAVIGATE ENT ENT 3 Upon arrival at your destination cancel navigation press MENU MENU to CANCEL NAVIGATION ENT to YES ENT The following figures show what the Navigation Page and Map Page look like while navigating a route Navigate a Route in Reverse Here s how you run a route backward from the end waypoint to the beginning waypoint...

Page 137: ...figure the traveler has reached Wpt 2 and is half way along the leg between Wpts 2 and 3 Trails Delete a Trail This is the command used to erase or delete a trail Press MENU MENU to MY TRAILS ENT to trail name ENT to DELETE TRAIL ENT to YES ENT Tip You can also delete all trails at once 1 Press MENU MENU to MY TRAILS ENT 2 Press to DELETE ALL ENT to YES ENT Edit a Trail Name To edit a trail name p...

Page 138: ...Y TRAILS ENT to trail name ENT to COLOR ENT Press or to select a color style then press ENT Press EXIT EXIT EXIT EXIT to return to the previous page display Edit a Trail Pattern To edit a trail pattern press MENU MENU to MY TRAILS ENT to trail name ENT to PATTERN ENT Press or to change the first character then press to the next character and repeat until the pattern is cor rect Press ENT then EXIT...

Page 139: ...name ENT to DELETE WAY POINT ENT to YES ENT To return to the previous page press EXIT EXIT To delete a waypoint from the map 1 Use the arrow keys to select the waypoint with the cursor 2 Press WPT to DELETE WAYPOINT ENT to YES ENT To return to the previous page and clear the cursor press EXIT To delete all waypoints at one time press MENU MENU to SYSTEM SETUP ENT to DELETE ALL MY WAYPOINTS ENT to ...

Page 140: ...map for navigating to for editing etc use the arrow keys and center the cursor over the waypoint A highlighted halo will appear around the waypoint Set a Waypoint by Average Position This feature sets a waypoint at the current position after taking several position readings and averaging them This boosts waypoint position accuracy by helping to eliminate errors caused by atmospheric condi tions an...

Page 141: ...s the reference position 4 Press to DISTANCE ENT Press or to change the first character then press to the next character and repeat until the distance is cor rect Press ENT 5 Press to BEARING ENT Press or to change the first character then press to the next character and repeat until the bearing is cor rect Press ENT 6 Press to PROJECTION ENT The Edit Waypoint menu appears You can simply save the ...

Page 142: ...134 Notes ...

Page 143: ...is set to 1 mile then the alarm flashes a message if you drift 1 of a mile or more to the right or left of the line to the waypoint The anchor alarm is triggered when you drift outside of a preset radius Again using the 1 mile as an example if you re anchored and your boat moves more than 1 of a mile the alarm will flash a message and sound a tone Alarms command left Alarm menu right To change ala...

Page 144: ... only those satellites When your GPS receiver is turned on for the first time it doesn t know what your position or elevation altitude is It does know the current UTC time and date since these were programmed into it at the factory and an internal clock keeps the time while the unit is turned off If the time and or date are incorrect you can set it using the Set Local Time menu The unit begins sea...

Page 145: ...e Space To check MMC Files Press MENU MENU to BROWSE MMC FILES ENT Main Menu left MMC File Browser right Communications Port Configuration SeaCharter 320DF only The SeaCharter 320DF has one NMEA 0183 version 2 0 compatible communication port or com port for short The Com Port Menu which is accessed from the System Setup Menu allows you to configure the communications port to send or receive data t...

Page 146: ...x and Lowrance DGPS receivers 1 Press MENU MENU to SYSTEM SETUP ENT 2 Press to COMMUNICATIONS PORT ENT A If you have a Magnavox receiver press to MAGNAVOX ENT B If you have a Lowrance or Starlink receiver press to STARLINK ENT C If you have a Magnavox or Starlink press EXIT EXIT EXIT This is the only setup necessary If you have a Lowrance receiver or another Magnavox or Starlink compatible brand c...

Page 147: ...rdinate System Selection The Coordinate System Menu lets you select the coordinate system to use when displaying and entering position coordinates Menus for changing coordinate system used to display positions To get to Coordinate System Selection 1 Press MENU MENU to GPS SETUP ENT 2 Press to COORDINATE SYSTEM ENT This unit can show a position in degrees 36 14952 degrees minutes and thousandths of...

Page 148: ...atum in use determines which one to use If you use standard and your position is off significantly then try the alternate NOTE When the position format is changed it affects the way all posi tions are shown on all screens This includes waypoints To change the coordinate system press ENT while COORDINATE SYSTEM is highlighted Press the or arrow keys to highlight the desired for mat Press ENT to sel...

Page 149: ...map USGS maps are parallel others may not be Also this works better with smaller scale maps The reference position can be anywhere on the map but the closer it is to your location the smaller the numbers will be that you ll have to deal with Once you ve decided on a reference position you can save it as a way point See the waypoint section for information on saving a waypoint Save the reference po...

Page 150: ...to select a different display option then press ENT After all op tions are set press EXIT to return to the page display Customize Navigation Page While on the Navigation Page press MENU to CUSTOMIZE ENT Press or to select a display option window With the display window high lighted and flashing press ENT to open a list of options Scroll and to select a different display option then press ENT After...

Page 151: ...e above steps or turn the unit off While in simulator mode you can press EXIT to clear the steering and speed boxes from the screen while continuing the simulation This will allow you to use the map cursor during a simulation To turn steering and speed boxes back on again return to the GPS Simulator menu se lect the STEER WITH ARROWS command press ENT then Press EXIT EXIT EXIT to return to the pre...

Page 152: ...he Sonar Page and the GPS pages and features To hide GPS features Press MENU MENU to SYSTEM SETUP ENT to HIDE GPS FEATURES ENT The GPS menus and pages are now hidden To restore GPS Features press MENU MENU to SHOW GPS FEA TURES ENT The GPS menus and pages are available once again Initialize GPS This command is handy when you are practicing in simulator mode See the entry in this section for GPS Si...

Page 153: ... ENT EXIT Repeat these steps to turn it off Map Data This menu lets you turn the map off if desired which turns the map screen into a GPS plotter turn off or on the pop up map info boxes draw the map boundaries or boxes around the areas of high detail or fill land areas with gray You can also turn on or off Map Overlays which display latitude and longitude grid lines or range rings on the map This...

Page 154: ... with your current position in the center The large ring touching the left and right sides of the screen is 100 miles in diameter same as the zoom range The second smaller ring is 50 miles in diameter always 1 2 the zoom range The distance from your current position to the smaller ring the ring s radius is 25 miles always 1 4 the zoom range With the arrow keys and map cursor you can scroll the map...

Page 155: ...lect the desired datum then press ENT 3 To return to the last page displayed press EXIT EXIT A list of the datums used by this unit is in the back of this manual GPS Setup Menu left Map Datum Menu right Map Detail Category Selection This menu determines which of the mapping features are shown on the screen This includes waypoints trails icons cities highways etc You can selectively turn on or off ...

Page 156: ... right is shown on the right side of the map and so on However if you travel any other direction the map doesn t line up with your view of the world To correct this problem a track up mode rotates the map as you turn Thus what you see on the left side of the screen should always be to your left and so on Another option is course up mode which keeps the map at the same orientation as the initial be...

Page 157: ... map on an MMC Left entrance to Chesapeake Bay in a MapCreate 6 custom map 10 mile zoom Center same position on Navionics chart at 11 15 mile zoom and right 5 56 mile zoom To display a Navionics chart 1 Install the Navionics MMC in the memory card compartment and turn on the unit For full card install instructions see Sec 2 WARNING You should never format the MMC containing your Navionics chart Fo...

Page 158: ...on the map display An example is displayed in the following figure To view Port Services information 1 Use the arrow keys to move the cursor over a Port Services icon When selected a pop up name box appears 2 Press WPT to display the Port Services Information screen The Port Services information screen has two windows The top window lists the various service categories The lower window lists the d...

Page 159: ...ation screens Tidal Current Information Navionics charts contain Tidal Current information represented at large zoom ranges by a box icon with the letter C The icon stands for a Tidal Current Station location An example is displayed at right When you zoom in to a sufficiently small zoom range the icon itself be comes an animated arrow showing tidal current velocity and direction for the selected t...

Page 160: ...rent Information screen displays daily tidal current data for this station on this date at the present time The graph at the top of the screen is an approximate view of the flood and ebb pattern for the day from midnight MN to noon NN to midnight MN The velocity scale at the top left side of the graph changes dynamically based upon the maximum velocity of the current for that day Cursor lines Tida...

Page 161: ...example is displayed at right When you zoom in to a sufficiently small zoom range the icon itself be comes an animated gauge showing a rising or falling tidal height for the selected station at the present time At larger zoom ranges you can se lect the boxed T icon and it becomes an animated gauge with a pop up name box An example is displayed in the following figure To view tide information 1 Sel...

Page 162: ...p tidal data for other dates by changing the month day and year selection boxes To select another date 1 Use and to highlight month day or year then press ENT 2 Use and to select the desired month day or year then press ENT To clear the information screen press EXIT Pop up Help Help is available for virtually all of the menu labels on this unit By highlighting a menu item and leaving it highlighte...

Page 163: ...ery slow speed The command remains available in the unit s software but we recom mend that you leave it in the default off unchecked mode The wan dering plot trail issue has now been corrected by the Track Smoothing feature Turning on Position Pinning could actually result in an inaccu rate plot trail if you are moving around in a relatively small area If you want to experiment with Position Pinni...

Page 164: ...to mode doesn t require DGPS reception to yield a position Here s how to turn mandatory DGPS on and off 1 Press MENU MENU to GPS SETUP ENT to REQUIRE DGPS ENT 2 To return to the last page displayed press EXIT EXIT 3 You can return to this command and press ENT again to turn the fea ture off GPS Setup command left Require DGPS command on the GPS Setup Menu right Screen Contrast and Brightness To ac...

Page 165: ...ghtness Press to BRIGHTNESS Press or to move the bar The left end of the scale is minimum contrast the right end is maximum contrast To adjust the screen s display mode Press to DISPLAY MODE ENT press or to select mode EXIT Display Mode menu Set Language This unit s menus are available in 10 languages English French Ger man Spanish Italian Danish Swedish Russian Dutch and Finnish To select a diffe...

Page 166: ...he year then press ENT The last field in this menu is CONFIG DST This feature allows your unit to automatically adjust with the time change caused by Daylight Sav ing Time you should only have to set it once You may select which set of rules matches DST in your region or simply accept the default Once you have each field set the way you want press EXIT repeatedly until you return to the previous p...

Page 167: ...ke the unit perform better or introduce a new fea ture or function You can find out what software version is running in your unit by using the Software Information command System Setup command left Software Information command center At right the Software Information screen 1 Press MENU MENU to SYSTEM SETUP ENT to SOFTWARE INFO ENT 2 Read the information displayed on the screen 3 To return to the ...

Page 168: ... Style Press to ALARM STYLE ENT Press or to change the style then press ENT After the option is set press EXIT EXIT to return to the page display Track Smoothing This is a factory setting on the GPS Setup menu that should always be left on When stopped or traveling at slow speeds such as walking or trolling Track Smoothing prevents wandering of trails the steering arrow compass rose and a map in t...

Page 169: ...rn on and uncheck it turn off Update Trail Criteria Auto Time Distance The options are automatic time or distance When it s in the default automatic mode the unit doesn t update the plot trail while you re traveling in a straight line Once you deviate from a straight line the unit drops a plot point trail waypoint onto the trail This conserves plot trail points If a plot trail uses all of the avai...

Page 170: ...T The Edit Trail menu appears as seen in the following fig ure Press to DELETE TRAIL ENT to YES ENT Edit Trail menu New Trail To manually start a new trail in the Trails Menu make sure NEW TRAIL is highlighted and press ENT Trail Visible Invisible and Other Trail Options The name maximum number of points in the trail activity and visi bility are all changed on the Edit Trail menu screen The Active...

Page 171: ...e the units Press MENU MENU to SYSTEM SETUP ENT ENT System Setup Menu left Units of Measure Menu right To set Speed Distance Unit of Measure Press or to change the Speed Distance then press ENT After the option is set press EXIT EXIT EXIT to return to the page display To set Heading Press or to change the heading type then press ENT After the option is set press EXIT EXIT EXIT to return to the pag...

Page 172: ...164 Notes ...

Page 173: ...u appears for waypoints and Points of Interest POI From the Map Page press MENU and the Map Page menu appears for streets addresses and highway exits Find Waypoint menu left Map Page menu right NOTE You can search for items after the unit has acquired a position or while using the unit in the indoor simulator mode Distance and bearing to the selected item will be calculated from the unit s cur ren...

Page 174: ...ter with Find By Name field active street name entry complete right 5 To enter a city name press to CITY ENT You will be asked if you want to find addresses only within a particular city This option is de signed so you can limit an address search to a single city if necessary see the note below If you select yes there are two options A You can spell out the city name in the top selection box Press...

Page 175: ... you are look ing for is highlighted at the top of the list press ENT If not use and to select the correct address from the list then press ENT The Map Page will then appear with the location selected by the cursor In the example below we are looking for 12303 East 11th Street in Tulsa not 11th Court so we had to scroll down the list to select the right one Address search result list left At cente...

Page 176: ...the map high lighted by cursor Center this address is a business in the POI data base so you can display the POI information window then navigate to it At right this address is not in the POI database so the Waypoint key will not display any information for this address Find Any Item Selected by Map Cursor On the Map Page with a POI or map feature selected by the cursor press WPT To return to the ...

Page 177: ...A You can spell out the highway name in the top selection box Press or to change the first letter then press to move the cursor to the next letter and repeat until the name is correct then press ENT ENT B Jump down to the lower selection list by pressing ENT then press or to select a highway from the list then press ENT Find By Name menu 3 Once you have selected a highway name you can then select ...

Page 178: ...or go to the exit B Press ENT to find the exit on the map Go To Exit option left Find On Map option right Tip You can also look up some additional information on the Exit Serv ices located near this exit Press to SERVICES press or to select Service Name ENT Exit Information screen left general location and amenities information at right ...

Page 179: ... a calculating screen then a list of the nearest POI s will appear Press or to the selected POI and press ENT to call up the POI s Waypoint Information screen Find by Nearest option left Calculating screen center POI list right 3 Search by name of POI Press ENT There are two options A You can spell out the POI in the top selection box Press or to change the first letter then press to move the curs...

Page 180: ...creen is displayed you can choose to Go To the POI waypoint by pressing ENT or find it on the map by pressing ENT Go To POI option left Find on Map POI option right Find Streets or Intersections Find a Street 1 From the Map Page press MENU to FIND STREETS ENT and the Find Streets Menu appears ...

Page 181: ... let ter and repeat until the name is correct then press ENT ENT B Or you can jump down to the lower box and pick a street from the selection list Press ENT then press or to select a street from the list and press ENT Find Street By Name menu Spell out name in the top box or select from the list in the lower box 3 The Find Streets menu reappears with the street you re searching for in the First St...

Page 182: ...ighlighted At right Streets Found list 4 The Map Page appears with the cursor pointing to the found street Map Page showing results of a street search The cursor points to the located street If you want to navigate to the found street at the cursor location just press MENU ENT EXIT Find an Intersection You must enter one street in the First Street dialog box and enter the next street in the Second...

Page 183: ... the second street in the top selection box Press or to change the first letter then press to move the cursor to the next letter and repeat until the name is correct then press ENT ENT B Or you can jump down to the lower box and pick the sec ond street from the selection list Press ENT then press or to se lect a street from the list and press ENT 5 The Find Streets menu reappears with the first an...

Page 184: ...section in our example is shown below Map Page showing results of an intersection search The cursor points to the located intersection If you want to navigate to the found intersection just press MENU ENT EXIT Find Waypoints 1 Press WPT ENT 2 If searching for the waypoint By Name press ENT If searching for the Nearest waypoint press to NEAREST ENT To search by name jump to step 5 below Find Waypoi...

Page 185: ...nt press ENT The Go To Waypoint command is already highlighted The unit will show navigation in formation to the waypoint B To find the waypoint press to FIND ENT The Map Page ap pears with the cursor highlighting the found waypoint Waypoint Information screens with the Go To Waypoint command se lected left and the Find on Map command selected right To clear these menus and return to the previous ...

Page 186: ...enu left Waypoint Information screen center At right the found waypoint is highlighted by the cursor on the Map Page A To navigate to the waypoint press ENT Go To Waypoint com mand is already highlighted The unit will show navigation infor mation to the waypoint B To find the waypoint press to FIND ENT The Map Page ap pears with the cursor highlighting the found waypoint ...

Page 187: ... Kenya Tanzania Ascension Island 1958 Ascension Island Astro Beacon E 1945 Iwo Jima Astro DOS 71 4 St Helena Island Astro Tern Island FRIG 1961 Tern Island Astronomical Station 1952 Marcus Island Australian Geodetic 1966 Australia Tasmania Australian Geodetic 1984 Australia Tasmania Ayabelle Lighthouse Djibouti Bellevue IGN Efate Erromango Islands Bermuda 1957 Bermuda Bissau Guinea Bissau Bogota O...

Page 188: ...gia Islands ISTS 073 Astro 1969 Diego Garcia Johnston Island 1961 Johnston Island Kandawala Sri Lanka Kerguelen Island 1949 Kerguelen Island Kertau 1948 West Malaysia Singapore Kusaie Astro 1951 Caroline Islands L C 5 Astro 1961 Cayman Brac Island Leigon Ghana Liberia 1964 Liberia Luzon Philippines Excluding Mindanao Luzon Philippines Mindanao Mahe 1971 Mahe Island Massawa Ethiopia Eritrea Merchic...

Page 189: ...927 Mexico North American 1983 Alaska Canada CONUS North American 1983 Central America Mexico Observaorio Metereo 1939 Azores Corvo Flores Islands Old Egyptian 1907 Egypt Old Hawaiian Mean for Hawaii Kauai Maui Oahu Old Hawaiian Hawaii Old Hawaiian Kauai Old Hawaiian Maui Old Hawaiian Oahu Oman Oman Ordinance Survey Great Britain 1936 Mean for England Isle of Man Scotland Shetland Islands Wales Or...

Page 190: ...an 1969 Guyana South American 1969 Paraguay South American 1969 Peru South American 1969 Trinidad Tobago South American 1969 Venezuela South Asia Singapore Tananarive Observatory 1925 Madagascar Timbalai 1948 Brunei East Malaysia Sabah Sarawak Tokyo Mean for Japan Korea Okinawa Tokyo Japan Tokyo Korea Tokyo Okinawa Tristan Astro 1968 Tristan da Cunha Viti Levu 1916 Fiji Viti Levu Island Wake Eniwe...

Page 191: ... against harmful interference in a residential installation This equipment generates uses and can radiate radio frequency energy and if not installed and used in accordance with the instructions may cause harmful interference to radio communications However there is no guarantee that interference will not occur in a particular installation If this equipment does cause harmful interference to radio...

Page 192: ...r 320DF rear view MY 4X Cable optional Temperature sensor built into transducer SPY X Speed Sensor with second connector TS 2X temperature sensor optional TS 3X temperature sensor optional Single temperature sensor installation Three temperature sensor installation Two temperature sensor installation Transducer connector ...

Page 193: ...185 Notes ...

Page 194: ...186 Notes ...
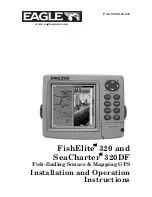
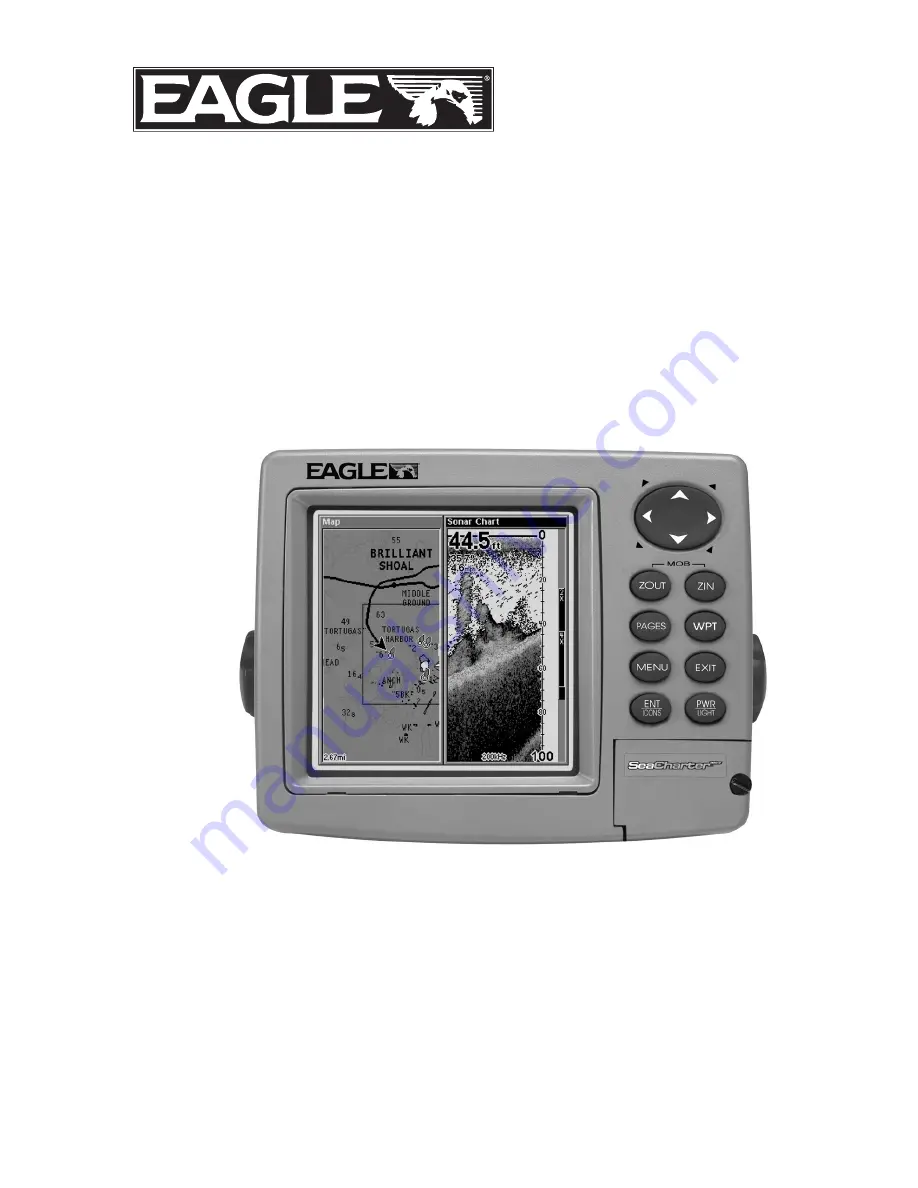
Page 195: ...the nonexclusive nonassignable right to use these Databases for supplemental navigation reference purposes but only as long as you comply with the terms and conditions of this License Agreement We reserve the right to terminate this license if you violate any aspect of this License Agreement You are responsible for using official government charts and prudent navigation for safe travel 3 The Datab...

Page 196: ...STANCES BE LIABLE TO ANYONE FOR ANY SPECIAL CONSEQUENTIAL INCIDENTAL OR OTHER INDIRECT DAMAGE OF ANY KIND Some states do not allow the exclusion or limitation of incidental or consequential damages so the above limitations or exclusions may not apply to you This warranty does NOT apply in the following circumstances 1 when the product has been serviced or repaired by anyone other than us 2 when th...

Page 197: ... OR REPLACEMENT OR REFUND AS JUST DESCRIBED IS THE EXCLUSIVE REMEDY AVAILABLE TO YOU AGAINST US FOR ANY DEFECT MALFUNCTION OR NON CONFORMITY CONCERNING THE PRODUCT OR FOR ANY LOSS OR DAMAGE RESULTING FROM ANY OTHER CAUSE WHATSOEVER WE WILL NOT UNDER ANY CIRCUMSTANCES BE LIABLE TO ANYONE FOR ANY SPECIAL CONSEQUENTIAL INCIDENTAL OR OTHER INDIRECT DAMAGE OF ANY KIND Some states do not allow the exclu...

Page 198: ...change or end our shipping policies regulations and special offers at any time We reserve the right to do so without notice in Canada If you re in Canada and you have technical return or repair questions please contact the Factory Customer Service Department Before any product can be returned you must call customer service to determine if a return is necessary Many times customer service can resol...

Page 199: ...s com 3 Canadian customers can write Lowrance Eagle Canada 919 Matheson Blvd E Mississauga Ontario L4W2R7 or fax 905 629 3118 Shipping Information If it becomes necessary to send a product for repair or replacement you must first receive a return authorization number from Customer Service Products shipped without a return authorization will not be accepted When shipping we recommend you do the fol...

Page 200: ...Visit our web site www eaglesonar com Eagle Pub 988 0143 672 Copyright 2003 All Rights Reserved Printed in USA 021903 Eagle Electronics ...

Reviews: