background image

Pub. 988-0143-871

                www.eaglesonar.com

FishElite 640c &

SeaCharter 640cDF

Fish-finding Sonars & Mapping GPS

Installation and Operation

Instructions

®

®

Summary of Contents for FishElite 640c

Page 1: ...Pub 988 0143 871 www eaglesonar com FishElite 640c SeaCharter 640cDF Fish finding Sonars Mapping GPS Installation and Operation Instructions ...

Page 2: ...es Inc Navionics is a registered trademark of Navionics Inc eXitSource Database copyright 2001 2005 Zenrin Co Ltd Exit Authority and eXitSource are trademarks of Zenrin Co Ltd Eagle Electronics may find it necessary to change or end our policies regulations and special offers at any time We reserve the right to do so without notice All features and specifications subject to change without notice A...

Page 3: ... hull installations 14 Selecting a Transducer Location 14 How low should you go 15 Shoot Thru Hull vs Transom Mounting 16 Transom Transducer Assembly and Mounting 17 Trolling Motor Bracket Installation single frequency only 22 Transducer Orientation and Fish Arches 23 Shoot Thru Hull Preparation 24 Hulls With Flotation Materials 24 Testing Determines Best Location 24 Shoot Thru Hull Installation 2...

Page 4: ... Displays 59 Depth Cursor 60 Depth Range Automatic 61 Depth Range Manual 61 FasTrack 62 Fish I D 62 FishTrack 63 Frequency SeaCharter only 64 HyperScroll 65 Log Sonar Chart Data 65 Noise Rejection 66 Overlay Data 66 Ping Speed HyperScroll 69 Reset Options 71 Reset Water Distance 71 Set Keel Offset 72 Sensitivity Auto Sensitivity 73 Automatic Sensitivity 73 Sonar Chart Mode 74 Sonar Page Sonar Char...

Page 5: ...arching 102 Set a Waypoint 104 Create Waypoint at Current Position 105 Create Waypoint on Map 106 Create Waypoint by Entering a Position 106 Navigate To a Waypoint 107 Set Man Overboard MOB Waypoint 108 Navigate Back to MOB Waypoint 108 Navigate to Cursor Position on Map 108 Navigate to a Point of Interest 110 Creating and Saving a Trail 110 Displaying a Saved Trail 111 Navigating Trails 112 Visua...

Page 6: ...ties 128 Alarm Clock 128 Sun Moon Rise Set Calculator 128 Trip Calculator 128 Trip Down Timer 128 Trip Up Timer 128 Waypoints 128 Delete a Waypoint 128 Edit a Waypoint 129 Selecting a Waypoint 130 Set a Waypoint by Average Position 130 Set a Waypoint by Projecting a Position 130 Section 8 System GPS Setup 131 Alarms 131 Check MMC Files and Storage Space 132 Communications Port Configuration 132 Co...

Page 7: ...rightness 153 Set Language 154 Set Local Time 154 Show WAAS Alarm 154 Software Version Information 155 Sounds Menu 156 Track Smoothing 156 Trail Options 157 General Trail Options 157 Specific Trail Options 159 Delete Trail 159 New Trail 159 Trail Visibility and Other Trail Options 159 Transparency 159 Units of Measure 160 Section 9 Searching 161 Find Addresses 162 Find Any Item Selected by Map Cur...

Page 8: ...ng to a way point but will also visually check to make sure a clear safe path to the waypoint is always available WARNING When a GPS unit is used in a vehicle the vehicle operator is solely re sponsible for operating the vehicle in a safe manner Vehicle operators must maintain full surveillance of all pertinent driving boating or fly ing conditions at all times An accident or collision resulting i...

Page 9: ...the manual So we designed our book so that you don t have to read the whole thing from front to back for the information you want At the start or end of each segment we ll tell you what content is coming up next If it s a concept you re already familiar with we ll show you how and where to skip ahead for the next important topic We ve also made it easy to look up any tips you may need from time to...

Page 10: ...en you come to a GPS menu command on the screen you can look it up in the manual by skimming over the table of contents just flipping through Section 6 or scanning through the command portion of Section 7 This unit is ready to use right out of the box but you can fine tune and customize it s operation with dozens of options Since sonar is the unit s key feature we put the main sonar options in Sec...

Page 11: ...6 x 8 6 cm sealed and waterproof suitable for saltwater use Back up memory Built in memory stores sonar records for decades Languages 10 menu languages selectable by user MMC slots One with waterproof door SD card compatible Sonar Frequency 50 200 kHz for SeaCharter 640cDF 200 kHz for FishElite 640c Recording MMC SD cards for recording sonar chart logs Transducers A dual frequency Skimmer transduc...

Page 12: ...ecording GPS trip de tails and displaying charts or custom maps Receiver antenna External EGC 12w 12 parallel channel GPS WAAS Background map Built in custom detailed Eagle map Con tains enhanced detail of continental U S and Hawaii Includes more than 60 000 nav aids and 10 000 wrecks obstructions in coastal and Great Lakes waters Metro areas selected major streets highways and interstate exit ser...

Page 13: ...the factory s Customer Service Department Customer service numbers are listed on the last page of this manual How Eagle Sonar Works Sonar has been around since the 1940s so if you already know how it works skip down to read about the relatively new technology of GPS But if you ve never owned a sonar fish finder this segment will tell you the under water basics Sonar is an abbreviation for SOund NA...

Page 14: ...es on page 6 If you re new to GPS read on Think of your unit as a small but powerful computer The unit includes a keypad and a screen with menus so you can tell it what to do The screen also lets the unit show your location on a moving map as well as point the way to your destination This gimbal mounted unit uses an external antenna receiver module which makes the whole system work something like ...

Page 15: ... can hold data ranging from 8 MB to 1 GB in size Compare that to a floppy disk s 1 44 MB capacity This unit uses all that MMC space for two key GPS purposes You can backup your onboard GPS Data Files by copying them to the MMC Since the MMC is removable like a floppy disk or a cassette tape you can store these GPS Data Files on a personal computer equipped with an MMC card reader Or store them on ...

Page 16: ...discontinued SA on May 2 2000 after the military developed other methods to deny GPS service to enemy forces Reliable accuracy for civilian users jumped from 100 meters 330 feet under SA to the present level of 10 to 20 meters about 30 to 60 feet Twenty four satellites orbit 10 900 nautical miles above the Earth passing overhead twice daily A series of ground stations with precisely surveyed locat...

Page 17: ... meters verti cally and horizontally but according to the FAA it consistently comes within 1 2 meters horizontally and 2 3 meters vertically It does this by broadcasting correction signals on GPS frequencies Your unit auto matically receives both GPS and WAAS signals There are however some fringe areas of the U S including parts of Alaska that do not yet receive robust WAAS coverage Continued WAAS...

Page 18: ...ilable on our web It makes a great supplement to this manual Sonar Viewer You can also download a free copy of our Sonar Viewer software This PC based software application plays back any sonar chart log recorded with a Eagle sonar product Features include Adjustable range zoom sensitivity ColorLine noise rejection surface clarity etc Color interpretation of sonar signals can be user defined Operat...

Page 19: ...ovement of dotted cross hair lines on your mapping screen called the cursor The arrow keys also control a hori zontal line depth cursor on the sonar screen The arrow keys help you move around the menus so you can execute different commands They are represented by symbols like these which denote the down arrow key the up arrow the left arrow and the right arrow Keyboard The other keys perform a var...

Page 20: ...ng the trail Now begin moving and follow your unit s directions Translated into complete English step 1 above would mean Start on the Map Page Press the Menu key twice Next repeatedly press or press and hold the down arrow key to scroll down the menu and select highlight the My Trails menu command Finally press the Enter key Step 2 would mean Press the down arrow key repeatedly to scroll to the tr...

Page 21: ...cable from the unit s location to an appropriate power source and connect it there 6 Connect the transducer power cable to the unit and mount the sonar unit on the bracket Transducer Installation These instructions will help you install your Skimmer transducer on a transom on a trolling motor or inside a hull These instructions cover both single and dual frequency Skimmer transducers Please read a...

Page 22: ...tions Tools two adjustable wrenches flat head screwdriver Supplies plastic cable ties Shoot through hull installations Tools these will vary depending on your hull s composition Consult your boat dealer or manufacturer Other tools are a wooden craft stick or similar tool for stirring and applying epoxy and a paper plate or piece of cardboard to mix the epoxy on Supplies rubbing alcohol 100 grit sa...

Page 23: ... closer than approximately one foot from the engine s lower unit This will prevent cavitation bubble interference with propeller operation 5 If possible route the transducer cable away from other wiring on the boat Electrical noise from engine wiring bilge pumps and aerators can be displayed on the sonar s screen Use caution when routing the trans ducer cable around these wires Good and poor trans...

Page 24: ...hoot Thru Hull vs Transom Mounting In a shoot thru hull installation the transducer is bonded to the inside of the hull with epoxy The sonar ping signal actually passes through the hull and into the water This differs from a bolt thru hull installa tion often called thru hull In that case a hole is cut in the hull and a specially designed transducer is mounted through the hull with a threaded shaf...

Page 25: ...nst the transom and see if you can move the transducer so that it s parallel with the ground The following instructions sometimes vary depending on the mounting bracket that came with your transducer Single frequency Skimmers come with a one piece stainless steel bracket while dual frequency Skimmers come with a two piece plastic mounting bracket Use the set of instructions that fits your model 1 ...

Page 26: ...2 Aligning the transducer on the transom A One piece bracket Slide the transducer between the two ratch ets Temporarily slide the bolt though the transducer assembly and hold it against the transom Looking at the transducer from the side check to see if it will adjust so that its face is parallel to the ground If it does then the A position is correct for your hull If the transducer s face isn t p...

Page 27: ...r from the side check to see if it will adjust so that its face is parallel to the ground If it does then the A positions are correct for your hull If the transducer s face isn t parallel with the ground remove and disassemble the transducer and ratchets Place the ratchets into the bracket holes with the letter B aligned with the bracket alignment mark Place them on the transducer aligned with the...

Page 28: ...transducer and bracket assembly against the transom The transducer should be roughly parallel to the ground The trans ducer s centerline should be in line with the bottom of the hull Don t let the bracket extend below the hull Mark the center of each slot for the mounting screw pilot holes You will drill one hole in the center of each slot Drill the holes For the one piece bracket use the 29 bit f...

Page 29: ...st the transducer so that it s parallel to the ground and tighten the nut until it touches the outer washer then add 1 4 turn Don t over tighten the lock nut If you do the transducer won t kick up if it strikes an object in the water Align transducer centerline with hull bottom and attach transducer to transom Rear view of dual frequency Skimmer shown 6 Route the transducer cable through or over t...

Page 30: ...ise Don t allow the transducer bracket to go below the bottom of the hull Trolling Motor Bracket Installation single frequency only 1 Attach the optional TMB S bracket to the transducer as shown in the following figure using the hardware supplied with the transducer Note The internal tooth washer is supplied with the TMB S Attach motor mounting bracket to transducer 2 Slide the adjustable strap su...

Page 31: ...f the arch slopes up but not back down then the front of the trans ducer is too high and needs to be lowered If only the back half of the arch is printed then the nose of the transducer is angled too far down and needs to be raised NOTE Periodically wash the transducer s face with soap and water to re move any oil film Oil and dirt on the face will reduce the sensitivity or may even prevent operat...

Page 32: ...r to a solid portion of the hull For example some but not all manufacturers use a layer of fiberglass then a core of balsa wood finishing with an outer layer of fiberglass Removing the inner layer of fiberglass and the balsa wood core exposes the outer layer of fiberglass The transducer can then be epoxied directly to the outer layer of fiberglass After the epoxy cures for 24 hours fill the remain...

Page 33: ...es the water depth The harder more rocky the bottom the easier it will be to get a second bot tom signal Don t touch the controls once they ve been set Example of a second bottom signal Unit is in 30 feet of water with range set at 80 feet and sensitivity set at 87 percent 2 Next take the transducer out of the water and place it in the water in the sump of the boat face down Notice how the signal ...

Page 34: ...nd observe the bottom signal You ll need to figure some way to prop the transducer into position while you make your test run A brick or two might be sufficient to hold it in place 5 When you re satisfied with a location mark it and proceed with the installation Shoot Thru Hull Installation If you are installing the transducer on a hull with floatation material sandwiched within the hull refer to ...

Page 35: ...1 5 mm thick on the face of the transducer as shown in the previous figure Make sure there are no air pockets in the epoxy layer Apply the remaining epoxy to the sanded area on the hull 3 Press the transducer into the epoxy twisting and turning it to force any air bubbles out from under the transducer face Stop pressing when you bottom out on the hull When you re finished the face of the trans duc...

Page 36: ...e same time you will need a combination device NOTE This unit is packed with a transducer containing a built in temp sensor The SeaCharter package also includes a speed sensor If you have a FishElite 640c and want a speed sensor or additional temp sensor see the Accessory Ordering Information in the back of this manual If a second temp sensor is used it must be the model TS 2U This model has a fix...

Page 37: ...ill bit for pilot holes screwdriver Required supplies for this job include four 8 stainless steel wood screws 3 4 long high quality marine grade above or below waterline sealant compound First find a location on the boat s transom where the water flow is smooth est Don t mount the sensor behind strakes or ribs These will disturb the water flow to the speed sensor Make sure the sensor will remain i...

Page 38: ... the gap between the tran som and the sensor with the sealant compound This will help ensure a smooth water flow Speed sensor mounting configuration side view left and rear view right Route the sensor s cable through or over the transom to the sonar unit If you need to drill a hole in the transom to pass the connector through the required hole size is 5 8 Caution If you drill a hole in the transom...

Page 39: ...not available we recommend connecting direct to the battery and in stalling an inline switch This will let you shut off power to the power cable when the unit is not in use When you are not using the unit you should always shut off power to the power cable es pecially when the power cable is disconnected from the unit Power connections for the sonar unit If possible keep the power cable away from ...

Page 40: ...w GPS module This device contains the unit s external antenna and receiver for GPS and WAAS signals The antenna receiver module comes with a 25 foot extension cable This module can be mounted on a flat surface or pole or a mag net is included for temporary mounting on any ferrous surface EGC 12w Module bottom view left and top view right You need to select an antenna installation location that has...

Page 41: ...munication port Com port one Com 1 can be used to receive NMEA format GPS data The com port can also transmit NMEA format GPS data to another device A data cable should contain three wires Com 1 uses the yellow wire to transmit the orange wire to receive and the shield wire for signal ground Com 1 wiring to receive NMEA position information from some other GPS receiver Com 1 wiring to transmit NME...

Page 42: ...t when it s tilted for the best viewing angle You should also make sure there is enough room behind the unit to attach the power and transducer cables A drawing on the next page shows the dimensions of a gimbal mounted unit Holes in the bracket s base allow wood screw or through bolt mounting You may need to place a piece of plywood on the back side of thin fiber glass panels to reinforce the pane...

Page 43: ... location This way the bracket can be installed so that it covers the hole holds the cables in position and results in a neat installation Some customers prefer to mount the bracket to the side of the cable hole It s a matter of personal preference Front view left and side view right showing dimensions of the SeaCharter 640cDF unit when mounted on gimbal bracket Millimeter Inch 27 6 1 09 77 1 3 03...

Page 44: ... over the hole and butt the rear of the bracket base firmly against the cables pinning them in place against the side of the hole Finally fasten the bracket to the dash Attach the unit to the gimbal bracket using the supplied gimbal knobs and washers In Dash Installation You can mount the unit in the dash with an optional FM 5 In Dash Adapter Kit The kit includes mounting hardware a template for c...

Page 45: ...informa tion inside the back cover of this manual Install batteries in typical portable power pack MMC or SD Card Memory Card Installation Your unit uses a MultiMedia Card to store information such as sonar logs custom maps waypoints trails and other GPS data The unit can also use Secure Digital Cards SD card to store data NOTE Throughout this manual we will use the term MMC but just re member you...

Page 46: ...ightened use a thumbnail a coin or a screwdriver to open the door 2 Just press a finger against the label of the MMC and drag it from the slot 3 Close the compartment door and fasten the thumb screw finger tight To add an MMC or SD Card 1 Open the card compartment door 2 Grasp the bottom of the MMC and push the top of the card into the slot Once the card is started use your fingernails to slide it...

Page 47: ...irst turn on the unit the Map Page appears If you would rather start learning about GPS operation jump to Sec 6 Basic GPS Operations Remember you don t need to read this manual from cover to cover to get going We designed it so you can skip around to the section you want to read ...

Page 48: ...40 Notes ...

Page 49: ... all work together BUT if you just can t wait to get on the water turn to the one page Quick Reference on page 49 Keyboard SeaCharter 640cDF unit showing map with sonar page keyboard and access door for MMC cards 1 PWR LIGHT The PWR key turns the unit on and off and activates the backlight 2 PAGES Pressing the Pages key and the arrow keys switches the unit between the four different page screens S...

Page 50: ... In key lets you zoom in the screen On the Sonar Page it enlarges fish signals and bottom detail On the Map Page it lets you see greater detail in a smaller geographic area Power lights on and off To turn on the unit press PWR As the unit powers up the Map Page is displayed first To switch to the Sonar Page press PAGES TO SONAR EXIT To turn on the backlight press PWR The unit has three backlight l...

Page 51: ...and alarms and sets the alarm style Transparency adjusts the level of transparency for menus Alarms turns sonar and GPS alarms on or off and changes alarm thresholds Route Planning used to plan view or navigate a route My Trails shows creates and deletes plot trails Also used to navigate or backtrack a trail Cancel Navigation turns off the various navigation commands Used to stop navigating after ...

Page 52: ...Status Page The Satellite Status Page provides detailed information on the status of the unit s satellite lock on and position acquisition To get to the Satel lite Status Page press the PAGES key then use to select STATUS Clear the Pages Menu by pressing EXIT This page represents a GPS function so it is discussed in much greater detail in Sec 6 No matter what Page you are on a flashing current pos...

Page 53: ...o the Navigation Page press PAGES to NAVIGATION EXIT This page represents a GPS function so it is discussed in much greater detail in Sec 6 Navigation Page recording a trail traveling northeast Map Page The Map Page screens show your course and track from a bird s eye view By default this unit shows the map with north always at the top of the screen The arrow in the center of the screen is your pr...

Page 54: ...onar chart This is a cross section view of the water column beneath the boat The chart moves across the screen displaying sonar signal echoes that represent fish structure and the bottom To get to the Sonar Page press the PAGES key then use to select SONAR The Sonar Pages Menu offers four chart display options Full So nar Chart Split Zoom Sonar Chart Split Frequency Sonar Chart and Digital Data Fr...

Page 55: ...left Split Zoom display mode right Split Frequency mode left and Digital Data mode right Full sonar chart mode Surface clutter Structure Bottom signal Fish arches Depth scale Digital data overlay depth temperature Surface signal Zoom bar FasTrack bar graph ...

Page 56: ...can help you better interpret the underwater scene We will discuss all of those features and options in Sec 4 but to show you how easy this unit is to operate the following page contains a 10 step quick reference that will cover most fish finding situations The quick reference describes how your unit will operate with all sonar fea tures set to default settings ...

Page 57: ... right to left showing you what s under the boat as you cruise across the water You can change the display by Zoom in to enlarge the chart for more detail press ZIN Zoom out to return to full chart mode press ZOUT 7 Watch the display for the appearance of fish symbols or arches if Fish I D is turned off When you see fish symbols or arches you ve found fish Stop the boat and get your lure or bait i...

Page 58: ...er appears on the screen Decreasing the sensitivity can reduce the clutter and show the strongest fish echoes if fish are present As you change the sensitivity setting you can see the difference on the chart as it scrolls These figures show results of different sensitivity levels on the same lo cation Fig 1 Sensitivity at 88 percent determined by Auto Sensitivity Typical of full auto mode Fig 2 Se...

Page 59: ...nsitivity in Manual Sensitivity Mode is similar to driving a car without cruise control you have complete manual control of the car s speed In the unit manual mode allows you to set sensitivity at 100 percent maximum or zero percent minimum Depending on wa ter conditions the bottom signal may completely disappear from the screen when you reduce sensitivity to about 50 percent or less Try adjusting...

Page 60: ...l return when he sees it However locating fish by symbol only has some limitations Your sonar unit s microprocessor is remarkably powerful but it can be fooled Some of the echoes calculated to be fish could be tree limbs or tur tles To see what s under your boat in maximum detail we recommend you turn off Fish I D and begin learning to interpret fish arches Fish I D is most handy when you are in a...

Page 61: ...wanted marks on the display The ASP feature has four settings Off Low Medium and High If you have high noise levels try using the High ASP setting However if you are having trouble with noise we suggest that you take steps to find the interference source and fix it rather than continually using the unit with the high ASP setting There are times when you may want to turn the ASP feature off This al...

Page 62: ...goes shallower than the shallow alarm s setting or deeper than the deep alarm s set ting For example if you set the shallow alarm to 10 feet the alarm will sound a tone if the bottom signal is less than 10 feet It will continue to sound until the bottom goes deeper than 10 feet The deep alarm works just the opposite It sounds a warning tone if the bottom depth goes deeper than the alarm s setting ...

Page 63: ...Alarm The zone alarm is triggered when any echo passes inside the zone alarm bar shown on the right side of the screen To adjust and turn on the zone alarm 1 From the Sonar Alarms menu press to ZONE ALARM ENABLED to ADJUST ZONE ENT Sonar Alarms menu with Adjust Zone command selected left Adjust Zone Alarm selection box with Upper selected right 2 To set the upper boundary for the Zone Alarm use to...

Page 64: ...racies Be fore you change the setting calculate the percentage the speed is off You will enter this percentage in a moment If you figure the sensor is reading 10 percent faster than actual speed you will enter 10 in the calibration window If the sensor is reading 5 percent slower than true speed you will enter 5 in the window A good way to gauge your speed sensor s performance is to compare its re...

Page 65: ...e appears on the screen as a long line instead of a fish arch Reducing the chart speed may result in a shorter line that more closely resembles a regular fish return Sonar Page menu with Chart Speed command selected left Chart Speed Control Bar right If you experiment with chart speed remember to reset it to maximum when you resume trolling or moving across the water at higher speed To change char...

Page 66: ...equal size one with red to yellow color and the other without then the target with brighter color yellow is the stronger signal This helps distinguish weeds from trees on the bottom or fish from structure ColorLine is adjustable Experiment with your unit to find the Color Line setting best for you Sonar Page menu with ColorLine command selected left The ColorLine control bar right To adjust the Co...

Page 67: ...or Data You can select items from any of these catego ries for display on any page To change the information displayed on your screen While on the Page display you want to customize press MENU to CUSTOMIZE ENT This will highlight one of the digital data boxes on the screen To change the data contained in the box press ENT or press or to select a different box to customize Upon making a selection y...

Page 68: ...e category name and press ENT Expand any categories that may contain information you want to dis play Then press to select a display option With the option high lighted press ENT to turn it on check and turn it off uncheck After all options are set press EXIT EXIT Depth Cursor The depth cursor consists of a horizontal line with a digital depth box on the right side The numbers inside the box show ...

Page 69: ... to a different depth Sonar Page menu with Depth Range command selected left The Depth Range Control Scale right 1 From the Sonar Page press MENU to DEPTH RANGE ENT 2 The Depth Range Control Scale appears Press to select a differ ent depth range A blue bar highlights the selected range Range num bers in light blue cannot be selected 3 When the new range is selected press EXIT to clear the menu Dep...

Page 70: ...n a normal chart display FasTrack con verts the graph to a vertical bar graph that with practice makes a use ful addition to fishing at a stationary location Sonar Page showing FasTrack Fish I D The Fish I D feature identifies targets that meet certain conditions as fish The microcomputer analyzes all echoes and eliminates surface clutter thermoclines and other undesirable signals In most instance...

Page 71: ...emember Fish I D is one of the many tools we provide so you can analyze your sonar returns for maximum fish finding infor mation This and other features can help you successfully see beneath the boat under varied water and fishing conditions So practice with the unit in both the Fish I D mode and without to become more famil iar with the feature The default setting for Fish I D is off Sonar Featur...

Page 72: ...50 kHz fre quency has a 35 cone angle The default frequency is 200 kHz best for use in shallow water about 300 feet or less This frequency is the best choice for about 80 percent of the fresh and salt water sport fishing applications When you get into deep salt water 300 to 500 feet or deeper the 50 kHz frequency will perform better The 200 kHz transducer will give you better detail and definition...

Page 73: ...press MENU to SONAR FEATURES ENT 2 Press to TRANSDUCER FREQUENCY select 200 KHZ and press ENT 3 Press EXIT EXIT to clear the menu HyperScroll See the entry on Ping Speed which controls the HyperScroll feature Log Sonar Chart Data If you have an MMC installed in the unit the sonar data shown on the screen can be saved to the MMC This can be played back at any time to play a recorded sonar chart log...

Page 74: ... you want to lower the file quality and record for a longer period of time After you have changed the settings select START LOGGING and press ENT Noise Rejection See the entry on Advanced Signal Processing in this section Overlay Data On any Page display except Satellite Status you can float or overlay additional GPS or navigation data on the screen with the Overlay Data command For example if you...

Page 75: ...ation categories with or symbols next to each category name A category with a next to it is expandable meaning its contents are hidden Selecting the category name and pressing ENT will show the category s contents An expanded category one with a next to its name can be collapsed to hide its contents 3 Expand categories that may contain data you want to display Then press to select a data option 4 ...

Page 76: ...om the display and press ENT ENT to re move the data To remove another item repeat Step 2 3 When you have finished removing all the items you want from the screen press EXIT to return to the main page display Overlay Data Shown menu with Local Time option selected left Data information window with Remove highlighted right To move overlay data You may find it useful to move data floating on your di...

Page 77: ... and Enor mous Press EXIT The selected data type will be displayed in the new size The Map Page left shows Depth Ground Speed and the Steering Ar row The Sonar Page right shows Depth Ground Speed and Track NOTE Some data types can be displayed in only one font size If that is the case the Data Size box will not be displayed for that data type Ping Speed HyperScroll Ping Speed controls the rate at ...

Page 78: ...er appearing on the screen If this occurs decrease the sensitivity to a level that eliminates the clutter When you turn Hyper Scroll off you can return to your original sensitivity level Sonar Menu with Ping Speed command selected left Ping Speed Control Bar right To change Ping Speed 1 From the Sonar Page press MENU to PING SPEED ENT 2 The Ping Speed Control Bar appears Press to increase ping spe...

Page 79: ... Map Page at the 4000 mile zoom range just as if you had turned it on for the first time All options have been returned to the factory settings System Setup menu with Reset Options command selected left The Reset Options dialog box right NOTE Reset Options does not erase any waypoints routes plot trails or sonar logs Reset Water Distance The sonar chart s Digital Data display option includes a box...

Page 80: ... to the lowest part of the boat In this example we will use 3 5 feet This will entered as a negative 3 5 feet which makes the depth indi cators perform as if the transducer s lower in the water than it really is 1 Press MENU MENU to SONAR SETUP ENT to SET KEEL OFFSET ENT 2 The Keel Offset dialog box appears Press to change the plus sign to a minus sign 3 Press to the first number then press to cha...

Page 81: ...a solid bottom signal displayed plus a little more power This gives it the capability to show fish and other detail Situations occur when an increase or decrease in sensitivity is needed An increase in sensitivity is necessary when you want to see more de tail A decrease in sensitivity will clear up the screen when it becomes cluttered by tiny air bubbles caused by boat wakes or wave action The co...

Page 82: ...y Control Bar on the screen as the chart scrolls You can see the changes on the screen as you press the up and down arrows This is handy when there is a lot of clutter in the water and you are matching the sensitivity to rapidly changing water conditions Sonar Chart Mode The default color scheme for the sonar chart is White Background but we offer other variations to suit your viewing preferences ...

Page 83: ...cross the screen from right to left Depth scales on the right side of the screen aid in determining the depth of targets The line at the top of the screen represents the surface The bottom depth and surface temperature if equipped with a temperature sensor or a transducer with a temp sensor built in show at the top left corner of the screen The FasTrack display shows just to the right of the scale...

Page 84: ...ws at the bottom left corner of the screen Digital Data This mode shows the chart on the right side of the screen The left side has five digital data boxes containing Water Depth Water Tempera ture Water Speed from an optional speed sensor Water Distance also requires a speed sensor and an air temperature sensor The Depth box also shows settings for the Shallow and Deep alarms Digital Data Customi...

Page 85: ... Each cate gory will have a or symbol next to it A category with a next to it is expandable meaning its contents are hidden Options List for customizing Digital Data boxes The list first appears with Water Temperature selected left Maximum Speed has been picked to replace Water Temperature right Selecting the category name and pressing ENT will bring up the cate gory s contents An expanded categor...

Page 86: ...n the left and the sonar chart on the right This screen option can be found on the Pages Menu under the Map Page category Full Map Page left The Pages Menu with the Map option list center Map With Sonar split screen right When using the Map with Sonar page you can switch between the two pages by pressing PAGES PAGES You will not be able to zoom in on one page if the other page is active You will h...

Page 87: ...e default sonar chart log stored in the unit press ENT EXIT The recorded chart begins scrolling across the screen just as if you were on the water To turn off the simulator repeat Step 1 Sonar Page playing a recorded sonar chart in Sonar Simulator mode Tip The Sonar Simulator can use sonar charts recorded on an MMC card To play back a sonar chart install the MMC containing the chart 1 Press MENU M...

Page 88: ... demo mode flash on the bottom of the display Demo mode will stop when you turn on the unit with a transducer attached Stop Chart If you are running multiple units on a boat or using this unit in a car there are times when you may want to turn off the sonar The Stop Chart command stops the chart from scrolling The sonar chart will restart each time you turn on your unit From the Sonar Page press M...

Page 89: ...gnals and the bottom This unit lets you zoom in the display by pressing the Zoom In key ZIN Pressing ZIN once doubles the size 2X of all echoes on the screen Pressing it again quadruples the size of the echoes 4X When turned on the zoom bar on the far right side of the screen shows which echoes will be displayed on the screen when the ZIN key is pressed To turn on the zoom bar press MENU to SONAR ...

Page 90: ...nd down the display By pointing your zoom at different portions of the chart as it scrolls you can get a close up look at structure or cover below you To use Zoom Pan you will have to turn off Auto Depth Range To do this press MENU and select Auto Depth Range Press ENT to uncheck the box next to it then press EXIT ZIN and use to pan up and down the water column Press ZOUT to return the display to ...

Page 91: ...ical wiring on the boat may help Route the sonar unit s power cable directly to the battery instead of through a fuse block or ignition switch 2 Inspect the transducer cable for breaks cuts or pinched wires 3 Check the transducer and power connector Make sure it s securely plugged in to the unit Weak bottom echo digital readings erratic or no fish signals 1 Make sure the transducer is pointing str...

Page 92: ...unit to eliminate weaker signals such as fish or even structure from the display Try using resis tor spark plugs or routing the sonar unit s power and transducer cables away from other electrical wiring on the boat No fish arches when the Fish I D feature is off 1 Make sure the transducer is pointing straight down This is the most common problem if a partial arch is displayed 2 The sensitivity may...

Page 93: ...ar s wires away from it You may need to route the sonar unit s power cable directly to the battery to isolate it from other wiring on the boat If no noise displays on the sonar unit from electrical equipment then make sure everything except the sonar unit is turned off then start the engine Increase the RPM with the gearshift in neutral If noise ap pears on the display the problem could be one of ...

Page 94: ...86 Notes ...

Page 95: ...ther BUT if you just can t wait to get outside turn to the one page Quick Reference on page 100 Keyboard SeaCharter 640cDF unit showing Map with Sonar page keyboard and access door for the MMC slot 1 PWR LIGHT turns the unit on and off and activates the backlight 2 PAGES Pressing this and the arrow keys 4 switches the unit between the four different page screens Satellite Status Page Navigation Pa...

Page 96: ...ZIN The Zoom In key lets you zoom in the screen On the Sonar Page it enlarges fish signals and bottom detail On the Map Page zooming in lets you see more detail in a smaller geographic area Power lights on and off To turn on the unit press PWR As the unit powers up the Map Page is displayed first To turn on the backlight press PWR again The unit has three backlight levels Repeatedly pressing PWR w...

Page 97: ...ides creates and deletes plot trails Also used to navigate or backtrack a trail Cancel Navigation turns off the various navigation commands Used to stop navigating after you have reached your destination Sonar Setup sets various sonar options GPS Setup sets various GPS receiver options System Setup sets general configuration options Sun Moon Calculations finds the rising and setting time of the su...

Page 98: ...to the Sonar Page press the PAGES key then use to select SONAR Satellite Status Page The Satellite Status Page shown in the following images provides de tailed information on the status of the unit s satellite lock on and posi tion acquisition To get to the Satellite Status Page press the PAGES key then use to select STATUS No matter what Page you are on a flashing current position indica tor ques...

Page 99: ...cked onto a satellite if the number is grayed out there fore it isn t being used to solve the position Beneath the circular graph are the bar graphs one for each satellite in view Since the unit has twelve channels it can dedicate one channel per visible satellite The taller the bar on the graph the better the unit is receiving the signals from the satellite NOTE One of the data display options fo...

Page 100: ...e top of the compass rose indicates the current direction of travel track Traveling north and recording a trail on the Navigation page The page looks like this when the unit is not navigating to a waypoint fol lowing a route or backtracking a trail When navigating to a waypoint the Navigation screen looks like the following figure Your ground speed track distance bearing to way point and course ar...

Page 101: ... desired course line The course line is an imaginary line drawn from your position when you started navigating to the destination The course line is shown on the Navigation screen and Map Page screens as a red line Navigation Page going to a waypoint while creating a new trail The cross track error range is shown on the compass rose as a white corridor flanking the course line The outer edges of t...

Page 102: ...ows the map with north always at the top of the screen This can be changed See the topic Map Orientation in Sec 8 If you are navigating to a waypoint the map shows your start ing location present position course line and destination You don t have to navigate to a waypoint to use the map Map Page is the default screen that appears when you turn on the unit To get to the Map Page from another page ...

Page 103: ... detail is 15 miles You can con tinue to zoom in closer but the map will be enlarged without revealing more map content except for a few major city streets Load your own high detail custom map made with MapCreate or a pre made Free domMap from LEI and you can zoom in to 0 02 miles with massive amounts of map detail Map Pages with high detail MapCreate map of an urban area loaded on the MMC Arteria...

Page 104: ...sive amounts of information not found in the background map MapCreate maps contain the searchable Points of Interest database all the minor roads and streets all the landmark features summits schools radio towers etc and smaller lakes rivers streams and ponds What is more important is the large scale map detail that allows your GPS unit to show a higher level of position accuracy For example the b...

Page 105: ...heck the text on Map Detail Category Selection page 143 It shows how to use the Map Categories Drawn menu to turn individual POI displays off and on Even though they are not set for display you can still search for POIs The icons will pop up when they are found The Map Page has its own menu which is used for several functions and various options To access the Map Page Menu from the Map Page press ...

Page 106: ...p windows right Resize Window command Resize Window is a feature for pages that have two major windows You can change the relative size of the windows as well as the layout switching between horizontal and vertical 1 From any two window display press MENU to RESIZE WINDOW ENT 2 Four flashing arrows appear along the centerline dividing the two windows Press an arrow key perpendicular to the centerl...

Page 107: ...map which is now zoomed in to 40 miles Fig 4 Pressing has switched the page layout from horizontal to vertical 3 To change the window size again or revert back to the original dis play just follow the steps above Most dual window displays use half the screen for each window by default The following page contains a 12 step quick reference for the most basic GPS operations If you don t want to carry...

Page 108: ... by Zoom in closer to see greater detail press ZIN zoom in key Zoom out to see more area less detail press ZOUT zoom out key Scroll map north south east or west using arrow keys To stop scrolling and return to current position on map press EXIT key 6 Set a waypoint Wpt 001 at your current position so you can navigate back here press WPT WPT Waypoint symbol and 001 appears 7 Zoom scroll map to find...

Page 109: ...the lower left corner of the screen 1 Press the ZIN key zoom in to move in closer and see greater detail in a smaller geographic area 2 Press the ZOUT key zoom out to move farther away and see less map detail but a larger geographic area When you are traveling the map will automatically move as you move This keeps your current location roughly centered on the screen You can manually pan or scroll ...

Page 110: ...IT to clear the cursor and jump back to your current position on the map When you want to take another peek at that distant place just press EXIT again You can use this trick to toggle between your cur rent position and your destination Searching Now that you have seen how the unit can find your current location let s search for something else Searching is one of the most powerful features in the ...

Page 111: ... Menu left Category Selection menu center List of the nearest restaurants right 4 If you want you could scroll here to select another restaurant but for now we will just accept the nearest one so press ENT POI information screen on fast food restaurant nearest this position Screen shows name street address phone number latitude longitude distance to restaurant and its compass bearing Go To command...

Page 112: ...nother place NOTE Search works from mapping and POI data loaded in the unit If you do not have a high detailed custom map for the area you are searching you may not find anything Set a Waypoint A waypoint is an electronic address based on the latitude and longitude of a position on the earth It represents a location spot or destination that can be stored in memory then recalled and used later on f...

Page 113: ...as way point 003 The waypoint symbol and number appear on the map NOTE The Quick Save method uses the default waypoint symbol until you edit an existing waypoint and change its symbol Edit Waypoint Symbol is described in Sec 7 After you have changed a waypoint symbol the unit will remember the one you chose and use it the next time you quick save a waypoint To revert back to the default symbol edi...

Page 114: ...he place where you want to make a waypoint 2 Press WPT WPT The waypoint is saved and automatically given a name with a sequential number such as waypoint 001 The waypoint symbol and number appear on the map Create Waypoint by Entering a Position 1 Press WPT to MY WAYPOINTS to NEW ENT 2 Press to ENTERED POSITION ENT to CREATE ENT 3 Press to LATITUDE ENT Enter the latitude by pressing to change the ...

Page 115: ...ypoint commands 1 Press WPT to MY WAYPOINTS ENT To look up the nearest waypoint press to NEAREST ENT To look by name and scroll through the en tire waypoint list press ENT For this example let s look by name 2 If your waypoint list is a long one you can spell out the waypoint name in the FIND BY NAME box Press to change the first character then press to move the cursor to the next character and re...

Page 116: ...ng toward the man overboard position and the destination name says Going To Man Overboard The Map Page displays a Man Overboard waypoint represented by a human figure and the steering arrow points where to steer to reach that position Navigating to Man Overboard Man Overboard activated message left The Navigation Page is shown center Going to Man Overboard position on Map Page right The man overbo...

Page 117: ...l not appear highlighted but the cursor will take you to those locations just the same The cursor crosshairs are centered on Oologah Oklahoma 3 Press MENU ENT and the unit will begin navigating to the cursor lo cation The Map Page will display a red line from your current position to the cur sor position The Navigation Page displays a compass rose showing naviga tion information to your destinatio...

Page 118: ...ravel history a record of the path you have taken Trails are useful for repeating a journey along the same track They are par ticularly handy when you are trying to retrace your trip and go back the way you came On the screen trails are represented by a solid line ex tending from the back of the current position arrow The default color is light magenta The unit is set to automatically create and r...

Page 119: ...You can save and recall up to 10 different plot trails which can be cop ied to your MMC for archiving or for transfer to your MapCreate soft ware Tip Another quick way to stop recording one trail and begin a new one is to use the New Trail command Press MENU MENU to MY TRAILS ENT ENT Caution You also have the option of completely turning off trail record ing under the trail Options command If howe...

Page 120: ...ge and Navigation Page The only difference be tween them is navigating a trail follows a trail forward while back tracking follows a trail in reverse When hiking at walking speed with a hand held GPS we often just use visual back trailing because it is a bit better at following each turn on a foot path At faster speeds like on the highway or on the water the Navigate Trail and Backtrack Trail comm...

Page 121: ...T A confirmation message will appear Press ENT Navigate a trail menu sequence Fig 1 My Trails command Fig 2 Trails Menu Fig 3 Edit Trail Menu Fig 4 Edit Route Menu with Navigate Route command highlighted for Trail 2 A trail is always con verted to a route when you navigate the trail On the Map Page the trail you are navigating is represented by a ma genta line when the visible trail option is on T...

Page 122: ...southeast straight toward trail point 3 left Driver has reached point 3 and has turned southwest to follow the trail right Navigate trail navigation page compass rose views Driver is heading north straight toward trail point 3 left Bearing arrow shows the bearing to the trail point is 355 degrees Driver has reached trail point 3 right causing the Arrival alarm to go off The unit now shows navigati...

Page 123: ...NCEL NAVIGATION ENT A confirmation message will appear Press ENT Transfer Custom Maps and GPS Data Files Custom Maps Custom maps work only from the MMC card or SD card When a card containing a Custom Map File is loaded into the unit the unit auto matically loads the map into memory when the unit is turned on Instructions for copying Custom Map Files to an MMC are contained in the instruction manua...

Page 124: ...ich tells you if an MMC is present or not If no MMC is present you must insert a card into the unit to activate the Load or Save commands To transfer data from the unit to the MMC press ENT for SAVE To transfer data from the MMC to the unit press to LOAD ENT 3 Saving to MMC To accept the default name Data for the GPS Data File press to SAVE DATA ENT If you want to rename the file as shown in the f...

Page 125: ...memory There may be more than one GPS Data File USR on the card To select a file press ENT to activate the selec tion box use to highlight the file then press ENT to accept the se lection Next press to LOAD DATA ENT The unit will display a comple tion message when the data transfer is finished To return to the main page display press EXIT repeatedly ...

Page 126: ...n MMC into the unit s memory Cancel Navigation You can turn off any of the navigation commands after you reach your destination or at any other time by using the Cancel Navigation com mand Press MENU MENU to CANCEL NAVIGATION ENT to YES ENT Figure 3 Figure 2 Figure 1 Figure 4 ...

Page 127: ...oat s current position to the cove is 5 78 miles left The distance from Houston to New Orleans is 316 9 miles right Find Distance From Point to Point You can also measure distance between two other points on the map 1 While on the Map Page press MENU to FIND DISTANCE ENT 2 Center the cursor crosshairs on the first position A rubber band line appears connecting your current position to the cursor s...

Page 128: ...the map or at your cur rent position while navigating Create Icon on Map 1 Use the arrow keys to move the cursor to the place where you want to make an icon 2 Press ENT and the screen shows the Select Icon Symbol menu 3 Select the desired icon symbol and press ENT The icon appears on the map Press EXIT to clear the cursor Cursor selects icon location left Select Icon Symbol menu center Boat Ramp i...

Page 129: ...ress ENT and it disap pears from the map Navigate to an Icon To execute the Navigate to Cursor command use the cursor to select the desired icon on the map 1 Center cursor crosshairs on an icon 2 To navigate to the icon press MENU ENT EXIT Follow the course line on the Map Page or the compass bearing arrow on the Navigation Page Routes A route is a series of waypoints linked together in an ordered...

Page 130: ...han the unit To load a MapCreate route into the unit follow instructions in MapCre ate s manual for creating a route and saving it as part of a GPS Data File file format usr Copy the GPS Data File to an MMC and insert the MMC in the unit See Sec 2 for instructions on installing MMCs To load the GPS Data File into the unit s memory see the entry on Transfer Custom Maps GPS Data Files in Sec 6 Basic...

Page 131: ...the spot where you want your route to begin 5 To set the first route waypoint press ENT In the example below we moved to the entrance of the cove where our boat was docked Route creation sequence from left to right Fig 1 Set route waypoint 1 at the cove entrance Fig 2 Move cursor northeast to set point 2 at channel entrance Fig 3 With point 2 set move cursor southeast to mark channel exit with way...

Page 132: ...in the unit s internal memory You can edit the route and run other commands but if you are finished with the route for now return to the main page display by pressing EXIT repeatedly NOTE When adding waypoints to an existing route the inserted way points will appear in the route in front of the waypoint you have selected in the Edit Route menu To insert waypoints at the end of the route make sure ...

Page 133: ... route name ENT to Route Waypoints List Use to select a waypoint and press ENT Edit Route Waypoints menu 3 Use to select a command from the Edit Route Waypoints menu and press ENT Add From Map lets you insert a waypoint in the route Add Waypoint calls up the Waypoint List so you can insert a waypoint from the list Remove Waypoint will delete the waypoint from the route View Waypoint will show you ...

Page 134: ...he end waypoint to the beginning waypoint 1 From the NAVIGATION PAGE press MENU ENT or from the MAP PAGE press MENU MENU to ROUTE PLANNING ENT 2 Press to saved route name ENT Highlight REVERSE ENT to NAVIGATE ENT 3 Upon arrival at your destination cancel navigation press MENU MENU to CANCEL NAVIGATION ENT to YES ENT Edit Route screen showing Route 1 with waypoints set to normal navi gation left Re...

Page 135: ...y Tip You can quickly call up the Edit Trail menu by selecting a trail on the map with the cursor Move the cursor over a trail and a pop up box appears Press WPT and the Edit Trail menu opens Trail selected with map cursor left The box at the bottom of the screen shows distance and bearing from current position to the se lected point on the trail The Edit Trail menu right Edit a Trail Color To edi...

Page 136: ...RM CLOCK ENT Sun Moon Rise Set Calculator To get to the Sun Moon menu press MENU MENU to SUN MOON CALCULATIONS ENT Trip Calculator To get to the Calculator menu press MENU MENU to TRIP CALCU LATOR ENT Trip Down Timer To get to the Down Timer menu press MENU MENU to TIMERS ENT to DOWN TIMER ENT Trip Up Timer To get to the Up Timer menu press MENU MENU to TIMERS ENT ENT Waypoints Delete a Waypoint T...

Page 137: ...point information screen 2 Use to select EDIT WAYPOINT then press ENT ENT Press to change the first character then press to the next character and re peat until the name is correct Press ENT To get back to the main page display press EXIT repeatedly To edit waypoint symbol 1 Press WPT to MY WAYPOINTS ENT to name ENT Select waypoint from the list then press ENT ENT Use to select EDIT WAYPOINT Press...

Page 138: ...bearing from a reference position The reference position can be a way point map feature or Point of Interest 1 Press WPT to MY WAYPOINTS to NEW ENT 2 Press to PROJECTED POSITION ENT to CREATE ENT 3 Select CHOOSE REFERENCE ENT Use to select a waypoint map fea ture or Point of Interest When a selection has been made press ENT Press to choose a subcategory then press ENT Highlight NAME ENT Spell out ...

Page 139: ...sage if you drift 1 miles or more to the right or left of the course line The anchor alarm is triggered when you drift outside of a preset radius If you are anchored and your boat moves more than 1 miles the alarm will flash a message and sound a tone Alarms command left Alarm menu right To change alarm settings 1 Press MENU MENU to ALARMS ENT ENT 2 Scroll to select the desired category then press...

Page 140: ...e arrival alarm Check MMC Files and Storage Space To check MMC Files Press MENU MENU to BROWSE MMC FILES ENT Press to MMC CARD INFO ENT to see the free space on the card Main Menu left MMC File Browser right Communications Port Configuration This unit has one NMEA 0183 version 2 0 compatible communication port The Com Port Menu accessed from the System Setup Menu al lows you to configure the commu...

Page 141: ...e NMEA sen tences A check mark next to a prefix means the prefix is in use Use to select a prefix then press ENT to turn it on or off NOTE The names of the NMEA sentences are abbreviated in this menu These are the functions of the various selectable prefixes GLL transmits latitude and longitude of present position time of position fix and status RMC and RMB transmits navigation information message...

Page 142: ...rees minutes and thousandths of a minute 36 28 700 or degrees minutes seconds and tenths of a second 36 28 40 9 It can also show position in UTM Universal Transverse Mercator projection MGRS Standard MGRS Standard 10 Map Fix Loran TD British Irish Finnish German New Zealand Swedish Swiss Taiwan and Greek grid systems UTM s are marked on USGS topographic charts This system divides the Earth into 60...

Page 143: ...ct it To setup Loran TD NOTE If the Loran TD conversion is chosen you must enter the local Lo ran chain identification for the master and slaves Do this by se lecting Setup Loran TD at the bottom of the Coordinate System menu then selecting the desired ID Press EXIT to close this menu Configure Loran TD menu Map Fix Map Fix is used with charts or maps This system asks for a reference position in l...

Page 144: ...ion as a waypoint Exit the waypoint screens 1 Press MENU MENU to GPS SETUP ENT 2 Press to COORDINATE SYSTEM ENT 3 Press to SETUP MAP FIX ENT The screen below appears and MAP SCALE is highlighted Press ENT and enter the map s scale This is generally at the bottom of the paper map It s shown as a ratio like 1 24000 Press EXIT and the unit returns to the Configure Map Fix screen Configure a map fix s...

Page 145: ... want to change the data in that box or use to select a different data box to customize 2 With the desired data box highlighted and flashing press ENT to ac cess the Data Viewer menu It has five Data Categories GPS Data Navigation Trip Calculator Time and Sonar Data Customize selected on the Satellite Status Page menu left After choosing a digital data box to customize the Data Viewer menu will ap...

Page 146: ... on the Map Page press PAGES select TWO POSITION FORMAT and press EXIT Press MENU select CUSTOMIZE and press ENT The digital data box at the top of the screen will begin to flash 1 Press ENT if you want to change the data in that box or use to select a different data box to customize 2 With the desired data box highlighted and flashing press ENT to ac cess the Data Viewer menu 3 Use to select a da...

Page 147: ...eat the steps above or turn off the unit If you selected the Steer with Arrows command and want to remove the dialog boxes from the screen press EXIT That will clear the track and speed boxes without disrupting the simulation and allow you to use the map cursor Simulating Trail or Route Navigation In Simulator mode your unit can automatically follow a trail or route without manual steering if you ...

Page 148: ...now hidden To restore GPS Features press MENU MENU to SHOW GPS FEA TURES ENT The GPS menus and pages are now accessible Initialize GPS In simulator mode the Initialize GPS command makes the unit operate as if it is sitting someplace other than its actual location So you and your unit could be located in Kansas City but practice navigating in the ocean off Islamorada Florida NOTE Remember if you wa...

Page 149: ...screen To turn this feature on from the MAP PAGE press MENU to AUTO ZOOM ENT EXIT Repeat these steps to turn it off Map Data From the Map Data menu you can turn off the map which will turn the map into a GPS plotter turn on or off pop up map info boxes draw map boundaries and fill water areas with white You also can turn on or off Map Overlays like range rings and latitude and longi tude grid line...

Page 150: ...ing touching the left and right sides of the screen is 100 miles in diameter same as the zoom range The second smaller ring is 50 miles in diameter always 1 2 the zoom range The distance from your current position to the smaller ring the ring s radius is 25 miles always 1 4 the zoom range With the map cursor you can scroll over to see the third and fourth rings In this example the distance to the ...

Page 151: ...ge the Datum 1 Press MENU MENU to GPS SETUP ENT to DATUM SELECTION ENT 2 Select the desired datum and press ENT 3 To return to the main page display press EXIT EXIT A list of the datums used by this unit is in the back of this manual GPS Setup Menu left Map Datum Menu right Map Detail Category Drawn This menu determines what mapping features are shown on the screen This includes waypoints trails i...

Page 152: ...s 3 Press EXIT EXIT to get back to the main page display Map Orientation By default this receiver shows the map with north always at the top of the screen This is the way most maps and charts are printed on paper Map orientation shown in north up left and track up right This is fine if you are always traveling north What you see to your left and right corresponds with the left and ride sides of th...

Page 153: ...TATION ENT Use to select the desired mode then press ENT Press EXIT EXIT to return to the page display Map Menu left Map Orientation menu with the North Up selected right NOTE In North Up and Course Up the present position arrow appears in the center of the map page In Track Up the position arrow appears centered in the lower third of the page NauticPath USA Marine Charts Your unit can display Nau...

Page 154: ...en use arrow keys to read the information To return to the main page display press EXIT repeat edly Entrance to Aransas Pass on a NauticPath chart with 8 nautical mile zoom left Remaining images left to right same position at 4 nautical mile 1 nautical mile and 0 3 nautical mile zoom ranges Port Information NauticPath charts contain Port Services information represented by anchor icons on the map ...

Page 155: ...appears The Port Services information screen for a NauticPath chart contains all the service information in one window 3 To scroll through the service information window use to see the types of services available To return to the main page display press EXIT repeatedly Port Services information screens Tidal Current Information NauticPath charts contain Tidal Current information represented at lar...

Page 156: ...ow with a pop up name box the name box disappears af ter a few seconds Examples are displayed in the following figures To view Tidal Current information 1 Use the arrow keys to move the cursor over a Tidal Current Station icon When it is selected a pop up name box appears 2 Press WPT to display the Tidal Current Information screen NauticPath chart showing Tidal Current Station icon selected by cur...

Page 157: ...y or year and press ENT To clear the information screen press EXIT Tide Information NauticPath charts contain Tidal Information repre sented at large zoom ranges by a box icon with the letter T These icons will appear when you are zoomed in to a 6 mile range The icon stands for a Tidal Station location An example is displayed at right When you zoom in to a sufficiently small zoom range 0 8 nautica...

Page 158: ...d upon the maximum range of the tide for that day The MLLW line also ad justs its position as the height scale changes You can look up tidal data for other dates by changing the month day and year selection boxes To select another date 1 Use to highlight month day or year then press ENT 2 Use to select the desired month day or year and press ENT To clear the information screen press EXIT Navionics...

Page 159: ...ake Navionics selected from Map Choice menu right WARNING You should never format the MMC containing your Navionics chart Formatting the MMC will permanently erase the chart from the card Pop up Help Help is available for most all menu items on this unit By highlighting a menu item and leaving it highlighted for a few seconds a pop up message appears that describes the function of the menu item Th...

Page 160: ...SET OPTIONS ENT to YES ENT NOTE Reset Options does not erase any waypoints routes icons plot trails or sonar logs System Menu with Reset Options selected left Reset Options confirmation message right Require WAAS You can choose to have WAAS signals automatically factored into every position reading The default setting Off uses WAAS automatically but does not require it to yield a position ...

Page 161: ... and Brightness To access the Screen menu press MENU MENU ENT The CONTRAST slider bar is already selected Press to adjust the contrast To adjust the display s brightness Press to BRIGHTNESS Use to adjust the brightness of the display To adjust the screen s display mode Press to DISPLAY MODE ENT Press to select mode EXIT Screen Command left Screen menu with Contrast selected center Normal highlight...

Page 162: ...he Day Press to DAY ENT Press to select the day and press ENT To set the Year Press to YEAR ENT Press to select the year and press ENT To set Time Format Press to TIME FORMAT highlight an option and press ENT to turn it on or off To set Date Format Press to DATE FORMAT highlight an option and press ENT to turn it on or off The last field in this menu is CONFIG DST This feature sets up the unit to ...

Page 163: ... display 3 To turn the alarm on again repeat Steps 1 and 2 Software Version Information From time to time Eagle updates the operating system software in some of its products These software upgrades usually are offered to customers as free downloads from our web site www eaglesonar com The upgrades make the unit perform better or introduce new features and functions Use the software information com...

Page 164: ...rn them off uncheck To set Volume Press to VOLUME Use to adjust the volume To set Alarm Style Press to ALARM STYLE ENT Press to change the style and press ENT After the option is set press EXIT EXIT to re turn to the main page display Track Smoothing This is a factory setting on the GPS Setup menu that should always be on When stopped or traveling at slow speeds like walking or trolling Track Smoo...

Page 165: ...rail delete a trail etc Main Menu left Trails Menu center Trail Options right General Trail Options To access the Trails Menu press MENU MENU to MY TRAILS ENT Delete All Trails From the Trails Menu press to DELETE ALL ENT to YES ENT Update Trail Option This menu lets you change the way the trail updates occur From the Trails Menu press to TRAIL OPTIONS ENT With UPDATE ACTIVE TRAIL highlighted pres...

Page 166: ... and placed at the end of the trail From the Trails Menu press to OPTIONS ENT Select one of the three Update Criteria options Auto Time or Distance and press ENT Trail Update Rate A trail updated by time has a range of 1 to 9999 seconds The default is 3 seconds The range for updating a trail by distance is 0 01 mile nm km to 9 99 mile nm km The default is 0 10 mi When time or distance are chosen a...

Page 167: ...ibility and Other Trail Options The name maximum number of points in the trail activity and visibil ity are all changed on the Edit Trail menu screen The Active setting determines whether the unit is recording new points for a trail Related trail functions are discussed in further detail under the Trails topic in Sec 7 Advanced GPS Operations Transparency set to 0 percent left 50 percent center an...

Page 168: ...s of Measure selected on System Setup menu left Units of Measure Menu right Units of Measure This menu sets the speed distance depth temperature and heading units To change the units Press MENU MENU to SYSTEM SETUP ENT ENT To set Units of Measure Select a category you would like to change Highlight the desired unit of measure option under the category and press ENT Repeat those steps for each cate...

Page 169: ...ctions all begin with either the Find Waypoint menu or the Map Page menu Press WPT and the Find Waypoint menu appears for waypoints and Points of Interest POI From the Map Page press MENU and the Map Page menu appears for streets ad dresses and highway exits Find Waypoint menu left Map Page menu right IMPORTANT NOTES Our search commands let you look up items by name or search for the item nearest ...

Page 170: ... the name in the top selection box Press to change the first letter then press to move the cursor to the next let ter and repeat until the name is correct then press ENT ENT B Jump down to the lower selection list by pressing ENT then use to select a street name from the list then press ENT The street name you selected is now in the street field 5 To enter a city name press to CITY ENT You will be...

Page 171: ...database a message appears saying the ad dress could not be found 7 The unit will display a list of addresses If the address you are look ing for is highlighted at the top of the list press ENT If not use to select the correct address from the list then press ENT The Map Page will appear with the location selected by the cursor In the following example we are looking for 12303 East 11th Street in ...

Page 172: ... the cursor on the map press WPT The POI s Waypoint Information window appears with the Go To Waypoint command highlighted If you want to go ahead and navigate to the POI address just press ENT EXIT Map Page showing location of the address on the map highlighted by cursor left This address is a business in the POI database so you can display the POI information window then navigate to it center Th...

Page 173: ...launch the Find Exit menu Find Highway Exits command left and Find Exit menu right 2 First select a highway name by pressing ENT which calls up the Find By Name menu There are two highway search options A You can spell out the highway name in the top selection box Press to change the first letter then press to move the cursor to the next let ter and repeat until the name is correct then press ENT ...

Page 174: ...ntil you highlight the exit then press ENT 4 In the Exit Information screen you have two choices A Press ENT ENT to navigate or go to the exit B Press ENT ENT to find the exit on the map Go To Exit option left Find On Map option right Tip You can also look up some additional information on the Exit Serv ices located near this exit Press to SERVICES to select Service Name ENT ...

Page 175: ...row your search press to select a subcategory before pressing ENT You will be given two options search by Name or by Nearest Find Waypoint menu with Services POI category selected left and RV Service subcategory selected right 2 Search by nearest POI Highlight NEAREST ENT A list of the near est POI s will appear Press to the selected POI and press ENT to launch the POI s Waypoint Information scree...

Page 176: ...the cursor to the next letter and repeat until the name is correct then press ENT ENT B Jump down to the lower selection list by pressing ENT then press to select a POI from the list then press ENT to call up the POI s Waypoint Information screen Find by Name option left Find by Name menu right 4 When the POI s Waypoint Information screen is displayed you can choose to Go To the POI waypoint by pr...

Page 177: ... street name in the First Street dialog box Press ENT to display the Find By Name menu There are two options A You can spell out the street in the top selection box Press to change the first letter then press to move the cursor to the next letter and re peat until the name is correct then press ENT ENT B Or you can jump down to the lower box and pick a street from the selection list Press ENT then...

Page 178: ... press MENU to FIND STREETS ENT and the Find Streets Menu appears 2 You must fill in a street name in the First Street dialog box Press ENT to display the Find By Name menu There are two options A You can spell out the street in the top selection box Press to change the first letter then press to move the cursor to the next letter and repeat until the name is correct and press ENT ENT B Or you can...

Page 179: ...probably be faster if you leave those boxes blank You can specify a city and or Zip code later on to narrow the search if the resulting list is too long Find Intersection command highlighted left Intersections Found list right 6 To search for the intersection of the two streets press to FIND INTERSECTION ENT When the Intersections Found list appears press to select the intersection you are searchi...

Page 180: ...oint press ENT and the Waypoint Information screen appears A To navigate to the waypoint press ENT The Go To Waypoint command is already highlighted The unit will show navigation in formation to the waypoint B To find the waypoint press to FIND ON MAP ENT The Map Page appears with the cursor highlighting the found waypoint To clear these menus and return to the main page display press EXIT repeate...

Page 181: ...the desired waypoint right A To navigate to the waypoint press ENT The Go To Waypoint command is already highlighted The unit will show navigation in formation to the waypoint B To find the waypoint press to FIND ON MAP ENT The Map Page appears with the cursor crosshairs centered on the found waypoint ...

Page 182: ...174 Notes ...

Page 183: ...50 Zambia Arc 1950 Zimbabwe Arc 1960 Mean for Kenya Tanzania Ascension Island 1958 Ascension Island Astro Beacon E 1945 Iwo Jima Astro DOS 71 4 St Helena Island Astro Tern Island FRIG 1961 Tern Island Astronomical Station 1952 Marcus Island Australian Geodetic 1966 Australia Tasmania Australian Geodetic 1984 Australia Tasmania Ayabelle Lighthouse Djibouti Bellevue IGN Efate Erromango Islands Bermu...

Page 184: ...ean 1950 Finland Norway European 1950 Greece European 1950 Iran European 1950 Italy Sardinia European 1950 Sicily European 1950 Malta Ireland 1965 Ireland ISTS 061 Astro 1968 South Georgia Is lands ISTS 073 Astro 1969 Diego Garcia Johnston Island 1961 Johnston Island Kandawala Sri Lanka Kerguelen Island 1949 Kerguelen Island Kertau 1948 West Malaysia Singapore Kusaie Astro 1951 Caroline Islands L ...

Page 185: ...n 1927 Canada New Brunswick New foundland Nova Scotia Quebec North American 1927 Canada Northwest Territories Sas katchewan North American 1927 Canada Yukon North American 1927 Canal Zone North American 1927 Cuba North American 1927 Greenland Hayes Peninsula North American 1927 Mexico North American 1983 Alaska Canada CONUS North American 1983 Central America Mexico Observaorio Metereo 1939 Azores...

Page 186: ...can 1969 Chile South American 1969 Colombia South American 1969 Ecuador South American 1969 Ecuador Baltra Ga lapagos South American 1969 Guyana South American 1969 Paraguay South American 1969 Peru South American 1969 Trinidad Tobago South American 1969 Venezuela South Asia Singapore Tananarive Obser vatory 1925 Mada gascar Timbalai 1948 Brunei East Malay sia Sabah Sarawak Tokyo Mean for Japan Ko...

Page 187: ...ion against harmful interference in a residential installation This equipment generates uses and can radiate radio frequency energy and if not installed and used in accordance with the in structions may cause harmful interference to radio communica tions However there is no guarantee that interference will not occur in a particular installation If this equipment does cause harmful interference to ...

Page 188: ...180 Notes ...

Page 189: ...181 Notes ...

Page 190: ...182 Notes ...
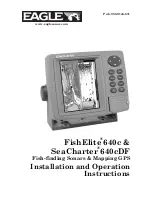
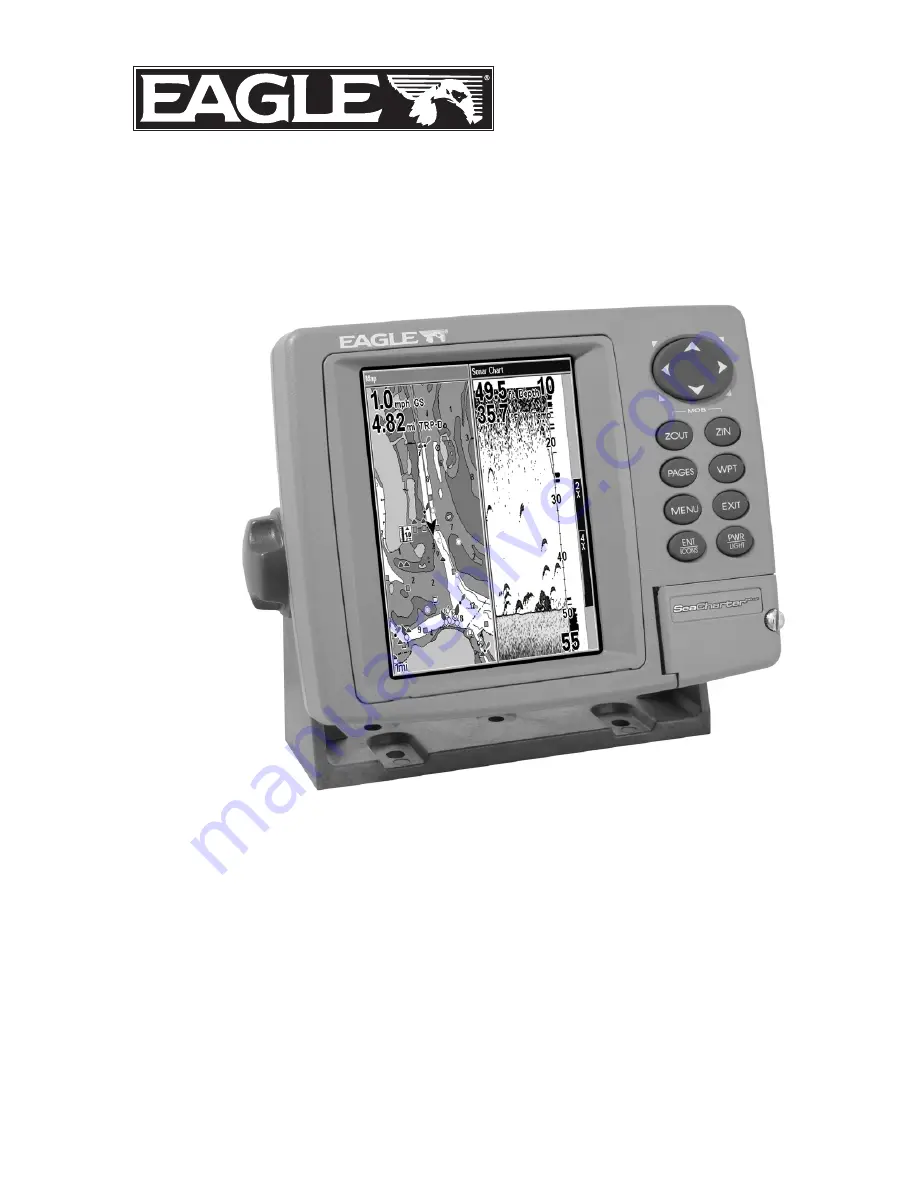
Page 191: ...xclusive nonassignable right to use these Databases for supplemental navigation reference purposes but only as long as you comply with the terms and conditions of this License Agreement We reserve the right to terminate this license if you violate any aspect of this License Agreement You are responsible for using official government charts and prudent navigation for safe travel 3 The Databases hou...

Page 192: ...BE LIABLE TO ANYONE FOR ANY SPECIAL CONSE QUENTIAL INCIDENTAL OR OTHER INDIRECT DAMAGE OF ANY KIND Some states do not allow the exclusion or limitation of incidental or consequen tial damages so the above limitations or exclusions may not apply to you This warranty does NOT apply in the following circumstances 1 when the product has been serviced or repaired by anyone other than us 2 when the prod...

Page 193: ...MENT OR REFUND AS JUST DESCRIBED IS THE EXCLUSIVE REMEDY AVAILABLE TO YOU AGAINST US FOR ANY DEFECT MALFUNCTION OR NON CONFORMITY CONCERNING THE PRODUCT OR FOR ANY LOSS OR DAMAGE RESULTING FROM ANY OTHER CAUSE WHATSOEVER WE WILL NOT UNDER ANY CIRCUMSTANCES BE LIABLE TO ANYONE FOR ANY SPECIAL CONSEQUENTIAL INCIDENTAL OR OTHER INDIRECT DAMAGE OF ANY KIND Some states do not allow the exclusion or lim...

Page 194: ...e or end our shipping policies regulations and special offers at any time We reserve the right to do so without notice in Canada If you re in Canada and you have technical return or repair questions please contact the Factory Customer Service Department Before any product can be returned you must call customer service to determine if a return is necessary Many times customer service can resolve yo...

Page 195: ...ry to send a product for repair or replacement you must first receive a return authorization number from Customer Service Products shipped without a return authorization will not be accepted When shipping we recommend you do the following 1 Please do not ship the knobs or mounting bracket with your unit 2 If you are sending a check for repair please place your check in an envelope and tape it to t...

Page 196: ...Visit our web site www eaglesonar com Eagle Pub 988 0143 871 Copyright 2005 All Rights Reserved Printed in USA 121205 LEI Eagle ...

Reviews:

Related manuals for FishElite 640c