background image

Pub. 988-0156-051 


                www.eaglesonar.com 


Mapping GPS Receiver 

Installation and Operation 

Instructions


Summary of Contents for IntelliMap 500C

Page 1: ...Pub 988 0156 051 www eaglesonar com Mapping GPS Receiver Installation and Operation Instructions ...

Page 2: ...Hot Spots Inc Navionics is a registered trademark of Navionics Inc eXitSource Database copyright 2001 2003 Zenrin Co Ltd Exit Authority and eXitSource are trademarks of Zenrin Co Ltd Eagle Electronics may find it necessary to change or end our policies regulations and special offers at any time We reserve the right to do so without notice All features and specifications subject to change without n...

Page 3: ...ns 23 Keyboard 23 Power lights on and off 24 Main Menu 24 Pages 26 Satellite Status Page 26 Navigation Page 28 Map Page 30 Background map vs MapCreate map content 32 Resize Window command 34 Basic GPS Quick Reference 36 Find Your Current Position 37 Moving Around the Map Zoom Cursor Arrow Keys 37 Selecting Any Map Item with the Cursor 38 Searching 38 Set a Waypoint 41 To create and save a Waypoint...

Page 4: ... 63 Edit a Route Name 63 Edit Route Waypoints 63 Navigate a Route 64 Navigate a Route in Reverse 65 Trails 66 Delete a Trail 66 Edit a Trail Name 67 Edit a Trail Color 67 Edit a Trail Pattern 67 Utilities 68 Alarm Clock 68 Sun Moon Rise Set Calculator 68 Trip Calculator 68 Trip Down Timer 68 Trip Up Timer 68 Waypoints 68 Delete a Waypoint 68 Edit a Waypoint 69 Selecting a Waypoint 69 Set a Waypoin...

Page 5: ...map fix 82 Map Orientation 83 Navionics Charts 84 To display a Navionics chart 84 Port Information 85 To view Port Services information 85 Tidal Current Information 86 To view Tidal Current information 86 Tide Information 88 To view tide information 88 Overlay Data 89 Pop up Help 92 Position Pinning 93 Reset Options 93 Require WAAS 94 Screen Contrast and Brightness 94 Set Language 95 Set Local Tim...

Page 6: ...ll show the shortest most direct path to the waypoint It provides navigation data to the waypoint regardless of obstructions Therefore the prudent navigator will not only take advantage of all available navigation tools when traveling to a way point but will also visually check to make sure a clear safe path to the waypoint is always available WARNING When a GPS unit is used in a vehicle the vehic...

Page 7: ...formation you want At the start or end of each segment we ll tell you what content is coming up next If it s a concept you re already familiar with we ll show you how and where to skip ahead for the next important topic We ve also made it easy to look up any tips you may need from time to time Here s how The manual is organized into 7 sections This first section is an intro duction to Eagle GPS It...

Page 8: ...ntroduce a search example in the Basic GPS Operation section but there are so many map items you can search for we had to give this function its own sec tion in the manual For example did you know this unit can look up business phone numbers functioning as a virtual Yellow Pages We ll show you how in Section 6 Finally in Section 7 we offer Supplemental Material including a list of the GPS datums u...

Page 9: ...d Hawaii Includes more than 60 000 nav aids and 10 000 wrecks obstructions in coastal and Great Lakes waters Metro areas selected major streets highways and interstate exit services details included Custom mapping MapCreate 6 software optional optional plug and play LEI FreedomMaps offer the same high detail without the computer work of MapCreate Other plug and play mapping options include IMS Fis...

Page 10: ...e First think of your unit as a small but powerful computer But don t worry we made it easy to use so you don t need to be a computer ex pert to find your way The IntelliMap 500C includes a keypad and a screen with menus so you can tell it what to do The screen also lets the unit show your location on a moving map as well as point the way to your destination This gimbal mounted IntelliMap 500C use...

Page 11: ...D card Secure Digital card flash memory card These solid state memory devices are about the size of a postage stamp but can hold data ranging from 8 MB to 1 GB in size Compare that to a floppy disk s 1 44 MB ca pacity This unit uses all that MMC space for two key GPS purposes First you can backup your onboard GPS Data Files by copying them to the MMC Since the MMC is removable like a floppy disk o...

Page 12: ...avail able at first but it was less accurate because the military scrambled the signal somewhat using a process called Selective Availability SA GPS proved so useful for civilian navigation that the federal govern ment discontinued SA on May 2 2000 after the military developed other methods to deny GPS service to enemy forces Reliable accuracy for civilian users jumped from 100 meters 330 feet und...

Page 13: ...an under way to boost GPS per formance even further with its Wide Area Augmentation System or WAAS This GPS add on will include a time control element that will help airliners fly closer together while avoiding collisions In addition to carefully spacing airplanes along travel corridors WAAS will eventu ally make instrument landings and takeoffs more accurate as it re places existing aviation navi...

Page 14: ...help you move around the menus so you can execute different commands They are represented by symbols like these which denote the down arrow key the up arrow the left arrow and the right arrow Keyboard The other keys perform a variety of functions When the text refers to a key to press the key is shown in bold sans serif type For example the Enter Icons key is shown as ENT and the Menu key is shown...

Page 15: ...tart on the Map Page Press the Menu key twice Next repeatedly press or press and hold the down arrow key to scroll down the menu and select highlight the My Trails menu command Finally press the Enter key Step 2 would mean Press the down arrow key repeatedly to scroll to the trail named Trail 1 and press Enter Next press the right arrow key and then the down arrow key to highlight the Navigate com...

Page 16: ...10 Notes ...

Page 17: ... for the GPS antenna module and its cable route 4 Determine the location of your battery or other power connection along with the power cable route 6 Install the GPS antenna and route the antenna cable to the GPS unit 7 Install the power cable and route it to the GPS unit 8 Mount the GPS unit GPS Antenna Receiver Module Installation The IntelliMap 500C package includes the EGC 12w GPS module This ...

Page 18: ...e directly to the battery CAUTION When using the unit in a saltwater environment we strongly rec ommend that you shut off the power supply to the power cable when the unit is not in use When the unit is turned off but still connected to a power supply electrolysis can occur in the power cable plug This may result in corrosion of the plug body along with the electri cal contacts in the cable and th...

Page 19: ...dam age can occur if the enclosed fuse is not used As with all electrical devices this unit could be damaged to a point that it is not repairable and could even cause harm to the user when not properly fused CAUTION Failure to use the enclosed 3 amp fuse will void your warranty For a replacement use a type 3AG 3 amp fuse This unit has reverse polarity protection No damage will occur if the power w...

Page 20: ...n connect to the NMEA inter face on the IntelliMap 500C and receive positioning information The IntelliMap 500C can exchange information with any device that trans mits or receives NMEA 0183 data 3 amp fuse Rear view of unit Power Connector NMEA 0183 Com Port Power cable GPS antenna module GPS Connector Com port data wires three 12 volt battery ...

Page 21: ...Portable You can install the IntelliMap 500C on the top of a dash with the sup plied gimbal bracket It can also be installed in the dash or mounted on a portable power supply If you use the supplied bracket you may be interested in an optional R A M bracket mounting system This converts the unit s gimbal bracket to a swivel mount which can be used on the dash or overhead mounting positions R A M o...

Page 22: ...through bolt mounting You may need to place a piece of plywood on the back side of thin fiber glass panels to reinforce the panel and secure the mounting hardware Install the gimbal bracket Orient the bracket so the arms slope toward the front of your unit Drill a 1 inch 25 4 mm hole in the dash for the power and antenna cables The best location for this hole is immediately under the gimbal bracke...

Page 23: ...ose to fill in the hole be sure to position the ca bles against the rear edge of the hole as you apply the fill material Before positioning the bracket be sure to hold the cables against the rear edge of the hole Then slide the bracket over the hole and butt the rear of the bracket base firmly against the cables thus pinning them in place against the side of the hole Finally fasten the bracket to ...

Page 24: ...nna module expand the uses for your GPS unit The PPP 13 makes it easy to transfer your unit from a boat to a car recreational vehicle airplane or other vehicle without drilling and mounting a second bracket You can use your unit in your own car or boat then take it along when riding in a friend s vehicle that s not equipped with GPS The PPP 13 Portable Power Pack can be used with eight D cell alka...

Page 25: ...ese solid state flash memory devices are about the size of a postage stamp An SD card is slightly thicker than an MMC As this manual went to press MMCs and SD cards were available in various storage capacities up to 1 gigabyte Additional MMC cards are available from LEI Extras see ordering in formation inside the back cover of this manual MMCs and SD cards are also available at many camera and con...

Page 26: ...Grasp the bottom of the MMC and push the top of the card into the slot Once the card is started use your fingernails to slide it the rest of the way to the left until it is firmly seated in the slot 3 Close the compartment door and fasten the thumb screw finger tight Other Accessories Other accessories include MMC cards MMC card readers and MapCre ate 6 custom mapping software for your computer MM...

Page 27: ...ft MMC card reader for USB ports right Now that you have your IntelliMap 500C installed move on to Section 3 Basic GPS Operations There we ll present a series of step by step tutorials to teach you the basics of GPS navigation ...

Page 28: ...22 Notes ...

Page 29: ...keys the three Page screens and how they all work together BUT if you just can t wait to get outside turn to the one page Quick Reference on page 36 Keyboard IntelliMap 500C GPS unit front view showing Map Page keyboard and access door for the MMC slot 1 PWR LIGHT Power Light The PWR key turns the unit on and off and activates the backlight 2 PAGES Pressing this and the arrow keys 4 switches the u...

Page 30: ...Zoom In This key lets you zoom the screen in Zooming in lets you see greater detail in a smaller geographic area on the map Power lights on and off To turn on the unit press PWR As the unit powers up the Map Page is displayed first To switch to another page press PAGES or to Page Name EXIT To turn on the backlight press PWR again The unit has three backlight levels to select from Repeatedly pressi...

Page 31: ... used to navigate or backtrack a trail Cancel Navigation command turns off the various navigation com mands Used to stop navigating after you have reached your destina tion waypoint Point of Interest or map cursor location or after you reach the end of a route or trail GPS Setup command sets various GPS receiver options System Setup command sets general configuration options Sun Moon Calculations ...

Page 32: ...information on the status of the unit s satellite lock on and posi tion acquisition To get to the Satellite Status Page Press the PAGES key then use or to select STATUS Clear the Pages Menu by press ing EXIT No matter what Page you are on a flashing current position indica tor question mark symbol and flashing GPS data displays indicate that satellite lock has been lost and there is no position co...

Page 33: ...number is grayed out there fore it isn t being used to solve the position Beneath the circular graph are the bar graphs one for each satellite in view Since the unit has twelve channels it can dedicate one channel per visible satellite The taller the bar on the graph the better the unit is receiving the signals from the satellite NOTE One of the data display options for the Satellite Status page i...

Page 34: ...nt track direction of travel you are taking Navigation Page recording a trail traveling southwest Page looks like this when the unit is not navigating to a waypoint following a route or backtracking a trail When navigating to a waypoint the Navigation screen looks like the following figure Your ground speed track distance and bearing to waypoint and course are all shown digitally on this screen NO...

Page 35: ...imaginary line drawn from your position when you started navigating to the destination waypoint The course line is shown on the Navigation Page screen and the Map Page screen as a dotted line Navigation Page going to a waypoint while creating a new trail The cross track error range is shown on the compass rose as a wide white corridor enclosing the course line The outer edges of this white corrido...

Page 36: ...sed for some ad vanced functions and for setting various options Options and setup are discussed in Sec 5 To access the Navigation Page Menu from the Navigation Page press MENU Map Page The Map Page screens show your course and track from a bird s eye view By default this unit shows the map with north always at the top of the screen This can be changed See the topic Map Orientation in Sec 5 If you...

Page 37: ...not been loaded on the MMC for this area If you re using only the factory loaded background map the maximum zoom range for showing additional map detail is 15 miles You can con tinue to zoom in closer but the map will simply be enlarged without revealing more map content except for a few major city streets Load your own high detail custom map made with MapCreate or a pre made FreedomMap from LEI a...

Page 38: ...t Lakes waters MapCreate custom maps include massive amounts of information not found in the background map MapCreate maps contain the searchable Points of Interest database all the minor roads and streets all the landmark features such as summits schools radio towers etc more rivers streams smaller lakes and ponds and their names What s more important is the large scale map detail that allows you...

Page 39: ...u re not watching for To see how check the text on Map Detail Category Selection page 81 It shows how to use the Map Categories Drawn menu to turn individual POI displays off and on Even though their display is turned off you can still search for POIs and their icons will pop up when your unit finds them for you The Map Page has its own menu which is used for several functions and for setting vari...

Page 40: ...elected left Map Page with two map windows at right Resize Window command Resize Window is another extremely handy feature for pages that have two major windows You can change the relative size of the windows as well as horizontal or vertical layout to suit your viewing preference Here s how 1 From any two window display press MENU to RESIZE WINDOW ENT 2 Four flashing arrows appear along the cente...

Page 41: ...to the original dis play just follow the steps above Most dual window displays use half the screen for each window by default You can also use the Reset Op tions command to revert to the factory default NOTE The units described by this manual are all capable of using this command If your unit does not have a Resize Window command on the Map Page menu you can update your software by visiting our we...

Page 42: ...iew of the earth You can move around the map by Zoom in closer to see greater detail press ZIN zoom in key Zoom out to see more area less detail press ZOUT zoom out key Scroll map north south east or west using arrow keys To stop scrolling and return to current position on map press EXIT key 6 Set a waypoint Wpt 001 at your current position so you can navigate back here press WPT WPT Waypoint symb...

Page 43: ...wer left corner of the screen 1 Press the ZIN key zoom in to move in closer and see greater detail in a smaller geographic area 2 Press the ZOUT key zoom out to move farther away and see less map detail but a larger geographic area When you are traveling the map will automatically move as you move This keeps your current location roughly centered on the screen You can manually pan or scroll the ma...

Page 44: ...point Press EXIT to clear the cursor and jump back to your current position on the map When you want to take another peek at that distant place just press EXIT again You can use this trick to toggle between your cur rent position and your destination without a lot of scrolling Searching Now that you ve seen how the unit can find where you are let s search for something somewhere else Searching is ...

Page 45: ...bottom of the list The nearest is highlighted Find Waypoint Menu left Category Selection menu center and list of the nearest restaurants right 4 If you wish you could scroll or here to select another restaurant but for now we will just accept the nearest one Press ENT 5 The POI information screen appears This is how you can use this unit as a business phone directory If you wanted to navigate ther...

Page 46: ... map appears with the cross hair cursor highlighting the restaurant s POI symbol A pop up data box shows the POI s name A data box at the bottom of the screen displays the location s latitude and longitude distance and bearing Map screen showing Finding Waypoint the result of a restaurant search 7 To clear the search and return to the last page displayed press EXIT EXIT EXIT EXIT Before you comple...

Page 47: ...o your personal computer with MapCreate software When you want to repeat a trip these archived waypoints can be reloaded into your GPS unit To create and save a Waypoint These first two techniques use the Quick Save method the fastest and easiest way to create a waypoint Create Waypoint at Current Position While you are traveling press WPT WPT The waypoint is saved and automatically given a name w...

Page 48: ...ymbol is visible on map Create Waypoint on Map 1 Use the arrow keys to move the cursor to the place where you want to make a waypoint 2 Press WPT WPT The waypoint is saved and automatically given a name with a sequential number such as waypoint 001 The waypoint symbol and number appear on the map Create Waypoint by Entering a Position 1 Press WPT to MY WAYPOINTS to NEW ENT 2 Press to ENTERED POSIT...

Page 49: ...gate to Cursor command we ll describe how later in this section However you can avoid scrolling the map to pick your waypoint if you use the Find Waypoint commands 1 Press WPT to MY WAYPOINTS ENT To look up the nearest waypoint press ENT or to look by name and scroll through the entire waypoint list press to NAME ENT For this example look by name 2 If your waypoint list is a long one you can spell...

Page 50: ...e ZOUT and ZIN keys at the same time Your position at the time these keys are pressed is used as the man overboard position Caution Saving a new Man Overboard waypoint will overwrite and erase the previous Man Overboard waypoint Navigate Back to MOB Waypoint Find your way back to the accident position with the Navigation Page or Map Page When MOB is activated the Navigation Page automati cally sho...

Page 51: ... stops showing navigation information Navigate to Cursor Position on Map The GO TO CURSOR command navigates to the current cursor position on the map It s a quick and handy way to navigate to anything you can see on the map display 1 Use the cursor controlled by the arrow keys with the zoom in and zoom out keys to maneuver around the map until you find a location you want to go to 2 Center the cur...

Page 52: ...aviga tion information to your destination See the following examples The 30 mile zoom figure at left clearly shows the red course line connect ing your current position to your destination The 30 mile zoom center shows both current position and direction to destination on screen The Navigation Page right will also show navigation information To stop navigating to the cursor use the Cancel Navigat...

Page 53: ...e track They are particularly handy when you are trying to retrace your trip and go back the way you came On the screen trails are represented by a solid line extending from the back of the current position arrow The default color is light magenta The unit is set at the factory to automatically create and record a trail while the unit is turned on The unit will continue recording the trail until t...

Page 54: ... ACTIVE ENT This unchecks the Active option 4 To return to the previous page press EXIT EXIT EXIT EXIT As you leave the Edit Trail menu you will notice that a new trail starts with a new sequential number In the example figure below the new trail is number 4 showing zero points Note that Trail 3 is inactive but it is still visible on the map New trail named Trail 4 is created when Trail 3 is made ...

Page 55: ... front of the trail name To turn off trail display 1 Press MENU MENU to MY TRAILS ENT 2 Press to enter the Saved Trail list then use or to select the desired Trail Name ENT 3 Press to VISIBLE ENT To return to the previous page press EXIT EXIT EXIT EXIT To turn on trail display 1 Press MENU MENU to MY TRAILS ENT 2 Press to enter the Saved Trail list then use or to select the desired Trail Name ENT ...

Page 56: ... that your current position arrow traces along the trail you have just made Tip Generally when using this method the smaller the zoom range the more accurately you will be able to steer along the trail Navigate a Trail forward The following figures illustrate the menu sequence for navigating a trail 1 Press MENU MENU to MY TRAILS ENT 2 Press to enter the Saved Trail list then use or to select the ...

Page 57: ...trail converted to a route is represented by a red line The magenta trail line overlays the red course line To see the red course line you much turn off the visible trail option The Navigation Page will show only the red course line unless you are recording a new trail The bear ing arrow on the compass rose points to the next waypoint on the trail As you travel the arrival alarm will go off when y...

Page 58: ...Arrival alarm goes off and bearing arrow swings around to say turn right east to ward the next waypoint trail point 3 The unit now shows navigation information to point 3 which is 0 40 miles away Navigate a Back Trail backtrack or reverse 1 Press MENU MENU to MY TRAILS ENT 2 Press to enter the Saved Trail list then use or to select the desired Trail Name ENT 3 Press to DELETE TRAIL to NAVIGATE ENT...

Page 59: ... for copying Custom Map Files to an MMC are contained in the instruction manual for your MMC card reader and MapCreate 6 software For instructions on inserting an MMC into the unit see Sec 2 Installation Accessories NOTE To load a Navionics chart see Sec 5 for the entry Navionics Charts GPS Data files GPS Data Files contain waypoints routes trails and event marker icons Instructions for copying GP...

Page 60: ...ess to LOAD ENT 3 Saving to MMC To accept the default name Data for the GPS Data File press to SAVE DATA ENT If you wish to rename the file as shown in the following figures press ENT to activate the selection box Press or to change the first character then press to the next character and repeat until the name is correct Then press ENT to SAVE DATA ENT The unit will display first a progress then a...

Page 61: ...ay a com pletion message when the data transfer is finished To return to the Page view press EXIT EXIT EXIT EXIT These figures show the menu sequence for loading a GPS Data File from an MMC into the unit s memory Cancel Navigation You can turn off any of the navigation commands after you reach your destination or at any other time by using the Cancel Navigation com mand Press MENU MENU to CANCEL N...

Page 62: ...56 Notes ...

Page 63: ...ition to the cove is 5 78 miles At right from Houston to New Orleans is 316 9 miles Find Distance From Point to Point You can also measure distance between two other points on the map 1 While on the Map Page press MENU to FIND DISTANCE ENT 2 Center your cursor over the first position A rubber band line ap pears connecting your current position to the cursor s location Press ENT to set the first po...

Page 64: ... icon on the map You can create an icon at the cursor position on the map or at your current position while you are navigating Create Icon on Map 1 Use the arrow keys to move the cursor to the place where you want to make an icon 2 Press ENT and the screen shows a Select Icon Symbol menu 3 Press or or or to select your icon symbol then press ENT The icon appears on the map Press EXIT to clear the ...

Page 65: ...ith the selected symbol have been deleted The Delete From Map command will prompt you to move the cursor over an icon to select it After selecting the icon press ENT and it disap pears from the map Navigate to an Icon Use the Navigate to Cursor command and use the cursor to select the desired icon on the map 1 Use arrow keys to center cursor cross hair over the icon 2 To navigate to the selected i...

Page 66: ...is the easiest method for preparing a route simply because your PC s larger screen keyboard and mouse are easier to manipulate than the unit To load a MapCreate route into the unit follow instructions in MapCre ate s manual for creating a route and saving it as part of a GPS Data File file format usr Copy the GPS Data File to an MMC and insert the MMC in the unit See Sec 2 for instructions on inst...

Page 67: ...th Add From Map command selected 4 Use the Zoom keys and arrow keys to move the map and cursor until the cursor is centered on the spot where you want your route to begin If you are starting at your current position or the current cursor posi tion you are already at the starting spot 5 Set the first route waypoint press ENT In this example we moved to the entrance of the cove where our boat was do...

Page 68: ...come the course for the route Route creation sequence continued Fig 4 Point 3 set at channel mouth Fig 5 Waypoint 4 set further south along the beach at a rec ognizable landmark Bob Hall Pier Waypoint PLFM Q W ends the route at an oil platform some distance from the shore Fig 6 Press EXIT to save the route and you return to this screen 6 Move the cursor to the next point in the route a spot where ...

Page 69: ...e ENT 3 Press to DELETE ROUTE ENT to YES ENT Tip You can also delete all routes at once 1 From the NAVIGATION PAGE press MENU ENT or from the MAP PAGE press MENU MENU to ROUTE PLANNING ENT 2 Press to DELETE ALL ENT to YES ENT Edit a Route Name You can edit the route name if you wish 1 From the NAVIGATION PAGE press MENU ENT or from the MAP PAGE press MENU MENU to ROUTE PLANNING ENT 2 Press to rout...

Page 70: ...om the list Re move Waypoint will delete the waypoint from the route View Waypoint will show you where the selected waypoint is on the map NOTE When adding waypoints to a route the inserted waypoints will ap pear in the route in front of the waypoint you have selected To in sert waypoints at the end of the route make sure to select ROUTE END before adding them Navigate a Route 1 From the NAVIGATIO...

Page 71: ...igures show what the Navigation Page and Map Page look like while navigating a route Navigate a Route in Reverse Here s how you run a route backward from the end waypoint to the beginning waypoint 1 From the NAVIGATION PAGE press MENU ENT or from the MAP PAGE press MENU MENU to ROUTE PLANNING ENT 2 Press to select route name ENT to REVERSE ROUTE ENT to NAVIGATE ROUTE ENT 3 Upon arrival at your des...

Page 72: ...d Wpt 2 off to the northeast In Fig 3 the traveler has turned northeast on his new course and is heading straight for Wpt 2 which is 0 27 miles away Fig 4 shows route navigation on the Map Page In this figure the traveler has reached Wpt 2 and is starting on the leg between Wpts 2 and 3 Trails Delete a Trail This is the command used to erase or delete a trail Press MENU MENU to MY TRAILS ENT to tr...

Page 73: ...ears Press WPT and the Edit Trail menu opens At left trail selected with map cursor The box at the bottom of the screen shows distance and bearing from current position to the selected point on the trail At right the Edit Trail menu Edit a Trail Color To edit a trail color press MENU MENU to MY TRAILS ENT to trail name ENT to COLOR ENT Press or to select a color style then press ENT Press EXIT EXI...

Page 74: ...NS ENT Trip Calculator To get to the Calculator menu press MENU MENU to TRIP CALCULA TOR ENT Trip Down Timer To get to the Down Timer menu press MENU MENU to TIMERS ENT to DOWN TIMER ENT Trip Up Timer To get to the Up Timer menu press MENU MENU to TIMERS ENT ENT Waypoints Delete a Waypoint To delete a waypoint from the waypoint list press WPT to MY WAY POINTS ENT ENT ENT to waypoint name ENT to DE...

Page 75: ...EDIT WAYPOINT ENT to ALTITUDE to CHOOSE SYM BOL ENT 2 Use arrow keys to select desired symbol and press ENT To return to the previous page press EXIT EXIT EXIT EXIT Waypoint Position To edit waypoint position 1 Press WPT to MY WAYPOINTS ENT ENT ENT to waypoint name ENT to EDIT WAYPOINT ENT 2 Latitude press to LATITUDE ENT Press or to change the first character then press to the next character and ...

Page 76: ...a specific distance and bearing from a reference position The reference position can be se lected from your waypoint list a map feature or from the Points of In terest list 1 Press WPT to MY WAYPOINTS to NEW ENT 2 Press to PROJECTED POSITION ENT to CREATE ENT 3 Press to CHOOSE REFERENCE ENT Use and to select a waypoint map feature or Point of Interest When the point has been selected press ENT and...

Page 77: ... warns you when your track drifts too far to the right or left of the course line to the waypoint For example if the alarm is set to 1 mile then the alarm flashes a message if you drift 1 of a mile or more to the right or left of the line to the waypoint The anchor alarm is triggered when you drift outside of a preset radius Again using the 1 mile as an example if you re anchored and your boat mov...

Page 78: ...d you run a route see the Navigate Routes segment this unit may not show navigation data to the next waypoint once you arrive at the first one since you may not be able to come close enough to the first waypoint to trip the arrival alarm Check MMC Files and Storage Space To check MMC Files Press MENU MENU to BROWSE MMC FILES ENT Press to MMC CARD INFO ENT to see the free space on the card Main Men...

Page 79: ...Press MENU MENU to SYSTEM SETUP ENT 2 Press to COMMUNICATIONS PORT ENT to CONFIGURE NMEA ENT 3 A menu appears showing the prefixes of the available NMEA sen tences A check mark next to a prefix means the prefix is in use Use to select a prefix then press ENT to turn off the prefix Press ENT again to check the box and turn a prefix on NOTE The names of the NMEA sentences are abbreviated in this men...

Page 80: ...ion The Coordinate System Menu lets you select the coordinate system to use when displaying and entering position coordinates Menus for changing coordinate system used to display positions To get to Coordinate System Selection 1 Press MENU MENU to GPS SETUP ENT 2 Press to COORDINATE SYSTEM ENT This unit can show a position in degrees 36 14952 degrees minutes and thousandths of a minute 36 28 700 o...

Page 81: ...andard and standard 10 MGRS on this unit Your position and datum in use determines which one to use If you use standard and your position is off significantly then try the alternate NOTE When the position format is changed it affects the way all posi tions are shown on all screens This includes waypoints To change the coordinate system press ENT while COORDINATE SYSTEM is highlighted Press the or ...

Page 82: ...a list of categories with or symbols next to each category A category with a is expandable meaning its con tents are currently hidden Customize Menu with GPS Data and Navigation categories expanded Selecting the category name and pressing ENT will show the category s contents so you can choose items within it An expanded category one with a next to its name can be collapsed to hide its contents Ju...

Page 83: ...r menu center Map Page shows Track and Speed steering arrow indicators right In this example you are traveling across Mudisland Point on a track of 19º at a speed of 50 miles per hour Make the desired settings then turn the simulator on by highlighting the GPS SIMULATOR ON box and pressing ENT key Press EXIT EXIT EXIT to erase this menu A message and tone appear periodically warning you that the s...

Page 84: ...at your destination cancel navigation as you normally do Tip You can pick any spot on the map to begin your simulation session by using the Initialize GPS command This makes your unit think it s located at the position you select See its entry following the en try for Hide GPS Features Initialize GPS This command is handy when you are practicing in simulator mode See the entry in this section for ...

Page 85: ...OOM ENT EXIT Repeat these steps to turn it off Map Data This menu lets you turn the map off if desired which turns the map screen into a GPS plotter turn off or on the pop up map info boxes draw the map boundaries or boxes around the areas of high detail or fill land areas with gray You can also turn on or off Map Overlays which display latitude and longitude grid lines or range rings on the map T...

Page 86: ...e at the 100 mile zoom the screen will show two rings with your current position in the center The large ring touching the left and right sides of the screen is 100 miles in diameter same as the zoom range The second smaller ring is 50 miles in diameter always 1 2 the zoom range The distance from your current position to the smaller ring the ring s radius is 25 miles always 1 4 the zoom range With...

Page 87: ...or to select the desired datum then press ENT 3 To return to the last page displayed press EXIT EXIT A list of the datums used by this unit is in the back of this manual GPS Setup Menu left Map Datum Menu right Map Detail Category Selection This menu determines which of the mapping features are shown on the screen This includes waypoints trails icons cities highways etc You can selectively turn on...

Page 88: ...ongitude lines must be parallel with the edge of the map USGS maps are parallel others may not be Also this works better with smaller scale maps such as 1 24000 The reference position can be anywhere on the map but the closer it is to your location the smaller the numbers will be that you ll have to deal with Once you ve decided on a reference position you can save it as a waypoint See the waypoin...

Page 89: ...ted press ENT and the unit returns to the Configure Map Fix menu Finally press EXIT to erase this menu Now press to COORD SYSTEM ENT select MAP FIX from the list and press ENT EXIT All position information now shows as a dis tance from the reference point you chose Map Orientation By default this receiver shows the map with north always at the top of the screen This is the way most maps and charts...

Page 90: ...orientation from the Map Page press MENU to MAP ORIENTATION ENT Use or to select the desired mode then press ENT Press EXIT EXIT to return to the page display NOTE In North Up and Course Up the present position arrow appears in the center of the map page In Track Up the position arrow appears centered in the lower third of the page Navionics Charts Your unit can display Navionics electronic charts...

Page 91: ...icons on the map display An example is displayed in the following figure To view Port Services information 1 Use the arrow keys to move the cursor over a Port Services icon When selected a pop up name box appears 2 Press WPT to display the Port Services Information screen The Port Services information screen has two windows The top window lists the various service categories The lower window lists...

Page 92: ...ategory window press ENT Port Services information screens Tidal Current Information Navionics charts contain Tidal Current information represented at large zoom ranges by a box icon with the letter C The icon stands for a Tidal Current Sta tion location An example is displayed at right When you zoom in to a sufficiently small zoom range the icon itself be comes an animated arrow showing tidal cur...

Page 93: ... and ebb pattern for the day from midnight MN to noon NN to midnight MN The velocity scale at the top left side of the graph changes dynamically based upon the maximum velocity of the current for that day Slack water the period of little or no current is represented by the Slack Water Line SWL The flood appears above the SWL and the ebb appears below the SWL You can look up tidal current data for ...

Page 94: ...or the selected station at the present time At larger zoom ranges you can se lect the boxed T icon and it becomes an animated gauge with a pop up name box An example is displayed in the following figure To view tide information 1 Select a Tide Station icon use the arrow keys to move the cursor over an icon When it is selected a pop up name box appears 2 After selecting the Tide Station icon press ...

Page 95: ...nother date 1 Use and to highlight month day or year then press ENT 2 Use and to select the desired month day or year then press ENT To clear the information screen press EXIT Overlay Data On any Page display but Status you can float additional data of your own choosing in your display window For example if you left your watch at home you could add the local time to your display Or if you wanted t...

Page 96: ...pressing ENT will show the category s contents so you can choose items within it An expanded category one with a next to its name can be collapsed to hide its contents and make more room on your screen Just select the category name and press ENT 3 Expand any categories that might contain information you want to display Then press or to select a display option 4 With the option highlighted press EN...

Page 97: ... displayed Select the item you want to remove from your display and press ENT ENT to re move the data To remove another item select the item and press ENT ENT 3 When you have finished removing all the items you want from the screen press EXIT to return to the page display Overlay Data Shown with Date option selected left Press ENT to ac cess REMOVE option center Press ENT again to remove item and ...

Page 98: ...mation anywhere on the screen See Customize Page Displays on page 76 for information on customizing data boxes Pop up Help Help is available for virtually all of the menu labels on this unit By highlighting a menu item and leaving it highlighted for a few seconds a pop up message appears that describes the function of the menu item This feature is on by default To set up Popup Help Press MENU MENU...

Page 99: ...t in the default off unchecked mode The wan dering plot trail issue has now been corrected by the Track Smoothing feature Turning on Position Pinning could actually result in an inaccu rate plot trail if you are moving around in a relatively small area If you want to experiment with Position Pinning the same instructions are used to turn the feature on checked and off unchecked 1 Press MENU MENU t...

Page 100: ...ENT 2 To return to the last page displayed press EXIT EXIT 3 You can return to this command and press ENT again to turn the fea ture off Require WAAS command on the GPS Setup Menu Screen Contrast and Brightness To access the Screen menu press MENU MENU ENT Once in the Screen menu To adjust the display s contrast The CONTRAST slider bar is already selected Press or to move the bar The left end of t...

Page 101: ... contrast the right end is maximum contrast To adjust the screen s display mode Press to DISPLAY MODE ENT press or to select mode EXIT Display Mode menu Set Language This unit s menus are available in 10 languages English French Ger man Spanish Italian Danish Swedish Russian Dutch and Finnish To select a different language 1 Press MENU MENU to SYSTEM SETUP ENT 2 Press to SET LANGUAGE ENT ...

Page 102: ...nu is CONFIG DST This feature allows your unit to automatically adjust with the time change caused by Daylight Sav ing Time you should only have to set it once You may select which set of rules matches DST in your region or simply accept the default Once you have each field set the way you want press EXIT repeatedly until you return to the previous page Show WAAS Alarm When the signal is available...

Page 103: ... or introduce a new fea ture or function You can find out what software version is running in your unit by using the Software Information command At left Main Menu with Software Information command selected At right the Software Information screen 1 Press MENU MENU to SYSTEM SETUP ENT to SOFTWARE INFORMATION ENT 2 Read the information displayed on the screen 3 To return to the last page displayed ...

Page 104: ... Alarm Volume Press to VOLUME Press or to move the bar The left end of the scale is low volume the right end is high volume After the option is set press EXIT EXIT to return to the page display To set Alarm Style Press to ALARM STYLE ENT Press or to change the style then press ENT After the option is set press EXIT EXIT to return to the page display Track Smoothing This is a factory setting on the...

Page 105: ...WARNING If you uncheck the Update Trail option automatic trail creation and recording will be turned off You must turn it back on to record trails The default setting is on From the Trails Menu press to OPTIONS ENT With UPDATE ACTIVE TRAIL highlighted press ENT to check it turn on and uncheck it turn off Update Trail Criteria Auto Time Distance The options are automatic time or distance When it s ...

Page 106: ...ria selected use the cursor arrows to high light either the UPDATE RATE or UPDATE DISTANCE data entry boxes and press ENT Press or to change the first character then press to the next character and repeat until the entry is correct Press EXIT to return to the Trail Options Menu Trail Options menu Update Time Rate setting left and Update Distance setting right Specific Trail Options Delete Trail To...

Page 107: ...ection you wish to change then press ENT Make your changes then press EXIT to erase this menu Related trail functions are discussed in further detail under the Trails topic in Sec 4 Advanced GPS Operations Transparency Use the transparency menu to adjust the transparency of menu win dows A high transparency allows you to continue monitoring the screen s display while adjusting feature settings tho...

Page 108: ...nautical miles me ters depth feet fathoms or meters temperature degrees Fahrenheit or Celsius altitude feet or meters and heading true or magnetic units To change the units Press MENU MENU to SYSTEM SETUP ENT ENT Main Menu System Setup submenu left Units of Measure Menu right To set Unit of Measure Use to select the desired category and press ENT Use to select the desired unit of measure and press...

Page 109: ...ch functions all begin with either the Find Way point menu or the Map Page menu Press WPT and the Find Waypoint menu appears for waypoints and Points of Interest POI From the Map Page press MENU and the Map Page menu appears for streets addresses and highway exits Find Waypoint menu left Map Page menu right IMPORTANT NOTES Our search commands let you look up items by name or search for the item ne...

Page 110: ...d 3 To enter an address number press or to change the first number then press to move the cursor to the next number and re peat until the number is correct then press ENT Find Address Menu 4 To enter a street name press to STREET ENT There are two op tions A You can spell out the name in the top selection box Press or to change the first letter then press to move the cursor to the next letter and ...

Page 111: ...ection box Press or to change the first letter then press to move the cursor to the next letter and repeat until the name is correct then press ENT ENT B Jump down to the lower selection list by pressing ENT then press or to select a city name from the list then press ENT The city name you selected is now in the city field NOTE We recommend that you do not enter a city name unless the list you are...

Page 112: ... right one Address search result list left At center Map Page showing location of the address on the map highlighted by cursor At right after the address is located you can navigate to it D symbol for destination 8 To navigate to the address press MENU ENT EXIT and the unit will begin showing navigation information to the address pointed out by the cursor If you are only looking up an address not ...

Page 113: ... for this address Find Any Item Selected by Map Cursor On the Map Page with a POI or map feature selected by the cursor press WPT To return to the previous page press EXIT A POI selected by the cursor left POI information screen right NOTE Since the Go To waypoint command is highlighted you can navi gate to the selected POI by pressing ENT EXIT while in the POI Waypoint Information screen Find Int...

Page 114: ...box Press or to change the first letter then press to move the cursor to the next letter and repeat until the name is correct then press ENT ENT B Jump down to the lower selection list by pressing ENT then press or to select a highway from the list then press ENT Find By Name menu 3 Once you have selected a highway name you can then select an exit Press to switch to the Exit List then press or unt...

Page 115: ...ave two choices A Press ENT to navigate or go to the exit B Press ENT to find the exit on the map Go To Exit option left Find On Map option right Tip You can also look up some additional information on the Exit Ser vices located near this exit Press to SERVICES press or to se lect Service Name ENT ...

Page 116: ... select a subcate gory before pressing ENT You will be given two options Search By Nearest or By Name Find Waypoint menu with Lodging POI category selected left and with the RV Parks subcategory selected right 2 Search by nearest POI Press ENT The find by nearest menu will show a calculating screen then a list of the nearest POI s will appear Press or to the selected POI and press ENT to call up t...

Page 117: ...e cursor to the next letter and repeat until the name is correct then press ENT ENT B Jump down to the lower selection list by pressing ENT then press or to select a POI from the list then press ENT to call up the POI s Way point Information screen Find by Name option left Find by Name menu right 4 When the POI s Waypoint Information screen is displayed you can choose to Go To the POI waypoint by ...

Page 118: ...a street name in the First Street dialog box Press ENT to display the Find By Name menu There are two options A You can spell out the street in the top selection box Press or to change the first letter then press to move the cursor to the next let ter and repeat until the name is correct then press ENT ENT B Or you can jump down to the lower box and pick a street from the selection list Press ENT ...

Page 119: ... it s I 35 To search for that street press to FIND FIRST STREET ENT A message appears asking you to wait while the unit finds the street When the Streets Found list appears press or to select the street you are searching for and press ENT At left the Find Streets menu with the Find First Street command highlighted At right Streets Found list 4 The Map Page appears with the cursor pointing to the f...

Page 120: ...o the next letter and repeat until the name is correct then press ENT ENT B Or you can jump down to the lower box and pick a street from the selection list Press ENT then press or to select a street from the list and press ENT 3 The Find Streets menu reappears with the street you re searching for in the First Street box In this example it s I 35 4 Now fill in the second street Press to SECOND STRE...

Page 121: ...nd highlighted left Intersections Found list right 6 To search for the intersection of the two streets press to FIND INTER SECTION ENT A message appears asking you to wait while the unit finds the intersection When the Intersections Found list appears press or to select the intersection you are searching for and press ENT In the previous example we selected the intersection of I 35 and I 44 7 The ...

Page 122: ...5 Find Waypoint menu left Find By Nearest command center Find by Name command right 3 If you re looking for nearest the unit says it is calculating then a list of waypoints appears The closest is highlighted at the top of the list and the farthest at the bottom of the list Calculating message left and list of the nearest waypoints right 4 To see location information on the closest highlighted wayp...

Page 123: ...h the Go To Waypoint command se lected left and the Find on Map command selected right To clear these menus and return to the previous page press EXIT re peatedly 5 If you re looking by name there are two options A You can spell out the name in the top selection box Press or to change the first letter then press to move the cursor to the next letter and repeat until the name is correct then press ...

Page 124: ...highlighted by cursor on Map Page A To navigate to the waypoint press ENT Go To Waypoint command is already highlighted The unit will show navigation information to the waypoint B To find the waypoint press to FIND ON MAP ENT The Map Page appears with the cursor highlighting the found waypoint ...

Page 125: ...0 Zambia Arc 1950 Zimbabwe Arc 1960 Mean for Kenya Tanzania Ascension Island 1958 Ascension Island Astro Beacon E 1945 Iwo Jima Astro DOS 71 4 St Helena Island Astro Tern Island FRIG 1961 Tern Island Astronomical Station 1952 Marcus Island Australian Geodetic 1966 Australia Tasmania Australian Geodetic 1984 Australia Tasmania Ayabelle Lighthouse Djibouti Bellevue IGN Efate Erromango Islands Bermud...

Page 126: ...pean 1950 Finland Norway European 1950 Greece European 1950 Iran European 1950 Italy Sardinia European 1950 Sicily European 1950 Malta Ireland 1965 Ireland ISTS 061 Astro 1968 South Georgia Is lands ISTS 073 Astro 1969 Diego Garcia Johnston Island 1961 Johnston Island Kandawala Sri Lanka Kerguelen Island 1949 Kerguelen Island Kertau 1948 West Malaysia Singapore Kusaie Astro 1951 Caroline Islands L...

Page 127: ... 1927 Canada New Brunswick New foundland Nova Sco tia Quebec North American 1927 Canada Northwest Territories Sas katchewan North American 1927 Canada Yukon North American 1927 Canal Zone North American 1927 Cuba North American 1927 Greenland Hayes Peninsula North American 1927 Mexico North American 1983 Alaska Canada CONUS North American 1983 Central America Mexico Observaorio Metereo 1939 Azores...

Page 128: ...ican 1969 Chile South American 1969 Colombia South American 1969 Ecuador South American 1969 Ecuador Baltra Ga lapagos South American 1969 Guyana South American 1969 Paraguay South American 1969 Peru South American 1969 Trinidad Tobago South American 1969 Venezuela South Asia Singapore Tananarive Observa tory 1925 Madagas car Timbalai 1948 Brunei East Malay sia Sabah Sarawak Tokyo Mean for Japan K...

Page 129: ...ion against harmful interference in a residential installation This equipment generates uses and can radiate radio frequency energy and if not installed and used in accordance with the in structions may cause harmful interference to radio communica tions However there is no guarantee that interference will not occur in a particular installation If this equipment does cause harmful interference to ...

Page 130: ...124 Notes ...

Page 131: ...31 132 Undo Feature 42 Custom Maps1 3 6 22 23 34 35 43 45 58 65 93 115 Customize Display 30 83 102 Customize Map Data Shown87 88 89 94 D Data Boxes Customize Display 30 83 102 Depth Range 4 32 33 34 35 36 39 41 54 87 89 96 98 99 111 G GPS Data File 5 6 58 59 60 61 65 79 I Icons 4 5 9 26 35 36 58 63 64 65 90 94 95 96 97 98 103 Creating 63 64 Deleting 64 Navigate 64 Information Displays Customize Di...

Page 132: ...100 Satellite Status 25 28 29 30 39 102 POI Point of Interest 26 27 35 36 43 44 45 49 51 76 85 92 115 119 120 123 124 125 POIs Search 123 Pop up Help 102 Pop up Map Info Map Data option 88 Power 1 2 3 6 7 12 13 14 15 17 18 20 21 22 25 26 39 Product Specifications 2 R Range 4 32 33 34 36 39 41 54 87 89 96 98 99 111 Range Rings Map Data option 89 Reset Options 38 45 103 104 Route 4 5 7 9 12 13 27 30...

Page 133: ...ator 28 74 84 99 100 Trip Down Timer 74 Trip Up Timer 75 U Units of Measure 113 Utilities 25 28 74 75 84 99 100 W WAAS 3 5 6 8 12 29 104 107 Require WAAS 104 Waypoints 2 4 5 8 22 26 27 30 31 32 33 39 40 42 43 44 45 46 47 48 49 51 56 57 58 63 65 66 67 68 69 70 71 72 75 76 77 78 79 83 85 86 87 90 91 92 93 103 106 110 115 116 119 120 123 124 125 130 131 132 Delete 75 Edit 75 Search 130 Select 76 Z Zo...

Page 134: ...128 Notes ...
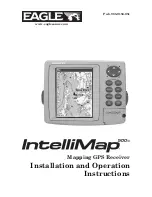
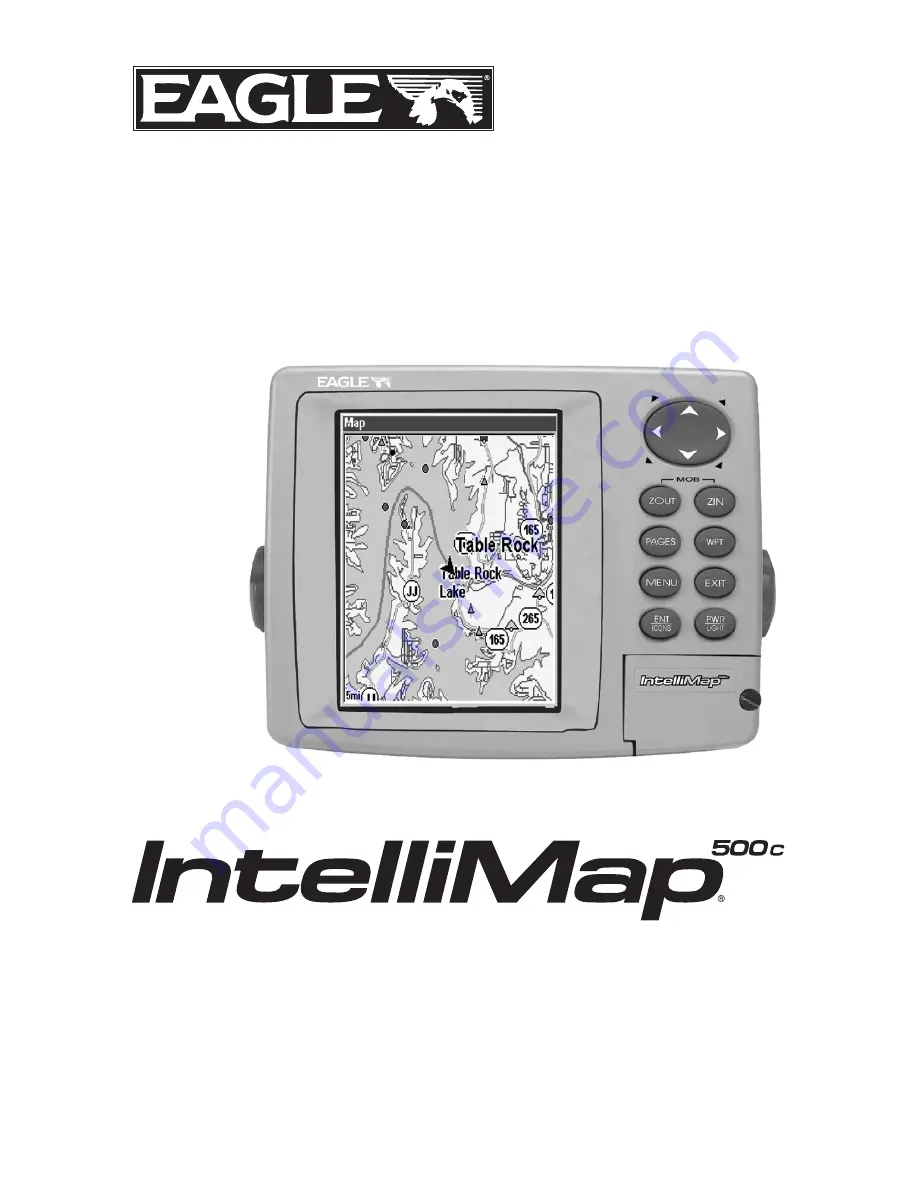
Page 135: ...e nonexclusive nonassignable right to use these Databases for supplemental navigation reference purposes but only as long as you comply with the terms and conditions of this License Agreement We reserve the right to terminate this license if you vio late any aspect of this License Agreement You are responsible for us ing official government charts and prudent navigation for safe travel 3 The Datab...

Page 136: ...MSTANCES BE LIABLE TO ANYONE FOR ANY SPECIAL CONSE QUENTIAL INCIDENTAL OR OTHER INDIRECT DAMAGE OF ANY KIND Some states do not allow the exclusion or limitation of incidental or consequential damages so the above limitations or exclusions may not apply to you This warranty does NOT apply in the following circumstances 1 when the product has been serviced or repaired by anyone other than us 2 when ...

Page 137: ...OR REPLACEMENT OR REFUND AS JUST DESCRIBED IS THE EXCLUSIVE REMEDY AVAILABLE TO YOU AGAINST US FOR ANY DEFECT MALFUNCTION OR NON CONFORMITY CONCERNING THE PRODUCT OR FOR ANY LOSS OR DAMAGE RESULTING FROM ANY OTHER CAUSE WHATSOEVER WE WILL NOT UNDER ANY CIRCUMSTANCES BE LIABLE TO ANYONE FOR ANY SPECIAL CONSEQUENTIAL INCIDENTAL OR OTHER INDIRECT DAMAGE OF ANY KIND Some states do not allow the exclus...

Page 138: ...ns and special offers at any time We reserve the right to do so without notice in Canada If you re in Canada and you have technical return or repair questions please contact the Factory Customer Service Department Before any product can be returned you must call customer service to determine if a return is necessary Many times customer service can resolve your problem over the phone without sendin...

Page 139: ...becomes necessary to send a product for repair or replacement you must first receive a return authorization number from Customer Service Products shipped without a return authorization will not be accepted When shipping we recommend you do the following 1 Please do not ship the knobs or mounting bracket with your unit 2 If you are sending a check for repair please place your check in an envelope a...

Page 140: ...Visit our web site www eaglesonar com Eagle Pub 988 0156 051 Copyright 2004 All Rights Reserved Printed in USA 121004 LEI Eagle ...

Reviews: