background image

Pub. 988-0152-131

                www.eaglesonar.com

FishElite 502c iGPS &

SeaCharter 502cDF iGPS

Fish-finding Sonars & Mapping GPS

Installation and Operation

Instructions

®

®

Summary of Contents for IntelliMap 502C iGPS

Page 1: ...Pub 988 0152 131 www eaglesonar com FishElite 502c iGPS SeaCharter 502cDF iGPS Fish finding Sonars Mapping GPS Installation and Operation Instructions ...

Page 2: ... Inc Navionics is a registered trademark of Navionics Inc eXitSource Database copyright 2001 2005 Zenrin Co Ltd Exit Authority and eXitSource are trademarks of Zenrin Co Ltd Eagle Electronics may find it necessary to change or end our policies regulations and special offers at any time We reserve the right to do so without notice All features and specifications subject to change without notice All...

Page 3: ...hoot through hull installations 14 Selecting a Transducer Location 14 How low should you go 16 Shoot Thru Hull vs Transom Mounting 16 Transom Transducer Assembly and Mounting 17 Trolling Motor Bracket Installation single frequency only 22 Transducer Orientation and Fish Arches 23 Shoot Thru Hull Preparation 24 Hulls With Flotation Materials 24 Testing Determines Best Location 24 Shoot Thru Hull In...

Page 4: ...mize Page Displays 57 Depth Cursor 59 Depth Range Automatic 59 Depth Range Manual 59 FasTrack 60 Fish I D 60 To turn on Fish ID 61 FishTrack 62 Frequency 62 HyperScroll 63 Log Sonar Chart Data 63 Noise Rejection 64 Overlay Data 64 Ping Speed HyperScroll 67 Reset Options 69 Reset Water Distance 69 Set Keel Offset 70 Sensitivity Auto Sensitivity 71 Automatic Sensitivity 71 Sonar Chart Mode 72 Sonar ...

Page 5: ... Cursor 100 Searching 100 Set a Waypoint 103 Create Waypoint at Current Position 103 Create Waypoint on Map 104 Create Waypoint by Entering a Position 104 Navigate To a Waypoint 105 Set Man Overboard MOB Waypoint 106 Navigate Back to MOB Waypoint 106 Navigate to Cursor Position on Map 107 Navigate to a Point of Interest 108 Creating and Saving a Trail 108 Displaying a Saved Trail 110 Navigating Tr...

Page 6: ...er 127 Trip Up Timer 127 Waypoints 127 Delete a Waypoint 127 Edit a Waypoint 128 Waypoint Name 128 Waypoint Symbol 128 Waypoint Position 128 Selecting a Waypoint 129 Set a Waypoint by Average Position 129 Set a Waypoint by Projecting a Position 129 Section 8 System GPS Setup Options 131 Alarms 131 Check MMC Files and Storage Space 132 Communications Port Configuration 132 Configure NMEA 133 Coordi...

Page 7: ...e 154 Show WAAS Alarm 154 Software Version Information 155 Sounds and Alarm Sound Styles 155 Track Smoothing 156 Trail Options 157 General Trail Options 157 Specific Trail Options 159 Delete Trail 159 New Trail 159 Trail Active Visible and Other Trail Options 159 Transparency 159 To adjust Menu Transparency level 159 Units of Measure 159 Section 9 Searching 161 Find Addresses 162 Find Any Item Sel...

Page 8: ...ng to a way point but will also visually check to make sure a clear safe path to the waypoint is always available WARNING When a GPS unit is used in a vehicle the vehicle operator is solely re sponsible for operating the vehicle in a safe manner Vehicle operators must maintain full surveillance of all pertinent driving boating or fly ing conditions at all times An accident or collision resulting i...

Page 9: ...anual So we designed our book so that you don t have to read the whole thing from front to back for the information you want At the start or end of each segment we ll tell you what content is coming up next If it s a concept you re already familiar with we ll show you how and where to skip ahead for the next important topic We ve also made it easy to look up any tips you may need from time to time...

Page 10: ...en you come to a GPS menu command on the screen you can look it up in the manual by skimming over the table of contents just flipping through Section 6 or scanning through the command portion of Section 7 This unit is ready to use right out of the box but you can fine tune and customize it s operation with dozens of options Since sonar is the unit s key feature we put the main sonar options in Sec...

Page 11: ...ed and waterproof suitable for saltwater use Back up memory Built in memory stores sonar records for decades Languages 10 menu languages selectable by user MMC slots One with waterproof door SD card compatible Sonar Frequency 50 200 kHz for SeaCharter 502cDF iGPS 200 kHz for FishElite 502c iGPS Recording MMC SD cards for recording sonar chart logs Transducers A dual frequency Skimmer transducer wi...

Page 12: ...r recording GPS trip de tails and displaying charts or custom maps Receiver antenna Internal Built in 12 parallel channel GPS WAAS Background map Built in custom detailed Eagle map Con tains enhanced detail of continental U S and Hawaii Includes more than 60 000 nav aids and 10 000 wrecks obstructions in coastal and Great Lakes waters Metro areas selected major streets highways and interstate exit...

Page 13: ...act the factory s Customer Service Department Customer service numbers are listed on the last page of this manual How Eagle Sonar Works Sonar has been around since the 1940s so if you already know how it works skip down to read about the relatively new technology of GPS But if you ve never owned a sonar fish finder this segment will tell you the under water basics Sonar is an abbreviation for SOun...

Page 14: ...ion Accessories on page 13 If you re new to GPS read on Think of your unit as a small but powerful computer The unit includes a keypad and a screen with menus so you can tell it what to do The screen also lets the unit show your location on a moving map as well as point the way to your destination This gimbal mounted unit uses an internal antenna and receiver which makes the system work like your ...

Page 15: ... can hold data ranging from 8 MB to 1 GB in size Compare that to a floppy disk s 1 44 MB capacity This unit uses all that MMC space for two key GPS purposes You can backup your onboard GPS Data Files by copying them to the MMC Since the MMC is removable like a floppy disk or a cassette tape you can store these GPS Data Files on a personal computer equipped with an MMC card reader Or store them on ...

Page 16: ...discontinued SA on May 2 2000 after the military developed other methods to deny GPS service to enemy forces Reliable accuracy for civilian users jumped from 100 meters 330 feet under SA to the present level of 10 to 20 meters about 30 to 60 feet Twenty four satellites orbit 10 900 nautical miles above the Earth passing overhead twice daily A series of ground stations with precisely surveyed locat...

Page 17: ...ally but according to the FAA it consistently comes within 1 2 meters horizontally and 2 3 meters vertically It does this by broadcasting correction signals on GPS frequencies Your unit auto matically receives both GPS and WAAS signals There are however some fringe areas of the U S including parts of Alaska that do not yet receive robust WAAS coverage Continued WAAS development is planned to exten...

Page 18: ...ownload a free copy of our Sonar Viewer software This PC based software application plays back any sonar chart log recorded with a Eagle sonar product Features include Adjustable range zoom sensitivity ColorLine noise rejection surface clarity etc Color interpretation of sonar signals can be user defined Operates like a Windows Multimedia Player with forward re verse pause fast forward fast revers...

Page 19: ...u can execute different commands They are represented by symbols like these which denote the down arrow key the up arrow the left arrow and the right arrow Keyboard The other keys perform a variety of functions When the text refers to a key to press the key is shown in bold sans serif type For example the Enter Icons key is shown as ENT and the Menu key is shown as MENU Menu Commands A menu comman...

Page 20: ...ld mean Start on the Map Page Press the Menu key twice Next repeatedly press or press and hold the down arrow key to scroll down the menu and select highlight the My Trails menu command Finally press the Enter key Step 2 would mean Press the down arrow key repeatedly to scroll to the trail named Trail 1 and press Enter Next press the right arrow key to highlight the Navigate command then press Ent...

Page 21: ...ducer cable to the sonar unit Install the speed or temp sensor if applicable and route the cable to the unit 5 Route the power cable from the unit s location to an appropriate power source and connect it there 6 Connect the transducer power cable and any sensor cables to the unit and mount the unit on the bracket Transducer Installation These instructions will help you install your Skimmer transdu...

Page 22: ...61 drill bit flat head screwdriver Supplies four 1 long 12 stainless steel slotted wood screws Single frequency trolling motor installations Tools two adjustable wrenches flat head screwdriver Supplies plastic cable ties Shoot through hull installations Tools these will vary depending on your hull s composition Consult your boat dealer or manufacturer Other tools are a wooden craft stick or simila...

Page 23: ...e but the principle is the same for Skimmers inside a hull 4 If the transducer is mounted on the transom make sure it doesn t interfere with the trailer or hauling of the boat Also don t mount it closer than approximately one foot from the engine s lower unit This will prevent cavitation bubble interference with propeller operation 5 If possible route the transducer cable away from other wiring on...

Page 24: ...h you may move the transducer a little higher for more protection There are two extremes you should avoid Never let the edge of the mounting bracket extend below the bottom of the hull Never let the bottom the face of the transducer rise above the bottom of the hull Shoot Thru Hull vs Transom Mounting In a shoot thru hull installation the transducer is bonded to the inside of the hull with epoxy T...

Page 25: ...nd of this instruction booklet to determine if you can satisfactorily shoot through the hull Transom Transducer Assembly and Mounting The best way to install these transducers is to loosely assemble all of the parts first place the transducer s bracket against the transom and see if you can move the transducer so that it s parallel with the ground The following instructions sometimes vary dependin...

Page 26: ...chets into the bracket with the letter A aligned with the align ment mark molded into the bracket Place the ratchets onto the trans ducer with the letter A aligned with the 12 o clock position on the transducer stem These positions set the transducer s coarse angle ad justment for a 14 transom Most outboard and stern drive transoms have a 14 angle Insert and align ratchets Add ratchets to bracket ...

Page 27: ...d place them against the transom Again check to see if you can move the transducer so it s par allel with the ground If you can then go to step 3A If it doesn t repeat step 2A but use a different alignment letter until you can place the transducer on the transom correctly Insert bolt and check transducer position on transom B Two piece bracket Assemble the transducer and bracket as shown in the fo...

Page 28: ...t position for the ratchets assemble the transducer as shown in the following figure Don t tighten the lock nut at this time Assemble transducer and bracket B Two piece bracket Once you determine the correct position for the ratchets assemble the transducer as shown in the figure in step 2B Don t tighten the lock nut at this time 4 Drilling mounting holes Hold the transducer and bracket assembly a...

Page 29: ...ch the transducer to the transom Slide the transducer up or down until it s aligned properly with the bottom of the hull as shown in the preceding and following figures Tighten the bracket s mounting screws sealing them with the sealant Adjust the transducer so that it s parallel to the ground and tighten the nut until it touches the outer washer then add 1 4 turn Don t over tighten the lock nut I...

Page 30: ...l the hole with the same marine grade above or below waterline seal ant used for the mounting screws 7 Make a test run to determine the results If the bottom is lost at high speed or if noise appears on the display try sliding the transducer bracket down This puts the transducer deeper into the water hope fully below the turbulence causing the noise Don t allow the transducer bracket to go below t...

Page 31: ...If you do not get good fish arches on your display it could be because the transducer is not parallel with the ground when the boat is at rest in the water or at slow trolling speeds If the arch slopes up but not back down then the front of the transducer is too high and needs to be lowered If only the back half of the arch is printed then the nose of the transducer is angled too far down and need...

Page 32: ...ur boat dealer or manufacturer to confirm your hull specifications Epoxy the transducer to a solid portion of the hull For example some but not all manufacturers use a layer of fiberglass then a core of balsa wood finishing with an outer layer of fiberglass Removing the inner layer of fiberglass and the balsa wood core exposes the outer layer of fiberglass The transducer can then be epoxied direct...

Page 33: ... play You ll need to turn off Auto Sensitivity Auto Depth Range and ASP Try a range setting that is two to three times the water depth The harder more rocky the bottom the easier it will be to get a second bot tom signal Don t touch the controls once they ve been set Example of a second bottom signal Unit is in 30 feet of water with range set at 80 feet and sensitivity set at 87 percent 2 Next tak...

Page 34: ...nt to make an extra effort to be absolutely sure that your selected location will work under all conditions make a test run with the boat on plane and observe the bottom signal You ll need to figure some way to prop the transducer into position while you make your test run A brick or two might be sufficient to hold it in place 5 When you re satisfied with a location mark it and proceed with the in...

Page 35: ... unworkable Spread a thin layer of epoxy about 1 16 or 1 5 mm thick on the face of the transducer as shown in the previous figure Make sure there are no air pockets in the epoxy layer Then apply the remaining epoxy to the sanded area on the hull 3 Press the transducer into the epoxy twisting and turning it to force any air bubbles out from under the transducer face Stop pressing when you bottom ou...

Page 36: ...o use a speed sensor and a second temperature sensor at the same time you will need a combination device NOTE This unit is packed with a transducer containing a built in temp sensor The SeaCharter package also includes a speed sensor If you have a FishElite 502c and want a speed sensor or additional temp sensor see the Accessory Ordering Information in the back of this manual If a second temp sens...

Page 37: ...ibe how to install the speed sensor Recommended tools for this job include drill 5 8 drill bit 1 8 drill bit for pilot holes screwdriver Required supplies for this job include four 8 stainless steel wood screws 3 4 long high quality marine grade above or below waterline sealant First find a location on the boat s transom where the water flow is smooth est Don t mount the sensor behind strakes or r...

Page 38: ...the sensor is flush with the bot tom of the hull and tighten the screws Stern view showing good location for mounting sensor on transom If the base of the transom has a radius fill the gap between the tran som and the sensor with the sealant This will help ensure smooth wa ter flow Speed sensor mounting configuration side view left and rear view right Route the sensor s cable through or over the t...

Page 39: ...nvironments we recommend you connect the power cable to the auxiliary power switch included in most boat designs If that results in electrical interference or if such a switch is not available we recommend connecting direct to the battery and in stalling an inline switch This will let you shut off power to the power cable when the unit is not in use When you are not using the unit you should alway...

Page 40: ... until the wires are attached correctly GPS Internal Antenna The unit has a built in 12 parallel channel GPS WAAS antenna NMEA Cable Connections NMEAis a standard communications format for marine electronic equipment For example an autopilot can connect to the NMEA inter face on the unit and receive positioning information The unit is capable of exchanging information with any device that transmit...

Page 41: ...ice Read your other product s owner s manual for more wiring information Mounting the Unit Bracket or Portable You can install the sonar unit on the top of a dash with the supplied gimbal bracket It can also be mounted on a portable power supply If you use the supplied bracket you may be interested in the optional R A M bracket mounting system This converts the unit s gimbal bracket to a swivel mo...

Page 42: ...ting You may need to place a piece of plywood on the back side of thin fiber glass panels to reinforce the panel and secure the mounting hardware Install the gimbal bracket Position the bracket so the arms slope to ward the front of your unit Drill a 1 inch 25 4 mm hole in the dash for the power and transducer cables The best location for this hole is immediately under the gimbal bracket location ...

Page 43: ...e bracket be sure to hold the cables against the rear edge of the hole Then slide the bracket over the hole and butt the rear of the bracket base firmly against the cables pinning them in place against the side of the hole Finally fasten the bracket to the dash Attach the unit to the gimbal bracket using the supplied gimbal knobs and washers Portable Installation Like many Eagle products this unit...

Page 44: ...just re member your unit can use an MMC or SD card to store data Both of these solid state flash memory devices are about the size of a postage stamp An SD card is slightly thicker than an MMC As this manual went to press MMCs were available in storage capacities of 8 MB 16 MB 32 MB 64 MB and 128 MB SD cards were available in capacities of 8 MB 16 MB 32 MB 64 MB 128 MB 256 MB and 1 GB Additional M...

Page 45: ...mb screw finger tight To add an MMC or SD Card 1 Open the card compartment door 2 Grasp the bottom of the MMC and push the top of the card into the slot Once the card is started use your fingernails to slide it the rest of the way to the left until it is firmly seated in the slot 3 Close the compartment door and fasten the thumb screw finger tight Other Accessories Other accessories include MMC ca...

Page 46: ...irst turn on the unit the Map Page appears If you would rather start learning about GPS operation jump to Sec 6 Basic GPS Operations Remember you don t need to read this manual from cover to cover to get going We designed it so you can skip around to the section you want to read ...

Page 47: ...l work together BUT if you just can t wait to get on the water turn to the one page Quick Reference on page 47 Keyboard SeaCharter 502cDF iGPS unit showing map with sonar page key board and access door for MMC cards 1 PWR LIGHT The PWR key turns the unit on and off and activates the backlight 2 PAGES Pressing the Pages key and the arrow keys switches the unit between the four different page screen...

Page 48: ... In key lets you zoom in the screen On the Sonar Page it enlarges fish signals and bottom detail On the Map Page it lets you see greater detail in a smaller geographic area Power lights on and off To turn on the unit press PWR As the unit powers up the Map Page is displayed first To switch to the Sonar Page press PAGES TO SONAR EXIT To turn on the backlight press PWR The unit has three backlight l...

Page 49: ...and alarms and sets the alarm style Transparency adjusts the level of transparency for menus Alarms turns sonar and GPS alarms on or off and changes alarm thresholds Route Planning used to plan view or navigate a route My Trails shows creates and deletes plot trails Also used to navigate or backtrack a trail Cancel Navigation turns off the various navigation commands Used to stop navigating after ...

Page 50: ...ng some Sonar display options Satellite Status Page The Satellite Status Page provides detailed information on the status of the unit s satellite lock on and position acquisition To get to the Satel lite Status Page press PAGES then use to select STAT This page represents a GPS function It is discussed in greater detail in Sec 6 No matter what Page you are on a flashing current position indica tor...

Page 51: ...so the direction to a recalled waypoint To get to the Navi gation Page press PAGES to NAVIGATION EXIT Navigation Page recording a trail traveling southwest Map Page The Map Page screens show your course and track from a bird s eye view on a moving map By default this unit shows the map with north always at the top of the screen The arrow in the center of the screen is your present position It poin...

Page 52: ... split screen showing both the Map and Sonar pages at the same time This feature is discussed in Sec 4 Sonar Options Other Features Sonar Page The Sonar Page displays the sonar chart This is a cross section view of the water column beneath the boat The chart moves across the screen displaying sonar signal echoes that represent fish structure and the bottom Pages Menu showing sonar chart display op...

Page 53: ... three display options under the Sonar Page cate gory To access them press PAGES to SONAR to Option Name EXIT The Sonar Page has its own menu which is used for some advanced functions and for setting various options To Access the Sonar Page menu from the Sonar Page press MENU Sonar Page Menu Most of these functions are discussed in Sec 4 ...

Page 54: ...ose features and options in Sec 4 but to show you how easy this unit is to operate the following page contains a simpli fied 10 step quick reference that will cover most fish finding situations The quick reference describes how your unit will operate with all the sonar features in their automatic modes which are set at the factory Surface clutter Structure Bottom signal Fish arches Depth scale Dig...

Page 55: ...oll from right to left showing you what s under the boat as you cruise across the water You can change the display by Zoom in to enlarge the chart for more detail press ZIN Zoom out to return to full chart mode press ZOUT 7 Watch the display for the appearance of fish symbols or arches if Fish I D is turned off When you see fish symbols or arches you ve found fish Stop the boat and get your lure o...

Page 56: ...o see more detail try increasing the sensitivity a little at a time There are situa tions when too much clutter appears on the screen Decreasing the sensitivity can reduce the clutter and show the strongest fish echoes if fish are present As you change the sensitivity setting you can see the difference on the chart as it scrolls These figures show results of different sensitivity levels on the sam...

Page 57: ...m tracking When you change the setting with auto turned on the unit will continue to track the bottom and make minor adjustments to the sensitivity level with a bias toward the setting you selected Adjusting sensitivity in Manual Sensitivity Mode is similar to driving a car without cruise control you have complete manual control of the car s speed In the unit manual mode allows you to set sensitiv...

Page 58: ...I D is an easier way for a sonar novice to recognize a fishy signal return when he sees it However locating fish by symbol only has some limitations Your sonar unit s microprocessor is remarkably powerful but it can be fooled Some of the echoes calculated to be fish could be tree limbs or tur tles To see what s under your boat in maximum detail we recommend you turn off Fish I D and begin learning...

Page 59: ...an produce unwanted marks on the display The ASP feature has four settings Off Low Medium and High If you have high noise levels try using the High ASP setting However if you are having trouble with noise we suggest that you take steps to find the interference source and fix it rather than continually using the unit with the high ASP setting There are times when you may want to turn the ASP featur...

Page 60: ...tom signal goes shallower than the shallow alarm s setting or deeper than the deep alarm s set ting For example if you set the shallow alarm to 10 feet the alarm will sound a tone if the bottom signal is less than 10 feet It will continue to sound until the bottom goes deeper than 10 feet The deep alarm works just the opposite It sounds a warning tone if the bottom depth goes deeper than the alarm...

Page 61: ...ered when any echo passes inside the zone alarm bar shown on the right side of the screen To adjust and turn on the zone alarm 1 From the Sonar Alarms menu press to ZONE ALARM ENABLED to ADJUST ZONE ENT Sonar Alarms menu with Adjust Zone selected left Adjust Zone Alarm selection box with Upper selected right 3 To set the upper boundary for the Zone Alarm use to select UPPER then press to move the ...

Page 62: ...ies Be fore you change the setting first calculate the percentage that the speed is off You will enter this percentage in a moment For example if you figure the sensor is reading 10 percent faster than actual speed you will enter 10 in the calibration window If the sen sor is reading 5 percent slower than true speed you will enter 5 in the window A good way to gauge your speed sensor s performance...

Page 63: ...ou are moving across the bottom If you are at anchor ice fishing or fishing from a dock experiment with a chart speed around 50 percent If you are drifting slowly try a chart speed around 75 percent When you are stationary and a fish swims through the sonar signal cone the image appears on the screen as a long line instead of a fish arch Reducing the chart speed may result in a shorter line that m...

Page 64: ...turns a strong signal which causes a wider brightly colored line red dish yellow to bright yellow If you have two signals of equal size one with red to yellow color and the other without then the target with brighter color yellow is the stronger signal This helps distinguish weeds from trees on the bottom or fish from structure ColorLine is adjustable Experiment with your unit to find the Color Li...

Page 65: ...lator Time and Sonar Data You can select items from any of these categories for display in any data box the category divisions are only there to help you sort through the information To change the information displayed in a data box While on a Page display with digital data boxes press MENU to CUSTOMIZE ENT A data box name flashes indicating it is selected Press ENT to change the data in the box o...

Page 66: ... that may contain data you want to display Then press to select a data option With the new option highlighted press ENT EXIT to get back to the main page display where the data option you selected is displayed in the selected digital data box You can select another data box to modify or press EXIT to return to normal operation A Page digital data boxes can show a limited number of boxes You can no...

Page 67: ... lower half of the screen This is called Auto Ranging and is part of the automatic function However depending upon the bottom depth and the current range you can change the range to a different depth To do this 1 From the Sonar Page press MENU to DEPTH RANGE ENT 2 The Depth Range Control Scale appears Press to select a differ ent depth range A blue bar highlights the selected range Range num bers ...

Page 68: ...e rest of the screen con tinues to operate normally FasTrack gives you a rapid update of condi tions directly under the boat This makes it useful for ice fishing or when you re fishing at anchor When the boat is not moving fish sig nals are long drawn out lines on a normal chart display FasTrack con verts the graph to a vertical bar graph that with practice makes a use ful addition to fishing at a...

Page 69: ...reen when actually there are no fish The reverse is also true The illustrations on the next page show how Fish I D can actually miss fish that are present Does that mean Fish I D is broken No the feature is interpreting sonar returns in a specific way to help take some of the work out of reading the screen Remember Fish I D is one of the many tools we provide so you can analyze your sonar returns ...

Page 70: ...turned on right Frequency Change Transducer Frequency The SeaCharter 502cDF transducer operates with both 200 kHz and 50 kHz The 200 kHz frequency has a 12 cone angle and the 50 kHz fre quency has a 35 cone angle The default frequency is 200 kHz which is best for use in shallow water about 300 feet or less This frequency is the best choice for about 80 percent of the fresh and salt water sport fis...

Page 71: ...requency setting to 200 kHz 1 From the Sonar Page press MENU to SONAR FEATURES ENT 2 Press to 200 KHZ ENT 3 Press EXIT EXIT to close the menu HyperScroll See the entry on Ping Speed which controls the HyperScroll feature Log Sonar Chart Data If you have an MMC installed in the unit the sonar data shown on the screen can be saved to the MMC This can be played back at any time to play a recorded son...

Page 72: ...if you want to lower the file quality and record for a longer period of time After you ve changed the settings select START LOGGING and press ENT Noise Rejection See the entry on Advanced Signal Processing in this section Overlay Data On any Page display except Satellite Status you can float or overlay additional GPS or navigation data on the screen with the Overlay Data command For example if you...

Page 73: ...ach category name A category with a next to it is expandable meaning its contents are hidden Highlight a category name and press ENT That will open the category allowing you to select one of its data options An category that has been opened one with a next to its name can be closed which will hide its contents Just select the category name and press ENT 3 Open categories that may contain data you ...

Page 74: ...ay and press ENT ENT To remove another item select the item and press ENT ENT 3 When you have finished removing items from the screen press EXIT to return to the page display Overlay Data Shown with Date option selected left Press ENT to ac cess REMOVE option center Press ENT again to remove item and return to Overlay Data Shown right To move overlaid data To rearrange data floating on the main pa...

Page 75: ...cted data type will be displayed in the new size To change the font size of another data type repeat Step 2 3 After the desired changes are made end the command and return to the previous page by pressing EXIT Map Page showing boat cruising Puget Sound Washington with Over lay Data turned on left This example shows Depth Ground Speed and the Steering Arrow The second figure right shows Depth Groun...

Page 76: ...ity for optimum performance Depending on water depth and other conditions HyperScroll may cause a second bottom echo to return to the transducer during the next ping cycle or sounding This can result in a large amount of clutter appearing on the screen If this occurs just decrease the sensitivity to a level that eliminates the clutter When you turn HyperScroll off you can return to your original s...

Page 77: ...TEM SETUP ENT to RESET OPTIONS ENT 2 Press to YES ENT 3 All menus are cleared and the unit reverts to the Map Page at the 4000 mile zoom All options have been set to factory default settings System Setup menu with Reset Options selected left Reset Options dialog box right with Yes selected NOTE Reset Options does not erase any waypoints routes plot trails or sonar logs Reset Water Distance Sonar c...

Page 78: ...ansducer to the lowest part of the boat In this example we will use 3 5 feet This will entered as a negative 3 5 feet which makes the depth indi cators perform as if the transducer s lower in the water than it really is 1 Press MENU MENU to SONAR SETUP ENT to SET KEEL OFFSET ENT 2 The Keel Offset dialog box appears Press to change the plus sign to a minus sign 3 Press to the first number then pres...

Page 79: ...lus a little more power This gives it the capability to show fish and other detail However situations occur when it becomes necessary to increase or de crease the sensitivity This typically happens when you wish to see more detail so an increase in sensitivity is indicated Or wave action and boat wakes can create enough tiny air bubbles to clutter much of the water column In that case a decrease i...

Page 80: ...cker sensitivity adjustments try leaving the Sensitivity Control Bar on the screen as the chart scrolls You can see the changes on the screen as you press the up or down arrows This is handy when there s a lot of clutter in the water and you are matching the sensitivity to rapidly changing water conditions Sonar Chart Mode The default color scheme for the sonar chart is white background but there ...

Page 81: ...ight to left Depth scales on the right side of the screen aid in determining the depth of targets The line at the top of the screen represents the surface The bottom depth and surface temperature if equipped with a temperature sensor or a transducer with a temp sensor built in show at the top left corner of the screen The FasTrack display shows just to the right of the scale This changes all echoe...

Page 82: ... shows at the bottom left corner of the screen Digital Data This mode shows the chart on the right side of the screen The left side has five customizable digital data boxes containing Water Depth Wa ter Temperature Water Speed Water Distance distance traveled re quires a speed sensor and an air temperature sensor The Depth box also shows settings for Shallow and Deep alarms Digital Data Customizin...

Page 83: ...t a different type of data then press ENT EXIT EXIT The list first appears with Water Temperature selected left Maximum Speed has been picked to replace Water Temperature right Tip You can customize other digital data boxes before returning to the Sonar Page After changing the first box by selecting the Data Type and pressing ENT EXIT use to select another box to change When the selected box title...

Page 84: ...ll appear at the top of the map page when it is activated Press PAGES PAGES again and the bar at the top of the sonar page turns blue Sonar Simulator This unit has a built in simulator that lets you run it as if you were on the water All sonar features and functions are useable To use the simulator 1 From the Sonar Page press MENU MENU to SONAR SETUP ENT to SONAR SIMULATOR ENT ENT EXIT Repeat thes...

Page 85: ...press ENT EXIT The recorded chart begins scrolling across the screen Sonar Page playing a recorded sonar chart in Sonar Simulator mode Tip The Sonar Simulator can use sonar charts that you or a friend has recorded on an MMC card To play back your own sonar chart make sure the MMC containing the chart is installed then 1 Press MENU MENU to SONAR SETUP ENT to SONAR SIMULATOR ENT 2 Press to CHART USE...

Page 86: ...ess MENU MENU to BROWSE MMC FILES ENT ENT 2 Press to chart name ENT to PLAY ENT EXIT NOTE For some great practice try running the Sonar Simulator and the GPS Simulator at the same time This will give you a feel for how the unit will work in the field Stop Chart If you are running multiple units on a boat or using this unit in a car there are times when you may want to turn off the sonar This com m...

Page 87: ...ay is a common fast and easy method used to enlarge small detail fish signals and the bottom This unit lets you zoom the display quickly and easily by pressing the Zoom In key ZIN Pressing ZIN once doubles the size 2X of all echoes on the screen Pressing it again quadruples the size of the echoes 4X When turned on the zoom bar on the far right side of the screen shows which echoes will be dis play...

Page 88: ...ch of an arrow key The Zoom Pan feature lets you rapidly move the zoomed area up and down to different depths By pointing your zoom at different portions of the chart as it scrolls you can get a close up look at structure or cover below you To use Zoom Pan switch to a manual Depth Range setting and turn on 2X or 4X Zoom Then press to pan up and down the water column ...

Page 89: ...ical wiring on the boat may help Route the sonar unit s power cable directly to the battery instead of through a fuse block or ignition switch 2 Inspect the transducer cable for breaks cuts or pinched wires 3 Check the transducer and power connector Make sure it s securely plugged in to the unit Weak bottom echo digital readings erratic or no fish signals 1 Make sure the transducer is pointing str...

Page 90: ...unit to eliminate weaker signals such as fish or even structure from the display Try using resis tor spark plugs or routing the sonar unit s power and transducer cables away from other electrical wiring on the boat No fish arches when the Fish I D feature is off 1 Make sure the transducer is pointing straight down This is the most common problem if a partial arch is displayed 2 The sensitivity may...

Page 91: ...ar s wires away from it You may need to route the sonar unit s power cable directly to the battery to isolate it from other wiring on the boat If no noise displays on the sonar unit from electrical equipment then make sure everything except the sonar unit is turned off then start the engine Increase the RPM with the gearshift in neutral If noise ap pears on the display the problem could be one of ...

Page 92: ...84 Notes ...

Page 93: ...work together BUT if you just can t wait to get outside turn to the one page Quick Reference on page 98 Keyboard SeaCharter 502cDF iGPS unit 1 PWR LIGHT The PWR key turns the unit on and off and activates the backlight 2 PAGES Pressing this and the arrow keys switches the unit be tween the four different page screens Satellite Status Page Naviga tion Page Map Page and Sonar Page 3 MENU Press this ...

Page 94: ...onar Page it enlarges fish signals and bottom detail On the Map Page it lets you see greater detail in a smaller geographic area Power lights on and off To turn on the unit press PWR As the unit powers up the Map Page is displayed first To switch to another page press PAGES to Page Name EXIT To turn on the backlight press PWR again The unit has three backlight levels Repeatedly pressing PWR will c...

Page 95: ... Navigation turns off the various navigation commands Used to stop navigating after you have reached your destination Sonar Setup sets various sonar options GPS Setup sets various GPS receiver options System Setup sets general configuration options Sun Moon Calculations finds the rising and setting time of the sun and the moon Trip Calculator shows trip status and statistics Timers controls the up...

Page 96: ... The Satellite Status Page shown in the following images provides de tailed information on the status of the unit s satellite lock on and posi tion acquisition To get to the Satellite Status Page press the PAGES key then use to select STAT No matter what Page you are on a flashing current position indica tor question mark symbol and flashing GPS data displays indicate that satellite lock has been ...

Page 97: ... is grayed out there fore it isn t being used to solve the position Beneath the circular graph are the bar graphs one for each satellite in view Since the unit has twelve channels it can dedicate one channel per visible satellite The taller the bar on the graph the better the unit is receiving the signals from the satellite NOTE One of the data display options for the Satellite Status page is Posi...

Page 98: ...u are taking Navigation Page showing a traveler recording a trail toward the southwest Page looks like this when the unit is not navigating to a waypoint following a route or backtracking a trail When navigating to a waypoint the Navigation screen looks like the following figure Your ground speed track distance and bearing to waypoint and course are all shown digitally on this screen NOTE Remember...

Page 99: ...oint The course line is shown on the Navigation Page screen and the Map Page screen as a red line Navigation Page going to a waypoint while creating a new trail The cross track error range is shown on the compass rose as a wide white corridor enclosing the course line The outer edges of this white corridor represent lines that show the current cross track error range The default for the cross trac...

Page 100: ...Page press MENU Map Page The Map Page screens show your course and track from a bird s eye view By default this unit shows the map with north always at the top of the screen This can be changed See the topic Map Orientation in Sec 8 If you re navigating to a waypoint the map also shows your starting location present position course line and destination You don t have to navigate to a waypoint howe...

Page 101: ...tom map made with MapCreate or a pre made Free domMap from LEI and you can zoom in to 0 02 miles with massive amounts of accurate map detail Map Pages loaded with high detail MapCreate map of an urban area Arterial streets are visible at the 4 mile zoom range left Numerous dots represent Points of Interest that are visible at the 2 mile range center At the 0 4 mile zoom right you can see an inters...

Page 102: ... For example the background map would show you the general outline and approximate shape of a coastline or body of water but the higher detail in MapCre ate shows the shoreline completely and accurately Many smaller is lands would not be included in the background map but are in Map Create NOTE Available through LEI Extras look inside back cover for accessory ordering information FreedomMaps are p...

Page 103: ...functions and for setting various options To access the Map Page Menu from the Map Page press MENU The Pages Menu also offers several map display options under the Map Page category To access them press PAGES to MAP to Op tion EXIT Digital Data map page option In pages that have two major windows you can toggle back and forth between the windows by pressing PAGES PAGES School POI POI Pop up Restau...

Page 104: ...he two windows Press to adjust the window size from top to bottom Press to switch between a horizontal and vertical layout You can only change size not switch layout on the Map With Sonar page it al ways has two vertical windows Press EXIT to return to normal operation Fig 1 Resize Window command on the GPS Page menu Fig 2 Two Maps page display with four flashing arrows on the dividing center line...

Page 105: ...st follow the steps above The following page contains a 12 step quick reference for the most basic GPS operations If you don t want to carry the manual with you as you practice with the unit you might consider photocopying this quick ref erence page and tucking it into your pocket ...

Page 106: ...nd the map by Zoom in closer to see greater detail press ZIN zoom in key Zoom out to see more area less detail press ZOUT zoom out key Scroll map north south east or west using arrow keys To stop scrolling and return to current position on map press EXIT key 6 Set a waypoint Wpt 001 at your current position so you can navigate back here press WPT WPT Waypoint symbol and 001 appears 7 Zoom scroll m...

Page 107: ... lower left corner of the screen 1 Press the ZIN key zoom in to move in closer and see greater detail in a smaller geographic area 2 Press the ZOUT key zoom out to move farther away and see less map detail but a larger geographic area When you are traveling the map will automatically move as you move This keeps your current location roughly centered on the screen You can manually pan or scroll the...

Page 108: ...w keys to scroll the map to some far away location or waypoint Press EXIT to clear the cursor and jump back to your current position on the map When you want to take another peek at that distant place just press EXIT again You can use this trick to toggle between your cur rent position and your destination without a lot of scrolling Searching Now that you ve seen how the unit can find where you ar...

Page 109: ...with the closest at the top of the list and the farthest at the bottom of the list The nearest is highlighted Find Waypoint Menu left Category Selection menu center and list of the nearest restaurants right 4 If you wish you could scroll here to select another restaurant but for now we will just accept the nearest one Press ENT 5 The POI information screen appears This is how you can use this unit...

Page 110: ... the restaurant s POI symbol A pop up data box shows the POI s name A data box at the bottom of the screen displays the location s latitude longitude distance and bearing Finding Waypoint screen showing the result of a restaurant search 7 To clear the search and return to the last main page display press EXIT repeatedly NOTE Search works from mapping and POI data loaded in the unit If you do not h...

Page 111: ...ip these archived waypoints can be reloaded into your GPS unit To create and save a Waypoint These first two techniques use the Quick Save method the fastest and easiest way to create a waypoint Create Waypoint at Current Position While you are traveling press WPT WPT The waypoint is saved and automatically given a name with a sequential number such as way point 003 The waypoint symbol and number ...

Page 112: ...to the place where you want to make a waypoint 2 Press WPT WPT The waypoint is saved and automatically given a name with a sequential number such as waypoint 001 The waypoint symbol and number appear on the map Create Waypoint by Entering a Position 1 Press WPT to MY WAYPOINTS to NEW ENT 2 Press to ENTERED POSITION ENT to CREATE ENT 3 Press to LATITUDE ENT Enter the latitude by pressing to change ...

Page 113: ...e Find Waypoint commands 1 Press WPT to MY WAYPOINTS ENT To look up the nearest waypoint press to NEAREST ENT or to look by name press ENT For this exam ple let s look by name 2 If your waypoint list is a long one you can spell out the waypoint name in the FIND BY NAME box Press to change the first character then press to move the cursor to the next character and repeat until the name is correct t...

Page 114: ...ge When MOB is activated the Navigation Page automati cally shows the compass rose with its bearing arrow pointing toward the man overboard position and the destination name says Going To Man Overboard The Map Page displays a Man Overboard waypoint represented by a human figure and the steering arrow points where to steer to reach that position Navigating to Man Overboard Man Overboard activated m...

Page 115: ...ms such as waypoints Points of In terest towns etc can be selected and appear highlighted with a pop up box Other features such as a river or a street intersection will not appear highlighted but the cursor will take you to those locations just the same In this example left cursor crosshairs are centered on Oologah Oklahoma GPS menu with Go To Cursor selected right 3 Press MENU ENT and the unit wi...

Page 116: ... After you have looked up an item with the Find Waypoint command use to make sure the GO TO command is highlighted at the bottom of the screen then press ENT The unit shows navigation information to the item To cancel navigation press MENU MENU to CANCEL NAVIGATION ENT to YES ENT The unit stops showing navigation information Creating and Saving a Trail A trail or plot trail is a string of position...

Page 117: ...d begins recording a new trail To Save a Trail 1 Press MENU MENU to MY TRAILS ENT Sequence for saving a trail and beginning a new one My Trails com mand left The Trails Menu center The arrow to the right of Trail 3 indicates the trail is active and the check to the left indicates the trail is visible on the map display The third figure right shows the Edit Trail menu with the Name command selected...

Page 118: ...e option of completely turning off trail record ing under the trail Options command However if the Update Active Trail option is left turned off it will cancel the automatic trail creation feature Displaying a Saved Trail The active trail is automatically displayed on the map the Visible option with the factory default settings You can selectively turn trail display off and on for any saved or act...

Page 119: ...r at following each little turn on a foot path At faster speeds such as the highway or on the wa ter the Navigate Trail and Backtrack Trail commands are handy Visual Trailing 1 On the Map Page zoom ZIN or ZOUT so your trail is visible 2 Begin moving and watch the Map Page Walk or steer so your cur rent position arrow traces along the trail you made Tip Generally when using this method the smaller ...

Page 120: ... trail converted to a route is represented by a red line The magenta trail line overlays the red course line To see the red course line you must turn off the visible trail option The Navigation Page will show only the red course line unless you are recording a new trail The bearing arrow on the compass rose points to the next waypoint on the trail As you travel the arrival alarm will go off when y...

Page 121: ...alarm goes off and bearing arrow swings around to say turn right east toward the next waypoint trail point 3 Navigate a Back Trail 1 Press MENU MENU to MY TRAILS ENT 2 Press to enter the Saved Trail list then use to select the de sired Trail Name ENT 3 Press to NAVIGATE ENT 4 Press to REVERSE ROUTE ENT to NAVIGATE ROUTE ENT The unit begins showing navigation information along the trail in reverse ...

Page 122: ...to an MMC are contained in the instruction manual for your MMC card reader and MapCreate 6 software For instructions on inserting an MMC into the unit see Sec 2 Installation Accessories GPS Data files GPS Data Files contain waypoints routes trails and event marker icons Instructions for copying GPS Data Files between your computer and an MMC are contained in the instruction manual for your MMC car...

Page 123: ...o LOAD ENT 3 Saving to MMC To accept the default name Data for the GPS Data File press to SAVE DATA ENT If you want to rename the file as shown in the following figures press ENT to activate the selection box Press to change the first character then press to the next char acter and repeat until the name is correct Then press ENT to SAVE DATA ENT The unit will display first a progress then a comple...

Page 124: ...lay a comple tion message when the data transfer is finished To return to the Page view press EXIT repeatedly These figures show the menu sequence for loading a GPS Data File from an MMC into the unit s memory Cancel Navigation You can turn off any of the navigation commands after you reach your destination or at any other time by using the Cancel Navigation com mand Press MENU MENU to CANCEL NAVI...

Page 125: ...miles right Find Distance From Point to Point You can also measure distance between two other points on the map 1 While on the Map Page press MENU to FIND DISTANCE ENT 2 Center your cursor over the first position A rubber band line ap pears connecting your current position to the cursor s location Press ENT to set the first point and the rubber band line disappears 3 Move the cursor to the second ...

Page 126: ... where you want to make an icon 2 Press ENT and the screen shows a Select Icon Symbol menu 3 Press to select your icon symbol and press ENT The icon appears on the map Press EXIT to clear the cursor Cursor selects icon location left Select Icon Symbol menu center Boat Ramp icon on map right Cursor has been moved for clarity Create Icon at Current Position 1 While you are traveling press ENT and th...

Page 127: ...ired icon on the map 1 Use arrow keys to center cursor cross hair over the icon 2 To navigate to the selected icon location press MENU ENT EXIT Follow course line on the Map Page or the compass bearing arrow on the Navigation Page Routes A route is a series of waypoints linked together in an ordered sequence that s used to mark a course of travel You can visualize a route as a string of beads The ...

Page 128: ...saving it as part of a GPS Data File file format usr Copy the GPS Data File to an MMC and insert the MMC in the unit See Sec 2 for instructions on installing MMCs To load the GPS Data File into the unit s memory see the entry on Transfer Custom Maps GPS Data Files in Sec 6 Basic GPS Operations Routes Created in the Unit You can create a route by selecting existing waypoints from the way point list...

Page 129: ... this example we moved to the entrance of the cove where our boat was docked to start out route a promising fishing spot next to an oil platform Creating this example route is illustrated in the following figures Route creation sequence Fig 1 Set route waypoint 1 at the cove en trance Fig 2 Move cursor northeast to set point 2 at channel en trance Fig 3 With point 2 set move cursor southeast to ma...

Page 130: ...oute screen with the route automatically named Route 1 and stored in the unit s internal memory You can edit the route and run other commands but if you are finished with the route for now return to the last page displayed by pressing EXIT repeatedly NOTE When adding waypoints to an existing route the inserted way points will appear in the route in front of the waypoint you have selected in the Ed...

Page 131: ... the cursor to the next character and repeat until the name is correct then press ENT Return to the previous page by pressing EXIT repeatedly Edit Route Waypoints You can edit the route by adding and removing waypoints 1 From the NAVIGATION PAGE press MENU ENT or from the MAP PAGE press MENU MENU to ROUTE PLANNING ENT 2 Press to route name ENT to Route Waypoints List Use to select a waypoint then ...

Page 132: ... Press to select route name ENT then use the arrow keys to select NAVIGATE ROUTE from the action window and press ENT 3 Upon arrival at your destination cancel navigation by pressing MENU MENU to CANCEL NAVIGATION ENT to YES ENT The following figures show what the Navigation Page and Map Page look like while navigating a route Navigate a Route in Reverse Here s how you run a route backward from th...

Page 133: ...to the northeast In Fig 3 the traveler has turned northeast on his new course and is heading straight for Wpt 2 which is 0 27 miles away Fig 4 shows route navigation on the Map Page In this figure the traveler has reached Wpt 2 and is starting on the leg between Wpts 2 and 3 Trails Delete a Trail This is the command used to erase or delete a trail Press MENU MENU to MY TRAILS ENT to trail name ENT...

Page 134: ...x appears Press WPT and the Edit Trail menu opens Trail selected with map cursor left The box at the bottom of the screen shows distance and bearing from current position to the se lected point on the trail The Edit Trail menu right Edit a Trail Color To edit a trail color press MENU MENU to MY TRAILS ENT to trail name ENT to COLOR ENT Press to select a color style then press ENT Press EXIT repeat...

Page 135: ...To get to the Calculator menu press MENU MENU to TRIP CALCU LATOR ENT Trip Down Timer To get to the Down Timer menu press MENU MENU to TIMERS ENT to DOWN TIMER ENT Trip Up Timer To get to the Up Timer menu press MENU MENU to TIMERS ENT ENT Waypoints Delete a Waypoint To delete a waypoint from the waypoint list press WPT to MY WAYPOINTS ENT to Name ENT Press to select the desired charac ter then pr...

Page 136: ...dify the name by pressing and to choose the next character Once the new name is set press ENT Press EXIT repeatedly to get back to the main page display Waypoint Symbol 1 Press WPT to MY WAYPOINTS ENT to name ENT Choose the de sired waypoint from the list by using to select the first character then press to choose the next character After the desired waypoint is highlighted in the list press ENT E...

Page 137: ...takes points to get an average for the position The greater the number of points the greater the accuracy When the desired number of points accumulates press ENT to create the waypoint 4 The Edit Waypoint menu appears You can save the waypoint by pressing EXIT EXIT or you can edit the waypoint Set a Waypoint by Projecting a Position This feature sets a waypoint at a point located a specific distan...

Page 138: ...to change the first character then press to the next character and repeat until the bearing is correct Press ENT 7 Press to PROJECT ENT The Edit Waypoint menu appears You can save the new projected waypoint by pressing EXIT EXIT or you can edit the waypoint Press EXIT ENT if you want navigate to the waypoint ...

Page 139: ...f the alarm is set to 1 mile then the alarm flashes a message if you drift 1 of a mile or more to the right or left of the line to the waypoint The anchor alarm is triggered when you drift outside of a preset radius Again using the 1 mile as an example if you re anchored and your boat moves more than 1 of a mile the alarm will flash a message and sound a tone Alarms command left Alarm menu right T...

Page 140: ...st one since you may not be able to come close enough to the first waypoint to trip the arrival alarm Check MMC Files and Storage Space To check MMC Files Press MENU MENU to BROWSE MMC FILES ENT Press to MMC CARD INFO ENT to see the free space on the card Main Menu left MMC File Browser right Communications Port Configuration The unit has one NMEA 0183 version 2 0 compatible communication port or ...

Page 141: ...o COMMUNICATIONS PORT ENT to CONFIGURE NMEA ENT 3 A menu appears showing the prefixes of the available NMEA sen tences A check mark next to a prefix means the prefix is in use Use to select a prefix then press ENT to turn off the prefix NOTE The names of the NMEA sentences are abbreviated in this menu These are the functions of the various selectable prefixes GLL transmits latitude and longitude o...

Page 142: ...ntering position coordinates Menus for changing coordinate system used to display positions To get to Coordinate System Selection 1 Press MENU MENU to GPS SETUP ENT 2 Press to COORDINATE SYSTEM ENT This unit can show a position in degrees 36 14952 degrees minutes and thousandths of a minute 36 28 700 or degrees minutes seconds and tenths of a second 36 28 40 9 It can also show position in UTM Univ...

Page 143: ...our position is off significantly then try the alternate NOTE When the position format is changed it affects the way all positions are shown on all screens This includes waypoints To change the coordinate system press ENT while COORDINATE SYSTEM is highlighted Press the to highlight the desired format Press ENT to select it Press EXIT to close the menus To setup Loran TD NOTE If the Loran TD conve...

Page 144: ...e on the map but the closer it is to your location the smaller the numbers will be that you ll have to deal with Once you ve decided on a reference position you can save it as a waypoint See the waypoint section for information on saving a waypoint Save the reference position as a waypoint Exit the waypoint screens 1 Press MENU MENU to GPS SETUP ENT 2 Press to COORDINATE SYSTEM ENT 3 Press to SETU...

Page 145: ...any data box the category divisions are only there to help you sort through the information To change the information displayed in a data box While on a Page display with digital data boxes press MENU to CUSTOMIZE ENT A data box name flashes indicating it is selected Press ENT to change the data in the box or hit to select another box and press ENT You will see a list of categories with or symbols...

Page 146: ...og boxes provided on the simulator menu screen To get to the GPS Simulator 1 Press MENU MENU to GPS SETUP ENT 2 Press to GPS SIMULATOR ENT The GPS Simulator Menu appears GPS Setup Menu left GPS Simulator menu center Map Page showing Track and Speed steering arrow indicators right Make the desired settings then turn on the simulator by highlighting the GPS SIMULATOR ON box and pressing ENT key Pres...

Page 147: ...n as you normally do Tip You can pick any spot on the map to begin your simulation session by using the Initialize GPS command This makes your unit think it s located at the position you select See its entry following the en try for Hide GPS Features Hide GPS Features The GPS menus and features can be hidden from view with the Hide GPS Features command The default setting is off allowing you to ro...

Page 148: ...As you travel toward the destina tion the unit automatically begins zooming in one zoom range at a time always keeping the destination on the screen To turn this feature on from the MAP PAGE press MENU to AUTO ZOOM ENT EXIT Repeat these steps to turn it off Map Data This menu lets you turn the map off if desired which turns the map screen into a GPS plotter turn off or on the pop up map info boxes...

Page 149: ... to return to the main page display Map Overlays Range Rings Lat Long Grid The map screen can be customized with four range rings and or grids that divide the plotter into equal segments of latitude and longitude Range rings are handy for visually estimating distances on the map The ring diameters are based on the current zoom range For example at the 100 mile zoom the screen will show two rings w...

Page 150: ...he entire world Other datums may also cover the entire world or just a small portion of it By default your position shows using the WGS 84 datum However it can show your position using one of 191 different datums Different datums can be selected to change the datum 1 Press MENU MENU to GPS SETUP ENT to DATUM SELECTION ENT 2 Use to select the desired datum and press ENT 3 To return to the last main...

Page 151: ...ft Map Categories Drawn Menu right Map Orientation By default this receiver shows the map with north always at the top of the screen This is the way most maps and charts are printed on paper The first figure left is shown in north up and the second figure right is in track up This is fine if you re always traveling due north What you see to your left corresponds to the left side of the map to your...

Page 152: ...ientation from the Map Page press MENU to MAP ORIENTATION ENT Use to select the desired mode then press ENT Press EXIT EXIT to return to the main page display Map Menu left Map Orientation menu with the North Up map orientation option selected right NOTE In North Up and Course Up the present position arrow appears in the center of the map page In Track Up the position arrow appears centered in the...

Page 153: ...en use arrow keys to read the information To return to the main page display press EXIT repeat edly Entrance to Aransas Pass on a NauticPath chart with 8 nautical mile zoom left Remaining images left to right same position at 4 nautical mile 1 nautical mile and 0 3 nautical mile zoom ranges Port Information NauticPath charts contain Port Services information represented by anchor icons on the map ...

Page 154: ...appears The Port Services information screen for a NauticPath chart contains all the service information in one window 3 To scroll through the service information window use to see the types of services available To return to the main page display press EXIT repeatedly Port Services information screens Tidal Current Information NauticPath charts contain Tidal Current information represented at lar...

Page 155: ...T to display the Tidal Current Information screen NauticPath chart showing Tidal Current Station icon selected by cur sor left Icon animates automatically at 08 mile zoom range right The Tidal Current Information screen displays daily tidal current data for this station on this date at the present time The graph at the top of the screen is an approximate view of the flood and ebb pattern for the d...

Page 156: ...These icons will appear when you are zoomed in to a 6 mile range The icon stands for a Tidal Station location An example is displayed at right When you zoom in to a sufficiently small zoom range 0 8 nautical mile the icon becomes an animated gauge showing a rising or falling tidal height for the selected station at the present time At larger zoom ranges you can select the boxed T icon and it becom...

Page 157: ... icon When it is selected a pop up name box appears 2 Press WPT to display the Tide Information screen Tide Information screen The Tide Information screen displays daily tidal data for this station on this date at the present time The graph at the top of the screen is an approximate view of the tidal range pattern for the day from midnight MN to noon NN to midnight MN The dotted line across the gr...

Page 158: ...h Navionics charts contain tide and port service information NOTE The primary operational difference between a NauticPath chart and a Navionics chart is the way the chart data is set up for dis play NauticPath charts are ready for display as soon as they are inserted into the unit Navionics charts must be inserted into the unit then selected as a Map Choice option in the Map Data menu To display a...

Page 159: ... by default To set up Popup Help Press MENU MENU to SYSTEM SETUP ENT to POPUP HELP With the option highlighted press ENT to turn it on check and turn it off uncheck After the option is set press EXIT EXIT to return to the main page display System Setup Menu left with Pop up Help highlighted The second example right shows the Pop up Help message for the Sensitivity Reset Options To reset all featur...

Page 160: ...lly but doesn t require it to yield a position 1 Press MENU MENU to GPS SETUP ENT to REQUIRE WAAS ENT 2 To return to the main page display press EXIT EXIT Require WAAS command on the GPS Setup Menu Screen Contrast and Brightness To access the Screen menu press MENU MENU ENT To adjust the display s contrast The CONTRAST slider bar is already selected Press to adjust the contrast ...

Page 161: ... DISPLAY MODE ENT press to select mode EXIT Display Mode menu Set Language This unit s menus are available in 10 languages English French Ger man Spanish Italian Danish Swedish Russian Dutch and Finnish To select a different language 1 Press MENU MENU to SYSTEM SETUP ENT 2 Press to SET LANGUAGE ENT 3 Use to select a different language and press ENT All menus now appear in the language you selected...

Page 162: ...ime change caused by Daylight Sav ing Time you should only have to set it once You may select which set of rules matches DST in your region or accept the default Once you have each field set the way you want press EXIT repeatedly to return to the main page display Show WAAS Alarm When the signal is available your unit will automatically use WAAS to boost the accuracy of the position fix When the W...

Page 163: ...ure or function You can find out what software version is running in your unit by using the Software Information command Main Menu with Software Information selected left The Software Information screen right 1 Press MENU MENU to SYSTEM SETUP ENT to SOFTWARE INFORMA TION ENT 2 Read the information displayed on the screen 3 To return to the main page display press EXIT repeatedly Sounds and Alarm S...

Page 164: ...T EXIT to return to the main page display To set Alarm Volume Press to VOLUME Press to adjust the vol ume After the option is set press EXIT EXIT to return to the main page display To set Alarm Style Press to ALARM STYLE ENT Press to change the style then press ENT After the option is set press EXIT EXIT to re turn to the main page display Track Smoothing This is a factory setting that should alwa...

Page 165: ...ls are updated display or hide trails create a new trail delete a trail etc General Trail Options To access the Trails Menu 1 Press MENU MENU to MY TRAILS ENT Main Menu left Trails Menu center Trail Options right Delete All Trails To remove all of the trails from memory from the Trails Menu press to DELETE ALL ENT to YES ENT Update Trail Option This menu lets you change the way the trail updates o...

Page 166: ...points If a plot trail uses all of the available points allotted to it the beginning points are taken away and placed at the end of the trail From the Trails Menu press to OPTIONS ENT to UPDATE CRITERIA Press to select criteria type ENT Trail Update Rate Time Distance You can update a trail by time with a range of 1 to 9999 seconds The default is 3 seconds You can update by distance with a range o...

Page 167: ... Transparency Use the transparency menu to adjust the transparency of menu win dows A high transparency allows you to continue monitoring the screen s display while adjusting feature settings though the text of the menus may fade until it is unreadable A low transparency will usually make menu text easier to read at the cost of watching your display Main Menu with Transparency selected To adjust M...

Page 168: ...o SYSTEM SETUP ENT ENT System Setup submenu left Units of Measure Menu right To set Unit of Measure Highlight the unit of measure you want to change and press ENT After the option is set press EXIT repeatedly to return to the main page display ...

Page 169: ...h functions all begin with either the Find Way point menu or the Map Page menu Press WPT and the Find Waypoint menu appears for waypoints and Points of Interest POI From the Map Page press MENU and the Map Page menu appears for streets addresses and highway exits Find Waypoint menu left Map Page menu right IMPORTANT NOTES Our search commands let you look up items by name or search for the item nea...

Page 170: ...options A You can spell out the name in the top selection box Press to change the first letter then press to move the cursor to the next let ter and repeat until the name is correct then press ENT ENT B Jump down to the lower selection list by pressing ENT then press to select a street name from the list then press ENT The street name you se lected is now in the street field Find Address menu left...

Page 171: ...ENT Your unit asks you to wait while it searches for the address If an address is not in the database a message appears saying the ad dress could not be found 7 The unit will display a list of addresses If the address you are look ing for is highlighted at the top of the list press ENT If not use to select the correct address from the list then press ENT The Map Page will then appear with the loca...

Page 172: ...ion selected by the cursor on the map press WPT The Waypoint Information window appears with the Go To Waypoint command highlighted If you want to go ahead and navigate to the POI address just press ENT EXIT Map Page showing location of the address on the map left This ad dress is a business in the POI database so you can display the POI in formation window center List of found addresses right Fin...

Page 173: ...rst select a highway name by pressing ENT which calls up the Find By Name menu There are two highway search options A You can spell out the highway name in the top selection box Press to change the first letter then press to move the cursor to the next let ter and repeat until the name is correct then press ENT ENT B Jump down to the lower selection list by pressing ENT then press to select a high...

Page 174: ...reen you have two choices A Press ENT ENT to navigate or go to the exit B Press ENT ENT to find the exit on the map Go To Exit option left Find On Map option right Tip You can also look up some additional information on the Exit Serv ices located near this exit Press to SERVICES press to select Service Name ENT Exit Information screen left general location and amenities information right ...

Page 175: ... subcategory There are two search options Name or Nearest Find Waypoint menu with Lodging POI category selected left and with the RV Parks subcategory selected right 2 Search by nearest POI Press ENT A list of the nearest POI s will appear Press to the selected POI and press ENT to call up the POI s Waypoint Information screen Find by Nearest option left POI list right ...

Page 176: ...ressing ENT then press to select a POI from the list and press ENT to call up the POI s Waypoint Information screen Find by Name option left Find by Name menu right 4 When the POI s Waypoint Information screen is displayed you can choose to Go To the POI waypoint by pressing ENT or find it on the map by pressing ENT Go To POI option left Find on Map POI option right Find Streets or Intersections F...

Page 177: ... until the name is correct then press ENT ENT B Or you can jump down to the lower box and pick a street from the selection list Press ENT then press to select a street from the list and press ENT Find Street By Name menu Spell out name in the top box or select from the Find in List window 3 The Find Streets menu reappears with the street you re searching for in the First Street box To search for t...

Page 178: ...s MENU ENT EXIT Find an Intersection You must enter one street in the First Street dialog box and enter the next street in the Second Street dialog box 1 From the Map Page press MENU to FIND STREETS ENT and the Find Streets Menu appears 2 You must fill in a street name in the First Street dialog box Press ENT to display the Find By Name menu There are two options A You can spell out the street in ...

Page 179: ...tion list Press ENT then press to select a street from the list and press ENT 5 The Find Streets menu reappears with the first and second street dialog boxes filled in In this example we selected I 44 as our second street You could now use similar techniques to select a city or Zip code but your search will probably be faster if you leave those boxes blank You can specify a city and or Zip code la...

Page 180: ...f searching for the Nearest waypoint press ENT If searching by Name press to NAME ENT To search by name jump to step 5 Find Waypoint menu left Find By Nearest center Find by Name command right 3 If you re looking for nearest the unit says it is calculating then a list of waypoints appears The closest is highlighted at the top of the list and the farthest at the bottom of the list ...

Page 181: ...To Waypoint command is already highlighted The unit will show navigation in formation to the waypoint B To find the waypoint press to FIND ON MAP ENT The Map Page appears with the cursor highlighting the found waypoint Waypoint Information screens with Go To selected left and Find on Map selected right To clear these menus and return to the previous page press EXIT re peatedly 5 If you re looking ...

Page 182: ...ENT The waypoint information screen appears Find By Name menu left Waypoint Information screen center The found waypoint is highlighted by the cursor on the Map Page right A To navigate to the waypoint press ENT Go To Waypoint com mand is already highlighted The unit will show navigation infor mation to the waypoint B To find the waypoint press to FIND ON MAP ENT The Map Page appears with the curs...

Page 183: ...50 Zambia Arc 1950 Zimbabwe Arc 1960 Mean for Kenya Tanzania Ascension Island 1958 Ascension Island Astro Beacon E 1945 Iwo Jima Astro DOS 71 4 St Helena Island Astro Tern Island FRIG 1961 Tern Island Astronomical Station 1952 Marcus Island Australian Geodetic 1966 Australia Tasmania Australian Geodetic 1984 Australia Tasmania Ayabelle Lighthouse Djibouti Bellevue IGN Efate Erromango Islands Bermu...

Page 184: ...ean 1950 Finland Norway European 1950 Greece European 1950 Iran European 1950 Italy Sardinia European 1950 Sicily European 1950 Malta Ireland 1965 Ireland ISTS 061 Astro 1968 South Georgia Is lands ISTS 073 Astro 1969 Diego Garcia Johnston Island 1961 Johnston Island Kandawala Sri Lanka Kerguelen Island 1949 Kerguelen Island Kertau 1948 West Malaysia Singapore Kusaie Astro 1951 Caroline Islands L ...

Page 185: ...n 1927 Canada New Brunswick New foundland Nova Scotia Quebec North American 1927 Canada Northwest Territories Sas katchewan North American 1927 Canada Yukon North American 1927 Canal Zone North American 1927 Cuba North American 1927 Greenland Hayes Peninsula North American 1927 Mexico North American 1983 Alaska Canada CONUS North American 1983 Central America Mexico Observaorio Metereo 1939 Azores...

Page 186: ...can 1969 Chile South American 1969 Colombia South American 1969 Ecuador South American 1969 Ecuador Baltra Ga lapagos South American 1969 Guyana South American 1969 Paraguay South American 1969 Peru South American 1969 Trinidad Tobago South American 1969 Venezuela South Asia Singapore Tananarive Obser vatory 1925 Mada gascar Timbalai 1948 Brunei East Malay sia Sabah Sarawak Tokyo Mean for Japan Ko...

Page 187: ...e reasonable pro tection against harmful interference in a residential installation This equipment generates uses and can radiate radio frequency energy and if not installed and used in accordance with the in structions may cause harmful interference to radio communica tions However there is no guarantee that interference will not occur in a particular installation If this equipment does cause har...

Page 188: ...180 Notes ...

Page 189: ...181 Notes ...

Page 190: ...182 Notes ...
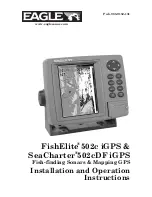
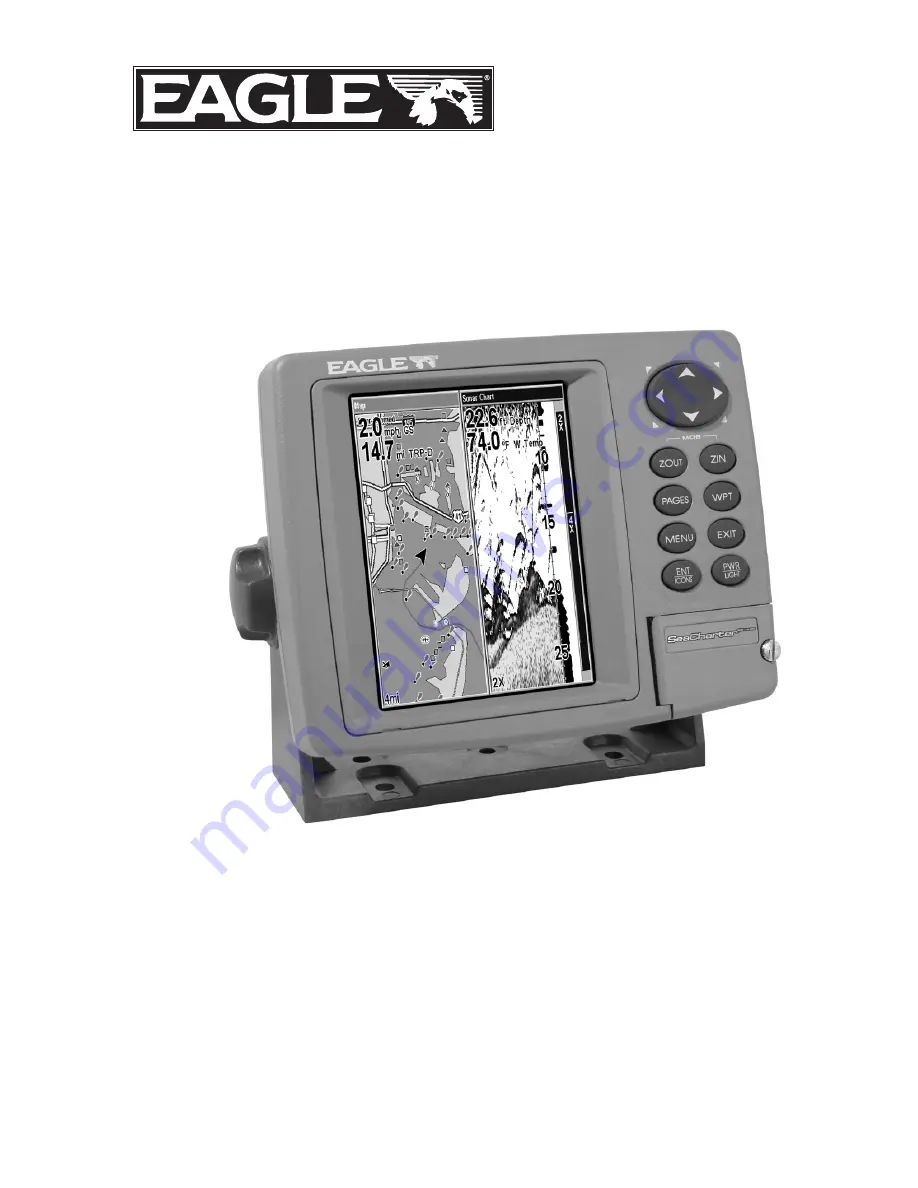
Page 191: ...xclusive nonassignable right to use these Databases for supplemental navigation reference purposes but only as long as you comply with the terms and conditions of this License Agreement We reserve the right to terminate this license if you violate any aspect of this License Agreement You are responsible for using official government charts and prudent navigation for safe travel 3 The Databases hou...

Page 192: ...BE LIABLE TO ANYONE FOR ANY SPECIAL CONSE QUENTIAL INCIDENTAL OR OTHER INDIRECT DAMAGE OF ANY KIND Some states do not allow the exclusion or limitation of incidental or consequen tial damages so the above limitations or exclusions may not apply to you This warranty does NOT apply in the following circumstances 1 when the product has been serviced or repaired by anyone other than us 2 when the prod...

Page 193: ...MENT OR REFUND AS JUST DESCRIBED IS THE EXCLUSIVE REMEDY AVAILABLE TO YOU AGAINST US FOR ANY DEFECT MALFUNCTION OR NON CONFORMITY CONCERNING THE PRODUCT OR FOR ANY LOSS OR DAMAGE RESULTING FROM ANY OTHER CAUSE WHATSOEVER WE WILL NOT UNDER ANY CIRCUMSTANCES BE LIABLE TO ANYONE FOR ANY SPECIAL CONSEQUENTIAL INCIDENTAL OR OTHER INDIRECT DAMAGE OF ANY KIND Some states do not allow the exclusion or lim...

Page 194: ...e or end our shipping policies regulations and special offers at any time We reserve the right to do so without notice in Canada If you re in Canada and you have technical return or repair questions please contact the Factory Customer Service Department Before any product can be returned you must call customer service to determine if a return is necessary Many times customer service can resolve yo...

Page 195: ...ry to send a product for repair or replacement you must first receive a return authorization number from Customer Service Products shipped without a return authorization will not be accepted When shipping we recommend you do the following 1 Please do not ship the knobs or mounting bracket with your unit 2 If you are sending a check for repair please place your check in an envelope and tape it to t...

Page 196: ...Visit our web site www eaglesonar com Eagle Pub 988 0152 131 Copyright 2005 All Rights Reserved Printed in USA 121505 LEI Eagle ...

Reviews: