background image

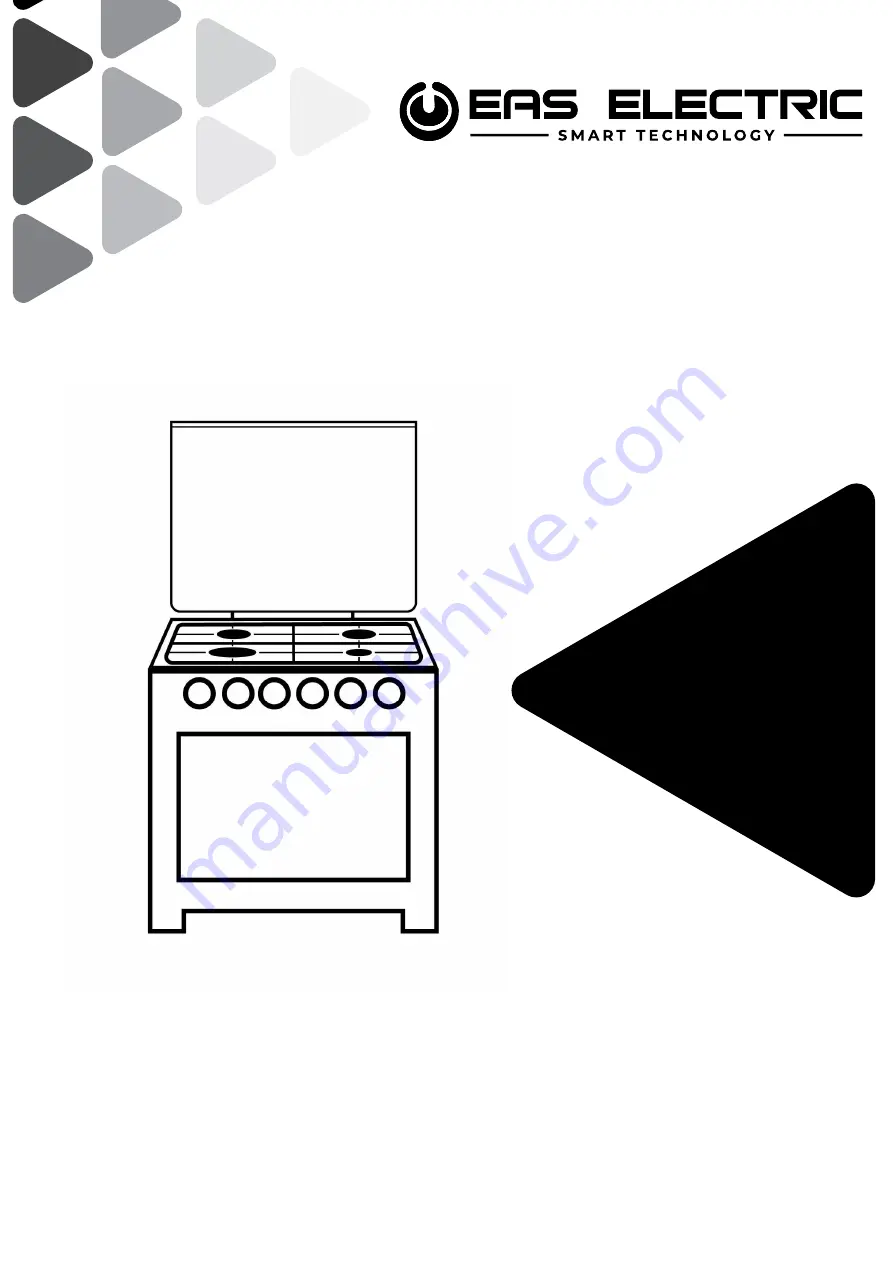
COCINA DE GAS

FREE STANDING COOKER 

MANUAL DE INSTRUCCIONES

INSTRUCTION MANUAL

EFG555X

EFG556W

EFG660X

EFG660W

EFG660C

EFG660N 

Summary of Contents for EFG555X

Page 1: ...COCINA DE GAS FREE STANDING COOKER MANUAL DE INSTRUCCIONES INSTRUCTION MANUAL EFG555X EFG556W EFG660X EFG660W EFG660C EFG660N ...

Page 2: ...e instrucciones antes de instalar y utilizar el producto Respete siempre las instrucciones de seguridad Conserve el manual en un lugar de fácil acceso para posteriores consultas Lea los otros documentos proporcionados junto con el producto No olvide que este manual de instrucciones podría ser aplicable a otros modelos Las diferencias entre distintos modelos se indican claramente en este manual Sím...

Page 3: ... Primer uso Limpieza inicial Primer calentamiento 15 5 Uso del horno 15 Información general sobre cómo hornear gratinar y asar 15 16 Uso del horno eléctrico 17 18 Explicación sobre cómo usar el quemador de gas 19 20 Explicación sobre cómo usar el horno de gas 20 21 Explicación sobre cómo usar la placa de grill 21 Explicación sobre cómo usar el asador de pollos 21 22 Modos de funcionamiento 23 24 U...

Page 4: ...gitud del cable Max 1 5 M Dimensiones exteriores altura anchura profundidad 60 X 60 890X600X600mm 57 X 57 890X570X570mm 50X60 880X500X585mm 50X55 50X50 Horno Horno estático opcional Clase de eficiencia energética B Iluminación interior 25 W Consumo de energía de la parrilla 2000 W Volumen de uso disponible en el horno 50X50 51 lt 50X60 51 lt 60X60 62 lt Panel de control Tabla Botón Tirador Cristal...

Page 5: ...ación sobre el producto o sobre los valores indicados en los documentos que acompañan al producto son valores obtenidos en laboratorio según los estándares correspondientes Estos valores pueden cambiar según condiciones ambientales y de uso del producto ACCESORIOS Según el modelo de producto el tipo de accesorios cambia Los accesorios descritos en este manual pueden no ser aplicables a su producto...

Page 6: ...tantes En este apartado se encuentran las instrucciones de seguridad para ayudar a prevenir lesiones personales o daños materiales Si no se respetan estas instrucciones se anulará todo tipo de garantía sobre el producto Seguridad General ...

Page 7: ... electricidad no deben tener contacto con la parte trasera del horno ya que pueden resultar dañadas No atrape los cables de conexión con la puerta del horno ni pase los cables por encima de superficies calientes Un cable derretido puede causar un cortocircuito y un incendio Asegúrese que el aparato está desconectado después de cada uso El aparato así como sus accesorios y piezas para cocinar estar...

Page 8: ... expuestas del aparato ATENCIÓN Durante el uso de la parrilla las partes accesibles podrían estar calientes Los niños pequeños deben mantenerse alejados del aparato Los niños menores de 8 años no deben tocar el aparato sin la vigilancia de un adulto Este producto puede ser usado por niños mayores de 8 años y o personas discapacitadas física sensorial o mentalmente si están instruidas sobre el uso ...

Page 9: ...pósito de uso Este producto está diseñado para un uso doméstico No está permitido el uso comercial ATENCIÓN este aparato deberá destinarse únicamente para cocinar alimentos No debe usarse para calentar la habitación u otros propósitos diferentes Este aparato no debe usarse para calentar platos debajo de la parrilla secar toallas o ropa colgada del tirador ni como calefacción El fabricante declina ...

Page 10: ...enen un sistema de descarga de gases de combustión El producto debe ser instalado y conectado según la normativa vigente de instalaciones Debe tener especial cuidado sobre los requisitos relacionados con la ventilación El aire necesario para la combustión se toma del aire de la habitación y los gases salientes son liberados directamente en la habitación Para un funcionamiento seguro de su producto...

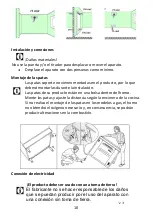
Page 11: ... de su producto están en una bolsa dentro del horno Monte las patas y ajuste la distancia según la encimera de la cocina Si no realiza el montaje de las patas en los modelos a gas el horno no obtendrá el oxígeno necesario y en consecuencia se podrán producir alteraciones en la combustión Conexión de electricidad El producto debe ser usado con una toma de tierra El fabricante no se hace responsable...

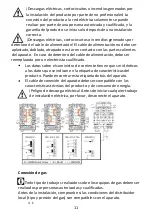
Page 12: ...le de alimentación debe ser reemplazado por un electricista cualificado Los datos sobre el suministro de corriente tienen que ser idénticos a los datos que se indican en la etiqueta de características del producto Puede encontrar esta etiqueta detrás del aparato El cable de conexión del aparato debe ser compatible con las características técnicas del producto y de consumo de energía Peligro de des...

Page 13: ... gas no debe exceder de los 90 C grados de temperatura Antes del uso asegúrese de que el sistema no tiene fugas de gas Conexión de NG gas natural Si su dispositivo está configurado para ser usado con gas natural haga la conexión con la empresa instaladora de la compañía distribuidora de gas natural La conexión de gas natural de su dispositivo es de Si desea convertir su dispositivo del LPG a gas n...

Page 14: ...erve la caja original del producto y transpórtelo en esa caja Siga las instrucciones que vienen encima de la caja Si no la conserva envuelva el producto con material de embalaje como papel de burbuja o con un cartón grueso y átelo bien Para evitar que la puerta del horno se dañe con la rejilla metálica o con la bandeja del horno coloque un cartón entre las bandejas Ate la puerta del horno a las pa...

Page 15: ...de uso se indica que hay que precalentar el horno precaliente el horno Durante la cocción no abra la puerta del horno con frecuencia Trate de cocinar varios platos a la vez en el horno Puede cocinar dos platos a la vez poniendo dos recipientes de cocción sobre la rejilla metálica Prepare las comidas de manera seguida así no se perderá el calor del horno Apague el horno unos minutos antes del tiemp...

Page 16: ...tes de la unidad Utilice guantes para el horno y mantenga a los niños alejados del aparato Horno eléctrico 1 Saque del horno las bandejas de hornear y las rejillas metálicas 2 Cierre la puerta del horno 3 Seleccione la posición estática 4 Elija la temperatura más alta ver apartado uso del Horno eléctrico 5 Poner el horno en funcionamiento durante unos 30 minutos 6 Apague el horno ver apartado uso ...

Page 17: ...sea cortada El pescado se debe poner en un recipiente resistente al fuego a una altura media o inferior Consejos para utilizar el grill La carne roja el pescado y la carne de ave se doran rápidamente cuando se cocinan al grill obteniendo así una corteza bonita sin que se sequen Los filetes y pinchos de carne las salchichas chorizos así como las verduras con jugo por ejemplo tomates y cebollas son ...

Page 18: ...sito 1 Botón eléctrico de temperatura 2 Botón de función eléctrica 3 Botón del reloj 4 Llave de luz y asador de pollos 5 Botón del encendedor 6 Icono del botón del encendedor 7 Botón del calentador eléctrico 8 Botón del horno de gas con termostato 9 Botón de cocina a gas 1 3 3 4 6 2 1 7 5 3 8 9 ...

Page 19: ...n tubería 1 Botón eléctrico de temperatura 2 Botón de función eléctrica 3 Botón del reloj 4 Llave de luz y asador de pollos 5 Botón del encendedor 6 Botón del calentador eléctrico 7 Botón de cocina a gas 6 1 2 3 3 7 ...

Page 20: ...Fuego lento 1 Presione el botón de cocina a gas gire en sentido contrario a las agujas del reloj y seleccione la posición de fuego fuerte 2 Según las características de su cocina encienda el mechero 3 Ajuste la posición según el fuego deseado 4 Cuando haya terminado con la cocción para apagar el quemador gire el botón de la cocina en el sentido de las agujas del reloj terminando en la parte más al...

Page 21: ...activa un mecanismo de seguridad que corta inmediatamente el gas para prevenir que los quemadores superiores se apaguen por desbordamiento de líquidos 1 Presionar sobre el botón de cocina a gas girar en el sentido contrario a las agujas del reloj y seleccionar la posición de fuego fuerte 2 Según las características de su cocina encienda el mechero 3 Después de encender el fuego mantenga pulsado el...

Page 22: ...en el sentido de las agujas del reloj hasta su parte más alta para apagar el horno Uso de la placa de grill Si dispone de placa de grill en su aparato Cuando se utiliza el quemador superior en los hornos a gas la puerta del horno se abre como se muestra en la figura 12 La placa de grill se monta en las pes que están sobre la tapa se une con Uso del asador de pollos opción Si accesorio para asar po...

Page 23: ...arriba 1 Programe el reloj del horno de acuerdo con el tiempo de cocción ver en el apartado correspondiente al uso del reloj del horno 2 Gire el botón de temperatura según el modo de funcionamiento deseado 3 Gire el botón de función según el modo de funcionamiento deseado El horno se calienta hasta la temperatura programada y mantiene ese calor Durante el calentamiento se enciende el piloto de tem...

Page 24: ...imentos que se deseen dorar en la parte inferior Superior inferior turbo fan opción El calentamiento superior inferior el motor turbo están en funcionamiento Con el uso del motor turbo se proporciona un calor más uniforme Es apto para cocinar por ejemplo bizcochos yogures empanadas bizcochos en moldes y estofados En este modo cocine con una sola bandeja dentro del horno Grill opción El grill funci...

Page 25: ... Grill calor superior y grill resistencia y el motor turbo están en funcionamiento El motor turbo proporciona un calor más uniforme Es apto para cocinar por ejemplo estofados Cocine con una sola bandeja Uso del reloj del horno Dijital taym r model 3 RELOJ MECÁNICO modelo 2 Si el modelo del reloj temporizador es como se muestra en la figura 2 para programar el tiempo de cocción gire el botón de aju...

Page 26: ...AD En cuanto se conecta la alimentación en la pantalla parpadea la hora y la palabra auto En este estado no se puede realizar ningún programa de cocción La hora que aparece en la pantalla no es correcta y se debe ajustar la hora ver ajuste del reloj Para realizar un programa de cocción debe pasarse al modo manual ver modo manual MODO MANUAL Para pasar al modo manual presione las teclas y al mismo ...

Page 27: ...ÓN AUTOMÁTICA Si va a cocinar de inmediato la comida que tiene en el horno basta con seleccionar el tiempo de cocción 1 Pase al modo manual 2 Ajuste las horas con las teclas o 3 La pantalla estará fija en unos 5 segundos 1 Seleccione el modo de ajuste de la hora de la alarma 2 Introduzca la hora con las teclas o Ej 5 minutos 3 Después de unos segundos se muestra la hora en la pantalla 1 Al finaliz...

Page 28: ...el horno se programa para que la comida esté lista a las 21 30h 1 La hora actual es 18 30h 2 Introduzca el modo de ajuste de tiempo de cocción 3 Introduzca la hora con las teclas o 4 Después de unos segundos se mostrará la hora actual en la pantalla y a continuación se indicará que la comida se está cocinando En este ejemplo el reloj de su horno ya está programado para la cocción de su comida en 2...

Page 29: ...e cocción finaliza la alarma se activa Si no es silenciada sonará durante 7 minutos 1 En la pantalla se puede ver que la comida estará lista a las 8 30 2 15 21 30h 2 Utilizando las teclas o puede finalizar el programa de cocción 2 En unos segundos la pantalla volverá a su estado inicial mostrando la hora actual Pantalla que se verá al inicio de la cocción Pantalla que se verá al final de la cocció...

Page 30: ...tema seguirá conservando su estado Nota Si no va usar el horno no olvide girar el botón del horno hasta la posición de apagado FUNCIÓN DE SEGURO PARA NIÑOS Esta función está preparada para impedir la modificación involuntaria de los ajustes que haya hecho en el reloj de su horno Cuando el seguro para niños está encendido ninguna tecla estará activa Si se activa el seguro mientras hay un programa d...

Page 31: ... LA ALARMA Con esta configuración puede modificar el volumen de la alarma mientras está sonando 1 Manteniendo presionado el botón se puede escuchar el ajuste del volumen ya configurado 2 Soltando y luego presionando de nuevo el botón puede escuchar y seleccionar el siguiente ajuste de volumen 3 niveles 3 Ahora su alarma sonará según el último ajuste de volumen que haya escuchado Nota El ajuste del...

Page 32: ...orizador se gira automáticamente en sentido contrario a las agujas del reloj La alarma suena y el horno se apaga automáticamente Si no desea utilizar la función de temporizador gire el botón en sentido contrario a las agujas del reloj hasta llegar a la posición del símbolo de la mano 2 Apague el horno con el botón del temporizador botón de funciones y el botón de temperatura Apagar el horno antes ...

Page 33: ...bolo de la mano si existe Encender el grill 1 Gire el botón de función hasta el símbolo del grill que quiere seleccionar 2 Después ajuste la temperatura del grill deseada 3 Si es necesario haga un precalentamiento durante 5 minutos La luz de temperatura se enciende Apagar el grill 1 Gire el botón de función hasta la posición de apagado arriba Tabla de tiempos de cocción con grill Asado en grill el...

Page 34: ...W Ø145 RAP T 1500W Ø180 1500W Ø180 RAP T 2000W 1 100 W 156 W 155 W 200 W 2 165 W 210 W 185 W 250 W 3 255 W 285 W 330 W 330 W 4 510 W 820 W 390 W 930 W 5 750 W 1070 W 731 W 1250 W 6 1000 W 1500 W 1500 W 2000 W Conmutador Posición Ø145 1000W Ø145 RAP T 1500W Ø180 1500W Ø180 RAP T 2000W 1 250 W 400 W 400 W 750 W 2 750 W 1100 W 1100 W 1250 W 3 1000 W 1500 W 1500 W 2000 W ...

Page 35: ...rica del aparato para evitar el peligro de descarga eléctrica Si el tamaño de la cacerola no es adecuado para la superficie del quemador el calor no se distribuye de manera uniforme y se consume mucha energía La cacerola o recipiente es demasiado grande o pequeño Los recipientes de vidrio resistentes al calor pueden romperse si son demasiado grandes Las cacerolas con bases pequeñas no son económic...

Page 36: ...impieza de las superficies de acero inoxidable o inox así como en el tirador Limpie en una sola dirección con la ayuda de un paño suave con detergente líquido uno que no arañe Algunos detergentes y productos de limpieza pueden dañar la superficie No utilice detergentes abrasivos polvos cremas de limpieza ni ningún objeto afilado No utilice limpieza a vapor para limpiar el producto Limpieza del pan...

Page 37: ...cas página 3 Dispone de lámparas para el horno en los Servicios Técnicos Autorizados La posición de la bombilla puede diferir de la mostrada en la figura Si dispone de bombilla redonda en su horno 1 Desconecte la alimentación eléctrica del aparato 2 Gire la cubierta de cristal en sentido contrario a las agujas del reloj y sáquela 3 Gire la bombilla del horno en sentido contrario a las agujas del r...

Page 38: ...horno no se calienta Puede que no haya corriente de electricidad Compruebe si hay electricidad en su casa y revise los interruptores del cuadro de electricidad Si hace falta active de nuevo los interruptores En los modelos con reloj puede que la hora no esté configurada Ajuste la hora o fije al símbolo manual mano El botón de función y o temperatura puede que no estén configurados Configure el bot...

Page 39: ...ducidas por causas fortuitas o siniestros de fuerza mayor o como consecuencia de un uso anormal negligente o inadecuado del aparato 6 Responsabilidades civiles de cualquier naturaleza 7 Daños consecuenciales al aparato siempre que estos no hayan sido provocados por una avería interna de funcionamiento 8 Mantenimientos o conservación del aparato revisiones periódicas ajustes y engrases 9 Las avería...

Page 40: ...excesivo o cualquier otra fuerza externa como insectos roedores y otros animales que puedan tener acceso al interior de la máquina o sus puntos de conexión 16 Daños derivados de terrorismo motín alboroto o tumulto popular manifestaciones y huelgas legales o ilegales hechos de actuaciones de la Fuerzas Armadas o de los Cuerpos de Seguridad del Estado en tiempos de paz conflictos armados y actos de ...

Page 41: ......

Page 42: ......

Page 43: ...rior to installation and operation of the product Always observe the instructions related to safety Keep the manual handy so that you may refer to it when it is required subsequently Read other documents given together with the product as well Remember this user manual may also apply for other versions Differences between the versions are clearly indicated Symbols and Description The following sym...

Page 44: ...aration 14 Things required to be done for energy saving 14 First use First cleaning First heating 15 5 Use of the Furnace 15 General information about cooking frying and grilling in the furnace 15 16 Use of electric furnace 17 18 Description of use of the gas stove 19 20 Description of use of gas furnace 20 21 Description of the grill sheet 21 Description of chicken roasting 21 22 Operating modes ...

Page 45: ...pe section 3 X 0 75 PVC 3 X 1 PVC 3 X 1 5 PVC 3 X2 5 PVC H05VV F Cable length Max 1 5 m Outer sizes height weight depth 60 x 60 890x600x600mm 57x57 890x570x570mm 50x60 880x500x585mm 50x55 50x50 Furnace Static furnace optional Energy efficiency class B Internal lighting 25 X Grill power consumption 2000 X Usable volume of the furnace 50x50x l 50x60 l 60x60 l Normal burner Strong burner Button Tray ...

Page 46: ...kings of the products or in other printed documents provided together with the product are values obtained in laboratory as per the respective standards These values may vary depending on the use and environment of the product ACCESSORIES Accessories provided vary according to the version of the product All accessories described in this user manual may not be available with your product Furnace Tr...

Page 47: ...sponsibility for any resulting damage If the product is damaged or has any visible defect do not operate the product Do not perform any repair or modification on the product However you may eliminate some problems see proposed solutions for the problems page 37 38 Never wash the product by spraying or pouring water on the product Risk of electric shock Do not use the product when your discernment ...

Page 48: ...connections should not contact with the back part otherwise the connection elements may be damaged Do not clinch the connection cables with the furnace cover and do not run them over the food Otherwise the cable will melt and cause short circuit of the furnace resulting in fire risk Make sure the product is closed after easy use Product and accessible parts of the product is hot during operation D...

Page 49: ... contact with the product when they are not attended by an adult person This product may be used by the children above 8 years old and or by any physically sensually or mentally handicapped people if they are informed about the risks and proper operation of the product is shown to them Children should not play with the product Cleaning and maintenance of the product may not be performed by the chi...

Page 50: ...his product may be used only for cooking It should not be used to heat the room or any other purpose This product should not be used for heating plate under the grate drying up towel or clothing on the handle or for general heating The manufacturer may not be held responsible for any damage that may occur as result of improper use or during handling The furnace part of the product may be used for ...

Page 51: ...harge the gases that form as a result of combustion The product should be installed and connected as per the applicable installation regulations Show attention to the requirements concerning ventilation Air necessary for combustion is taken out of the room air and the resulting gases are directly given into the room It is essential that the room should be ventilated well for safe operation of the ...

Page 52: ...eed of the product is in a bag inside the furnace Assembly the feet of your product and adjust the distance related to the kitchen counter In case of gas versions if the feet are not assembled the furnace may not take sufficient amount of oxygen resulting in combustion problem Power connection The product should definitely have a grounded line If the product is used without grounding the manufactu...

Page 53: ... cable gets damaged it should be replaced by a qualified electrician Power supply data should comply with those indicated on the nameplate The nameplate is on the rear of the product Connection cable of the product should comply with the technical specifications and power consumption Electric shock risk Please disconnect the power prior to any operation on the electric installation Gas connection ...

Page 54: ...art at the rear of the furnace Gas hose should not exceed 90o C degrees Prior to use make sure the system is leakage proof Figure 6 NG natural gas connection If your equipment has natural gas setting have it connected by the concerning natural gas supply company Natural gas connection of your product is When you desire to convert your equipment from LPG to natural gas or from natural gas to LPG ap...

Page 55: ...the product inside this box Comply with the instructions given on the box If its original cartoon is not available wrap it by use of bubble packaging material or a thick cardboard and band it tightly Put the wire grill and tray inside the furnace in the inner part of the furnace cover to prevent them from giving damage to the furnace cover and place c cartoon strip aligned with these trays And ban...

Page 56: ...sk against the children 4 Preliminary Preparation Things required to be done for energy saving The following information will help you use the product ecologically by making energy saving Use containers dark in color or enamel covered with good heat transmission in he furnace When cooking the food preheat the furnace if it is specified so in the recipe or user manual Do not open the furnace cover ...

Page 57: ...l baking trays and wire grill out of the furnace 2 Close cover of the furnace 3 Bring it to the static position 4 Choose the highest temperature see Use of the electric furnace 5 Operate it about 30 minutes 6 Switch off the furnace see Use of the electric furnace Smell and smoke form during the first heating Ensure good ventilation 5 Use of the furnace General information about baking roasting and...

Page 58: ... the meat is cut it does not come out Firs should be placed in flameproof plate and positioned on the medium or lower shelf Hints about grilling When you grill red meat fish and poultry it becomes brown quickly and have a good shell and does not dry up Flatten meats skewer meats and sausages sujuks and stews e g tomatoes onion are particularly suitable for grilling Place the arts to be grilled on ...

Page 59: ...e and operating mode Pool versions 1 Electric temperature button 2 Electric function button 3 Timer button 4 Light and chicken roasting switch 5 Lighter button 6 Button lighter symbol 7 Electric heater button 8 Gas thermostat furnace button 9 Gas stove button ...

Page 60: ...18 Pipe versions 1 Electric temperature button 2 Electric function button 3 Timer button 4 Light and kitchen roasting switch 5 Lighter button 6 Electric heater button 7 Gas stove button ...

Page 61: ...it to the desired flame position 4 Bring the stove button to the upper point clockwise in order to close the heater burner when the desired cooking time expires On the control panel the screen prints on the button show position of the button Gas flow is cut of High flame Low flame Set the gas flame in such a way it will not protrude the container base Put the container in the center of the pan sup...

Page 62: ...on of the stove clockwise to the highest point in order to switch on the stove burner Use of the gas furnace Screen prints on the button on the control panel indicate the position of the button 1 Push the button of the gas furnace anticlockwise and bring it to high flame and or the heat position on the panel 2 If as shown in the Figure 11 the furnace cock is controlled by the upper heater burner t...

Page 63: ... baking is over Use of the grill sheet if grill sheet is available with your product For the gas furnaces the furnace cover is opened as shown in Figure 12 when using the upper burner Fix the grill sheet to the grills on the cover and push the cover forward to ensure it to contact with the frame Use of the Chicken roasting optional If your product has chicken roasting accessories take the shish ou...

Page 64: ...pective button to off upper position 1 Set the baking period by help of the furnace timer see Use of the furnace timer 2 Bring the temperature button to the desired operating mode 3 Bring the function button to the desired operating mode The furnace is heated up to the set temperature and maintains it Temperature light is on during heating Switching off the electric furnace Bring the furnace timer...

Page 65: ...more homogenous heating for the food thanks to its turbo motor For example it is suitable for cakes yoghurt and pastries or cakes in the baking forms and casseroles Bake it by help of a single tray Grill option Grill operates under the furnace ceiling It is suitable for grilling meat For grilling put the food portions on the correct shelf position under the grill heater Bring the temperature to th...

Page 66: ...ing is on It ensures more homogenous heating for the food thanks to its turbo motor For example it is suitable for casserole Bake it by help of a single tray Use of the furnace timer MECHANICAL CLOCK model 2 If the timer shown in the Version 2 is available turn the timer setting button clockwise and set the baking time Model 2 Model 4 ANALOGUE TIMER model 4 1 SETTING THE TIMER Push the button to s...

Page 67: ...sumes the timer and auto statements flash on the display When it is in this position you cannot make any baking program Timer on the display is not correct and required to be set see timer setting You should switch it to the manual mode for programming the baking see Manual mode MANUAL MODE Press two buttons at the same time TIMING Timing may be performed when there is no current baking program Sw...

Page 68: ...u will immediately start to bake the food you have put in the furnace simply you should enter the baking time 1 Switch to the manual mode 2 Set the time by using the keys or 3 Display will become firm after 5 seconds 3 Switch to the manual mode 1 Enter the time by using the keys or for example 5 minutes 2 Display will become show the time after several seconds 2 When the alarm time you set expires...

Page 69: ...e is 18 30 now 1 Switch to the setting mode of the baking time 4 Enter the time by use of the keys and 3 After several seconds the display will show the current time indicating that it bakes the food The furnace timer has been programmed to cook your food starting from the current time for 2 hours and 15 minutes Remember to bring other control buttons on the furnace to the proper positions accordi...

Page 70: ...g program is over audio alarm will activate and it will ring for 7 minutes unless it is silenced 3 Display shows the time when the food will be ready e g 8 30 2 15 21 30 2 Complete the baking by use of and keys 1 After several seconds the display will return to show the time Display appears when the baking process starts Display appears when the baking process is over 1 Switch off the furnace 2 Re...

Page 71: ... failure for seconds the system will keep the position Note If you do not intend to operate the furnace remember to bring the button on the furnace to off position CHILD LOCK FUNCTION This function is to prevent change of your settings on the furnace timer inadvertently When the child lock is activated no key will activate If the key lock is activated when there is a current program then only the ...

Page 72: ...o the default format again ALARM VOLUME SETTING Thanks to this setting you may change audio volume you hear when the alarm sounds 1 You may hear audio volume by keeping key pressed 2 You may hear and select the next volume by releasing and pressing again key 3 levels 3 Now your alarm will sound in the volume you heard last Note Default format is the highest level In case mains failed an extended t...

Page 73: ...r button will automatically return anticlockwise An alarm audio is heard indicating the time is power and the power is cut off If you do not desire to use timer function turn the button anticlockwise toward the manual hand symbol 2 Switch off the furnace by use of the timer setting button function button and temperature button Switching off the furnace earlier than the time you select Turn the tim...

Page 74: ...Furnace tray 1 60 70 Turkey part Furnace tray 1 25 min 220 180 240 Fish Furnace tray 1 2 200 15 25 Switch to 150o C after max minutes Operation of the grill Hot surface may cause burns Close the furnace s cover during grilling When grilling bring the timer button to the hand symbol if any Switching on the grill 1 Bring the function button on the symbol of of grill you select 2 And set it to the de...

Page 75: ... W 156 W 155 W 200 W 2 165 W 210 W 185 W 250 W 3 255 W 285 W 330 W 330 W 4 510 W 820 W 390 W 930 W 5 750 W 1070 W 731 W 1250 W 6 1000 W 1500 W 1500 W 2000 W Switch Position Ø145 1000W Ø145 RAPID 1500W Ø180 1500W Ø180 RAPID 2000W 1 250 W 400 W 400 W 750 W 2 750 W 1100 W 1100 W 1250 W 3 1000 W 1500 W 1500 W 2000 W In order to get the most of the electric stove it is recommended to use pant in diamet...

Page 76: ... manner of use Use pans with dry base on the stove Do not place the pan covered especially if it is wet on the stove After use of the stove allow it to cool down and wipe it off with damp cloth If it is very dirty clean it thoroughly with detergent water After cleaning the stove heat it several minutes to dry it up Stainless steel around the electric stoves may change color over time due to heat I...

Page 77: ...ent is required to clean the product Clean the product with the washing liquid lukewarm water and soft cloth or sponge and wipe it dry Make sure that no liquids left after the cleaning process and you immediately clean any splash of food during the cooking Do not use any cleaning agent containing acid or chlorine to clean the stainless or inox surfaces and handle Clean by wiping in one direction b...

Page 78: ...age to the glass Hot surfaces may cause burns 1 Open the furnace s cover Prior to replacement of the furnace s light switch off the power and allow it to cool down to prevent risk of electric shock Furnace s light is a special electric lamp resistant to heat up to 300o C For specifications of the lamp see Technical specifications page 3 You may have the furnace lamps from the Authorized Service Ce...

Page 79: ...e furnace when it operates Steam coming out during operation of the product is normal It is not a failure Metal sounds are hard when the product heats up and cools down Metal parts expands when they are heated resulting in audible sounds It is not a cause of failure Furnace does not heat No power Control whether power is available at home and check the fuses in the fuse box If required engage the ...

Page 80: ...38 If the problem persists although you have observed the instructions given in this section then contact your dealer or authorized service center Never attempt to repair the product yourself ...

Page 81: ......

Page 82: ...www easelectric es ...

Reviews: