background image

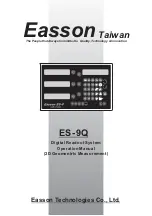
Easson Technologies Co., Ltd.

Digital Readout System

Operation Manual

(2D Geomentric Measurement)

ES-9Q

The People that Always Committed to Quality, Technology & Innovation

Easson

Taiwan

Polar

XY

Store

Recall

R/D

Print

Enter

Q

FINISH

Summary of Contents for ES-9Q

Page 1: ...ologies Co Ltd Digital Readout System Operation Manual 2D Geomentric Measurement ES 9Q The People that Always Committed to Quality Technology Innovation EassonTaiwan Polar XY Store Recall R D Print En...

Page 2: ...ely it might burn out the electronic devices in the optic ruler Do not operate this display in elevated ambient temperature or under high humidity Do not operate this display in strong electric field...

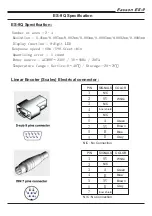
Page 3: ...rce AC100V 230V 50 60Hz 20VA Temperature fange Service 0 40 Storage 20 70 Linear Encoter Scales Electrical connector ES 9Q Specification ES 9Q Specification 0V A 5V B R 1 2 3 4 5 6 7 Inner shield N C...

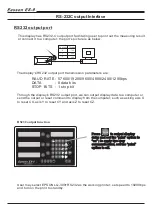
Page 4: ...put port we can output display data to a computer or send the output or reset command to display from the computer such as asking axis X to reset CX axis Y to reset CY and axis Z to reset CZ User may...

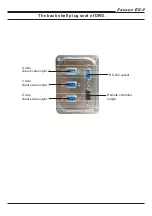
Page 5: ...Y Axis linear scale output Z Axis linear scale output X Axis linear scale output RS 232 output Remote controller output The back shell plug seat of DRO...

Page 6: ...Basic Functions 1 Non linear error Compensations 29 Parameters Setup Function 37 Content 2D Geometric Measurement Function 7...

Page 7: ...Basic Functions 1 Polar XY Store Recall R D Print Enter Q FINISH...

Page 8: ......

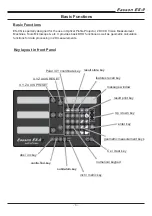
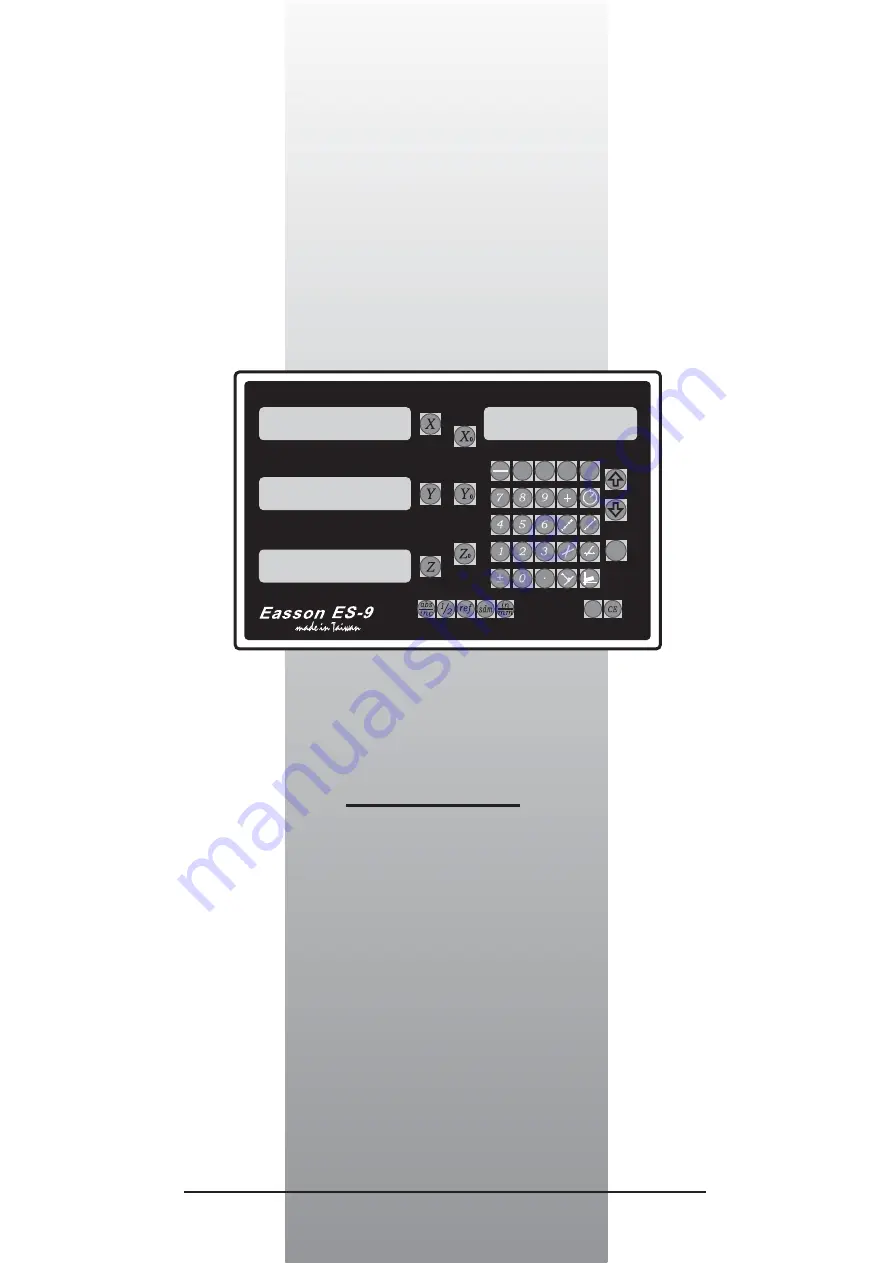
Page 9: ...ools Microscope etc It provides basic DRO functions as well as geometric calculation functions for data processing in 2D measurements Basic Functions Key layout in front Panel Polar XY coordinate key...

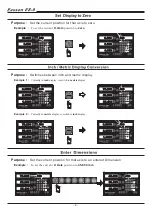
Page 10: ...Dimension Purpose Polar XY Store Recall R D Print Enter Q FINISH ABS 0 000 0 000 0 000 Polar XY Store Recall R D Print Enter Q FINISH ABS 12 345 0 000 0 000 Polar XY Store Recall R D Print Enter Q FIN...

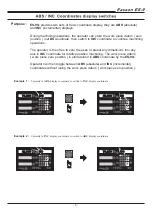
Page 11: ...solute and incremental coordinates without losing the work piece datum work piece zero position store the work piece datum zero position in coordinate then switch to coordinate to continue machining o...

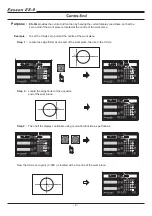
Page 12: ...der at the opposite end of the work piece Step 3 Then half the display coordinate using centre find function as per follows Now the X Axis zero point 0 000 is located at the X centre of the work piece...

Page 13: ...2DGeometricMeasurementfunctions 7 Geometric Measurement functions A B B Polar XY Store Recall R D Print Enter Q FINISH...

Page 14: ......

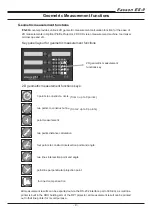
Page 15: ...two points to construct a line point measurement two points distance calculation four points to construct intersection point and angle two lines intersection point and angle point line perpendicular p...

Page 16: ...S 9Q is a very special coordinate this coordinate are a temporary coordinate used by many geometric calculation functions in ES 9Q For example it is preset to the centre position for 3 point circle me...

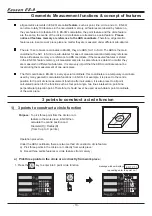
Page 17: ...ircle User can select up to 9 points associating the datum line if less than nine points picked press to close the calculation during the measuring process 3 points to construct a circle function A En...

Page 18: ...ordinate of the ES 9Q will be preset to the centre coordinate of the circle to be measured operator move to 0 000 in INC coordinate then this is the centre of the circle to be measured b Recall three...

Page 19: ...his circle feature into the memory of ES 9Q as per following procedure press key to store the feature into the memory ES 9Q asking the feature memory location to be stored 3 points to construct a circ...

Page 20: ...the ES 9Q will be preset to the centre coordinate of the circle to be measured operator move to 0 000 in INC coordinate then this is the centre of the circle to be measured X Y centre coordinate Diame...

Page 21: ...r at the second point on the circle press to enter the point no 2 Purpose On the instrument pick up points from 2 up to 9 points from the edge of work piece to associate a line A B User can select up...

Page 22: ...feature 0 99 respectively in this example we are going to store this line parameters as feature 06 procedure are as follows enter the feature memory location then the line parameters are store into m...

Page 23: ...measured point press to enter the point X coordinate Y coordinate There are 100 feature memory available in ES 9Q they are feature 0 99 respectively in this example we are going to store this point p...

Page 24: ...degree minute second angle display two point distance calculation function 2 If pressed to confirm the distance calculation then ES 9Q will displays angle distance distance angle recall the feature 05...

Page 25: ...he intersection point and the intersection angle function L1 PT 1 message window displays requesting enter the point no 1 of line 1 2 located the cross hair centre to the position A of line 1 press to...

Page 26: ...osition D of line 2 press to enter the point intersection point XY coordinates 6 press key to condirm the measurements then ES 9Q will displays the intersection point and angle Press to switch over an...

Page 27: ...ersection point parameters coordinate and angle operator can store this point feature into the memory of ES 9Q as per following procedure press key to store the feature into the memory ES 9Q asking th...

Page 28: ...feature recall the feature 06 as the line 2 feature x x x x x x x degree minute second angle display 2 If pressed to confirm the distance calculation then ES 9Q will displays intersection point coord...

Page 29: ...ore into memory location as feature 09 After the two lines intersection point and angle calculation the INC coordinate of the ES 9Q will be preset to the intersection point of line 1 2 operator move t...

Page 30: ...ture no recall the feature 07 as the point feature B recall the feature 06 as the line feature A 24 2 If pressed to confirm the projection pont calculation then ES 9Q will displays projection point co...

Page 31: ...ed There are 100 feature memory available in ES 9Q they are feature 0 99 respectively in this example we are going to store this point parameters as feature 10 procedure are as follows enter the featu...

Page 32: ...of this compensation is to help operator set up the specimen quickly specimen this process is called the coordinate inclined compensation The Rotate the x axis or y axis and move the coordinate to ov...

Page 33: ...f To switch over between the inclined compensation mode and normal mode press to do so 3 axes display 2 axes display PS To cancer or abort the inclined compensation mode press to end it up If rebooti...

Page 34: ...as follows a for example recall the feature 07 from memory recall feature from memory b for example recall the feature list in the memory browse features list in the memory In case the memeory loctai...

Page 35: ...ate polar display swap for ease of 2D measurement swap key for XY polar display length angle During the polar display mode press to reset the display coordinate 3 Axes polar display mode length angle...

Page 36: ......

Page 37: ...Nonlinearerrorcompensations 1 2 3 4 CP START CP PITCH CP STEP 10 REF 5 6 7 8 9 10 error error curve position direction Non linear error compensation 31...

Page 38: ......

Page 39: ...mpensate the readout readings according to the error table that built in during the set up process The compensation always started from the CP START position and only compensate towards the positive d...

Page 40: ...ake fast real time calculation possible the readout assume all internal error compensation calculations are only in positive direction Therefore the CP START position should be located in the most neg...

Page 41: ...he CP START 90 565 3 Start measure the errors to build up an error curve To make the error measurement more easy swap to INC coordinate and zero at the CP START position swap to INC coordinate zero at...

Page 42: ...measured result 4 Enter the error curve data into the ES 9Q readout switch off the readout and then switch it on again to enter into the SETUP function during the start up of readout when the readout...

Page 43: ...CP STEP After entering the Point 1 status press the up down key to select the measuring result at the point selected Input the measuring result The measuring result Enter Polar XY Store Recall R D Pr...

Page 44: ...ts are done press CE to exit Press up down key till EXIT appears Polar XY Store Recall R D Print Enter Q FINISH POINT 21 1 000 Enter Polar XY Store Recall R D Print Enter Q FINISH EXIT Polar XY Store...

Page 45: ...ff printer BEEP ON OFF turn on off beeper RESOLUTE set up Linear scale resolution CP ERROR compensate Linear scale error LINEAR P compensate linear error NL ERROR compensate nonlinear error point comp...

Page 46: ......

Page 47: ...O power 2 Turn on the DRO when 11111111 test signal is shown in the display window press 0 and the display start performing reset 3 1 When parameters reset WATING will show on the display While turnin...

Page 48: ...on display window Setup option selection key Setup value input key The setup procedure is designed to option menu mode the Definition List facilitates user to apply the following options Operation ste...

Page 49: ...ing of RS232 transmission baud 3 Press to BAUD SET Press or to select the correct baud speed from 1200 2400 4800 9600 19200 57600 After baud speed is selected press to end up this setting function Pol...

Page 50: ...ET BAUD SET Polar XY Store Recall R D Print Enter Q FINISH PRT OFF Enter Polar XY Store Recall R D Print Enter Q FINISH PRT OFF Polar XY Store Recall R D Print Enter Q FINISH PRT ON Polar XY Store Rec...

Page 51: ...FINISH RESOLUTE 0 001 Polar XY Store Recall R D Print Enter Q FINISH RESOLUTE 0 0005 Polar XY Store Recall R D Print Enter Q FINISH RESOLUTE 0 001 0 001 0 001 Polar XY Store Recall R D Print Enter Q F...

Page 52: ...olar XY Store Recall R D Print Enter Q FINISH SD VALUE SD VALUE 100 000 100 000 100 000 Polar XY Store Recall R D Print Enter Q FINISH LINEAR P LINEAR P Enter Polar XY Store Recall R D Print Enter Q F...

Page 53: ...fter the compensation procedure is done press to end up the compensation of linear scale Polar XY Store Recall R D Print Enter Q FINISH X STD X STD 100 000 Polar XY Store Recall R D Print Enter Q FINI...

Page 54: ...R D Print Enter Q FINISH CP START 1 000 Polar XY Store Recall R D Print Enter Q FINISH CP START 1 000 Polar XY Store Recall R D Print Enter Q FINISH SEL AXIS Enter Polar XY Store Recall R D Print Ente...

Page 55: ...suring result Press up down key till EXIT appears Next step Enter Polar XY Store Recall R D Print Enter Q FINISH CP PITCH 1 000 Enter Polar XY Store Recall R D Print Enter Q FINISH CP STEP 1 000 Enter...

Page 56: ...ters Setup Polar XY Store Recall R D Print Enter Q FINISH CP ERROR Polar XY Store Recall R D Print Enter Q FINISH DIRECT Polar XY Store Recall R D Print Enter Q FINISH DIRECT Polar XY Store Recall R D...

Reviews: