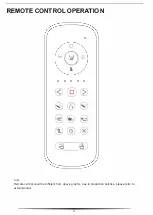
ECOWAY TitanDT300 2050, User Manual
Get the most out of your ECOWAY TitanDT300 2050 with our comprehensive User Manual. Discover step-by-step instructions, troubleshooting tips, and expert advice to optimize your device's performance. Download this manual for free from 88.208.23.73:8080 and unleash the full potential of your ECOWAY TitanDT300 2050.
Share
Download


Reviews:
No comments
Related manuals for TitanDT300 2050

Crown Head
Brand: Raritan Pages: 8

P70003-00
Brand: Kallista Pages: 12

POTTY BENCH
Brand: Boon Pages: 3

Mini
Brand: NATURE LOO Pages: 16

CLASSIC 650
Brand: NATURE LOO Pages: 22

K-4195
Brand: Kohler Pages: 4

K-4352
Brand: Kohler Pages: 8

SM-1T803
Brand: Swiss Madison Pages: 9

P70330
Brand: Kallista Pages: 12

Alessi H830971
Brand: Laufen Pages: 8

CLEANET RIVA
Brand: Laufen Pages: 69

SOLO Toilet Lift
Brand: Drive DeVilbiss Healthcare Pages: 2

500800100
Brand: Drive DeVilbiss Healthcare Pages: 24

BEDSIDE COMMODE P40010
Brand: PEPE Pages: 8

aquaclean sela
Brand: Geberit Pages: 8

WF00035
Brand: Wellis Pages: 12

WF00106
Brand: Wellis Pages: 44
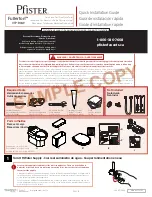
Fullerton VTP-R31W
Brand: Pfister Pages: 8


