background image

DANIA Air Tight Plus
DANIA Air Tight C Plus

PELLET STOVE

EN Installation, use and maintenance  

page 2

Summary of Contents for DANIA Air Tight C Plus

Page 1: ...DANIA Air Tight Plus DANIA Air Tight C Plus PELLET STOVE EN Installation use and maintenance page 2 ...

Page 2: ...d EN 14785 2006 PELLET STOVE tradename EDILKAMIN models DANIA AIR TIGHT C DANIA AIR TIGHT SERIAL NUMBER Nameplate reference Performance declaration DANIA AIR TIGHT C DANIA AIR TIGHT DoP EK n 193 Nameplate reference And also declares that the wood pellet stove satisfies the requirements of the following European directives 2014 35 EC Low Voltage Directive 2014 30 EC Electromagnetic Compatibility Di...

Page 3: ...ith local and national law and European regulations For the installation and for anything not specifically indicated in the manual observe local regulations The diagrams provided in this manual are for illustration purposes only they do not always strictly refer to your specific model and are not binding in any way MEANING OF SYMBOLS In some parts of the manual the following symbols are used INFOR...

Page 4: ...d environmental damage may ensue cleaning the hearth when hot DO NOT CLEAN THE HEARTH WITH A VACUUM CLEANER WHILE IT IS HOT Risk of damage to the cleaner and smoke in the room cleaningthefumesductwithcleaningproducts DO NOT CLEAN THE PRODUCT WITH FLAMMABLE PRODUCTS Risk of fire and blowback cleaning the hot glass pane with unsuitable cleaning products DO NOT CLEAN THE GLASS WHILE IT IS HOT WITH WA...

Page 5: ...96 57 55 5 5 57 Ø 8 cm uscita fumi Ø 13 cm uscita fumi coassiale 96 30 3 12 3 Ø 6 cm Ø 6 cm air 2 11 8 12 3 11 8 USER INSTALLER Ø 6 cm COMBUSTION Ø 8 cm SMOKE Ø 8 cm SMOKE Ø 13 cm COAXIAL DIMENSIONS cm DANIA AIR TIGHT PLUS DANIA AIR TIGHT C PLUS ...

Page 6: ...nomy 10 30 ore Heatable volume 210 m3 Fume duct diameter 80 130 mm Weight including packaging 137 kg Energy efficiency class according to UE 2015 1186 regulation Class A G A TECHNICAL DATA FOR SIZING THE FLUE which must in any case satisfy the requirements in this sheet and the installation instructions for the product Nominal power Reduced power Fumes temperature at smoke outlet 199 106 C Minimum...

Page 7: ...cycling them in a regulatory fashion recycling them in a regulatory fashion Always move the stove vertically with suitable equipment and in compliance with safety regulations Do not turn the package over and handle all parts requiring installation with care In the stove you will find remote control warranty certificate this manual power cable The lever for opening the interior door is on the palle...

Page 8: ...8 ITALIANO V V V UNPACKING DO NOT REMOVE THE PRODUCT FROM THE PALLET BEFORE LOOSENING THE SCREWS INSTALLER INDICATIVE DRAWINGS NOT ALWAYS REFERRING TO THE SPECIFIC MODEL ...

Page 9: ... takes the majority of the air from the outside For different countries check if air from the outside For different countries check if there are particular installation conditions allowed for there are particular installation conditions allowed for sealed stoves sealed stoves Checking the suitability of the installation space The room must have a volume of at least 30 m3 The floor must be able to ...

Page 10: ...UMES DUCT THE FUMES DUCT Further to the general prescriptions for the fumes duct and flue the fumes duct may not be made of flexible metal material must be insulated if routed through unheated areas or outdoors must not be routed through rooms where the installation of combustion heat generators is prohibited or there is risk of fire or that cannot be inspected must enable the recovery of soot and...

Page 11: ...heck on the specific waiver conditions must be anti downdraught must have an internal cross section equivalent to that of the flue and a fumes outlet at least double that of the interior of the flue for dual flues which should be spaced at least 2 m apart the chimney pot receiving the fumes from the solid fuel appliance or that from the higher storey must be at least 50 cm higher than the other it...

Page 12: ...or Installing it in front of the appliance will create unpleasant draughts The air may be drawn from an adjacent room only if the flow is taken from permanent unobstructed openings communicating with the outdoors the air pressure in the adjacent room is never reduced to a level below outdoor pressure the adjacent room is not a garage subject to fire hazard a bathroom or a bedroom the adjacent room...

Page 13: ...ation of the stove The electrical system must be compliant check the operation of the earth in particular Edilkamin is not responsible for malfunctions resulting from an improperly earthed system The power line must be of adequate section for the power of the appliance The power cable must not come into contact with the flue or other hot parts of the stove Power up the stove by setting its switch ...

Page 14: ...p grille since the plastic bag may melt and damage the appliance s paint Use the gloves when loading the stove while it is operating and hence hot to the touch Take care not to touch the fume exhaust pipe when hot COMBUSTIBLE Use BS EN ISO 17225 2 category A1 wood pellets or similar certified products with the following characteristics Use BS EN ISO 17225 2 category A1 wood pellets or similar cert...

Page 15: ...f thus reducing the power EASY TIMER manual automatic is used to pro gramme the switch ing off on after a set number of hours maximum 12 hours OPTIONAL CONNECTIONS The technician can supply on request external thermostat telephone dialler probes thermostats for managing the ducting fans if present on the purchased model INTERFACE Alternatively the product can be managed as a standard configuration...

Page 16: ... figures user of the product operations not protected by password installer operations with dedicated password because any errors can jeopardise the product s operations and SECURITY Edilkamin technical assistance centre operations with dedicated password because any errors can jeopardise the product s operations and SECURITY ...

Page 17: ...tion the language is not set the adjacent language selection screen will ap pear Choose the language with the buttons and confirm with OK REMOTE CONTROL POWER SAVING After 20 of non use the backlighting decreases and after a further 10 the display switches off If any button is pressed with the display on the counter resets If any button is pressed with the display off the display and the backlight...

Page 18: ... ing the remote control Maintenance necessary symbol Appears after a certain number of hours of operation The relative function is active Relax airKare EasyTimer Crono EasyTimer and Crono cannot be activated simultaneously C F Indicates the unit of measurement of the displayed temperature degrees centigrade C or Fahrenheit Reserve indicator It switches on if the function is active The arrows switc...

Page 19: ...de the product s air power depends on the room temperature or is set by the user Setting Indicates that the remote control is in the setting mode The settable value will appear in the bottom bar Digits for SET POINTS Setting of the various SET POINTS temperature power fan speed Number of the parameter in the parameter setting section Bottom bar for weekly scheduling and messages The days of the we...

Page 20: ...button on the remote control or due to an external contact timer telephone dialler From the OFF page press the ON OFF button for 3 seconds to access the ON page ON STATUS The product is active and can fulfil the heating requests ALARM STATUS In case of a stoppage due to an alarm ON STATUS Stand by activated The product is momentarily off because there are no heating requests ...

Page 21: ... Simply wait without taking any action During the switch off the display will show the word OFF If time scheduling is active the status bar will alternately show 3 seconds the status and the programming During the switch on the display will show the status CLEANING SWITCH ON etc The ON OFF button is used to manually start the on or off phase ...

Page 22: ...sing the and buttons For example press any button and the display will activate then press the button For example press any button and the display will activate then press the button flame symbol The setting can be confirmed with the button or by waiting 5 without pressing any button After confirming SET will stop flashing AUTOMATIC and MANUAL setting Press the AUTO MAN button for a few seconds to...

Page 23: ...e ducted fans 2 and 3 FAN ADJUSTMENT The setting can be made with the stove turned OFF or ON If the backlight is switched off it can be activated by pressing any button Pressing the or button will make SET flash and instead of the room set point the number of the fan being modified will appear F1 Simultaneously the fan speed can be increased or decreased in the following sequence AUTO 1 2 3 4 5 fo...

Page 24: ...essing any button to exit the fan setting and SET will stop flashing even if there are other fans Pressing the button to confirm will take you to the next fan Fan 3 if present Waiting 5 without pressing any button takes you back to the home page with the modified SET for PLUS versions Pressing the button to confirm will take you to the next fan Fan 2 if present Pressing the or button modifies the ...

Page 25: ...set the relative room set point and display the room temperature After setting the installation room temperature or with the room power in manual mode wait 5 without pressing any button and SET will flash then you will exit the settings page Otherwise if you confirm with the OK button you can set the room set point of zone 2 if the probe is present and active indicated on the bottom bar Press OK t...

Page 26: ...ailable in all modes automatic manual and timer based Press and hold the button to activate the Relax function Its activation on the display will be signalled by the arrow relative to the Relax button Prolonged pressing of the button will deactivate the function The product reduces its power output and after a few minutes switches the fan off too ...

Page 27: ...ptional feature on other models check which model you have The function if available can be activated with the stove either on or off in any mode except in alarm mode The airKare can be activated by pressing the dedicated button Its activation on the display will be signalled by the arrow relative to the airKare button USER ...

Page 28: ...hour intervals By activating the Easy Timer function with the product off the user sets the switch on time Pressing the OK button or after 5 without pressing any button the countdown will start with 5 minute intervals The Easy Timer function can be deactivated by pressing the dedicated button The display will show an arrow above the button and the countdown To change the timer before the switching...

Page 29: ...rwise it works with the power Pressing the button allows for switching from Temperature Timer to Power Timer and vice versa Pressing the button activates or deactivates the timer pre programmed from the app or remote control USER INSTRUCTIONS USER NOTE Timer regulation is possible by MENU Crono key is only used to turn off on Crono ...

Page 30: ...ing order 01 STAND BY 02 PELLET LOAD 03 CHRONO PROG TIMER 04 T1 T2 05 DATE HOUR TIME 06 C F 07 LANGUAGE 08 DISPLAY 09 INFO 10 SOFTWARE 11 DATA 12 ALARMS 13 AUGER MOT ON OFF SCREW FEEDER 14 PLT LVL SENS PELLET LEVEL SENSOR 15 TECHNICAL MENU The set point digits contain the progressive number of the menu item while the status bar includes the description of the menu item in large letters SET POINT D...

Page 31: ...rature set point is reached To access the function from the main menu as indicated in the Menu section above press the MENU button The menu items can be scrolled with the and buttons and the item can be entered with the button After entering the Stand by function the display will show the name of the function on the first line of the status bar and the current value on the second line OFF if deact...

Page 32: ...tes the function and the display will propose to choose how many minutes must pass before the devices switches off in stand by mode es 5 minutes The and buttons can be used to modify the time and the button to confirm Pressing the button automatically takes you to the first level ...

Page 33: ...USER INSTRUCTIONS USER To access the function from the main menu as indicated in the Menu paragraph above press the MENU button The menu items can be scrolled with the and buttons and the item can be entered with the button PELLET LOAD Allows you to load pellets after the screw feeder has emptied Useful for the technician during the initial start up Available only in the OFF status Any attempt to ...

Page 34: ...IONS USER CHRONO PROG TIMER To access the function from the main menu as indicated in the Menu section above press the MENU button The menu items can be scrolled with the and buttons and the item can be entered with the button ...

Page 35: ...ay and confirm with the button The cursor rectangular and 2 pixels wide positions itself on 00 00 The time at the top RH shows the start of the time slot The word SET appears with the pre set level for that time slot Use the and buttons to scroll the time with 1 2 hour steps by moving the cursor and displaying the pre set level BUTTON OK SAVE ...

Page 36: ... P5 After reaching 23 30 you must go backwards If you shift by pressing and holding the and buttons for more than 2 you copy the previous level onto the next level with a 1 2 h frequency per second The level can be copied also with backward shifts After setting the entire day confirm with the following button BUTTON OK COPY BUTTON OK PASTE ...

Page 37: ... Only if stand by is on the product switch on at the reached temperature Pressing the button briefly allows you to exit the programming but the programme will not activate To activate it you must briefly press the button again from the main page The day of the week will flash again and you can move to the next day et Confirm with the following button ...

Page 38: ... line T1 is the lowest temperature T2 the highest Use the and buttons to move to set point T2 setting Modify the values with the and buttons and confirm with the button Pressing the button automatically takes you to the first level To access the function from the main menu as indicated in the Menu section above press the MENU button The menu items can be scrolled with the and buttons and the item ...

Page 39: ... the and buttons and confirmed with the button The minutes will then flash If the product is connected to the cloud the date and time can be set from the Web and in the menu after accessing the function a message like Date Time from Web will appear If the product is connected to a smartphone the date and time can be set using the app After entering the Date Time function the display will show the ...

Page 40: ...e on the second line You can switch from C to F using the and buttons and then confirm with the button and exit Pressing the OK button automatically takes you back to the first level USER USER INSTRUCTIONS To access the function from the main menu as indicated in the Menu section above press the MENU button You can scroll the menu items with the and buttons and enter the item with the following bu...

Page 41: ... back to the first level To access the function from the main menu as indicated in the Menu section above press the MENU button You can scroll the menu items with the and buttons and enter the item with the following button After entering the Language Menu item the name of the function appears on the first line of the status bar and the current value on the second line ITALIANO that means Italian ...

Page 42: ...42 ENGLISH USER USER INSTRUCTIONS DISPLAY It allows you to choose the background of the display ...

Page 43: ...stic meaning of the messages and values and may ask you to read them to him her if you experience problems Exit with the following button USER To access the function from the main menu as indicated in the Menu paragraph above press the MENU button You can scroll the menu items with the and buttons SMOKE TEMP SMOKE EXTR LEONARDO AUGER MOTOR ...

Page 44: ...he following button USER USER INSTRUCTIONS To access the function from the main menu as indicated in the Menu paragraph above press the MENU button The menu items can be scrolled with the and buttons and the item can be entered with the button DATA NR OF IGN 236 DATA WORKING HOURS 1228 DATA HOURS P1 2 3 4 5 ...

Page 45: ...tons The alarms are arranged from the most recent to the oldest SCREW FEEDER ON OFF FOR THE TECHNICIAN ONLY ON INDICATION OF THE AFTER SALES DEPARTMENT PELLET LEVEL SENSOR FOR THE TECHNICIAN ENABLING Exit with the following button ALARMS AUGER MOT ON OFF OFF PLT LVL SENS OFF PLT LVL SENS ON AUGER MOT ON OFF ON ALARMS ALARMS ...

Page 46: ...r the Type of Flame setting with the button and then modify the correction value with the and buttons Use the button to exit and return to the Technical Menu You must enter with the installer password 1111 and access the installer parameters settings only Flame type INST Pellet type INST Chimney sweep function INST Cold test Parameters INST Reset hours Smoke probe correction NOTES inappropriate ch...

Page 47: ...an scroll the Technical Menu items with the and buttons until you reach PELLET TYPE You can enter the Pellet Type setting with the following button and modify the value with the and buttons Use the button to exit and return to the Technical Menu PELLET TYPE ...

Page 48: ...e used to conduct the requested checks agreed upon with the technician Scroll between the Nominal Max or Minimum Min function using the and buttons and modify the value from OFF to ON with the and buttons Use the button to confirm the value and return to the Technical Menu If you confirm the ON value the chimney sweep function activates otherwise you can deactivate it ...

Page 49: ...buttons and modify the value with the and buttons If you entered the Technical Menu with the installer password only the installer parameters will appear otherwise all the other parameters will be shown Enter the Parameters section with the button the first parameter will be displayed Use the button to exit the parameter modification section and return to the Technical Menu PARAMETERS PLT LEVEL SE...

Page 50: ...duct is controlled via the SAVE PANEL FUNCTIONS To switch on the product press the On Off button for a few seconds To set the power level with the product on press the power button once Pressing it repeatedly will cause the power to increase with the following setting appearing on the display P1 P2 P3 P4 P5 P1 P2 The ventilation of all room fans will automatically follow the product s power level ...

Page 51: ...leaning mode in work mode Stove cooling Stove in alarm mode Stove cooling Stove off due to blackout Stove in warning mode Digits ON active LED1 LED2 LED3 and LED4 Digits OFF active LED1 and LED2 Digits AL XX active LED1 Digits OFF Active LED1 LED2 and LED3 Digits bout active LED1 Digits W XX active LED1 Active LED1 network present Digits OFF active LED1 Digits ON active LED1 and LED2 Digits ON act...

Page 52: ...NCE Before doing any maintenance disconnect the appliance from the mains Regular maintenance is essential to keep the appliance in good working order Failure to service the product properly will prevent it from working properly Any problems due to failure to service the stove will void the warranty Using the stove without cleaning the burning pot can cause the gas in the combustion chamber to igni...

Page 53: ...provided 2 The burning pot A slips into position in its housing Empty the ash tray B and burning pot into a non flammable container the ashes may still contain embers and or hot parts or vacuum if cold Vacuum out the interior of the combustion chamber the bed and the compartment around the burning pot into which the ash falls 3 Scrape the burning pot with scraper and clean out any obstructed holes...

Page 54: ...s contact your reseller or techni cian Using non original spare parts may damage the appliance and relieves Edilkamin of all liability for damage resulting therefrom DISPOSAL At the end of its service life dispose of the product as required by regulations Deliver to the special recycling centres In accordance with art 26 of Legislative Decree no 49 of 14th March 2014 Implementation of Directive 20...

Page 55: ...t cleaned regularly as explained above ignition may involve a slight detonation If white smoke forms in the combustion chamber for a long time disconnect the mains supply and wait 30 minutes before opening the door and emptying out the burning pot alternating SHUTDOWN MESSAGES AND THEIR SOLUTIONS In case of an alarm an alarm code will appear instead of the room temperature While the product switch...

Page 56: ...here are pellets in the tank and burning pot Try switching it on with a solid ecological igniter contact the technician beforehand and follow the instructions of the igniter supplier very carefully The operation must be regarded purely as a trial under the technician s guidance A05 Shutdown due to air flow rate sensor breakage Contact the technician A06 displays when the logic board determines tha...

Page 57: ...UTION A12 Room temperature probe failure The product is operating in manual mode Contact the technician A14 Ducting room temperature probe if present fault The product is operating in manual mode Contact the technician A20 Gearmotor fault switch off Contact the technician ...

Page 58: ...f operation The product is working but it must be serviced by an authorised Edilkamin technician LACK OF COMMUNICATION In case of a prolonged lack of communication between the stove and the remote control the Bluetooth transmission icon will disappear as well as the icons transmitted by the circuit board to the remote control Only the room temperature and the time will remain visible The Wi Fi tra...

Page 59: ...el sensor is installed and has been activated When the level sensor intervenes the circuit board emits a single beep in any switch on or work status and the moving reserve symbol will appear on the display The arrows will light up in sequence to signal the need for pellet loading The ignition frequency is roughly 0 5 seconds ...

Page 60: ...t be restarted After reloading the pellets the stove must be restarted manually If the pellets are reloaded and there is an ignition request coming from the timer the stove will restart If the sensor intervenes with the stove OFF or in Initial Cleaning mode following manual emptying of the tank the final symbol will immediately appear and the stove cannot be switched on during the ignition phase t...

Page 61: ......

Page 62: ......

Page 63: ......

Page 64: ...cod 942171 GB 2 21 A w w w e d i l k a m i n c o m 942171 GB ...
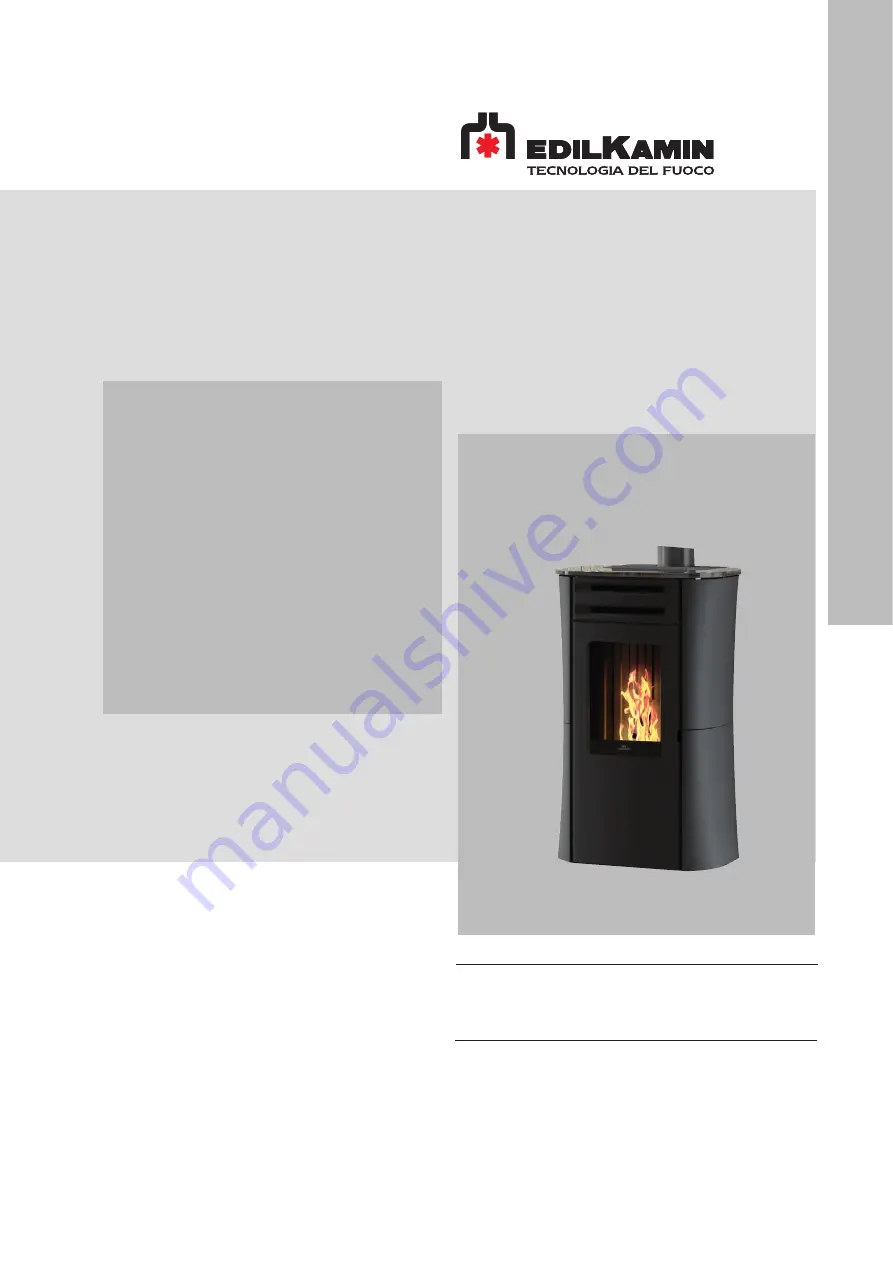
Reviews: