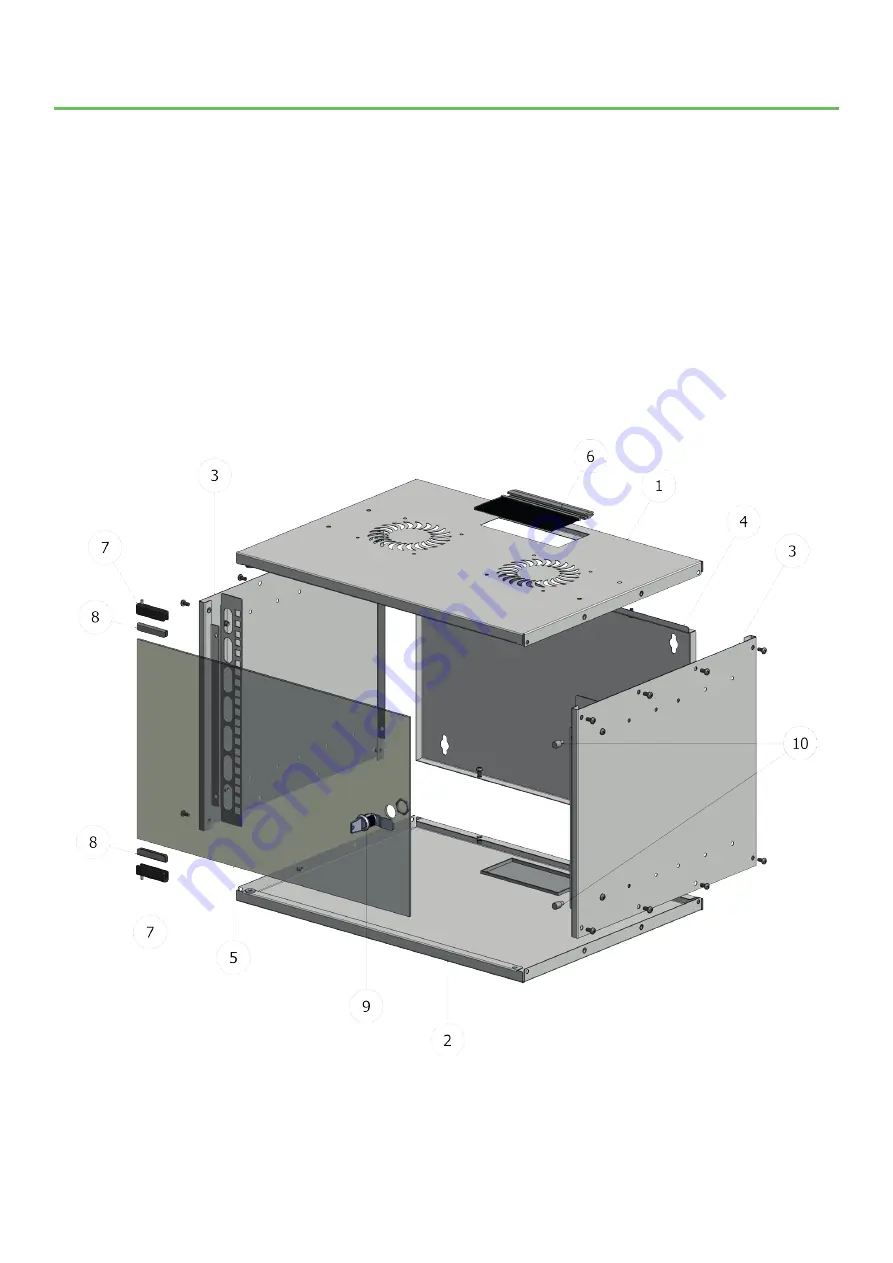
• Use the rear wall (4) of the housing as a template and mark the positions of the mounting holes at the wall
• Drill the holes, place some dowels (not included) in the holes of the wall and fix the rear wall (4) of the housing at the wall
• For mounting, place the bottom element (2) on a table or on the floor
• Mount both side walls (3) with each 4 screws M5 x 10 to the bottom element (2)
Please note: for the hinged side, you must use the side wall with the shorter inner steel edge, else the hinge will collide with the steel
• Loosen the thread bolts of the hinges (7) and together with the rubber elements (8) place the hinges (7) on the glass plate (5);
thereby the rubber elements (8) lay between hinge and glass plate
• Carefully tighten the thread bolts without damaging the glass
• Place the lock (9) in the prepared cutout in the glass plate (5) and put the latch into the correct position
• Fix the lock carefully with the locknut without damaging the glass
• Put the rubber elements (10) into the holes of the fold on the side wall (3) near to the lock
• Mount the glass door in the frame
• Mount the roof element (1) with each 4 screws M5 x 10 to both side walls (3)
• Install the brush (6) resp. the cover in the openings of roof (1) or bottom (2)
• Complete the housing by pushing it onto the rear wall (4) already mounted on the wall
• Fix the rear wall (4) with the screws M5 x 10 in the rear-sided openings in the bottom
• Mounting is now completed
Wall Housing Series Basic - Mounting Instructions
V3 - 09.08.18 - MN - E


