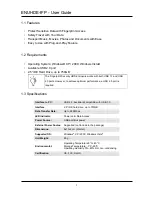
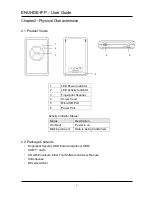
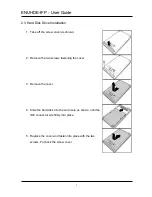
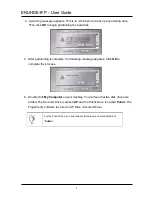
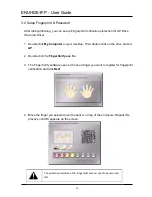
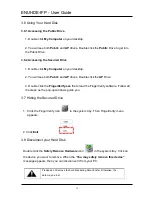
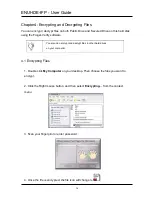
background image


ENUHDE-IFP 

Fingerprint Security HDD Enclosure 


User Manual 


Summary of Contents for ENUHDE-IFP

Page 1: ...ENUHDE IFP Fingerprint Security HDD Enclosure User Manual...

Page 2: ...in it may be reproduced transmitted transcribed stored in a retrieval system or translated into any language in any form or by any means except documentation kept by the purchaser for backup purposes...

Page 3: ...nstallation 7 Chapter3 Getting Started 8 3 1 Partition Your Hard Disk Drive 8 3 2 Setup Fingerprint Password 10 3 3 Fingerprint Access Setting 12 3 4 Password Access Setting 13 3 5 Access Validity Tim...

Page 4: ...rd disk All of the existing data will be erased during the partition process Use the software included on the supplied Setup CD to partition a hard disk Once you have partitioned a hard disk using the...

Page 5: ...nd USB 2 0 ports However to achieve optimum performance a USB 2 0 port is required 1 3 Specifications Interface to PC USB 2 0 backward compatible wirh USB 1 X Interface 2 5 IDE hard drive up to 750GB...

Page 6: ...Scanner 4 Screw Cover 5 Mini USB Port 6 Power Port Activity Indicator Status Status Description On Red Power is on Blinking Green Data is being transferred 2 2 Package Contents Fingerprint Security H...

Page 7: ...e screw cover as shown 2 Remove the two screws fastening the cover 3 Remove the cover 4 Slide the hard disk into the enclosure as shown until the IDE connector sits firmly into place 5 Replace the cov...

Page 8: ...on the hard disk drive if any All existing data will be erased during the partition process 1 Connect the ENUHDE IFP to any free USB port on your PC using the supplied USB cable Insert the supplied Se...

Page 9: ...ing is complete the following message appears Click OK to complete the process 6 Double click My Computer on your desktop You will see that two disk drives are added The Secured Drive is named AP and...

Page 10: ...ktop Then double click on the drive named AP 2 Double click the FingerVerify exe file 3 The FingerVerify software opens Choose a finger you want to register for fingerprint verification and click Next...

Page 11: ...he password again to confirm your setting 7 After fingerprint verification is set up double click My Computer on your desktop The Secured Drive is automatically renamed as Security Click the icon to a...

Page 12: ...password 4 The fingerprint registration appears Select the finger you wish to use and then that finger will become blue Click Next to scan your fingerprint Right click on the finger you wish to use a...

Page 13: ...d Access Setting 1 Click the FingerVerify icon in the system tray Then FingerVerify menu appears 2 Click User Setting Choose Fingerprint Software Password Setting 3 Enter hint original password and ne...

Page 14: ...scan your fingerprint or enter the password to access the Secured Drive of the hard disk 1 Click the FingerVerify icon in the system tray Then FingerVerify menu appears 2 Click User Setting Fingerpri...

Page 15: ...3 Double click the FingerVerify exe file to load the FingerVerify software Follow all the steps as the pop up windows guide you 3 7 Hiding the Secured Drive 1 Click the FingerVerify icon in the syste...

Page 16: ...fy software You also can encrypt and decrypt files in other hard drives on your computer 4 1 Encrypting Files 1 Double click My Computer on your desktop Then choose the files you want to encrypt 2 Cli...

Page 17: ...ck My Computer on your desktop Then choose the files you want to encrypt 2 Click the Right mouse button and then select Decrypting from the menu that appears 3 Scan your fingerprint or enter password...

Page 18: ...ake sure the USB port works properly If you are not sure please try another USB port Your computer may not be able to recognize your hard disk if it has not been partitioned yet Please refer to 3 1 Pa...

Reviews: