background image


WSG

1068


6.8


LITER


INDUSTRIAL


ENGINE


SERVICE


MANUAL


EDI


#1050180


March,


2009


Summary of Contents for WSG-1068

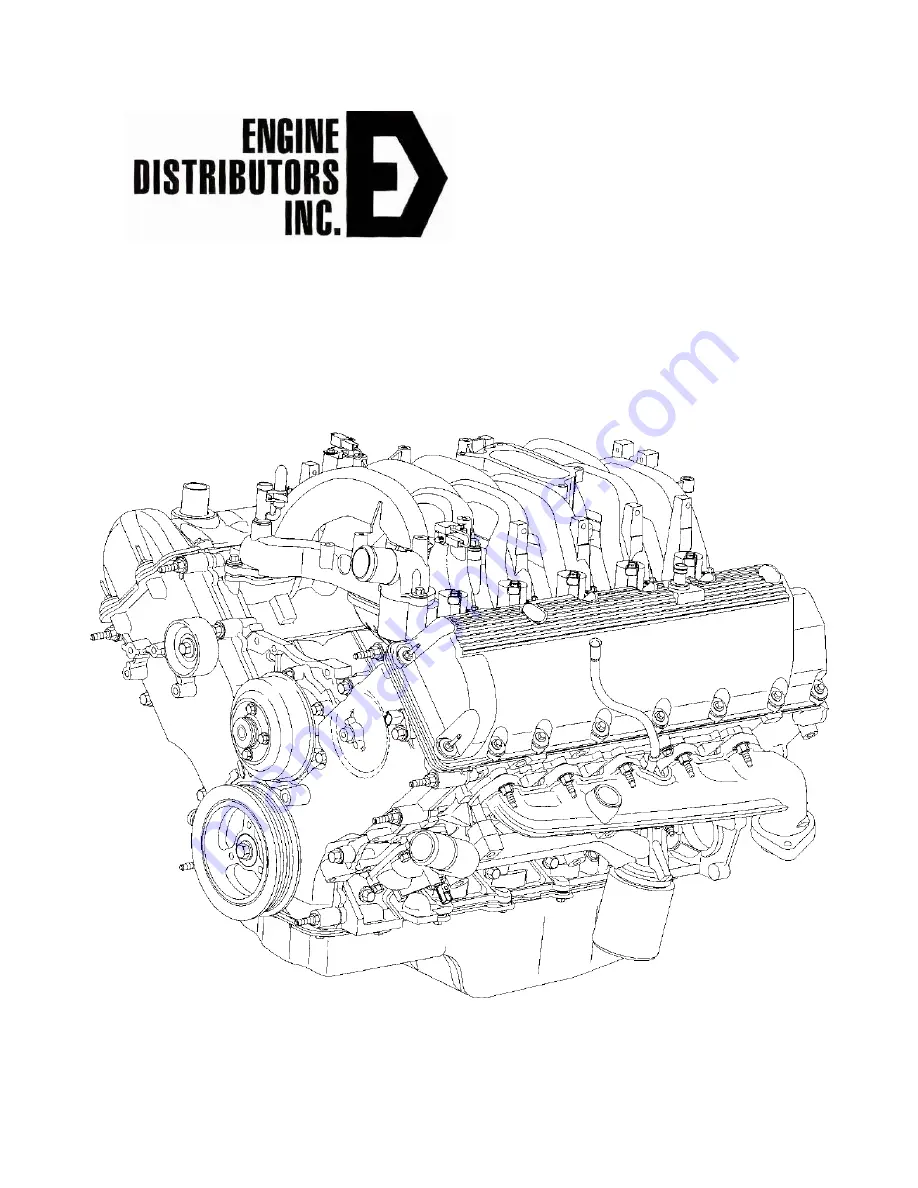
Page 1: ...WSG 1068 6 8 LITER INDUSTRIAL ENGINE SERVICE MANUAL EDI 1050180 March 2009 ...

Page 2: ...e every effort is made to ensure that this publication is up to date and correct in all respects the right to change prices specifications and equipment at any time without notice is reserved Accordingly this publication is not to be regarded as a final description of any individual engine Pages 1 28 Pages 29 158 Pages 159 183 Pages 184 188 Pages 189 219 Pages 220 233 Pages 234 250 Pages 251 298 P...

Page 3: ...larly dangerous The electric cooling fan used on some installations is actuated automatically when the coolant reaches a specified temperature For this reason care should be taken to ensure that the ignition isolating switch is OFF when working in the vicinity of the fan as an increase in coolant temperature may cause the fan suddenly to operate 3 Avoid contact with exhaust pipes exhaust manifolds...

Page 4: ... Lobe Lift Camshaft Runout Crankshaft Main Bearing Journal Diameter Crankshaft Main Bearing Journal Taper Crankshaft Main Bearing Journal Clearance Bearing Inspection Crankshaft End Play Crankshaft Runout Cylinder Bore Taper Cylinder Bore Out of Round Piston Inspection Piston Diameter Piston to Cylinder Bore Clearance Piston Selection Piston Ring End Gap Piston Ring to Groove Clearance Crankshaft ...

Page 5: ...Valve Spring Out of Square Valve Spring Compression Pressure Valve and Seat Refacing Measurements Valve Seat Width Valve Seat Runout Flywheel Inspection Oil Pump Gear Radial Clearance Oil Pump Rotor Inspection Oil Pump Side Clearance Cylinder Bore Honing Cylinder Bore Cleaning Cylinder Block Repair Cast Iron Porosity Defects Cylinder Block Core Plug Replacement Cylinder Head Distortion Spark Plug ...

Page 6: ...s the crankshaft cylinder head valve guide valves camshaft or cylinder block make sure part s is not serviceable WARNING TO AVOID THE POSSIBILITY OF PERSONAL INJURY OR DAMAGE DO NOT OPERATE THE ENGINE UNTIL THE FAN BLADE HAS FIRST BEEN EXAMINED FOR POSSIBLE CRACKS OR SEPARATION CAUTION Use of abrasive grinding discs to remove gasket material from the engine sealing surfaces during repair procedure...

Page 7: ...OCEDURE REQUIRES YOU TO BE UNDER THE EQUIPMENT BE SURE THAT THE IGNITION SWITCH IS ALWAYS IN THE OFF POSITION UNLESS OTHERWISE REQUIRED BY THE PROCEDURE SET THE PARKING BRAKE IF EQUIPPED WHEN WORKING ON THE EQUIPMENT IF YOU HAVE AN AUTOMATIC TRANSMISSION SET IT IN PARK ENGINE OFF OR NEUTRAL ENGINE ON UNLESS INSTRUCTED OTHERWISE FOR A SPECIFIC OPERATION PLACE WOOD BLOCKS 4 X 4 OR LARGER TO THE FRON...

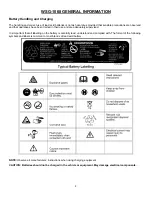
Page 8: ...rained in their use and are adequately supervised It is important that all labelling on the battery is carefully read understood and complied with The format of the following symbols and labels is common to most brands of lead acid battery NOTE Observe all manufacturers instructions when using charging equipment CAUTION Batteries should not be charged in the vehicle or equipment May damage electri...

Page 9: ... at the back of this manual Regular maintenance will result in minimal operating costs Engines manufactured by Ford Motor Company are available through Engine Distributors Incorporated When in need of parts or service contact your local Authorized Distributor In overseas territories in the event of difficulties communicate directly with the supervising Ford affiliated Company in your area whose ad...

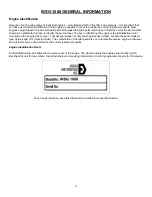
Page 10: ...ing the engine is the identification decal mounted on the engine rocker cover That decal provides not only the engine serial number but also the exact model or type options and S O Special Order The combination of that data permits you to isolate the precise engine build level and customer so you can determine the correct replacement parts Engine Identification Decal An identification Decal is aff...

Page 11: ...tors listed in the back portion of this manual They also may be found in the yellow pages under Engines or contact Engine Distributors Engine Distributors Inc are equipped to perform major and minor repairs They are anxious to see that all of your maintenance and service needs are quickly and courteously completed ...

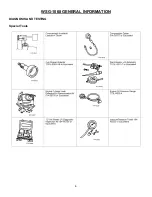
Page 12: ...6 WSG 1068 GENERAL INFORMATION DIAGNOSIS AND TESTING Special Tools ...

Page 13: ...for obvious signs of mechanical and electrical damage Engine coolant leaks Engine oil leaks Fuel leaks Damaged or severely worn pads Loose mounting bolts studs and nuts 3 If the inspection reveals obvious concerns that can be readily identified repair as required 4 If the concerns remain after the inspection determine the symptoms and go to the symptom chart ...

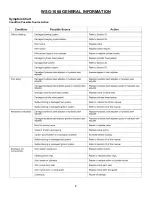
Page 14: ...8 WSG 1068 GENERAL INFORMATION Symptom Chart Condition Possible Source Action ...

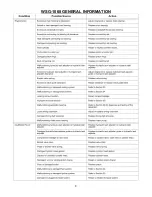
Page 15: ...9 WSG 1068 GENERAL INFORMATION ...

Page 16: ...ation tube appropriate plugs to seal any openings leading to the crankcase a solution of liquid detergent and water to be applied with a suitable applicator such as a squirt bottle or brush Fabricate the air supply hose to include the air line shutoff valve and the appropriate adapter to permit the air to enter the engine through the crankcase ventilation tube Fabricate the air pressure gauge to a...

Page 17: ... Test Results The indicated compression pressures are considered within specification if the lowest reading cylinder is within 75 percent of the highest reading Refer to the Compression Pressure Limit Chart If one or more cylinders reads low squirt approximately one tablespoon of clean engine oil meeting Ford specification ESE M2C153 E on top of the pistons in the low reading cylinders Repeat the ...

Page 18: ...ctor tests for engine oil leaks and checks the valve stem seals for leakage 1 Plug all crankcase openings except the one used for connecting the leakage detector 2 Connect the Engine Cylinder Leak Detection Air Pressurization Kit to a crankcase opening an oil level indicator tube is convenient Adjust the air pressure to approximately 34 kPa 5 psi 3 Using a solution of liquid soap and water brush t...

Page 19: ...7 POOR VALVE SEATING A small but regular downscale flicking can mean one or more valves are not seating 8 WORN VALVE GUIDES When the needle oscillates over about a 13 kPa 4 in Hg range at idle speed the valve guides could be worn As engine speed increases the needle will become steady if guides are responsible 9 WEAK VALVE SPRINGS When the needle oscillation becomes more violent as engine rpm is i...

Page 20: ...portant that the engine oil is changed at the intervals specified Refer to the Engine Operator s handbook Oil Consumption Test The following diagnostic procedure is used to determine the source of excessive internal oil consumption NOTE Oil use is normally greater during the first 300 hours of service As hours increase oil use generally decreases Engines in normal service should get at least 31 7 ...

Page 21: ...of oil consumption such as valves piston rings or other areas NOTE After determining if worn parts should be replaced make sure correct replacement parts are used 18 Check valve guides for excessive guide clearances REPLACE all valve stem seals after verifying valve guide clearance 19 Worn or damaged internal engine components can cause excessive oil consumption Small deposits of oil on the tips o...

Page 22: ...for plugged oil metering orifice in cylinder head oil reservoir if equipped Static checks engine off are to be made on the engine prior to the dynamic procedure Valve Train Analysis Dynamic Start the engine and while idling check for proper operation of all parts Check the following Rocker Arm Check for plugged oil in the rocker arms or cylinder head Check for proper overhead valve train lubricati...

Page 23: ...be in its lowest position If checking during engine assembly turn the crankshaft using a socket or ratchet 6 Zero the dial indicator Continue to rotate the crankshaft slowly until the camshaft lobe is in the fully raised position highest indicator reading NOTE If the lift on any lobe is below specified service limits the camshaft and any component operating on worn lobes must be replaced 7 Compare...

Page 24: ... adjuster Leakdown Tester to check the leakdown rate The leakdown rate specification is the time in seconds for the plunger to move a specified distance while under a 22 7 kg 50 lb load Test the lash adjusters as follows Leakdown Testing NOTE Do not mix parts from different hydraulic valve tappets lash adjusters Parts are select fit and are not interchangeable 1 Clean the lash adjuster to remove a...

Page 25: ...limits are provided as an aid to making a decision Any component that fails to meet specifications and cannot be refinished must be replaced Camshaft Journal Diameter Measure each camshaft journal diameter in two directions If it is out of specification replace as necessary Camshaft Journal Clearance NOTE The camshaft journals must meet specifications before checking camshaft journal clearance Mea...

Page 26: ...Indicator with Bracketry to measure camshaft exhaust lobe lift 4 Rotate the camshaft and subtract the lowest dial indicator reading from the highest dial indicator reading to figure the camshaft lobe lift Camshaft Runout Special Tool s NOTE Camshaft journals must be within specifications before checking runout Use the Dial Indicator with Bracketry to measure the camshaft runout Rotate the camshaft...

Page 27: ...g journal diameters in at least two directions If it is out of specification replace as necessary Crankshaft Main Bearing Journal Taper Measure each of the crankshaft main bearing journal diameters in at least two directions at each end of the main bearing journal If it is out of specifications replace as necessary ...

Page 28: ...t main surface NOTE Do not turn the crankshaft while doing this procedure 3 Install and remove the crankshaft main bearing cap 4 Verify the crankshaft journal clearance If it is out of specification replace as necessary Bearing Inspection Inspect bearings for the following defects Possible causes are shown Cratering fatigue failure A Spot polishing improper seating B Scratching dirty C Base expose...

Page 29: ...haft thrust washers or thrust bearing Crankshaft Runout Special Tool s NOTE Crankshaft main bearing journals must be within specifications before checking runout Use the Dial Indicator with Bracketry to measure the crankshaft runout Rotate the crankshaft and subtract the lowest dial indicator reading from the highest dial indicator reading to figure the crankshaft runout If it is out of specificat...

Page 30: ...h to clean the pistons or possible damage can occur 1 Clean and inspect the ring lands skirts pin bosses and the tops of the pistons If wear marks or polishing is found on the piston skirt check for a bent or twisted connecting rod 2 Use the Piston Ring Groove Cleaner to clean the piston ring grooves Make sure the oil ring holes are clean Piston Diameter Measure the piston skirt diameter Piston to...

Page 31: ... Red in the lower third of the size range Blue in the middle third of the size range Yellow in the upper third of the size range Piston Ring End Gap Special Tool s CAUTION Use care when fitting piston rings to avoid possible damage to the piston ring or the cylinder bore CAUTION Piston rings should not be transferred from one piston to another to prevent damage to cylinder worn or piston NOTE Cyli...

Page 32: ...ankshaft Connecting Rod Journal Taper Measure the crankshaft rod journal diameters in two directions perpendicular to one another at each end of the connecting rod journal The difference in the measurements from one end to the other is the taper Verify measurement is within the wear limit Connecting Rod Cleaning CAUTION Do not use a caustic cleaning solution or damage to connecting rods can occur ...

Page 33: ...ections at the points shown Verify the diameter is within specifications Connecting Rod Bushing Diameter Measure the inner diameter of the connecting rod bushing Verify the diameter is within specification Connecting Rod Bend Measure the connecting rod bend on a suitable alignment fixture Follow the instructions of the fixture manufacturer Verify the bend measurement is within specification Connec...

Page 34: ...ances CAUTION The connecting rod bolts are torque to yield and must be discarded and replaced after this diagnostic test 1 Remove the connecting rod bearing cap 2 Position a piece of Plastigage across the bearing surface NOTE Do not turn the crankshaft during this step 3 Install and torque to specifications then remove the connecting rod bearing cap 4 Measure the Plastigage to get the connecting r...

Page 35: ...ication D Both edges worn journal damaged E One edge worn journal tapered or bearing not seated F Roller Follower Inspection Inspect the roller for flat spots or scoring If any damage is found inspect the camshaft lobes and hydraulic lash adjusters for damage Hydraulic Lash Adjuster Inspection Inspect the hydraulic lash adjuster and roller for damage If any damage is found inspect the camshaft lob...

Page 36: ... the Valve Stem Clearance Tool contacts the upper surface of the valve guide 2 Move the Valve Stem Clearance Tool toward the Dial Indicator and zero the Dial Indicator Move the Valve Stem Clearance Tool away from the Dial Indicator and note the reading The reading will be double the valve stem to valve guide clearance Valves with oversize stems will need to be installed if out of specification Val...

Page 37: ...guide Valve Guide Reaming 1 Use a hand reaming kit to ream the valve guide 2 Reface the valve seat 3 Clean the sharp edges left by reaming Valve Spring Installed Length Measure the installed length of each valve spring Valve Spring Free Length Measure the free length of each valve spring Valve Spring Out of Square Measure the out of square on each valve spring Turn the valve spring and observe the...

Page 38: ...trength at the specified valve spring length Valve and Seat Refacing Measurements NOTE After grinding valves or valve seats check valve clearance Check the valve seat and valve angles Valve Seat Width Measure the valve seat width If necessary grind the valve seat to specification Valve Seat Runout Use the Valve Seat Runout Gauge to check valve seat runout ...

Page 39: ...e flywheel ring gear runout Oil Pump Gear Radial Clearance Measure the clearance between the rotor and the pump housing Oil Pump Rotor Inspection Inspect the oil pump rotor tips for damage or wear Oil Pump Side Clearance Place the Straight Edge across the top of the oil pump and rotors and use the Feeler Gauge to measure the clearance between the rotors and the Straight Edge ...

Page 40: ...rface Hone with the Engine Cylinder Hone Set at a speed of 300 500 rpm and a hone grit of 180 220 to provide the desired cylinder bore surface finish Cylinder Bore Cleaning CAUTION If these procedures are not followed rusting of the cylinder bores may occur 1 Clean the cylinder bores with soap or detergent and water 2 Thoroughly rinse with clean water and wipe dry with a clean lint free cloth 3 Us...

Page 41: ... 50 F 4 Sand or grind the repaired area to blend with the general contour of the surface 5 Paint the surface to match the rest of the cylinder block Cylinder Block Core Plug Replacement Special Tool s 1 Use a slide hammer or tools suitable to remove the cylinder block core plug 2 Inspect the cylinder block plug bore for any damage that would interfered with the proper sealing of the plug If the cy...

Page 42: ...ed the flanged edge must be below the chamfered edge of the bore to effectively seal the bore Use a fabricated tool to seat the cup type cylinder block core plug Cylinder Block Core Plug Expansion Type CAUTION Do not contact the crown when installing an expansion type cylinder block core plug This could expand the plug before seating and result in leakage Use a fabricated tool to seat the expansio...

Page 43: ...ffect on cylinder head or spark plug life 1 Clean the spark plug seat and threads 2 Start the tap into the spark plug hole being careful to keep it properly aligned As the tap begins to cut new threads apply aluminum cutting oil 3 Continue cutting the threads and applying oil until the stop ring bottoms against the spark plug seat 4 Remove the tap and metal chips 5 Coat the threads of the mandrel ...

Page 44: ...l Tool s Place the Straightedge across the exhaust manifold flanges and check for warping with a feeler gauge NOTE The exhaust manifold shown is a typical exhaust manifold SPECIFICATIONS NOTE Ford Power Products industrial engines are designed to perform with engine oils that are licensed by the American Petroleum Institute API and oils carrying the most current API classification should be used ...

Page 45: ...llation Timing Drive Components Removal Timing Drive Components Installation Camshaft Removal Camshaft Installation Exhaust Manifold RH Removal Exhaust Manifold RH Installation Exhaust Manifold LH Removal Exhaust Manifold LH Installation Cylinder Head Removal Cylinder Head Installation Oil Level Indicator Tube Removal Oil Level Indicator Tube Installation Oil Pan Removal Oil Pan Installation Oil P...

Page 46: ...30 WSG 1068 ENGINE INDEX CONT Subject Page Specifications Torque Specifications General Specifications 171 171 ...

Page 47: ...ed for each spark plug 12405 The cylinder block module is a cast iron 90 degree V 10 cylinder block 6010 The basic engine components consist of the following Two overhead camshafts Engine dynamic balance shaft Two valves per cylinder Aluminum cylinder heads 6049 Cast iron 90 degree V 10 cylinder block Two piece aluminum intake manifold system Engine Identification It is important the engine codes ...

Page 48: ...32 WSG 1068 ENGINE Module View ...

Page 49: ...33 WSG 1068 ENGINE Engine Intake Components ...

Page 50: ...34 WSG 1068 ENGINE ...

Page 51: ...35 WSG 1068 ENGINE Low End Components ...

Page 52: ...36 WSG 1068 ENGINE ...

Page 53: ...37 WSG 1068 ENGINE Upper End Components ...

Page 54: ...38 WSG 1068 ENGINE ...

Page 55: ...39 WSG 1068 ENGINE Major Front End Components ...

Page 56: ...40 WSG 1068 ENGINE DIAGNOSIS AND TESTING Refer to Section 01 for basic mechanical concerns ...

Page 57: ...r unit electrical connectors 6 Disconnect and remove the ten ignition coils 12029 refer to Section 03 7 Remove the drive belt 8620 refer to Section 05 8 Remove the generator GEN 10300 refer to Section 06 WARNING DO NOT SMOKE OR CARRY LIGHTED TOBACCO OR OPEN FLAME OF ANY TYPE WHEN WORKING ON OR NEAR ANY FUEL RELATED COMPONENTS HIGHLY FLAMMABLE MIXTURES ARE ALWAYS PRESENT AND CAN BE IGNITED RESULTIN...

Page 58: ...e water thermostat 8575 11 Remove the two studs retaining the heater water return tube 12 Remove the bolts the upper intake manifold and the intake manifold gasket 9439 Discard the intake manifold gaskets 13 Pull back and remove the heater water return tube Inspect the O rings and replace if required ...

Page 59: ...he ten bolts Discard the intake manifold gasket 15 Clean all mating surfaces Intake Manifold Variable Resonance Induction System VRIS Installation 1 Position the lower intake manifold gasket 9461 and the upper intake manifold on the intake manifold and loosely install the ten bolts ...

Page 60: ...ghten the bolts in two stages Tighten the bolts in the sequence shown Stage 1 Tighten to 2 Nm 18 lb in Stage 2 Tighten to 8 12 Nm 71 106 lb in 3 Position the water return tube as shown 4 Install the heater water return tube studs ...

Page 61: ...d the intake manifold and loosely install the bolts 6 Install the thermostat gasket and the thermostat housing and loosly install the bolts 7 NOTE Be sure to tighten the bolts in two stages Tighten the bolts in the sequence shown Stage 1 Tighten to 2 Nm 18 lb in Stage 2 Tighten to 20 30 Nm 15 22 lb ft ...

Page 62: ...GINE 8 Install the heater water hose and position the clamp 9 Connect the water temperature indicator sending unit electrical connector 10 Install the generator 11 Install the drive belt 12 Install the ignition coils ...

Page 63: ...r outlet tube 9B659 16 Fill the cooling system refer to Section 05 17 Install the engine cover 18 Connect the battery ground cable Valve Cover Left Removal 1 NOTE The bolts are a part of the valve cover 6582 and are not to be removed Fully loosen the valve cover Remove the two nuts and the sixteen bolts and remove the valve cover and the valve cover gasket 6584 ...

Page 64: ...g Ford specification WSEM4G323 A6 NOTE Sealant must be removed and area cleaned with solvent if above instructions are not followed Use metal surface cleaner F4AZ 19A536 RA or equivalent meeting Ford specification WSEM5B292 A 2 Apply silicone in two places where the engine front cover 6019 meets the cylinder head Use Silicone Gasket and Sealant F6AZ 19562 AA or equivalent meeting Ford specificatio...

Page 65: ...49 WSG 1068 ENGINE 4 Tighten the nuts and bolts in the sequence shown ...

Page 66: ...d Fully loosen the bolts and remove the valve cover and the valve cover gasket 6584 Valve Cover Right Installation 1 Remove the PCV valve CAUTION Mating parts must make contact to each other within 4 minutes and connecting bolts must be torqued within 15 minutes after applying sealant Failure to follow this procedure can cause future oil leakage Use silicone gasket and sealant F6AZ 19562 AA or equ...

Page 67: ...er F4AZ 19A536 RA or equivalent meeting Ford specification WSE M5B292 A 2 Apply silicone in two places where the engine front cover 6019 meets the cylinder head 6049 3 Position the valve cover on the cylinder head and loosely install the bolts ...

Page 68: ...52 WSG 1068 ENGINE 4 Tighten the bolts in the sequence shown 5 Reinstall the PCV valve ...

Page 69: ...s called for by the procedures can be obtained by calling 1 800 ROTUNDA 1 800 768 8632 1 Remove the engine cooling fan and fan shroud 8146 2 Remove the drive belt 8620 3 Remove the crankshaft pulley bolt 6A340 4 Using the Crankshaft Damper Remover remove the crankshaft pulley 6312 ...

Page 70: ...equivalent meeting Ford specification WSE M4G323 A6 NOTE Sealant must be removed and area cleaned with solvent if above instructions are not followed Use metal surface cleaner F4AZ 19A536 RA or equivalent meeting Ford specification WSE M5B292 A 1 Use the Crankshaft Damper Replacer to install the crankshaft pulley 2 Tighten the crankshaft pulley bolt in four stages Stage 1 Tighten to 90 Nm 66 lb ft...

Page 71: ...ecial Tool s Special Service Tools called for by the procedures can be obtained by calling 1 800 ROTUNDA 1 800 768 8632 1 Remove the crankshaft pulley 6312 refer to this section 2 Using the a Front Cover Seal Remover remove the B crankshaft front seal 6700 ...

Page 72: ...crankshaft front seal inner lip Use Super Premium SAE 5W30 Motor Oil XO 5W30 QSP or equivalent meeting Ford specification WSS M2C153 G 2 Use the A Crankshaft Seal Replacer to install the B crankshaft front seal into the C engine front cover 3 Install crankshaft pulley refer to Crankshaft Pulley in this section ...

Page 73: ...attery ground cable 14301 2 Remove the valve covers 6582 refer to Valve Cover in this section 3 Remove the radiator 8005 4 Disconnect the camshaft position sensor CMP sensor 6B288 5 Remove the drive belt 8620 6 Disconnect the crankshaft position CKP sensor electrical connector 7 Remove the drain plug and drain the engine oil 8 Remove the crankshaft front seal 6700 refer to Crankshaft Front Oil Sea...

Page 74: ...fasteners 11 Remove the engine front cover 6019 from the front cover to cylinder block dowels 6C002 1 Install a new engine front cover gasket 6020 on the engine front cover then position the engine front cover on the front cover to cylinder block dowels ...

Page 75: ...59 WSG 1068 ENGINE ...

Page 76: ...wn Stage 1 Tighten fasteners 1 through 5 to 20 30 Nm 15 22 lb ft Stage 2 Tighten fasteners 6 through 15 to 40 55 Nm 30 41 lb ft 3 NOTE Be sure to tighten the bolts through the front of the oil pan in two stages Stage 1 Tighten to 20 Nm 15 lb ft Stage 2 Tighten an additional 60 degrees ...

Page 77: ...P electrical connector 7 Install a new crankshaft front seal and the crankshaft pulley 6312 refer to Crankshaft Pulley in this section 8 Install the drive belt 8620 9 Install the valve covers refer to Valve Cover in this section 10 Fill the engine 6007 with oil Use engine oil meeting Ford specification D9AZ 19579A ...

Page 78: ...alled for by the procedures can be obtained by calling 1 800 ROTUNDA 1 800 768 8632 1 Remove the engine front cover 6019 refer to Engine Front Cover in this section 2 Remove the crankshaft sensor ring from the crankshaft 6303 3 Remove the six bolts and remove the balance shaft bearing caps ...

Page 79: ...ise instructed at no time when the timing chains 6268 are removed and the cylinder heads 6049 are installed may the crankshaft or camshaft 6250 be rotated Severe piston 6108 and valve damage could occur Use the Crankshaft Holding Tool to position the crankshaft as shown ...

Page 80: ...64 WSG 1068 ENGINE 6 Install the Camshaft Holding Tools on the camshafts 7 Remove the bolts and the timing chain tensioners 6L266 Remove the timing chain tensioner arms 6L253 from the dowel pins ...

Page 81: ...timing chain and the crankshaft sprockets 6306 1 Remove the RH timing chain from the camshaft sprocket 6256 2 Remove the RH timing chain and outer crankshaft sprocket from the crankshaft 3 Repeat for the LH timing chain and crankshaft sprocket ...

Page 82: ...g chain guides Timing Drive Components Installation 1 CAUTION Timing chain procedures must be followed exactly or damage to valves and pistons will result CAUTION Do not compress the ratchet assembly This will damage the ratchet assembly Compress the tensioner plunger using an edge of a vise ...

Page 83: ...push back and hold the ratchet mechanism 3 While holding the ratchet mechanism push the ratchet arm back into the tensioner housing 4 Install a paper clip into the hole in the tensioner housing to hold the ratchet assembly and plunger in during installation ...

Page 84: ...68 WSG 1068 ENGINE 5 If copper links are not visible mark two links on one end and one link on the other end and use as timing marks 6 Install the timing chain guides ...

Page 85: ...lding Tool 8 Install the inner crankshaft sprocket with the long hub facing outward 9 Install the inner timing chain on the crankshaft sprocket with the timing marks aligned 10 NOTE Be sure the upper half of the timing chain is below the tensioner ...

Page 86: ...ned NOTE The lower half of the timing chain must be positioned above the dowel Install the outer crankshaft sprocket and timing chain belt with the long hub of the crankshaft sprocket facing inward 12 Position the timing chain on the camshaft sprocket Make sure the two copper colored links align with the camshaft sprocket timing mark 13 Check for proper alignment of all timing marks ...

Page 87: ...71 WSG 1068 ENGINE Camshaft Assembly Timing Mark Alignment ...

Page 88: ...72 WSG 1068 ENGINE Timing Chains Camshaft Gears and Crankshaft Gears Alignment ...

Page 89: ...8 ENGINE 14 Position the LH and RH timing chain tensioner arms on the dowel pins Position the timing chain tensioners and install the bolts 15 Remove the retaining pins from the RH and LH timing chain tensioners ...

Page 90: ...rankshaft sensor ring on the crankshaft 18 Lubricate the balance shaft journals with engine oil Use Super Premium SAE 5W30 Motor Oil XO 5W30 QSP or equivalent meeting Ford specification WSS M2C153 G 19 Position the balance shaft on the journals 20 Align the balance shaft timing marks as shown ...

Page 91: ...to each other within 4 minutes and connecting bolts must be torqued within 15 minutes after applying sealant Failure to follow this procedure can cause future oil leakage Use silicone gasket and sealant F6AZ 19562 AA or equivalent meeting Ford specification WSE M4G323 A6 NOTE Sealant must be removed and area cleaned with solvent if above instructions are not followed Use metal surface cleaner F4AZ...

Page 92: ... AND CAN BE IGNITED RESULTING IN POSSIBLE PERSONAL INJURY 1 Disconnect the battery ground cable 14301 2 Remove the intake manifold 9424 refer to Intake Manifold Variable Resonance Induction System VRIS in this section 3 Remove the timing chains 6268 refer to Timing Drive Components in this section CAUTION The caps must be marked for installation in their original location or damage to the engine m...

Page 93: ...ed for installation in their original location or damage to the engine may occur 7 Remove the bolts the camshaft bearing caps 6B280 and the camshaft 6250 from the cylinder block 6010 Camshaft Installation 1 Lubricate the camshaft journals and bearing caps Use Super Premium SAE 5W30 Motor Oil D9AZ 19579 A or equivalent meeting Ford specification WSS M2C153 G ...

Page 94: ...78 WSG 1068 ENGINE 2 Install the bearing caps in their original locations and the bolts 3 Tighten the bolts in the sequence shown ...

Page 95: ...oil Use Super Premium SAE 5W30 Motor Oil D9AZ 19579 A or equivalent meeting Ford specification WSS M2C153 G 6 Using the index mark on the balance shaft mark the corresponding teeth on the gear with chalk 7 Position the balance shaft on the journals 8 Align the balance shaft timing marks as shown Align the chalk mark on the balance shaft with the camshaft timing mark as shown ...

Page 96: ...eeting Ford specification WSS M2C153 G 10 Position the bearing caps in their original locations and the bolts Tighten the bolts in the sequence shown 11 Install the intake manifold refer to Intake Manifold Variable Resonance Induction System VRIS in this section 12 Install the timing chains refer to Timing Drive Components in this section ...

Page 97: ...val 1 Remove the nuts from exhaust pipe and remove exhaust pipe 2 Remove the ten nuts and the exhaust manifold 9430 and exhaust manifold gasket 9448 Discard the exhaust manifold gasket 3 Clean and inspect the exhaust manifold refer to Section 01 ...

Page 98: ...82 WSG 1068 ENGINE Exhaust Manifold RH Installation 1 Follow the removal procedure in reverse order ...

Page 99: ...d LH Removal 1 Remove the nuts from the exhaust pipe and remove pipe 2 Remove the exhaust manifold nuts and the exhaust manifold 9430 Discard the exhaust manifold gaskets 9448 3 Clean and inspect the exhaust manifold refer to Section 01 ...

Page 100: ...haust Manifold LH Installation 1 Follow the removal procedure in reverse order Cylinder Head Removal Special Tool s Special Service Tools called for by the procedures can be obtained by calling 1 800 ROTUNDA 1 800 768 8632 ...

Page 101: ...nduction System VRIS in this section 3 Remove the timing chains 6268 refer to Timing Drive Components in this section 4 Compress and slide the hose clamp back and remove the evaporation water hose 18472 if so equipped 5 Install the Lifting Handles 6 CAUTION These bolts must be replaced with new bolts They are tighten to yield designed and cannot be reused Remove the bolts and the cylinder head 604...

Page 102: ...e oil leakage Use silicone gasket and sealant F6AZ 19562 AA or equivalent meeting Ford specification WSE M4G323 A6 NOTE Sealant must be removed and area cleaned with solvent if above instructions are not followed Use metal surface cleaner F4AZ 19A536 RA or equivalent meeting Ford specification WSE M5B292 A 1 Rotate the crankshaft 6303 to position the keyway at 12 o clock 2 NOTE Do not turn the cra...

Page 103: ...n the RH is similar 4 NOTE Be sure to tighten the bolts in three stages Stage 1 Tighten to 37 43 Nm 27 32 lb ft Stage 2 Tighten an additional 85 degrees to 95 degrees Stage 3 Tighten an additional 85 degrees to 95 degrees 5 Install the timing chains refer to Drive Components in this section 6 Install the intake manifold refer to Intake Manifold Variable Resonance Induction System VRIS in this sect...

Page 104: ... 2 Inspect the oil level indicator tube for damage 1 Follow the removal procedure in reverse order 2 Replace and lubricate the O rings with Super Premium SAE 5W30 Motor Oil D9AZ 19579 A or equivalent meeting Ford specification WSS M2C153 G 3 Replace oil level indicator oil dipstick ...

Page 105: ... the radiator 8005 and disconnect the upper radiator hose 8260 at the radiator 3 Drain the engine oil and remove the oil bypass filter 6714 4 Remove the nuts retaining the front engine support insulator 6038 to the front engine support bracket 6028 The RH is shown the LH is typical ...

Page 106: ...90 WSG 1068 ENGINE 5 Remove the flywheel inspection plate 6 Remove the bolts and partially lower the oil pan 6675 ...

Page 107: ...d tube 2 CAUTION Mating parts must make contact to each other within 4 minutes and connecting bolts must be torqued within 15 minutes after applying sealant Failure to follow this procedure can cause future oil leakage Use silicone gasket and sealant F6AZ 19562 AA or equivalent meeting Ford specification WSE M4G323 A6 NOTE Sealant must be removed and area cleaned with solvent if above instructions...

Page 108: ... Nm 18 lb in Stage 2 Tighten to 20 Nm 15 lb ft Stage 3 Tighten an additional 60 degrees 4 Install oil drain plug 11 16 Nm 98 143 lb in 5 Tighten the front engine support insulators 6 Connect the battery ground cable 7 Fill the engine with oil Use Motorcraft Engine Oil XO 5W30 QSP or equivalent meeting Ford specification WSSM2C153 G 8 Fill the cooling system ...

Page 109: ...refer to Oil Pan in this section 4 Remove the oil pump 6600 Remove the bolts Remove the oil pump 1 Clean and inspect the mating surfaces 2 Position the oil pump and loosely install the bolts Tighten the bolts in the sequence shown 3 Install the oil pan refer to Oil Pan in this section 4 Install the timing chain 6268 refer to Timing Drive Components in this section 5 Connect the battery ground cabl...

Page 110: ...SG 1068 ENGINE 1 Disconnect the battery ground cable 14301 2 Remove generator from bell housing 3 Remove bell housing 4 Remove the bolts and the flywheel 6375 1 Follow the removal procedure in reverse order ...

Page 111: ...ve the flywheel 6375 refer to Flywheel in this section 3 Use the Rear Crankshaft Slinger Remover and the Slide Hammer to remove the crankshaft oil slinger 6310 4 Use the Rear Crankshaft Seal Remover and the Impact Slide Hammer to remove the crankshaft rear oil seal 6701 ...

Page 112: ...OTE Sealant must be removed and area cleaned with solvent if above instructions are not followed Use metal surface cleaner F4AZ 19A536 RA or equivalent meeting Ford specification WSEM5B292 A 2 Using the Rear Crankshaft Seal Replacer and the Rear Crankshaft Seal Adapter install the crankshaft rear oil seal 3 With the Rear Crankshaft Seal Adapter still installed use the Rear Crankshaft Slinger Repla...

Page 113: ...l with retainer plate Removal 1 Disconnect the battery ground cable 14301 Remove the flywheel 6375 refer to Flywheel in this section 2 Use the Rear Crankshaft Slinger Remover and the Impact Slide Hammer to remove the crankshaft oil slinger 6310 ...

Page 114: ... within 15 minutes after applying sealant Failure to follow this procedure can cause future oil leakage Use silicone gasket and sealant F6AZ 19562 AA or equivalent meeting Ford specification WSEM4G323 A6 NOTE Sealant must be removed and area cleaned with solvent if above instructions are not followed Use metal surface cleaner F4AZ 19A536 RA or equivalent meeting Ford specification WSEM5B292 A 2 Ap...

Page 115: ...o bolts Tighten in two stages Stage 1 Tighten retainer plate bolts to 8 12 Nm 71 107 lb in Stage 2 Tighten oil pan bolts to 14 20 Nm 10 15 lb ft then tighten an additional 90 4 Use the Rear Crankshaft Seal Replacer and Rear Crankshaft Seal Adapter to install the crankshaft rear oil seal 5 With the Rear Crankshaft Seal Adapter still installed use the Rear Crankshaft Slinger Replacer and Rear Cranks...

Page 116: ...intake manifold 9424 refer to Intake Manifold Variable Resonance Induction System VRIS in this section 3 Remove the radiator upper and lower radiator supports 16138 4 Remove the radiator 8005 fan shroud 8146 and engine cooling fan 5 Remove the drive belt 8620 refer to Section 05 ...

Page 117: ...er water inlet disconnect and set aside the lower radiator hose 8286 7 Disconnect the engine harness 8 Remove exhaust pipe nuts 9 Drain engine oil and remove the oil bypass filter 6714 10 Remove the starter motor 11002 refer to Section 07 ...

Page 118: ...102 WSG 1068 ENGINE 11 Remove the engine support insulator nuts 12 Install the Modular Lifting Bar 13 Remove the engine from the equipment ...

Page 119: ...pact Slide Hammer to remove the crankshaft oil slinger 6310 16 Use the Rear Crankshaft Seal Remover and the Impact Slide Hammer to remove the crankshaft rear oil seal 6701 17 Remove the bolts and remove the crankshaft rear oil seal retainer plate 18 Mount the engine on an engine stand 19 Remove the Modular Lifting Bar ...

Page 120: ...104 WSG 1068 ENGINE Engine Disassembly 1 With the engine on the engine stand remove the engine wiring harness ...

Page 121: ...WSG 1068 ENGINE 2 Remove the bolts the oil pan 6675 and the oil pan gasket 6710 3 Remove the two bolts and nut retaining the oil pump screen cover and tube 6622 and remove the oil pump screen cover and tube ...

Page 122: ...106 WSG 1068 ENGINE 4 NOTE The bolts are a part of the valve cover 6582 and are not to be removed LH is shown RH is similar Fully loosen the sixteen bolts and remove the valve cover gasket 6584 ...

Page 123: ... 5 Remove the drive belt 6 Remove the water pump pulley 8509 1 Remove the four bolts 2 Remove the water pump pulley 7 Remove the four bolts from the water pump 8 Remove the A water pump 8501 from the B cylinder block 6010 ...

Page 124: ...ankshaft Damper Remover to remove the crankshaft pulley 6312 10 Use the A Front Cover Seal Remover to remove the B crankshaft front seal 6700 11 Remove the engine front cover fasteners 12 Remove the engine front cover 6019 from the front cover to cylinder block dowels 6C002 ...

Page 125: ...109 WSG 1068 ENGINE 13 Remove the crankshaft sensor ring from the crankshaft 6303 14 Remove the balancing shaft bearing caps 15 Remove balancing shaft ...

Page 126: ...g chains 6268 are removed and the cylinder heads 6049 are installed is the crankshaft or camshaft 6250 to be rotated Severe piston 6108 and valve damage will occur Position the crankshaft with the Crankshaft Holding Tool as shown 17 Install the Camshaft Holding Tools on the camshafts 2 ...

Page 127: ...111 WSG 1068 ENGINE 18 Remove the bolts and the timing chain tensioners 6L266 Remove the timing chain tensioner arms 6L253 from the dowel pins ...

Page 128: ...s are installed is the crankshaft or camshaft to be rotated Severe piston and valve damage will occur Remove the Crankshaft Holding Tool Remove the RH timing chain from the camshaft sprocket 6256 Remove the RH timing chain and outer crankshaft sprocket from the crankshaft Repeat for the LH timing chain and crankshaft sprocket ...

Page 129: ...113 WSG 1068 ENGINE 20 Remove the timing chain guides 6K297 Remove the bolts Remove the timing chain guides ...

Page 130: ... the ten nuts and the RH exhaust manifold 9430 and exhaust manifold gasket 9448 Discard the exhaust manifold gasket 22 Remove the ten nuts the LH exhaust manifold and the exhaust manifold gaskets Discard the exhaust manifold gasket ...

Page 131: ...Lifting Handles on both ends of the cylinder head 25 CAUTION These bolts must be replaced with new bolts They are tighten to yield designed and cannot be reused Remove the bolts cylinder head and head gasket Discard the head gasket 6051 cylinder head bolts and clean the engine block surface LH is shown RH is similar ...

Page 132: ...lvent if above instructions are not followed Use metal surface cleaner F4AZ 19A536 RA or equivalent meeting Ford specification WSEM5B292 A 27 Remove the bolts and remove the engine mounts 28 Remove the bolts and nut retaining the oil filter adapter 6881 to the cylinder block Remove the oil filter adapter and clean the gasket surface 29 Remove the bolts and the oil pump 6600 ...

Page 133: ...haft bearing supports 31 CAUTION Make sure connecting rods 6200 and rod caps are numbered to keep in proper orientation Remove the bolts and the connecting rod caps Rotate the crankshaft so that the connecting rod is at bottom dead center Remove the bolts and discard them ...

Page 134: ...kshaft journals with the connecting rod Remove the piston and rod assembly Use the Connecting Rod Guide Tools to guide the piston and rod assembly out of the cylinder 33 Repeat the previous steps until all ten piston and rod assemblies have been removed from the cylinder block ...

Page 135: ...119 WSG 1068 ENGINE 34 Remove and discard the twelve cross mounted bolts 35 Remove the main bearing bolts and discard the bolts 36 Remove the main bearing cap dowel pins ...

Page 136: ...120 WSG 1068 ENGINE 37 Remove the main bearing caps the lower crankshaft main bearings 6333 and the thrust washer 38 Remove the crankshaft and the crankshaft main bearings from the cylinder block ...

Page 137: ...121 WSG 1068 ENGINE 1 Remove the Camshaft Holding Tool from the camshaft 6250 ...

Page 138: ...ood surface to prevent damage to the joint face Install the Valve Spring Spacer between the valve spring coils to prevent valve stem seal damage 3 Use the Valve Spring Compressor to compress the valve springs 6513 and remove the roller followers 4 Remove the hydraulic lash adjusters 5 Use the Valve Spring Compressor to compress the valve springs ...

Page 139: ...The 10 cylinder is similar NOTE Shown without camshaft for clarity Remove the A valve spring retainer keys the B valve spring retainers 6514 the C valve springs and the valves 7 Remove the valve stem seals 6571 8 CAUTION The caps must be marked for installation in their original location or damage to the engine may occur Remove the bolts the bearing caps and the camshaft ...

Page 140: ...nt must be removed and area cleaned with solvent if above instructions are not followed Use metal surface cleaner F4AZ 19A536 RA or equivalent meeting Ford specification WSEM5B292 A 2 Lubricate the camshaft journals Use Super Premium SAE 5W30 Motor Oil D9AZ 19579 A or equivalent meeting Ford specification WSS M2C153 C 3 Install the camshaft and the camshaft bearing caps in their original location ...

Page 141: ...125 WSG 1068 ENGINE 4 Tighten the bolts in the sequence shown 5 Install the valves in the valve guides located in the cylinder block 6010 ...

Page 142: ... retainer onto the valve 7 Install the valve spring spacer between the valve spring coils to prevent valve stem seal damage 8 Use the Valve Spring Compressor to compress the valve spring and install the valve spring retainer keys 9 Install the hydraulic lash adjusters ...

Page 143: ...127 WSG 1068 ENGINE 10 Install the roller followers 11 Remove the Valve Spring Spacer ...

Page 144: ...must be free of chips dirt paint and foreign material Also make sure the coolant and oil passages are clear Lubricate and install the crankshaft upper main bearings into the cylinder block Use Super Premium SAE 5W30 Motor Oil D9AZ 19579 A or equivalent meeting Ford specification WSS M2C153 G ...

Page 145: ...e back of the No 6 main boss 4 Push the crankshaft forward and install the front lower crankshaft thrust washer at the front of the No 6 main boss 5 NOTE To aid in assembly apply petroleum jelly to the back of the crankshaft thrust washer Install the upper crankshaft thrust washer to the back side of the No 6 main bearing cap with oil grooves facing the crankshaft surface and install the No 6 rear...

Page 146: ...rings into the main bearing caps Locate the main bearing caps on the cylinder block and tap into place using a plastic or dead blow hammer 7 Install new main cap bearing bolts 8 Install the ten dowel pins so that the flat sides face the crankshaft Install the cross mounted bolts ...

Page 147: ...sequence shown Stage 1 Tighten to 37 43 Nm 22 32 lb ft Stage 2 Tighten an additional 85 degrees to 95 degrees 10 Tighten fasteners 13 through 24 in two stages in the sequence shown Stage 1 Tighten to 27 33 Nm 20 26 lb ft Stage 2 Tighten an additional 85 degrees to 95 degrees ...

Page 148: ...bly NOTE The connecting rod caps are of the cracked design and must mate with the connecting rod ends Excessive bearing clearance will result if not mated properly Install the connecting rod bearings position the connecting rod cap and loosely install the two new bolts 14 NOTE Be sure to tighten the bolts in two stages Tighten the connecting rod bolts in the sequence shown Stage 1 Tighten to 40 45...

Page 149: ...33 WSG 1068 ENGINE 16 Install the oil filter adapter 6881 17 Install the front engine support insulators 6038 18 Install the lower crankshaft bearing supports and tighten fasteners in the sequence shown ...

Page 150: ...6754 20 Position the oil pump 6600 and install the bolts loosely Tighten the bolts in the sequence shown 21 Rotate the crankshaft to position the keyway at 12 o clock NOTE After crankshaft has been positioned do not turn the crankshaft until instructed to do so ...

Page 151: ...g Handles 25 Install the cylinder head 6049 on the head gasket and loosely install new bolts The LH is shown the RH is similar 26 NOTE Be sure to tighten the new bolts in three stages Stage 1 Tighten to 37 43 Nm 27 32 lb ft Stage 2 Tighten an additional 85 degrees to 95 degrees Stage 3 Tighten an additional 85 degrees to 95 degrees ...

Page 152: ...136 WSG 1068 ENGINE 27 Install the left and right exhaust manifold gaskets 9448 and exhaust manifolds 9430 Loosely install the nuts Tighten the nuts in the sequence shown ...

Page 153: ...e left and right camshaft sprockets 6256 29 CAUTION Do not compress the ratchet assembly This will damage the ratchet assembly Compress the tensioner plunger using an edge of a vise 30 Using a small screwdriver or pick push back and hold the ratchet mechanism 31 While holding the ratchet mechanism push the ratchet arm back into the tensioner housing ...

Page 154: ...the tensioner housing to hold the ratchet assembly and plunger in during installation 33 If the copper links are not visible mark two links on one end and one link on the other end to use as timing marks 34 Loosen the Camshaft Holding Tools on both camshafts 6250 ...

Page 155: ...139 WSG 1068 ENGINE 35 Install the timing chain guides 6K297 ...

Page 156: ...itioning 37 CAUTION Unless otherwise instructed at no time when the timing chains 6268 are removed and the cylinder heads are installed is the crankshaft or camshaft to be rotated Severe piston and valve damage will occur CAUTION Rotate the crankshaft counterclockwise only Do not rotate past the position shown or severe piston or valve damage can occur Position the crankshaft with the Crankshaft H...

Page 157: ...ng chain with the slot on the crankshaft sprocket 41 NOTE Make sure the upper half of the timing chain is below the tensioner guide dowel If necessary use the Camshaft Holding Tool to adjust NOTE If necessary adjust the camshaft sprocket slightly to obtain timing mark alignment Position the timing chain on the camshaft sprocket with the two copper chain links and the camshaft sprocket timing mark ...

Page 158: ...wer half of the timing chain must be positioned above the dowel Position the outer camshaft sprocket and the RH timing chain with the long hub of the camshaft sprocket facing inward 43 NOTE If necessary adjust the camshaft sprocket slightly to obtain timing mark alignment Position the RH timing chain on the camshaft sprocket Make sure the two copper colored links align with the camshaft sprocket t...

Page 159: ...timing mark alignment 45 Position the LH and RH timing chain tensioner arm 6L253 on the dowel pins Position the timing chain tensioners 6L266 and install the bolts 46 Remove both the RH and LH retaining pins from the timing chain tensioner assembly ...

Page 160: ...e camshafts 48 Lubricate the balance shaft journals with engine oil Use Super Premium SAE 5W30 Motor Oil XO 5W30 QSP or equivalent meeting Ford specification WSS M2C153 G 49 Position the balance shaft on the journals 50 Align the balance shaft timing marks as shown ...

Page 161: ...t journals with engine oil Use Super Premium SAE 5W30 Motor Oil XO 5W30 QSP or equivalent meeting Ford specification WSS M2C153 G 52 Install the bearing caps and the bolts Tighten the bolts in the sequence shown 53 Position the crankshaft sensor ring ...

Page 162: ... A6 NOTE Sealant must be removed and area cleaned with solvent if above instructions are not followed Use metal surface cleaner F4AZ 19A536 RA or equivalent meeting Ford specification WSEM5B292 A NOTE The RH timing chain is removed for clarity Apply a bead of silicone along the cylinder headto block surface and the oil pan to cylinder block surface as specified 55 Install a new engine front cover ...

Page 163: ...068 ENGINE 57 Tighten the fasteners in two stages refer to the preceding illustration Stage 1 Tighten fasteners 1 through 5 to 20 30 Nm 15 22 lb ft Stage 2 Tighten fasteners 6 through 15 to 40 55 Nm 30 41 lb ft ...

Page 164: ...rea cleaned with solvent if above instructions are not followed Use metal surface cleaner F4AZ 19A536 RA or equivalent meeting Ford specification WSEM5B292 A Apply a bead of silicone where the rear crankshaft seal retainer plate and the front cover meets the cylinder block Use Silicone Gasket and Sealant F6AZ 19562 AA or equivalent meeting Ford specification WSEM4G323 A6 60 NOTE Be sure to tighten...

Page 165: ...lent meeting Ford specification ESE M97B44 A and install the O ring seal onto the water pump 2 Position the water pump into the cylinder block 3 Install the water pump retaining bolts 63 Lubricate the A engine front cover and the B front oil seal inner lip Use Super Premium SAE 5W30 Motor Oil XO 5W30 QSP or equivalent meeting Ford specification WSS M2C153 G 64 Use the A Crankshaft Seal Replacer Al...

Page 166: ... solvent if above instructions are not followed Use metal surface cleaner F4AZ 19A536 RA or equivalent meeting Ford specification WSEM5B292 A Apply silicone to the Woodruff key slot on the crankshaft pulley 6312 Use Silicone Gasket and Sealant F6AZ 19562 A or equivalent meeting Ford specification WSEM4G323 A6 66 Use the Crankshaft Damper Replacer to install the crankshaft pulley 67 Tighten the cra...

Page 167: ...151 WSG 1068 ENGINE 68 Position the water pump pulley 8509 on the water pump and install the bolts ...

Page 168: ...ication WSEM4G323 A6 NOTE Sealant must be removed and area cleaned with solvent if above instructions are not followed Use metal surface cleaner F4AZ 19A536 RA or equivalent meeting Ford specification WSEM5B292 A Apply silicone in two places where the engine front cover meets the cylinder head Use Silicone Gasket and Sealant F6AZ 19562 AA or equivalent meeting Ford specification WSEM4G323 A6 70 Po...

Page 169: ...sealant Failure to follow this procedure can cause future oil leakage Use silicone gasket and sealant F6AZ 19562 AA or equivalent meeting Ford specification WSEM4G323 A6 NOTE Sealant must be removed and area cleaned with solvent if above instructions are not followed Use metal surface cleaner F4AZ 19A536 RA or equivalent meeting Ford specification WSEM5B292 A 4 Apply a bead of silicone around the ...

Page 170: ...ear Crankshaft Seal Replacer and Rear Crankshaft Seal Adapter to install the crankshaft rear oil seal 6701 7 With the Rear Crankshaft Seal Adapter still installed use the Rear Crankshaft Slinger Replacer to install the crankshaft oil slinger 8 Install the flywheel 6375 9 Install the starter motor 11002 ...

Page 171: ...ctor if equipped 12 Install the intake manifold 9424 refer to Intake Manifold Variable Resonance Induction System VRIS in this section 13 Install vacuum hoses 14 Install the drive belt 8620 15 Install the upper and lower radiator supports 16138 16 Install the radiator 8005 17 Install the engine air cleaner ACL 9600 and the air cleaner outlet tube 9B659 18 Fill all fluids to the proper levels 19 Co...

Page 172: ...156 WSG 1068 ENGINE SPECIFICATIONS ...

Page 173: ...157 WSG 1068 ENGINE ...

Page 174: ...158 WSG 1068 ENGINE ...

Page 175: ...king Mode Transient Mode Overspeed Mode Electronic Engine Controls Cylinder Head Temperature CHT Sensor Starting Mode CHT Effects IAT Effects Not Used Overspeed Protection Engine Protection Starter Lockout Tachometer Output Ignition System Components Location Firing Order Ignition Coil on Plug Removal Ignition Coil on Plug Installation Harness Connector Pinout Description Fuel Select Operation Dia...

Page 176: ...st procedures to find the specific cause of the symptoms Step 4 Verify the cause Confirm that you have found the correct cause by connecting jumper wires and or temporarily installing a known good component and operating the circuit Step 5 Make the repair Repair or replace the inoperative component Step 6 Verify the repair Operate the system as in Step 1 and check that your repair has removed all ...

Page 177: ...ter be sure power is off in circuit during testing Hot circuits can cause equipment damage and false readings Switch Circuit Check Voltage Check Figure 4 Switch Circuit Check and Voltage Check In an inoperative circuit with a switch in series with the load jumper the terminals of the switch to power the load If jumpering the terminals powers the circuit the switch is inoperative Figure 4 Continuit...

Page 178: ...il the Test Lamp goes out For example in Figure 5 with a ground at X the bulb goes out when C1 or C2 is disconnected but not after disconnecting C3 This means the short is between C2 and C3 Figure 6 Ground Check Ground Check Turn on power to the circuit Perform a Voltage Check between the suspected inoperative ground and the frame Any indicated voltage means that the ground is inoperative Figure 6...

Page 179: ...examples of wiring harness splices and connectors that will create intermittent electrical concerns The concerns are hidden and can only be discovered by a physical evaluation as shown in each illustration NOTE When servicing gold plated terminals in a connector only replace with gold plated terminals designed for that connector ...

Page 180: ...164 WSG 1068 IGNITION SYSTEM ...

Page 181: ...Crankshaft Position Sensor CKP Input Fuel Select Switch From these inputs the GCP computes spark strategy spark advance and fuel mixture air fuel to obtain optimum engine performance for correct load conditions Operation The ignition control module needs the following information to calibrate the engine properly Crankshaft position Engine RPM Engine temperature Engine load and altitude Fuel select...

Page 182: ...e B applied to the coil primary circuit builds a magnetic field around the primary coil When the switch opens the power is interrupted and the primary field collapses inducing the high voltage in the secondary coil windings and the spark plug is fired A kickback voltage spike occurs when the primary field collapses 4 The GCP processes the CKP signal and uses it to drive the tachometer as the Clean...

Page 183: ...aust The spark in the exhaust cylinder is wasted but little of the coil energy is lost Run Mode The GCP interprets engine speed above100 RPM as Run Mode The Base Spark Advance BSA is calculated by the GCP module processing the engine speed and load plus sensors mentioned in operation of this section and Fuel Select Switch Inputs to the GCP Effecting the Ignition The spark strategy is based on sens...

Page 184: ...ows the engine to operate without the GCP knowing if cylinder one is under compression or exhaust Cranking Mode Cranking mode is the area of engine operating speed within which the ignition timing is at a static position The static spark advance is fixed at 10 degrees BTDC up to 250 RPM Transient Mode This function is to provide a limp in mode whenever certain components fail The engine will run b...

Page 185: ...ying the resistance of the passive sensor causes a variation in total current flow Voltage that is dropped across a fixed resistor in series with the sensor resistor determines the voltage signal at the GCP This voltage signal is equal to the reference voltage minus the voltage drop across the fixed resistor The CHT sensor is installed in the aluminum cylinder head and measures the metal temperatu...

Page 186: ...s strategy must be compatible with governor controllers Engine Protection Reaction for overtemp based on CHT input and low oil pressure based on oil pressure switch input the module will be shut off stalling the engine Key must cycle from run to off to start in order to restart engine Engine protection becomes active after 240 crankshaft revolutions and when 800 rpm is exceeded The purpose of havi...

Page 187: ...gnition timing based on inputs from the electronic engine control system sensors For additional information on sensor inputs related to ignition control refer to Section 08 The ignition coils change a supplied low voltage signal into high voltage pulses to the spark plugs The ignition control module controls the low side of each coil The ignition system is set for base timing at 10 degrees before ...

Page 188: ...172 WSG 1068 IGNITION SYSTEM Firing Order ...

Page 189: ...YS WEAR SAFETY GLASSES TO PROTECT EYES FROM FLYING FOREIGN MATERIAL 1 NOTE Remove any foreign material from spark plug wells with compressed air 2 Insert a small amount of dielectric grease into each boot using Motorcraft Silicone Brake Caliper Grease and Dielectric Compound XG 3 or equivalent meeting Ford specification ESE M1C171 A To install reverse the removal procedure ...

Page 190: ...174 WSG 1068 IGNITION SYSTEM Harness Connector Pinout Description I O Input Output ...

Page 191: ... which is all dependent on whether pin 7 of the 42 pin connector is Open grounded or has 12 volts The configurations are listed below Fuel Select Configuration 1 GND LP Open Gsln V NG 2 Gnd NG Open Gsln V LP 3 Gnd Open Gsln V LP 4 Gnd Open Gsln V NG 5 Gasoline Only 6 LP Only 7 NG Only 8 Gnd Open LP V NG 9 Gnd Open NG V LP 10 Gnd LP Open NG V Gsln ...

Page 192: ...a broken side electrode is not sufficient to check for spark and may lead to incorrect results Volt ohmmeter Rotunda 73111 Automotive Meter 105 R005 7 or equivalent A volt ohmmeter is essential for gathering system operating data during diagnosis testing and engine servicing procedures This digital volt ohmmeter DVOM can also be used for general purpose electrical troubleshooting on conventional s...

Page 193: ...s connector and a reliable ground The voltage must be less than 1 0 volt Visual Physical Check Several of the symptom procedures call for a careful visual physical check This can often lead to repairing a problem without performing unnecessary steps Use the following guidelines when performing a visual physical check Inspect unit for modifications or aftermarket equipment that can contribute to sy...

Page 194: ...178 WSG 1068 IGNITION SYSTEM Engine Controls ...

Page 195: ...179 WSG 1068 IGNITION SYSTEM Engine Sensors part of SK2U1L 12A200 BA ...

Page 196: ...D1 11 Tan Orange RS232 Tx 12 Not populated FPP2 13 Red Light Blue Not used 14 Light Blue Black FPP1 15 Dark Blue To start switch S terminal 16 Red White Aux PWM 4 17 Not populated Not used 18 White Purple To fuel pump negative 19 Not populated Autocrank start 20 Not populated Not used 21 Not populated Aux PWM 5 22 Purple Not used 23 Not populated GVS 2 24 Tan Light Blue GVS 1 25 Black Yellow IVS 2...

Page 197: ...181 WSG 1068 IGNITION SYSTEM 90 Pin GCP Connector ...

Page 198: ...spect all power ground and terminal connections prior to the start of this test as failures and corrosion associated with these areas can adversely affect the engine to start properly Inspection and Verification 1 Visually inspect for obvious signs of mechanical and electrical damage 2 Visually inspect for and note auxiliary system connections not shown on the recommended wiring schematic ...

Page 199: ...183 WSG 1068 IGNITION SYSTEM ...

Page 200: ...ral Information System Operation LPG System Operation Natural Gas Diagnosis and Testing Pinpoint Test A Fuel Pressure Check Page 200 200 202 NOTE For further information on Servicing the fuel system refer to Manufacturer s Service Information 04 ...

Page 201: ... the vaporizer regulator The electrical supply to fuel shut off valve passes through a vacuum operated safety switch Should the engine stall the vacuum switch opens and cuts off the electrical supply to the fuel shut off valve When starting the engine there is sufficient vacuum present even at cranking speed to close the safety switch FUEL SYSTEMS FIELD CALIBRATIONS GENERAL When performing field c...

Page 202: ...ched off vacuum supply to the fuel shut off vacuum is disconnected and the valve closes cutting off the fuel supply to the regulator Should the engine stall the loss of vacuum will close the fuel shut off valve When starting the engine there is sufficient vacuum present even at cranking speed to open the fuel shut off valve The system is similar to the LPG system except a convertor vaporizer is no...

Page 203: ...ect for obvious signs of mechanical and electrical damage 2 Visually inspect for and note auxiliary system connections not shown on the Recommended Customer Connections Wiring Schematic Normal Operation Fuel pressure is customer supplied The following test is a generalized procedure which should be completed prior to all test ...

Page 204: ...188 WSG 1068 FUEL SYSTEM ...

Page 205: ...Belt Tensioner Installation Belt Idler Pulley Removal Belt Idler Pulley Installation Water Pump Removal Water Pump Installation Diagnosis and Testing Visual Inspection Cooling System Visual Test Thermostat Test Thermostat Removed Radiator Leak Test Removed from Vehicle Engine Cylinder Head Temperature CHT Sensor V Ribbed Serpentine Drive Belt Drive Belt Symptom Chart Drive Tensioner Belt Length In...

Page 206: ...190 WSG 1068 COOLING SYSTEM INDEX CONT Subject Specifications General Specifications Torque Specifications Page 234 234 ...

Page 207: ...ea the owner of patents 3 601 181 and RE27 965 has granted Ford Motor Company rights with respect to cooling systems covered by these patents The cooling system components are Cylinder head temperature sensor CHT sensor Water thermostat and gasket assembly Water pump assembly ...

Page 208: ...freeze and water This mixture is to be used year round with temperatures above 30 F Recycled Coolant Use recycled engine coolant produced by Ford approved processes Not all coolant recycling processes produce coolant which meets Ford specification ESE M97B44 A or WSS M97B44 D and use of such a coolant may harm engine and cooling system components Unsatisfactory Coolant Material Alcohol type antifr...

Page 209: ... HAVING SCALDING HOT COOLANT OR STEAM BLOW OUT OF THE DEGAS BOTTLE WHEN REMOVING THE PRESSURE RELIEF CAP WAIT UNTIL THE ENGINE HAS COOLED DOWN TO AT LEAST 110 F 1 Wrap a thick cloth around the pressure relief cap and turn it slowly one half turn counterclockwise Stepping back while the pressure is released from the cooling system 2 When you are sure all the pressure has been released still with a ...

Page 210: ... recovered with the engine in the vehicle Dirty rusty or contaminated coolant requires replacement 3 Place a suitable container below the radiator draincock 8115 If equipped disconnect the coolant return hose at the fluid cooler 4 Open the radiator draincock 5 Remove the cylinder drain plug if equipped to drain the coolant from the cylinder block 6010 1 Place a drain pan below the cylinder block 2...

Page 211: ...alled and tight 7 Close the radiator draincock when finished Cooling System Filling 1 Add the proper engine coolant mixture to the degas bottle or radiator 2 Move the temperature blend selector to the full warm position when equipped 3 Run the engine until it reaches operating temperature ...

Page 212: ...bottle or radiator until the coolant level is between the COOLANT FILL LEVEL marks NOTE Systems without degas bottle fill radiator up to 1 inch below the filler neck 5 Turn off the engine and allow the cooling system to cool 6 Repeat Steps 1 through 5 until the radiator level is OK ...

Page 213: ...197 WSG 1068 COOLING SYSTEM Drive Belt Routing Cooling System Flushing Special Tool s Special Service Tools called for by the procedures can be obtained by calling 1 800 ROTUNDA 1 800 768 8632 ...

Page 214: ...0 50 mixture Operate the engine for several minutes then check the hoses and connections for leaks Thermostat Removal WARNING AVOID INJURY FROM HOT COOLANT WHEN ENGINE IS HOT 1 Partially drain the cooling system For additional information refer to Cooling System Draining Filling and Flushing in this section 2 Disconnect the upper radiator hose 3 Remove the water outlet connection Remove the bolts ...

Page 215: ...ht side cylinder head and remove the tube 4 Inspect the water pump tube assembly o rings for damage Installation of Water Heater Return Tube Assembly with by pass Hose 1 Lightly lubricate the o rings prior to installing the water outlet tube 2 Install the heater water outlet tube 3 Install the water tube mounting studs 4 Install the lower and upper intake manifold Refer to Section 01 5 Install rub...

Page 216: ...linder head temperature CHT sensor 1 Disconnect the electrical connector 2 Remove the CHT sensor 3 To install reverse the removal procedure CAUTION Do not over torque May damage sensor Fan Drive Belt Removal and Installation 1 Rotate the drive belt tensioner counterclockwise and remove the drive belt 2 NOTE Refer to 05 9 for correct drive belt routing To install reverse the removal procedure ...

Page 217: ...Removal 1 Remove the drive belt 8620 For additional information refer to Fan Drive Belt page 05 12 2 Remove the belt tensioner 1 Remove the bolts 2 Remove the belt tensioner Belt Tensioner Installation 1 To install reverse the removal procedure ...

Page 218: ...oval 1 Remove the fan drive belt 8620 off of the belt idler pulley 8678 For additional information refer to Fan Drive Belt page 05 12 2 Remove the bolt and the belt idler pulley Belt Idler Pulley Installation 1 To install reverse the removal procedure ...

Page 219: ...p pulley 5 Remove the water pump bolts 6 Remove the A water pump from the B cylinder block Clean and inspect the mating surfaces Water Pump Installation 1 CAUTION Cooling systems are recommended to be filled with Motorcraft Premium Engine Coolant VC 4 A meeting Ford specification ESE M97B44 A green color Do not mix coolant types Install the water pump 1 Lubricate the new O ring seal using engine c...

Page 220: ...EM 2 Position the pulley onto the water pump 3 Install the fan spacer and fan 4 Install the drive belt 5 Refill the cooling system For additional information refer to Cooling System Draining Filling and Flushing in this section ...

Page 221: ...ck 3 All block core plugs and drain plugs 4 Edges of all cooling system gaskets 5 Water pump shaft and bushing NOTE A small amount of antifreeze coming out the water pump weep hole may be normal Most vehicles use an ethylene glycol base antifreeze solution to which the manufacturers have added a dye color The dye color makes the antifreeze solution an excellent leak detector If this type of soluti...

Page 222: ... when vehicle has been allowed to reach normal operating temperature This will make sure sufficient engine coolant exchange has occurred 3 Inspect the coolant in both the radiator and the degas bottle for coolant color Clear light green or blue indicates higher water content than required Dark brown indicates unauthorized stop leak may have been used Use cooling system Stop Leak Powder E6AZ 19558 ...

Page 223: ...oltage is above 1 5 volts drain flush and replace coolant with a 50 50 mixture NOTE Above 3 volts may indicate a bad head gasket Thermostat Test Thermostat Removed WARNING USE CAUTION WORKING WITH HOT BOILING WATER AND WEAR APPROPRIATE PROTECTIVE GEAR MAY CAUSE BODILY HARM Remove the thermostat and immerse it in boiling water Replace the thermostat if it does not open at least 0 230 after one minu...

Page 224: ...Engine cylinder head temperature CHT sensor is a type of thermistor that converts engine temperature to an electrical voltage signal The electrical resistance of the CHT sensor changes with temperature As engine coolant temperature increases the CHT resistance decreases Output is a variable voltage signal which typically ranges from 0 3 volt to 4 5 volts At 40 F CHT resistance is approximately 925...

Page 225: ...209 WSG 1068 COOLING SYSTEM CHT Sensor Data Temperature Sensor Characteristics ...

Page 226: ...210 WSG 1068 COOLING SYSTEM V Ribbed Serpentine Drive Belt Cracks Across Ribs Normal Drive Belt Symptom Chart Chunks of Rib Missing Replace Belt ...

Page 227: ...off the drive pulleys Non standard replacement drive belts may track differently or improperly If a replacement drive belt tracks improperly replace it with an original equipment drive belt to avoid performance failure or loss of belt With the engine running check drive belt tracking If the A edge of the drive belt rides beyond the edge of the pulleys noise and premature wear may occur Make sure t...

Page 228: ...Verify the customer s concern by operating the engine to duplicate the condition 2 Inspect to determine if any of the following mechanical or electrical concerns apply Symptom Chart Inspection and Verification 3 If the inspection reveals an obvious concern that can be readily identified repair as necessary 4 If the concern remains after the inspection determine the symptom s and go to the Symptom ...

Page 229: ...213 WSG 1068 COOLING SYSTEM PINPOINT TEST A LOSS OF COOLANT ...

Page 230: ...214 WSG 1068 COOLING SYSTEM PINPOINT TEST A LOSS OF COOLANT Continued ...

Page 231: ...215 WSG 1068 COOLING SYSTEM PINPOINT TEST A LOSS OF COOLANT Continued PINPOINT TEST B THE ENGINE OVERHEATS ...

Page 232: ...216 WSG 1068 COOLING SYSTEM PINPOINT TEST B THE ENGINE OVERHEATS Continued ...

Page 233: ...217 WSG 1068 COOLING SYSTEM ...

Page 234: ...218 PINPOINT TEST B THE ENGINE OVERHEATS Continued WSG 1068 COOLING SYSTEM ...

Page 235: ...219 PINPOINT TEST C THE ENGINE DOES NOT REACH NORMAL OPERATING TEMPERATURE WSG 1068 COOLING SYSTEM ...

Page 236: ...220 SPECIFICATIONS General Specifications NOTE Bolt information on installation page this section Torque Specifications WSG 1068 CHARGING SYSTEM ...

Page 237: ... Test Battery Drain Test Symptom Chart Pinpoint Test A Generator Output Voltage Pinpoint Test B Voltage Output High Pinpoint Test C Indicator Lamp ON Engine Running Removal and Installation Generator Removal Generator Installation R Regulator Removal R Regulator Installation Specifications Torque Specifications Generator Parts Cross Reference Special Tools Page 236 236 237 238 238 239 239 239 239 ...

Page 238: ...d is typically higher in the winter than in the summer allowing for better battery recharge Battery Positive Voltage B Output The generator output circuit 38 BK O is supplied through the battery positive voltage B output connection to the battery and electrical system The B circuit is hot at all times This circuit is protected by a 12 gage fuse link I Circuit The I circuit or ignition switch 11572...

Page 239: ...223 WSG 1068 CHARGING SYSTEM DIAGNOSIS AND TESTING Recommended Accessory Wiring ...

Page 240: ... performing generator tests on the unit note conditions such as slow cranking dead battery charge indicator lamp stays on with engine running etc This information will aid in isolating the part of the system causing the symptom Voltage Regulator and Back of Governor ...

Page 241: ...the generator Generator output should be greater than values given in graph below If not refer to symptom chart in this Section Generator Voltage Test 1 Switch the tester to the voltmeter function 2 Connect the positive lead to the generator A terminal connector and the negative lead to ground 3 Turn off all electrical accessories 4 With the engine running at 2000 rpm check the generator voltage 5...

Page 242: ...not broken between the battery and the negative battery cable when connecting the meter If this happens the entire procedure must be repeated Connect the tester between the negative battery cable and the post The meter must be capable of reading milliamps and should have a 10amp capability NOTE If the meter settings need to be switched or the test leads need to be moved to another jack the jumper ...

Page 243: ...227 WSG 1068 CHARGING SYSTEM Symptom Chart ...

Page 244: ...omer Connections Wiring Schematic Normal Operation With voltage applied to the generator I circuit the regulator is activated allowing current to flow from the sense A circuit to generator field coil The generator then generates an internal AC current which is converted to a DC output by the rectifier assembly internal to the generator and is supplied to the battery through the B terminal The S st...

Page 245: ...229 WSG 1068 CHARGING SYSTEM ...

Page 246: ...sually inspect for obvious signs of terminal corrosion and electrical harness damage 2 Inspect for poor ground connections or backed out connector pins or damage to wiring 3 Visually inspect for and note auxiliary system connections not shown on the Recommended Customer Connections Wiring Schematic ...

Page 247: ...ect for and note auxiliary system connections not shown on the Recommended Customer Connections Wiring Schematic Normal Operation With voltage applied the high side of a charge warning indicator lamp the generator will momentarily will pull the warning lamp to ground and illuminate the indicator until the regulator is activated The S stator circuit NOT USED is used to feed back a voltage signal fr...

Page 248: ...bolts and tighten to 40 55 Nm 30 40 ftlb 3 Install the drive belt over the generator pulley 4 Relieve the tension of the drive belt tensioner and install the drive belt over tensioner 5 Connect generator voltage regulator wiring to the voltage regulator Tighten generator Battery Positive Voltage B wire attaching nut to 9 12 Nm 6 5 9 ftlb 6 Install wiring connector bracket 7 Install snow ice shield...

Page 249: ...minal screw 3 Depress the generator brushes in the generator brush holder Hold the generator brushes in position by inserting a standard size paper clip or equivalent through both the location hole in the voltage regulator and through the holes in the generator brush holders 4 Install the voltage regulator and generator brush holder to the generator with attaching screws Remove paper clip or equiv...

Page 250: ...234 WSG 1068 CHARGING SYSTEM SPECIFICATIONS Torque Specifications Generator Parts Cross Reference Special Tools ...

Page 251: ...Chart Pinpoint Test A Starter Lockout Relay Check Pinpoint Test B Starter Does Not Crank Component Tests Starter Drive and Flywheel Ring Gear Insection Removal and Installation Starter Motor Battery Cable Routing Starter Motor Removal Starter Motor Installation Specifications Torque Specifications General Specifications Special Tools Electronic Specifications Page 250 251 251 252 252 253 254 254 2...

Page 252: ... to the drive assembly engages the drive pinion gear to the flywheel ring rear 5 When the iron plunger core is all the way into the coil its contact disc closes the circuit between the battery and the motor terminals 6 The current flows to the motor and the drive pinion gear drives the flywheel and the engine crankshaft 7 As current flows to the motor the solenoid pull in coil is bypassed 8 The ho...

Page 253: ...STER BATTERY TO A DISCHARGED BATTERY 1 Position vehicles or equipment so jumper cables will reach being careful that vehicles do not touch WARNING MAKING THE FINAL CABLE CONNECTION COULD CAUSE AN ELECTRICAL SPARK NEAR THE BATTERY AND COULD CAUSE AN EXPLOSION REFER TO WARNING AT THE BEGINNING OF THE JUMP STARTING PROCEDURE WARNING WHEN SERVICING STARTER OR PERFORMING OTHER UNDERHOOD WORK IN THE VIC...

Page 254: ...f carbon pile until voltmeter indicates same reading as that obtained while starter cranked the engine The ammeter will indicate starter current draw under load Check this with value listed in Specifications on page 07 19 Bench Tests CAUTION Make sure that the starter is securely mounted in bench vise while energizing as starter will move or jump 1 Connect a fully charged battery Rotunda Starting ...

Page 255: ...rter will move or jump Wire Color Relay Terminal Circuit Description Lt Bl Pink 30 Voltage to Starter Red Lt Gn 86 Relay Coil Power Lt Gn Pr 85 To GCP Lt Bl Pink 87A Ignition Feed W Pink 87 Auxiliary Run Output NOTE All readings are made with connector attached to relay and back probing connector using a paper clip and fully charged battery ...

Page 256: ...THER WORK IN THE VICINITY OF THE STARTER BE AWARE THAT THE HEAVY GAUGE BATTERY INPUT LEAD AT THE STARTER SOLENOID IS ELECTRICALLY HOT AT ALL TIMES NOTE Be sure to disconnect battery negative cable before servicing starter 1 Inspect starting system for loose connections 2 If system does not operate properly note condition and continue diagnosis using the symptom chart WARNING WHEN WORKING IN AREA O...

Page 257: ...n the recommended wiring schematic 3 Greater than 4 Less than Normal Operation Terminals 30 and 87A of the starter lockout relay are normally closed while the ignition switch is in the start crank position and the engine rpm is less than 600 When the engine has reached 600 rpm or greater the GCP will ground the relay terminal 85 and open terminals 30 87A which will not allow the starter to be enga...

Page 258: ...als 30 and 87A of the starter lockout relay are normally closed while the ignition switch is in the start crank position and the engine rpm is less than 600 Battery voltage flows to the starter solenoid engaging the starter When the engine has reached 600 rpm or greater the GCP will ground the relay terminal 85 and open terminals 30 87A which will not allow the starter to be engaged while the engi...

Page 259: ...243 WSG 1068 STARTER SYSTEM ...

Page 260: ... starter switch Read and record the voltage The voltage reading should be 0 5 volts or less 5 If the voltage reading is 0 5 volts or less Refer to Starter Motor Motor Ground Circuit on page 14 6 If the voltage reading is greater than 0 5 volts indicating excessive resistance move the 73 Digital Multimeter negative lead to the starter motor B terminal and repeat the test If the voltage reading at t...

Page 261: ...ter switch and crank the engine Read and record the voltage reading The reading should be 0 5 volts or less 5 If the voltage drop is more than 0 5 volts clean the negative cable connections at the battery and body connections and retest 6 If the voltage drop is greater than 0 5 volts determine which way the current is flowing in the cable Connect the 73 Digital Multimeter positive lead to the end ...

Page 262: ...ywheel ring gear If the wear pattern is normal install the starter motor refer to Starter Motor Installation on page 07 18 2 If the A starter drive gear and the flywheel ring gear are not fully meshing or the gears are B milled or damaged replace the starter motor refer to Starter Motor Installation on page 07 18 Replace the flywheel ring gear ...

Page 263: ...st not be installed between the large round electrical terminal and the solenoid blade terminal at the starter If done voltage is generated to the solenoid by the spinning starter after release of the start key or button causing the starter to remain engaged resulting in failure ...

Page 264: ...ENANCE IS COMPLETE FAILURE TO FOLLOW THESE INSTRUCTIONS MAY RESULT IN PERSONAL INJURY 1 Disconnect the battery ground cable 2 Raise and support the vehicle or equipment 3 Remove the starter motor solenoid terminal cover 11N087 4 Disconnect the starter motor electrical connections 1 Remove the two nuts 2 Remove the battery cable 3 Remove the starter solenoid wire 5 Remove the nut and the starter mo...

Page 265: ...CTLY TO THE BATTERY MAKE SURE PROTECTIVE CAPS ARE IN PLACE WHEN MAINTENANCE IS COMPLETE FAILURE TO FOLLOW THESE INSTRUCTIONS MAY RESULT IN PERSONAL INJURY NOTE It is recommended that wiring service kit F2PZ 11K162 A be used which includes a 70 inch long 12 gauge wire a terminal nut a terminal cover four tie wraps and insulation instructions 1 Install the starter motor 1 Position the starter motor ...

Page 266: ...TEM 2 Connect the starter motor electrical connections 1 Position the starter solenoid wire 2 Position the battery cable 3 Install the nuts 3 Install the starter motor solenoid terminal cover 4 Connect the battery ground cable ...

Page 267: ...RTER SYSTEM SPECIFICATIONS Torque Specifications Electrical Specifications General Specifications Special Tools Special Service Tools called for by the procedures can be obtained by calling 1 800 ROTUNDA 1 800 768 8632 ...

Page 268: ...ttent MIL Malfunction Indicator Lamp MIL DTC Retrieval Procedure Diagnosis Using a Personal Computer Visual Inspection Intermittent Problems Symptom Charts Engine Control Module GCP Diagnostic Trouble Codes Removal and Installation Camshaft Position CMP Sensor Replacement Crankshaft Position CKP Sensor Removal Crankshaft Position CKP Sensor Installation Cylinder Head Temperature CHT Sensor Replace...

Page 269: ... requirements Configurable outputs available based on ECT RPM or MAP signals and customer requirements Starter lockout Auto crank Programmable overspeed protection Diagnostic software allows viewing of historical and active faults with on demand diagnostics to assist technicians and reduce equipment downtime The Engine Control Module GCP engine control system is a complete engine control system fo...

Page 270: ... voltage low oil pressure unauthorized tampering over cranking starter motor The GCP controls the following Fuel metering system Ignition timing On board diagnostics for engine functions The GCP constantly observes the information from various sensors The GCP controls the systems that affect engine performance The GCP performs the diagnostic function of the system It can recognize operational prob...

Page 271: ...ignal to the GCP The GCP uses this signal as a sync pulse to trigger the injectors in the proper sequence The GCP uses the CMP signal to indicate the position of the 1 piston during its power stroke The CMP uses a Hall Effect sensor to measure piston position This allows the GCP to calculate true sequential fuel injection SFI mode of operation If the GCP detects an incorrect CMP signal while the e...

Page 272: ... in the GCP and measures the voltage The signal voltage will be high when the engine is cold and low when the engine is hot By measuring the voltage the GCP calculates the engine coolant temperature Engine coolant temperature affects most of the systems that the GCP controls After engine start up the temperature should rise steadily to about 85 C 185 F It then stabilizes when the thermostat opens ...

Page 273: ...ximately 100mV to 900 mV when the engine is running in closed loop fuel control The Heated Oxygen Sensor HO2S voltage can be monitored on an IBM PC compatible computer with diagnostic software By monitoring the voltage output of the oxygen sensor the GCP calculates the pulse width command for the injectors to produce the proper combustion chamber mixture The 4 wire HO2S indicates whether the air f...

Page 274: ...ctuator The Throttle Position TP Sensor is a dual track rotary potentiometer that uses a variable resistive element which is packaged inside a plastic housing The resistive element varies linearly and is directly proportional to the throttle plate angle The GCP applies reference voltage and ground to the sensor and monitors the sensor s ratio metric output voltage to determine precise throttle pos...

Page 275: ...e exhaust gas The GCP changes the air fuel ratio to the engine by controlling the amount of time that the fuel injector is ON The best mixture to minimize exhaust emissions is 14 7 parts of air to 1 part of gasoline by weight which provides the most efficient combustion Because of the constant measuring and adjusting of the air fuel ratio the fuel injection system is called a closed loop system Th...

Page 276: ...ombustion by providing a spark to ignite the compressed air fuel mixture at the correct time To provide optimum engine performance fuel economy and control of exhaust emissions the GCP controls the spark advance of the ignition system Coil on plug ignition has the following advantages over a mechanical distributor system No moving parts Less maintenance Remote mounting capability No mechanical loa...

Page 277: ...uits unless instructed to do so When measuring voltages use only a digital voltmeter with an input impedance of at least 10 megohms Do not employ any non standard practices such as charging the battery with an arc welder Take proper precautions to avoid static damage to the GCP Refer to electrostatic Discharge Damage for more information Use of Circuit Testing Tools Do not use a test light to diag...

Page 278: ...262 WSG 1068 ENGINE CONTROLS Diagrams and Schematics Symbols ...

Page 279: ...263 WSG 1068 ENGINE CONTROLS GCP Power Distribution Box ...

Page 280: ...264 WSG 1068 ENGINE CONTROLS Wire Colors Revision Level The following wiring schematics are taken from the wiring diagram labeled below ...

Page 281: ...265 WSG 1068 ENGINE CONTROLS Power Distribution ...

Page 282: ...266 WSG 1068 ENGINE CONTROLS Ignition System ...

Page 283: ...267 WSG 1068 ENGINE CONTROLS Starting System ...

Page 284: ...268 WSG 1068 ENGINE CONTROLS Charging System ...

Page 285: ...269 WSG 1068 ENGINE CONTROLS Engine Controls Sensors 1 of 2 ...

Page 286: ...270 WSG 1068 ENGINE CONTROLS Engine Controls Sensors 2 of 2 ...

Page 287: ...271 WSG 1068 ENGINE CONTROLS Fuel Injectors ...

Page 288: ...272 WSG 1068 ENGINE CONTROLS Engine Controls Actuator Data Link Connector DLC WSG 1068 ENGINE CONTROLS ...

Page 289: ...273 Engine Controls Dry Fuel EPR ...

Page 290: ...274 WSG 1068 ENGINE CONTROLS Engine Component Locator View ...

Page 291: ...ocated in this section Diagnostic Trouble Codes can be cleared from memory with a laptop computer or by turning the ignition key to the OFF position and removing the FORD system main power fuse F3 for 15 seconds If more than one DTC is detected begin with the lowest number DTC and diagnose each problem to correction unless directed to do otherwise by the fault tree The DTC s are numbered in order ...

Page 292: ...engine RPM will be limited to a maximum of 800 RPM If the Force to Idle is active it will remain active until the active DTC goes away DTC 2122 FPP1 high voltage DTC 2123 FPP1 low voltage DTC 2128 FPP2 high voltage DTC 2127 FPP2 low voltage DTC 2115 FPP1 higher than IVS limit DTC 2139 FPP1 lower than IVS limit DTC 2116 FPP2 higher than IVS limit DTC 2140 FPP2 lower than IVS limit DTC 2126 FPP1 hig...

Page 293: ...flashing When extracting DTCs via the MIL the following apply The flashing MIL is on for 0 4 second and off for 0 4 second The MIL is off for 1 2 seconds between digits of three digit DTCs The MIL is off for 2 4 seconds between DTCs Each DTC repeats 3 times before the next stored DTC begins flashing Up to 6 DTCs can be stored Once all stored DTCs are flashed the process repeats with the first stor...

Page 294: ... Hook up For connection to a laptop use kit PN 5080050 Connect USB port on the back of the laptop computer Connect interface cable to the to the diagnostic connector on the engine harness Laptop Computer USB Connection Diagnostic Connector ...

Page 295: ...ble Click CD ROM drive letter This will display the contents of the CD as shown Double click FPP Display icon You will now see a welcome screen Click next A screen will pop up telling you the name of the destination folder Click next You will now see a screen telling you it is ready to install the software Click next ...

Page 296: ...tem in a folder called FPP Display Refer now to Using Technicians GCP Software in this Section Using GCP Software Menu Functions You can begin using the technicians GCP software after installation by clicking Start Programs GCP Display GCP Display as shown Type in the Password which can be found on the label of the CD ROM Place the ignition key in the ON position The GCP system Gauge screen should...

Page 297: ...wing useful information If the fault occurred during the current key cycle If the fault caused current engine shutdown How many key cycles since the fault was active Snapshot Data explained later Flight Data Recorder explained later The DTC Dialogue Box also allows you to clear a single fault by clicking on the Clear This Fault button and it allows you to clear all faults by clicking on the Click ...

Page 298: ...ading Sensor Actuator Values Most applicable sensor and actuator values are displayed on the Gauges Screen The display shows the voltage the FORD system GCP is reading and for sensors the sensor value in engineering units This is one of three main screens GAUGES FAULTS AND RAW VOLTS The GAUGES screen shows the following Manifold Absolute Pressure MAP Engine Coolant Temperature ECT Intake Air Tempe...

Page 299: ...xis You may change the desired time interval and sample interval for the plot by stopping the plot and typing in a new intervals The plot can be saved to the PC by stopping the plot and clicking the SAVE button When saving a plot you will have to type in a filename Plot files can later be viewed with the edis_saplot software located in the Windows Start Programs FPP_Dis folder or the data can be v...

Page 300: ...ling Ignition Ouputs To disable the ignition system for an individual cylinder use the mouse to highlight the Spark Kill button and select the desired coil The spark output can be re enabled by using the mouse to highlight the Spark Kill button and selecting Normal If the engine is running below 1000 RPM the spark output will stay disabled for 15 seconds and then re set If the engine is running ab...

Page 301: ...e 1000 RPM the injector driver will stay disabled for 5 seconds and then re set Record the change in rpm or closed loop multiplier while each driver is disabled Throttle Test To select this test mode the engine must be off but the key must be in the ON position The DBW Test mode allows the technician to control the throttle directly without the engine running with the foot pedal or entering a numb...

Page 302: ... The RAW VOLTS screen shows actual voltage readings from various circuits Use the keys at the upper left corner or the page command to toggle the three main screens GAUGES FAULTS AND RAW VOLTS NOTE F9 key will toggle to the last screen you were on ...

Page 303: ...raw If no evidence of a problem is found after visual inspection has been performed proceed to Diagnostic System Check Intermittent Problems NOTE An intermittent problem may or may not turn on the MIL or store a DTC Do not use the DTC charts for intermittent problems The fault must be present to locate the problem NOTE Most intermittent problems are caused by faulty electrical connections or wirin...

Page 304: ...at idle replace the pedal NOTE Items listed in the possible cause column generally do not set a diagnostic trouble code DTC orilluminate the MIL light NOTE EDI engines are used in many different applications and equipment When performing any system diagnosis be aware of any OEM inputs or equipment monitoring devices that may have an effect on the engine s performance or any of the engine s operati...

Page 305: ...289 WSG 1068 ENGINE CONTROLS Engine Performance While Under Load ...

Page 306: ...290 WSG 1068 ENGINE CONTROLS Engine Concerns ...

Page 307: ...nction Indicator Lamp MIL the following sequence will be flashed 123 will flash 3 times to indicate the beginning of the flash code display sequence Any active DTC s will flash 3 times each 123 will flash 3 times indicating the end of the code display sequence If code 123 is the only code present the system does not have any active codes all systems are working fine If an active DTC is present ref...

Page 308: ...t to Ground 265 Injector Coil Shorted 267 Injector Loop Open or Low side short to Ground 268 Injector Coil Shorted 270 Injector Loop Open or Low side short to Ground 271 Injector Coil Shorted 273 Injector Loop Open or Low side short to Ground 274 Injector Coil Shorted 276 Injector Loop Open or Low side short to Ground 277 Injector Coil Shorted 279 Injector Loop Open or Low side short to Ground 280...

Page 309: ...ow 1176 Megajector internal actuator fault detection 1177 Megajector internal circuitry fault detection 1178 Megajector internal comm fault detection 1181 Fuel run out longer than expected 1182 Fuel impurity level high 1183 Megajector autozero lockoff failed 1311 Misfire detected 1312 Misfire detected 1313 Misfire detected 1314 Misfire detected 1315 Misfire detected 1316 Misfire detected 1317 Misf...

Page 310: ...2121 FPP1 lower than FPP2 2122 FPP1 high voltage 2123 FPP1 low voltage 2125 FPP2 invalid voltage and FPP1 disagrees with IVS 2126 FPP1 higher than FPP2 2127 FPP2 low voltage 2128 FPP2 high voltage 2130 IVS stuck at idle FPP1 2 match 2131 IVS stuck off idle FPP1 2 match 2135 TPS1 2 simultaneous voltages out of range 2139 FPP1 lower than IVS limit 2140 FPP2 lower than IVS limit 2229 BP high pressure...

Page 311: ...e a new o ring seal Lubricate o ring with clean engine oil prior to installation Tighten bolt to 7 Nm 62 lb in Crankshaft Position CKP Sensor Removal 1 Disconnect battery ground cable refer to section 6 2 Remove or disconnect any component to allow access and removal of the CKP Sensor 3 Disconnect CKP electrical connector 4 Remove plug 5 Install special tool 303 507 and turn the crankshaft pulley ...

Page 312: ...he new sensor and is not available separately 2 Adjust the CKP sensor with the alignment tool and tighten 2 bolts Tighten to 7 Nm 62 lb in 3 Connect CKP sensor electrical connector 4 Remove the M6 bolt 5 Remove special tool 303 507 6 Install the plug Tighten to 10 Nm 89 lb in 7 Reconnect or install any other component that was removed 8 Reconnect battery cable refer to section 6 ...

Page 313: ... Reverse procedure to install Tighten CHT sensor to 12 Nm 9 lb ft Heated Oxygen Sensor HO2S Replacement 1 Disconnect battery ground cable refer to section 6 2 Remove or disconnect any component to allow access and removal of the HO2S Sensor 3 Disconnect HO2S electrical connector NOTE Use penetrating oil to assist in removal 4 Remove HO2S sensor using special tool 303 476 5 Reverse procedure to ins...

Page 314: ...sor must be installed 4 Remove bolt and KS sensor and discard sensor 5 Reverse procedure to install Install a new KS sensor Tighten bolt to 20 Nm 15 lb ft Temperature Manifold Absolute Pressure TMAP Sensor Replacement 1 Disconnect battery ground cable refer to section 6 2 Remove or disconnect any component to allow access and removal of the TMAP sensor 3 Disconnect TMAP electrical connector 4 Remo...

Page 315: ...299 WSG 1068 ENGINE CONTROLS SPECIFICATIONS ...

Page 316: ...n Nomenclature for Bolts Bolt Strength Identification Hex Nut Strength Identification Other Types of Parts English Metric conversion Decimal and Metric Equivalents Torque Conversion J1930 Terminology List Page 315 315 316 316 317 318 319 319 320 09 ...

Page 317: ...e identified with markings or numbers indicating the strength of the fastener These markings are described in the pages that follow Attention to these markings is important to ensure that the proper replacement fasteners are used Further some metric fasteners especially nuts are colored blue This metric blue identification is in most cases a temporary aid for production start up and color will gen...

Page 318: ...asing number of slashes represent increasing strength Metric System Metric mm bolts Identification class numbers correspond to bolt strength increasing numbers represent increasing strength Common metric fastener bolt strength property are 9 8 and 10 9 with the class identification embossed on the bolt head HEX NUT STRENGTH IDENTIFICATION ...

Page 319: ...PES OF PARTS Metric identification schemes vary by type of part most often a variation of that used of bolts and nuts Note that many types of English and Metric fasteners carry no special identification if they are otherwise unique ...

Page 320: ...304 WSG 1068 METRICS ENGLISH METRIC CONVERSION ...

Page 321: ...305 WSG 1068 METRICS DECIMAL AND METRIC EQUIVALENTS TORQUE CONVERSION ...

Page 322: ...RMINOLOGY LIST Certain Ford Component names have been changed in this Service Manual to conform to Society of Automotive Engineers SAE directive J1930 SAE J1930 standardizes automotive component names for all vehicle manufacturers ...

Page 323: ...307 WSG 1068 METRICS ...

Page 324: ...308 WSG 1068 METRICS ...

Page 325: ...309 WSG 1068 METRICS ...

Page 326: ...310 WSG 1068 METRICS ...

Page 327: ...311 WSG 1068 METRICS ...

Page 328: ...312 WSG 1068 METRICS ...

Page 329: ...313 WSG 1068 METRICS ...

Page 330: ...314 ...

Page 331: ...315 EDI Worldwide Service Engine Distributors Inc 400 University Court Blackwood NJ 08012 Service Warranty 1 800 220 2700 1 856 228 7298 1 856 228 5657 fax parts service 1 856 228 5531 fax sales ...

Reviews: