background image

Color Digital Camera

Color Digital Camera

Printed in Japan

99.09-.1

4011118

S01-00

Digital Camera Utility Programs

Photo!3

Photo File Uploader3

User's Guide

Photo!3
Photo File Uploader3

User's Guide

4010706

BK

cover-F Rev.0

4010706

Y

cover-F Rev.0

4010706

M

cover-F Rev.0

4010706

C

cover-F Rev.0

Summary of Contents for A882401

Page 1: ...inted in Japan 99 09 1 4011118 S01 00 Digital Camera Utility Programs Photo 3 Photo File Uploader3 User s Guide Photo 3 Photo File Uploader3 User s Guide 4010706 BK cover FRev 0 4010706 Y cover FRev 0 4010706 M cover FRev 0 4010706 C cover FRev 0 ...

Page 2: ... as a result of accident misuse or abuse of this product or unauthorized modifications repairs or alterations to this product SEIKO EPSON CORPORATION and its affiliates shall not be liable against any damages or problems arising from the use of any options or any consumable products other than those designated as Original EPSON Products or EPSON Approved Products by SEIKO EPSON CORPORATION EPSON i...

Page 3: ...ii L Proof Sign off BLE H Kato E Omori F Fujimori SEI M Kauppi R4C4410 Rev C A5 size FRONT FM 2 14 00 Pass 3 ...

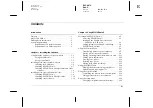
Page 4: ...ling EPSON Photo File Uploader3 1 10 Installing other software 1 10 Chapter 2 Using EPSON Photo 3 Working with EPSON Photo 3 2 1 Accessing EPSON Photo 3 2 1 Setting up the Shutter Press feature for Windows 98 USB users 2 3 Getting information through online help 2 4 EPSON Photo 3 menus 2 5 Using the Camera Menu 2 6 Transferring photos to your computer 2 7 Placing photos in your documents 2 9 Erasi...

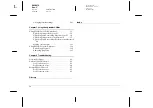
Page 5: ...ding audio recording files from your PC 3 4 Uploading images from your Macintosh 3 7 Uploading audio recording files from your Macintosh 3 9 Making screen copies 3 11 Using EPSON Program Uploader 3 14 Uploading programs 3 14 Removing programs 3 15 Chapter 4 Troubleshooting Software Problems 4 1 Uninstall EPSON Photo 3 4 3 For Windows users 4 3 For Macintosh users 4 4 Reinstall EPSON Photo 3 4 5 Fo...

Page 6: ...to File Uploader3 allows you to upload image files and audio recording files stored in your computer or capture screen shots on the computer screen and save them in the digital camera s memory EPSON Program Uploader allows you to upload optional programs from the computer to the camera or delete programs from the camera You can convert image files into various formats such as JPEG and Bitmap Files...

Page 7: ... Information Online help also provides information about EPSON Photo 3 settings To set upand use the digital camera see the user s guide of your camera System Requirements Requirements for serial connection PCs Macintosh computers 486 processor or higher Serial port with standard RS 232C interface and a communication speed of 19200 bps or higher At least 16 MB RAM 32 MB for Windows 98 Hard disk dr...

Page 8: ...or higher USB port TYPE A receptacle At least 32 MB RAM Hard disk drive with at least 40 MB of free space VGA monitor with at least 16 color display Microsoft Windows 98 pre installed Power PC G3 processor Apple Macintosh with built in USB port 24 MB RAM Hard disk drive with at least 40 MB free space Monitor with minimum resolution of 640 480 Macintosh OS 8 1 or later OS 8 1 requires that iMac Upd...

Page 9: ...4 Introduction L Proof Sign off BLE H Kato E Omori F Fujimori SEI M Kauppi R4C4410 Rev C A5 size INTRO FM 2 14 00 Pass 3 ...

Page 10: ... EPSON Photo 3 first You cannot install other software before EPSON Photo 3 is installed When you install EPSON Photo 3 the EPSON Program Uploader utility is also installed automatically Connecting the Camera to Your Computer You can connect your camera to a PC or Macintosh with a serial cable or the included USB cable See the instructions in this section Note When the camera is connected to your ...

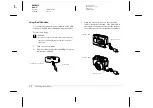
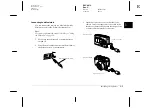
Page 11: ...aution Be sure to use the USB cable that comes with your camera to avoid damaging the camera s interface connector 1 Turn on your computer 2 PlugthecableconnectorintotheUSBportonyour computer or USB hub 3 Open the connector cover on the side of the camera Insert the other end of the USB cable to the interface connector Make sure the shape of the cable connector fits the interface connector USB por...

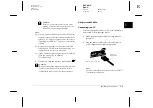
Page 12: ...ends connecting it as explained above to secure the connection If your camera does not work properly when connected to the hub see page 4 3 in Chapter 4 Troubleshooting 4 If necessary turn the camera s dial switch to c Caution Keep your camera and computer away from potential sources of electromagnetic interference such as loudspeakers or base units of cordless telephones Using a serial cable Conn...

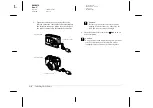
Page 13: ...e shape of the cable connector fits the interface connector c Caution Be sure to position the cable correctly before pushing it into the connector Otherwise the cable and connector may be damaged 4 Turn the camera s dial switch to and turn on your computer c Caution Keep your camera and computer away from potential sources of electromagnetic interference such as loudspeakers or base units of cordl...

Page 14: ...ect to a Macintosh with a USB cable see Using the USB cable on page 1 2 1 Make sure the camera and your computer are turned off 2 Plug the serial cable connector into the modem or the printer port on your computer 3 Open the connector cover on the side of the camera Insert the other end of the cable to the interface connector Make sure the shape of the connector fits the interface connector Macint...

Page 15: ...recognize your camera c Caution Keep your camera and computer away from potential sources of electromagnetic interference such as loudspeakers or the base units of cordless telephones Installing Software for Windows Users When you use the USB cable to connect your camera and computer install the USB driver first and then EPSON Photo 3 When you use the serial cable you install only EPSON Photo 3 No...

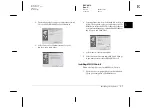
Page 16: ...ct the Specify a location check box as shown below Then type in or browse and select the CD ROM drive letter the EPSON folder the folder of your preferred language and the Win 98 folderas the location and click Next 5 Follow the on screen instructions 6 After installation iscomplete clickFinish Thengo to the next section to install EPSON Photo 3 Installing EPSON Photo 3 Follow the steps below to i...

Page 17: ...install more software go to the next section Installing EPSON Photo File Uploader3 and other software In addition to EPSON Photo 3 your software CD contains other software to expand the capabilities of your camera such as EPSON Photo File Uploader3 Follow the steps below to install the software of your choice See your software documentation for a description of the available software 1 Make sure E...

Page 18: ...ftware for Macintosh Users Installing EPSON Photo 3 Follow the steps below to install EPSON Photo 3 1 Turn on the computer andinsert the included CD in the CD ROM drive 2 Double click the EPSON icon that appears on your computer s desktop Then double click the EPSON Photo 3 folder In some locations the EPSON Photo 3 foldermay contain multiple language versions of the software Double click the fold...

Page 19: ...Uploader3 Install icon to start the installation program Follow the on line screen instructions Installing other software In addition to EPSON Photo 3 and EPSON Photo File Uploader3 your software CD contains other software to expand the capabilities of your camera Follow the steps below to install the software of your choice See your software documentation for a description of the available softwa...

Page 20: ... your camera Working with EPSON Photo 3 Once your camera and computer are connected and turned on youare ready to startworkingwith EPSON Photo 3 If you have not yet installed EPSON Photo 3 in your computer see Chapter 1 Installing the Software to install it Note If you do not set your camera s clock before connecting it to the computer the camera s time and date is automatically set to that of the...

Page 21: ...oto 3 in the list and click OK For Macintosh users Double click the EPSON Photo 3 Ver 1 icon in the EPSON Photo 3 Ver 1 program group or folder Opening EPSON Photo 3 from an application program From a TWAIN compliant application Choose EPSON Photo 3 Ver 1 for Windows or Photo 3 Ver 1 for Macintosh as the TWAIN data source on your application s File menu then acquire an image From an OLE2 compliant...

Page 22: ...ameras icon appears on the control panel and your camera is listed in the Scanners and Cameras Properties dialog box as shown below Assigning an application to the shutter button After you install applications that support Shutter Press events such as EPSON Photo 3 you need to select one of those applications for the event If you want to use your camera s shutter button with EPSON Photo 3 as the s...

Page 23: ...ct an application when the shutter button is pressed Some applications do not support linkage to digital cameras Linkage is available only with the applications that appear in the Send to this application list 3 Close the dialog box by clicking the OK button Getting information through online help EPSON Photo 3 s online help can answer most of your questions about this software To access online he...

Page 24: ...ng this time otherwise communication may be interrupted When you connect the camera and computer with the USB cable star icons always move across the display panel because the camera and computer are always communicating If the Setup menu appears when you open EPSON Photo 3 your camera and computer may not be connected properly Connect the camera to your computer and make sure your camera s dial s...

Page 25: ... camera s memory card Controls menu Displays camera settings such as image quality and flash control You can change some of the camera settings and also take pictures using the Live Preview window on your computer Note To take a picture or use the Live Preview feature make sure to turn the dial switch to or before accessing EPSON Photo 3 If your camera is the PhotoPC 800 open the lens cover Setup ...

Page 26: ...port you are using To change the port setting see Changing the communication port on page 2 19 Transferring photos to your computer There are two ways to transfer or save your pictures to your computer You can click the Save To Folder button to create a JPEG file that is named automatically Or you can click the Export Photos button to name the file yourself and save it as a JPEG BMP PCX or PICT fo...

Page 27: ... Export Photos button is only available when you open EPSON Photo 3 directly You can name the files and choose between the following file formats JPEG BMP PCX or PICT for Macintosh only Follow the steps below to save photos in your computer with this button 1 Open EPSON Photo 3 as directed in Opening EPSON Photo 3 directly on page 2 2 2 In the Camera menu click the thumbnails of the images you wan...

Page 28: ...s not work you can always insert the photo by first saving it and then opening it from your application Inserting photos directly into documents You can add pictures directly to your documents with the Get Photo button or the Get Photos button or you can use the drag and drop method Windows only Note Depending on the application you use the Get Photo button may appear as the Get Photos button You ...

Page 29: ...cation that supports OLE2 object linking and embedding 1 Make sure EPSON Photo 3 is open 2 Start your word processor or other application 3 Open the document or file where you want to use the photo 4 Arrange your screen so that both the application window and the EPSON Photo 3 window can be seen 5 In the EPSON Photo 3 Camera menu click the thumbnail of the image you want to use 6 Drag the photo fr...

Page 30: ...you want to insert the photo 6 Choose the Insert Picture or Import File command The command name may vary depending on your application It may appear on the File menu the Insert menu or another menu 7 Enter the file name in the box that appears or use the list to locate and select your photo 8 Click OK The photo appears in your document Erasing selected pictures from memory card You can erase sele...

Page 31: ...ation The following information is always displayed Date and time the photo was taken Image size Camera model Camera ID Directory and file number Aperture The following information is displayed when you use these features Digital zoom 2 0 Image Quality HyPict Super fine Fine or Standard Flash state Macro state Locked state File format Design rule for camera file system or when you rotate the photo...

Page 32: ...ea The size of the photo is one half the width and height of your monitor s screen resolution For example if your monitor is set to 800 600 mode the view of the photo will be 400 300 in Fine and 400 150 in Fine Panorama Note The View Photo button is disabled when multiple thumbnails are selected Rotating your photos You can rotate photos clockwise or counterclockwise without lowering image guality...

Page 33: ...cordings For instructions see Using the Camera Menu on page 2 6 The major difference between the Folder menu and the Camera menu is that in the Folder menu you can open a dialog box with the Browse button to find the folder containing the images you downloaded or saved Also you can upload EPSON Photo file format images from your computer to your camera using the Upload Copy button Note EPSON Photo...

Page 34: ...ile Uploader3 on page 3 1 Uploading and copying photos Click the Upload Copy button to upload selected photos to a memory card installed in your computer or camera You can also copy photos to another folder with this button The following dialog box appears after clicking this button Select the transfer method then click the OK button Images are added to the memory card in the camera or to the sele...

Page 35: ...enu allows you to see a live preview on your computer screen take photos from your computer and change camera settings When the camera is not connected to your computer this menu is not accessible See Connecting the Camera to Your Computer on page 1 1 to connect your camera correctly Note Makesuretoturnthecamera sdialswitchto or before starting EPSON Photo 3 If your camera is the PhotoPC 800 open ...

Page 36: ...flash mode Usethearrowin theControlmenu sFlashboxto select one of the following flash mode settings Off Automatic Red eye Reduction Forced Slow sync Note The red eye reduction setting is available only on the PhotoPC 850Z When taking photos in the Full Auto camera mode slow synchro is not available See the user s guide of your camera for details Setting the self timer Select the Self Timer check b...

Page 37: ...nd shooting lights flash green then turn off 4 When the light stops flashing and turns green the image is saved and you can take another picture When you want to take picture while displaying your image in the Live Preview window click the Start button in the Live Preview box Then click Take a Picture button to take a picture Note The live preview feature consumes much battery power so use of the ...

Page 38: ...eed options You can also test the connection and establish communication by clicking the Test Connection button Connection information appears in the Computer Connection window Note Make sure the camera s dial switch is set to Do not change the Port and Speed settings from Auto unlessyouknowtheconfigurationof theserialportyou want to use If you change the Port and Speed settings you may lose the c...

Page 39: ... 7 5 3 or higher When you select the USB port you cannot change communication speed Checking the current status of the camera The Computer Connection window displays the current status of the camera and its connection to the computer If there is a problem with the connection EPSON Photo 3 provides information in this window to help you solve the problem Follow these steps if you get an error messa...

Page 40: ...The camera s clock will continue to keep time accurately as long as power is being supplied to your camera If your batteries run out you must replace them within 30 minutes to avoid losing the time settings in your camera Follow these steps to set the camera s clock 1 In the Setup menu click the Set Time button The Set Camera Time and Date dialog box appears 2 Use the arrows to change the time and...

Page 41: ...2 22 Using EPSON Photo 3 L Proof Sign off BLE H Kato E Omori F Fujimori SEI M Kauppi R4C4410 Rev C A5 size PHT3 FM 2 14 00 Pass 3 ...

Page 42: ...oftware included on the CD ROM shipped with your camera allows you to convert any JPEG or BMP image to the EPSON Photo file format and upload it to a memory card It also allows you to covert any WAV or AIFF for Macintosh only audio recording to the EPSON Photo file format and upload it to the memory card You can also use this software to make and save screen shots of everything displayed on the co...

Page 43: ...load images to the memory card in your camera from a PC running Windows 95 Windows 98 or Windows NT version 4 0 or later To upload images from a Macintosh see Uploading images from your Macintosh on page 3 7 1 Make sure EPSON Photo 3 is not running on your computer Connect your camera to the computer See Connecting the Camera to Your Computer on page 1 1 2 Open your EPSON Photo File Uploader3 prog...

Page 44: ...e all the files from the Selected Files List box These buttons are disabled when more than one file is selected If you want to rearrange the uploading order select the image you want to rearrange then click the or Sort arrow Note If you want to preview a selected image and confirm its size select the Preview check box 5 For each file in the Selected Files List box select an image size from the Ima...

Page 45: ...ing click Cancel Uploading audio recording files from your PC Follow these steps to upload audio recording files from a PC to the memory card in your camera Make sure that Windows 95 Windows 98 or Windows NT version 4 0 or later runs on the PC To upload audio recording files from a Macintosh see Uploading audio recording files from your Macintosh on page 3 9 1 Make sure EPSON Photo 3 is not runnin...

Page 46: ... audio recording file 5 Click Sound Select to select an audio recording file you want to link to the image file Select the foldercontainingtheaudiorecordingfilefromthe Look in list Then double click your selected folder File names appear in the box 6 Select the audio recording file in the box and click Open Note When you select the audio recording file and click Test Play you can play back the aud...

Page 47: ...ith the speaker icon and click Sound Delete 8 Turn the camera s dial switch to 9 Click Start to begin uploading the audio recording files as well as the image files EPSON Photo 3 starts and shows thumbnails of uploading images and audio recordings Pressing the ESC key stops uploading Press Yes to stop or No to continue the operation Note You can listen to the linked audio recording by clicking the...

Page 48: ... program group or folder The EPSON Photo File Uploader dialog box appears 3 Click Add The Select Files dialog box appears Double click thefoldercontaining the imagesyou want to upload then select each file you want to upload and click Select When you finish selecting image files click Done to close the Select Files dialog box The selected images appear in the Selected File List box in the order th...

Page 49: ...s Then click Browse and select the folder where you want to save the files Click OK The folder you selected is displayed to the right of the Browse button 6 Turn the camera s dial switch to 7 Click Upload to start uploading the photos EPSON Photo 3 starts and shows thumbnails of uploading images Pressing the command and period keys together stops uploading Press OK to stop the operation If you sel...

Page 50: ... 2 Double click the EPSON Photo File Uploader3 icon in the EPSON Photo File Uploader3 folder The EPSON Photo File Uploader dialog box appears 3 Select the image files and add them to the Selected File List box For more information about file selection see Uploading images from your Macintosh on page 3 7 4 Select the image file in the Selected File List box to link the sound file 5 Click Sound Sele...

Page 51: ...udio recording file and click 7 Repeat steps 4 to 6 to link the audio recording files to image files to upload The speaker icon appears at the left of the image file names in the Selected File List box Note When you select the image file with the speaker icon and click Play Sound you can play back the linked audio recording If you want to cut the link between the image file and audio recording fil...

Page 52: ...lick Cancel 12 When the dialog box prompts you to select your action click Upload Photo and Audio To upload the photos only click Upload Photo Only Clicking Abort cancels uploading Making screen copies You can make copies or screen shots of the images that appear on your computer screen then save those images to your camera s memory card This allows you to include documents you make with your comp...

Page 53: ...using the Hot Key settings box Select the ALT CTRL or SHIFT check box then select a key from the hot key list The default hot key is the F5 key 6 Click Start to register the key combination When the key combinationisregistered theStart button changes to a Stop button The key combination remains registered only for the current session Pressing the Stop button erases the hot key combination 7 Start ...

Page 54: ...king screen shots Follow these steps to make screen shots on your Macintosh 1 Make sure EPSON Photo 3 is not running on your computer Connect your camera to the computer 2 Double click the EPSON Photo File Uploader3 icon The EPSON Photo File Uploader window appears 3 Start your application and open the file you want to capture then press SHIFT COMMAND 3 on your computer keyboard Your Macintosh nam...

Page 55: ...ms or you cannot upload them correctly The incorrectdial switchoperation results in malfunction of the camera You can also upload programs directly from the memory card in your camera See the user s guide of your camera for instructions 1 Make sure EPSON Photo 3 is not running on your computer Connect your camera to the computer 2 Turn the camera s dial switch to 3 Click or double click the EPSON ...

Page 56: ...m You can now use the programsin your camera See the user s guide of your camera for instructions on opening the programs Removing programs Follow these steps to remove optional programs from the camera Note You can also remove programs by using the camera itself See the user s guide of your camera for instructions 1 Make sure EPSON Photo 3 is not running on your computer Connect your camera to th...

Page 57: ...oof Sign off BLE H Kato E Omori F Fujimori SEI M Kauppi R4C4410 Rev C A5 size UPLOADER FM 2 14 00 Pass 3 6 Click OK The selected programs are removed from the camera and from the Applications in Camera list 7 Click Close to quit the program ...

Page 58: ...nect the camera to your computer and open EPSON Photo 3 Make sure the cable is connected correctly as described in Connecting the Camera to Your Computer on page 1 1 Make sure the camera s dial switch is set to When you use the Controls menu make sure to set the dial switch to or If your camera is the PhotoPC 800 open the lens cover Make sure the batteries have enough power and are installed corre...

Page 59: ... to the computer Make sure the cable is connected correctly as described in Connecting the Camera to Your Computer on page 1 1 Make sure the camera s dial switch is set to When you use the Controls menu make sure to set the dial switch to or If your camera is the PhotoPC 800 open the lens cover Make sure the batteries have enough power and are installed correctly Make sure the computer has enough ...

Page 60: ...directly to the USB port of your computer Use other USB hubs if you have any Uninstall EPSON Photo 3 For Windows users Before you reinstall or upgrade EPSON Photo 3 remove the program currently installed Uninstallation procedures differ slightly depending on the connecting cable used When connected with a USB cable 1 Connect the camera and computer with USB cable then turn the camera s dial switch...

Page 61: ...rt point to Programs point to EPSON Photo 3 Ver 1 then click Uninstall 2 Click OK to uninstall 3 After the program is uninstalled click OK 4 Restart the computer For Macintosh users Before you reinstall or upgrade EPSON Photo 3 remove the program currently installed 1 Turn on the computer andinsert the includedCD in the CD ROM drive 2 Locate and double click the Photo 3 Installer Part1 icon to sta...

Page 62: ... USB cable on page 4 3 and When connected with a serial cable on this page to remove the program Then see Installing the USB driver on page 1 6 and Installing EPSON Photo 3 on page 1 7 to reinstall the USB driver and the program When connected with a serial cable See When connected with a serial cable on this page to remove the program Then see Installing EPSON Photo 3 on page 1 7 to reinstall the...

Page 63: ...4 6 Troubleshooting L Proof Sign off BLE H Kato E Omori F Fujimori SEI M Kauppi R4C4410 Rev C A5 size TRBLE FM 2 14 00 Pass 3 ...

Page 64: ...the object in a new location Design rule for camera file system Recording standard for image files This standard has been established by Japan Electronic Industry Development Association JEIDA Exif2 1 Standard format for audio image files This standard has been established by Japan Electronic Industry Development Association JEIDA grayscale Images represented with various shades of gray in additio...

Page 65: ...per inch dpi or pixels per inch ppi thumbnails Small representations of images TWAIN A type of interface protocol that makes input peripherals such as scanners or digital cameras easier to access directly from application programs USB A Universal Serial Bus A hardware interface for connecting low speed peripherals such as a keyboard mouse scanner or printer to the computer USB hub A device that no...

Page 66: ...tos 2 11 Export Photos 2 8 2 10 2 14 Get Photo 2 9 Get Photos 2 9 Photo Info 2 12 rotation 2 13 Save To Folder 2 7 2 15 Select All 2 11 Set Time 2 19 2 21 Stop 2 18 Take a Picture 2 18 Test Connection 2 19 2 20 Upload Copy 2 14 2 15 View Photo 2 13 C Cables serial 1 3 to 1 6 USB 1 2 to 1 3 Camera clock 2 21 Camera ID 2 12 2 21 Camera menu 2 6 2 6 to 2 13 Clock setting 2 21 Communication port 2 19 ...

Page 67: ...enu 3 11 to 3 13 uploading images and audio recordings 3 1 to 3 13 Upload To Camera menu 3 2 to 3 6 EPSON Program Uploader accessing 3 14 installing 3 14 using 3 14 to 3 16 Erasing photos 2 11 to 2 12 F Finding the folder containing your photos 2 15 Flash settings 2 16 Folder menu 2 6 2 14 to 2 16 H Help 2 4 I Image quality settings 2 16 Image selection window 2 6 2 14 Inserting a picture by impor...

Page 68: ...moving programs 3 15 Rotating photos 2 13 S Saving photos to a folder 2 7 Screen Capture menu 3 11 to 3 13 Self timer settings 2 16 Serial cable 1 3 to 1 6 Serial communication speed 2 20 Setup menu 2 6 2 19 to 2 21 Shutter activating from the computer 2 18 Shutter button assigning an application to 2 3 Shutter Press feature for Windows 98 USB users 2 3 System requirements for serial connection wi...

Page 69: ...ass 3 images from your Macintosh to the memory card 3 7 to 3 8 images from your PC to the memory card 3 2 to 3 4 photos to the memory card 2 15 programs to the camera 3 14 Upload To Camera menu 3 2 to 3 6 USB cable 1 2 to 1 3 installing the driver in Windows 98 1 6 V Viewing photo information 2 12 photos 2 13 ...

Page 70: ... NSW Phone 2 9903 9000 Fax 2 9903 9177 EPSON SINGAPORE PTE LTD No 1 Temasek Avenue 36 00 Millenia Tower Singapore 039192 Phone 065 33 77 911 Fax 065 33 41 185 EPSON HONG KONG LTD Rooms 4706 10 47 F China Resources Bldg 26 Harbour Road Wanchai Hong Kong Phone 2585 4300 Fax 2827 7083 EPSON TAIWAN TECHNOLOGY TRADING LTD 10F No 287 Nanking E Road Sec 3 Taipei Taiwan R O C Phone 02 717 7360 Fax 02 712 ...

Page 71: ...inted in Japan 99 09 1 4011118 S01 00 Digital Camera Utility Programs Photo 3 Photo File Uploader3 User s Guide Photo 3 Photo File Uploader3 User s Guide 4010706 BK cover FRev 0 4010706 Y cover FRev 0 4010706 M cover FRev 0 4010706 C cover FRev 0 ...

Reviews: