Assembling the Printer
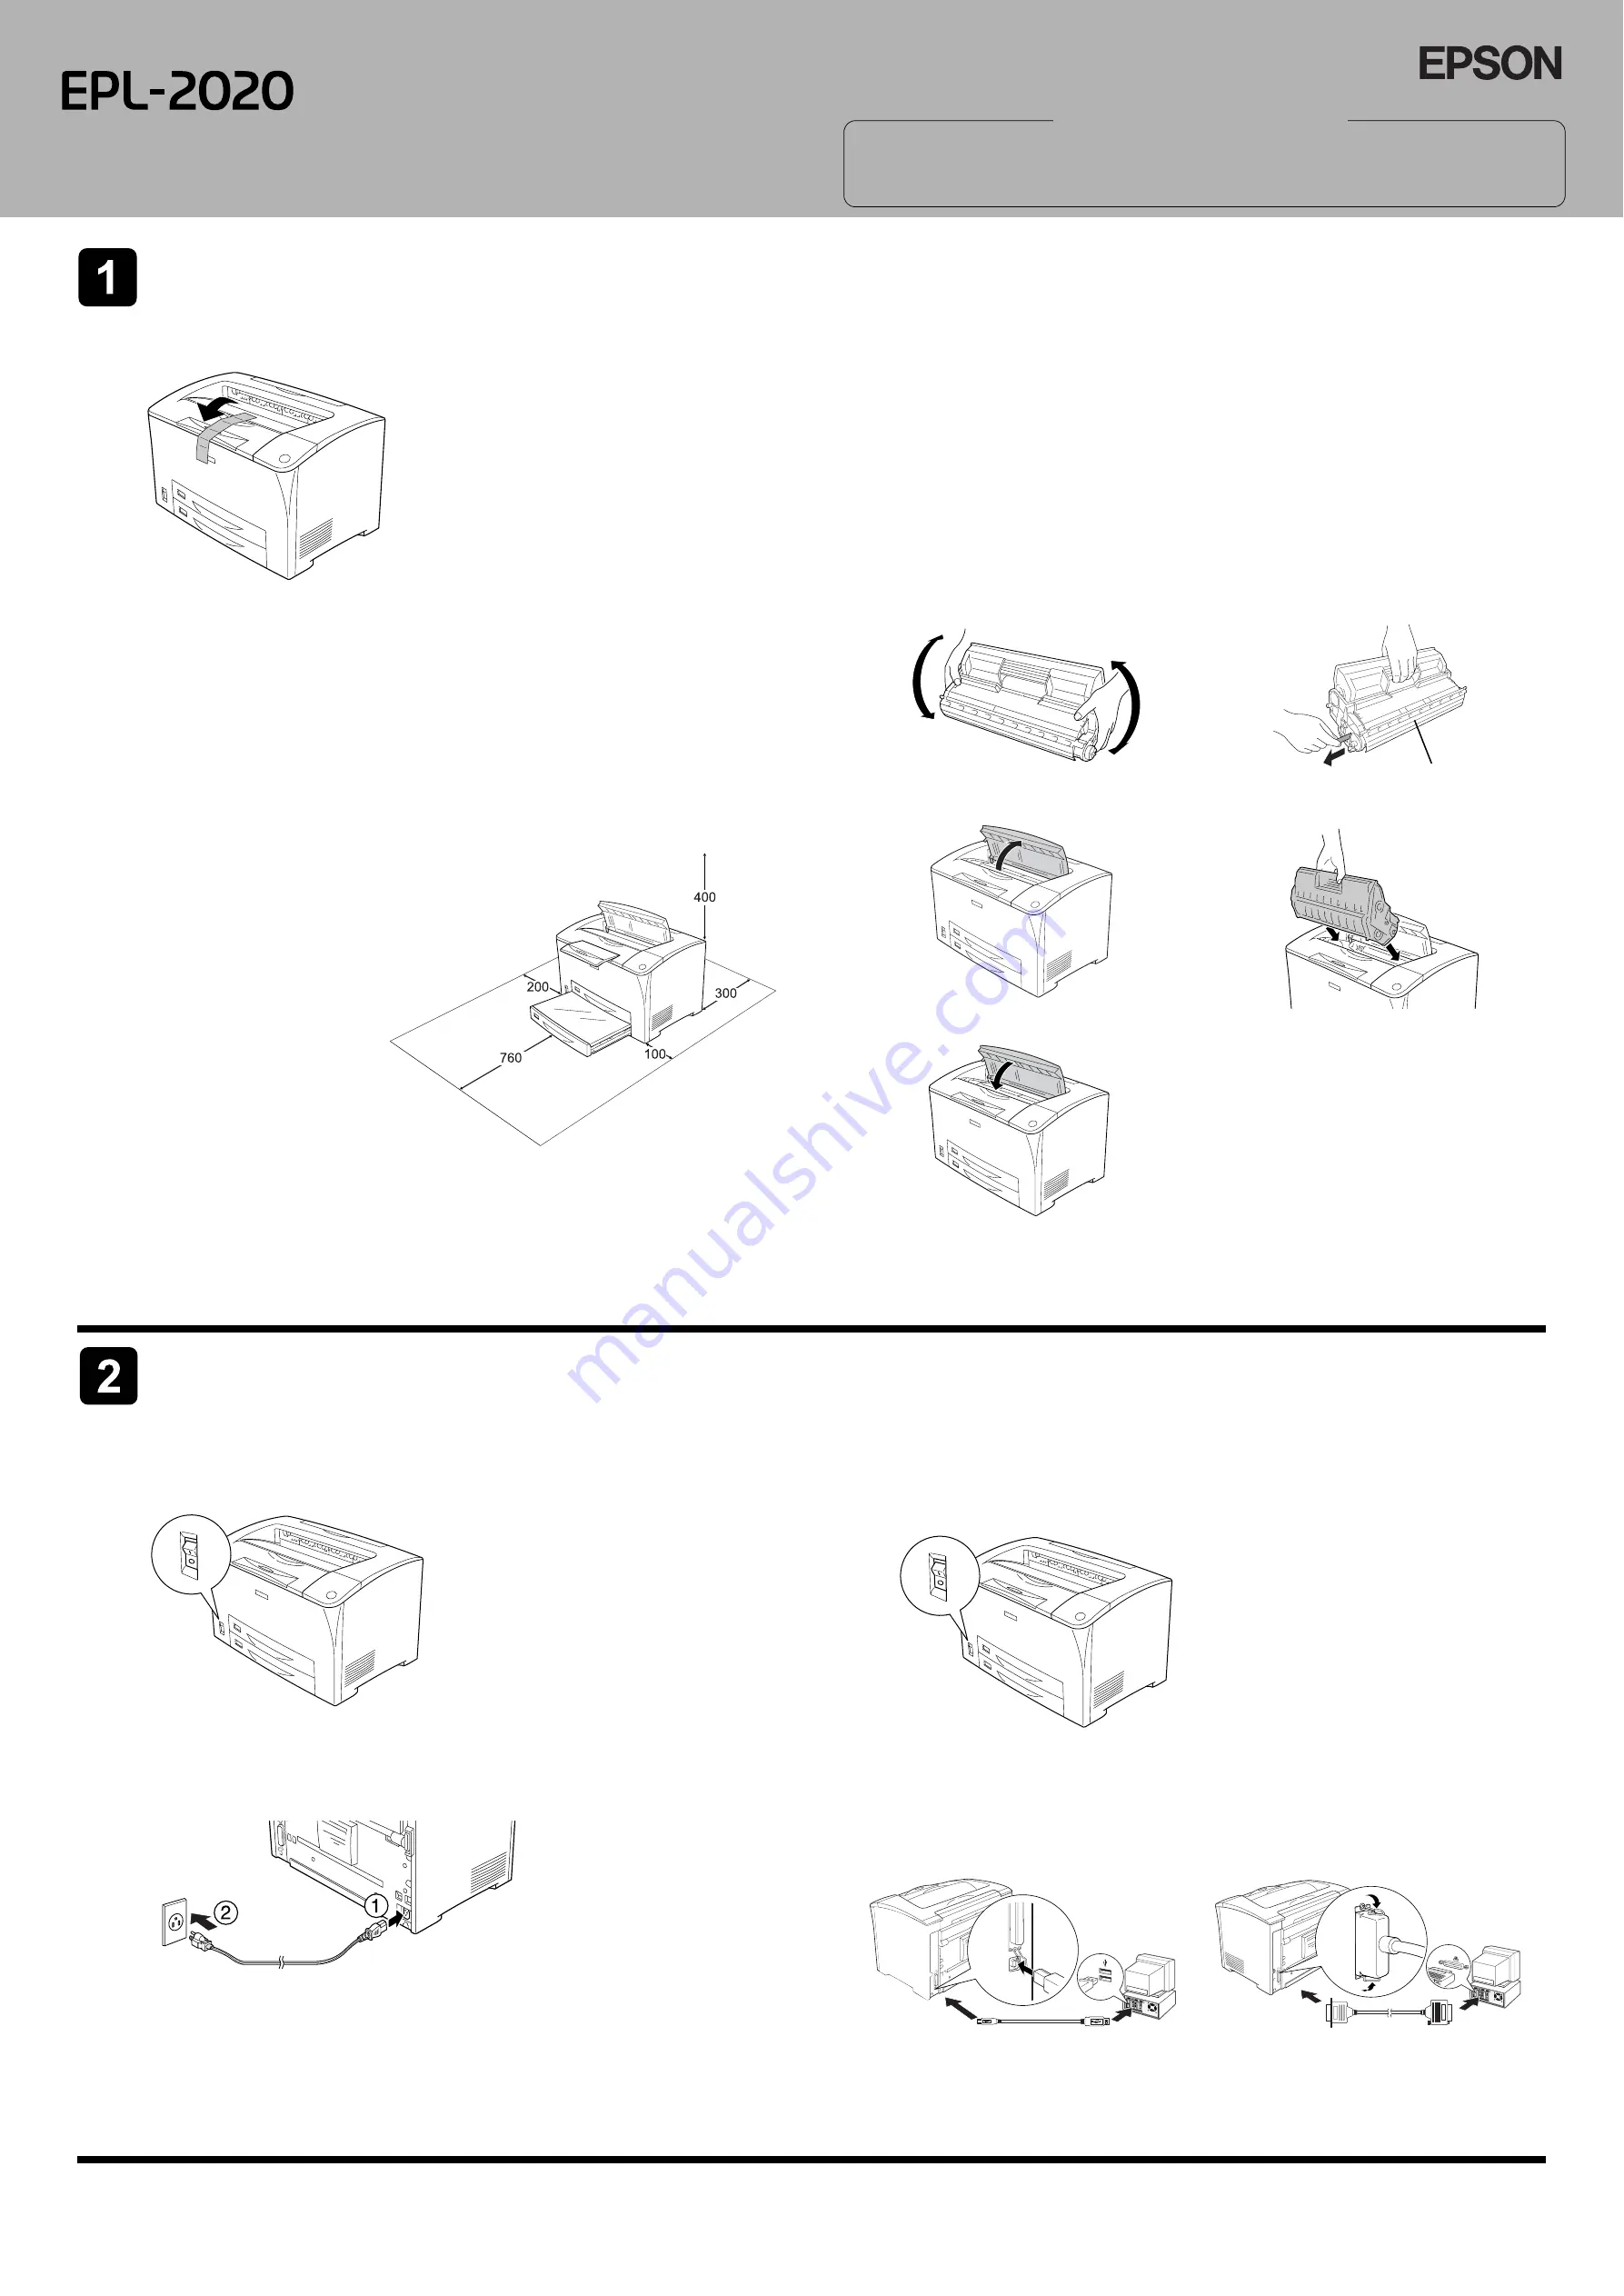
Removing the Protective Materials
Finding a Place for the Printer
Allow adequate space for easy operation and maintenance.
The illustration shows the recommended amount of space.
❏
Place the printer where you can easily unplug the power cord.
❏
Keep the entire computer and printer system away from potential sources of interference, such as
loundspeakers or the base units of cordless telephones.
c
Caution:
❏
Avoid locations that are subject to
direct sunlight, excessive heat,
moisture, or dust.
❏
Do not place the printer on a surface
that is smaller than the printer’s
bottom panel. Doing so may cause
troubles on printing and feeding due
to the internal excessive load of the
printer. Be sure to locate the printer
on a flat, wide surface where the
rubber pads can be placed stably.
Installing the Imaging Cartridge
c
Caution:
❏
When handling the imaging cartridge, always place them on a clean smooth surface.
❏
If toner gets onto your skin or clothes, wash it off with soap and water immediately.
❏
Wait for at least one hour before installing an imaging cartridge after moving it from a cool to a
warm environment to prevent damage from condensation.
❏
Do not turn the imaging cartridge upside down or stand it on its ends.
❏
Do not open the drum’s protective cover and avoid exposing the imaging cartridge to room light
any longer than necessary. Overexposing the cartridge may cause abnormally dark or light areas
to appear on the printed page and reduce the life of the cartridge.
Connecting the Printer
Plugging in the Printer
Connecting the Printer to a Computer
Use a shielded, USB Revision 1.1 cable, or twisted-pair parallel interface cable that is IEEE-1284 compatible.
Dimensions shown in the illustration below are
in millimeters
1
Gently shake the imaging cartridge a few
times.
2
Pull the yellow tape seal all the way out and
remove it.
3
Open cover A.
4
Insert the cartridge firmly.
5
Close cover A.
Do not open this cover.
1
Make sure the printer is turned off.
2
Insert the power cord into the back of the printer. Then plug the other end into an electrical outlet.
1
Make sure that both the printer and the computer are off.
2
Attach the USB or parallel interface cable to the printer. Plug the other end of the cable into the
computer’s USB or parallel interface connector.
<For parallel interface users>
<For USB interface users>
Laser Printer
Setup
c
Cautions
must be observed
to avoid damage to your
equipment.
Notes
contain important
information and useful tips on
the operation of your printer.
Warnings, Cautions and Notes
w
Warnings
must be followed
carefully to avoid bodily
injury.
4041462-00
C01


