background image

Where to Find Information

Setup Sheet

Provides you with information on assembling the printer’s parts
and installing the printer’s software.

Reference Guide (this manual)

Provides you with detailed information on the printer’s functions,
optional products, maintenance, troubleshooting, and technical
specifications.

Online Help

Provides you with detailed information and instructions on the
printer software that controls your printer. Online help is
automatically installed when you install the printer’s software.

Summary of Contents for EPL-6100

Page 1: ...e Guide this manual Providesyouwithdetailedinformationontheprinter sfunctions optional products maintenance troubleshooting and technical specifications Online Help Provides you with detailed information and instructions on the printer software that controls your printer Online help is automatically installed when you install the printer s software ...

Page 2: ...ii ...

Page 3: ...cations repairs or alterations to this product or excluding the U S failure to strictly comply with SEIKO EPSON CORPORATION s operating and maintenance instructions SEIKO EPSON CORPORATION shall not be liable against any damages or problems arising from the use of any options or any consumable products other than those designated as Original EPSON Products or EPSON Approved Products by SEIKO EPSON...

Page 4: ...iv ...

Page 5: ... 8 Indicator lights 9 Buttons 10 About Your Printer 11 Features 12 Options and Consumable Products 13 Options 13 Consumable products 14 Chapter 2 Paper Handling Paper Sources 15 MP tray 15 Loading Paper 15 Loading the MP tray 16 Loading the Manual Feed slot 19 Printing on Special Media 20 Labels 21 Envelopes 21 Thick paper 22 Transparencies 22 Loading an Uncommon Paper Size 23 ...

Page 6: ...s Monitor 3 43 Getting printer status details 45 Setting Monitoring Preferences 47 Status Alert window 48 Stopping monitoring 49 Setting Monitored Printers 50 Canceling Printing 51 Uninstalling Printer Software 51 Uninstall the printer driver and the EPSON Status Monitor 351 Uninstall only the EPSON Status Monitor 3 54 Chapter 4 Setting Up Your Printer on a Network About the Shared Printer 57 Sett...

Page 7: ...ert window 91 Canceling Printing 91 Uninstalling Printer Software 91 Chapter 6 Installing and Removing Options 500 Sheet Lower Paper Cassette Unit A4 1 Installing the 500 Sheet Lower Paper Cassette Unit A4 1 Removing the 500 Sheet Lower Paper Cassette Unit A4 6 Face up Tray 7 Installing the Face up tray 7 Using the Face up tray 9 Removing the Face up tray 9 Memory Module 10 Installing a memory mod...

Page 8: ...ter 8 Replacing Consumable Products Precautions During Replacement 73 Replacing the Developer Cartridge 73 Replacing the Photoconductor Unit 80 Chapter 9 Cleaning and Transporting Cleaning the Printer 87 Cleaning the inside of the printer 87 Cleaning the paper path rollers 88 Cleaning the printer case 90 Removing spilled toner 91 Transporting the Printer 91 Chapter 10 Troubleshooting Status and Er...

Page 9: ...or ISO 131 In the ESC P2 or FX Modes 132 International character sets 133 Characters available with the ESC command 133 In the I239X Emulation Mode 134 Appendix B Working with Fonts Available Fonts 135 Adding More Fonts 139 Selecting Fonts 139 Downloading Fonts 139 EPSON Font Manager 140 Installing the EPSON Font Manager 140 EPSON BarCode Fonts 141 System requirements 143 Installing EPSON BarCode ...

Page 10: ...3 For European Users 164 For United Kingdom and the Republic of Ireland Users 164 For Users in Germany 166 France 166 Spain 166 Italy 167 Portugal 167 Austria 167 Netherlands 167 Belgium Luxemburg 168 Switzerland 168 Glossary Index ...

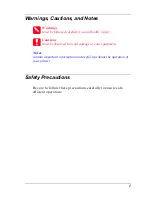
Page 11: ...o avoid bodily injury cCautions must be observed to avoid damage to your equipment Notes contain important information and useful tips about the operation of your printer Safety Precautions Be sure to follow these precautions carefully to ensure safe efficient operation ...

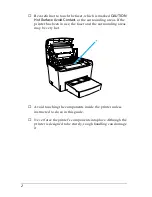
Page 12: ...nding areas If the printer has been in use the fuser and the surrounding areas may be very hot Avoid touching the components inside the printer unless instructed to do so in this guide Neverforcetheprinter scomponentsintoplace Althoughthe printer is designed to be sturdy rough handling can damage it ...

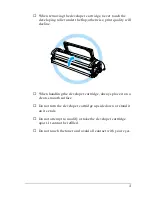
Page 13: ...ty will decline When handling the developer cartridge always place it on a clean smooth surface Do not turn the developer cartridge upside down or stand it on its ends Do not attempt to modify or take the developer cartridge apart It cannot be refilled Do not touch the toner and avoid all contact with your eyes ...

Page 14: ...um When you remove the photoconductor unit from the printer always place the unit on a clean smooth surface Avoid touching the drum since oils from your skin can permanently damage its surface and affect print quality To get the best print quality do not store the photoconductor unit in an area subject to direct sunlight dust salt air or corrosive gases such as ammonia Avoid locations subject to e...

Page 15: ...this printer Important Safety Instructions Connect your printer to an electrical outlet that meets the power requirements of this printer Your printer s power requirements are indicated on a label attached to the printer If you are not sure of the power supply specifications in your area contact your local power company or consult your dealer If you are unable to insert the AC plug into the electr...

Page 16: ... printer Until the Ready light green comes on and is not flashing While the Data light yellow is flashing While printing The International ENERGY STAR Office Equipment Program is a voluntary partnership with the computer and office equipment industry to promote the introduction of energy efficient personal computers monitors printers fax machines copiers and scanners in an effort to reduce air pol...

Page 17: ...Information 7 1 1 1 1 1 1 1 1 1 1 1 1 Chapter 1 Product Information Printer Parts 1 Control panel 2 Printer cover 3 MP Multi Purpose tray 4 Manual feed slot 5 Power switch 6 Latch 7 Face down tray 2 3 4 5 6 7 1 ...

Page 18: ...or 4 Type B interface slot 5 Paper path selector Control Panel The printer s control panel has six indicator lights and three buttons The indicator lights inform you of basic printer status errors and warnings The buttons allow you to control a number of basic printer operations 5 1 2 3 4 ...

Page 19: ... that the printer is ready to receive and print data When the printer is not ready this light is off 3 Data On when data is received and stored in the print buffer the section of memory reserved for receiving data but not yet printed Flashing indicates that the printer is processing data When no data remains in the print buffer this light is off 1 6 5 4 2 3 ...

Page 20: ... indicates an error or a warning with the paper such as when the paper source is empty 5 Toner On when the printer s developer cartridge has run out of toner Flashes to indicate that toner is running low If this light is flashing have a new developer cartridge ready 6 Memory Usually turns on or flashes in combinationwithotherlightstoindicate an error or a warning that is memory related 1 2 3 ...

Page 21: ...e in Microsoft Windows Me 98 95 XP 2000 and NT 4 0 ECP mode supports high speed data transfer and bidirectional communication with your computer 1 Start Stop Switches the printer between ready and offline status 2 Information Prints a status sheet when the Error light is off and no warning is indicated Clears the warning when a warning is indicated 3 Job Cancel Deletes the oldest print job stored ...

Page 22: ...er which has only a default memory because printing at 1200 dpi uses a lot of memory When you print at 1200 dpi install more memory than 16 MB to avoid this error Toner Save mode To reduce the amount of toner used in printing documents you can print rough drafts using the Toner Save mode Resolution Improvement Technology and Enhanced MicroGray technology Resolution Improvement Technology RITech is...

Page 23: ...commended for printing on media that require a straight through paper path such as thick paper labels and transparencies For details see Face up Tray on page 7 Memory Module The printer comes with 8 MB of memory which can be expanded uptoa total of136 MB For details see Memory Module on page 10 Note Make sure that the DIMM you purchase is compatible with EPSON products For details contact the stor...

Page 24: ...e the image on paper The service life of the cartridge is approximately 6 000 printed pages Developer Cartridge S050095 This cartridge includes the toner that is used to create the image on paper The printer comes with this cartridge already installed The service life of the cartridge is approximately 3 000 printed pages Photoconductor Unit S051055 The photoconductor unit contains a light sensitiv...

Page 25: ...pe Capacity Paper Size Plain paper Up to 250 sheets of 75 g m paper Weight 60 to 90 g m 16 to 24 lb A4 A5 B5 Letter LT Legal LGL F4 Half Letter HLT Executive EXE Government Letter GLT Government Legal GLG Custom size paper 76 127 mm 3 0 5 0 in minimum 216 356 mm 8 5 14 0 in maximum Letterhead Labels Up to 10 sheets Weight 90 to 163 g m 24 to 43 lb Thick paper Transparencies Up to 5 Sheets Envelope...

Page 26: ...nt The use of colored paper is acceptable but coated paper should be avoided You may use paper with preprinted letterheads provided that the paper and ink are both laser printer type Loading the MP tray You can load up to 250 sheets of plain paper into the MP tray Follow these steps to load paper into the MP tray 1 Lift off the tray cover then slide the paper guide to accommodate the paper you are...

Page 27: ...a stack of paper and tap it on a flat surface to even the edges and set the paper into the MP tray with the printable surface facing up Then adjust the paper guide to the size of the paper and then replace the MP tray cover Note Make sure to load the paper as far as it will go inside the MP tray ...

Page 28: ...se the Face down tray to prevent paper from falling off the edge If you installed the optional Face up tray and you want the sheets to come out face up then raise the Face up tray instead and set the paper path selector down ...

Page 29: ...rinting on Special Media on page 20 Loading the Manual Feed slot You can use the 76 to 216 148 to 356 mm 3 0 to 8 5 5 8 to 14 0 in size paper when using the Manual Feed slot Follow these steps to load a single sheet of paper from the Manual Feed slot 1 Make sure the cover is in place on the MP tray 2 Insert a single sheet of paper with the printable side up as far as it will go into the Manual Fee...

Page 30: ...the N Start Stop button The printer loads the paper from the Manual Feed slot Note When you no longer need to feed paper manually be sure to clear the Manual Feed check box in the printer driver s Basic Settings menu Windows or Basic Settings dialog box Macintosh before printing from the MP tray or the optional 500 sheet Lower Paper Cassette Unit A4 Printing on Special Media Note Since the quality...

Page 31: ... labels You should test the label sheet for leaking adhesive by pressing a sheet of paper on top of a sheet of labels If the paper sticks to the label sheet when you lift it off do not use the labels Envelopes You can load up to 10 envelopes into the MP tray depending on the envelope thickness 85 to 105 g m Load envelopes with the flap side down and short edge first To print on envelopes choose Th...

Page 32: ... to feed some types of thick paper one sheet at a time Use thick paper of a weight between 90 and 163 g m 24 to 43 lb To print on thick paper be sure to change the Paper Type Setting in the printer driver s Basic Settings menu Windows or Basic Settingsdialogbox Macintosh ChooseThick Narrow Windows or Thick N Macintosh for thick paper which is less than 188 mm wide Choose Thick Wide Windows or Thic...

Page 33: ...n Paper Size You can use an uncommon or custom paper size from 76 127 mm 3 0 5 0 in to 216 356 mm 8 5 14 0 in When you use a manual feed you can use an uncommon paper size from 76 148 mm 3 0 5 8 in to 216 356 mm 8 5 14 0 in Note Choose paper type such as Thick Wide or Thick W Thick Narrow or Thick N or Transparency intheprinterdriver s Basic Settings menu Windows or Basic Settings dialog box Macin...

Page 34: ...24 Paper Handling ...

Page 35: ...itor 3 on page 41 for more information Accessing the Printer Driver You can access the printer driver directly from any application programs from your Windows operating system The printer settings made from many Windows applications override settings made when the printer driver is accessed from theoperatingsystem soyou shouldaccess the printer driverfrom your application to make sure you get the ...

Page 36: ...ndows NT 4 0 Making Changes to Printer Settings Choosing the print quality You can change the print quality or resolution of printouts to favor speed or detail If you need high quality output choose a higher number Please note that doing so reduces the print speed There are three levels of print output 600 dpi Class 1200 dpi and 1200 dpi Class 1200 dpi provides high quality printing results on par...

Page 37: ...n list 3 Click OK to accept the setting Note For details about the Enh MG or RITech functions see the Online Help If printing is unsuccessful or a memory related error message appears selecting a lower resolution may allow printing to proceed Resizing printouts You can have your document enlarged or reduced automatically during printing ...

Page 38: ... from the Output Paper drop down list The page will be printed to fit on the paper you have selected 4 Select Upper Left for Location to print the enlarged or reduced page image at the upper left corner of the paper Select Center to print the enlarged or reduced page image with centering 5 Click OK to accept the settings To resize pages by a specified percentage 1 Click the Layout tab ...

Page 39: ...K The percentage can be set between 50 and 200 in 1 increments If necessary select the paper size to be printed from the Output Paper drop down list Modifying the print layout Layout printing prints either 2 or 4 pages onto a single page and specifies the printing order automatically resizing each page to fit the specified paper size You can also choose to print documents surrounded by a frame ...

Page 40: ...ver with Windows 1 Click the Layout tab 2 Select the Print Layout check box and click Print Layout Settings The Print Layout Settings dialog box appears 3 Select the number of pages you want to print on one sheet of paper 1 2 ...

Page 41: ...e Print Layout Settings dialog box 6 Click OK on the Layout menu to accept the settings Using watermarks Follow the steps to use a watermark on your document In the Watermark dialog box you can select from a list of predefined watermarks or you can select a bitmap BMP or text TXT file as your own custom watermark The Watermark dialog box also allows you to make a variety of detailed watermark sett...

Page 42: ...32 Using the Printer Driver with Windows 2 Select the Watermark check box 3 Click Watermark Settings The Watermark dialog box appears ...

Page 43: ...ntal or vertical Offset position 7 Adjust the image intensity of the watermark with the Intensity slider bar 8 Adjust the size of the watermark with the Size slider bar 9 Select Front to print the watermark on the face of the document or Back to print the watermark on the backside of the document for the Position setting 10 Click OK to accept the settings Making a new watermark You can make a new ...

Page 44: ...e then click OK Note Before making a custom watermark you should prepare a bitmap bmp file 7 Click Save to close the User Defined Watermarks dialog box Your watermark will appear in the list box 8 Click OK to register the new watermark settings Using an overlay The Overlay settings dialog box allows you to print form data overlaid with data made by another application Note The overlay function is ...

Page 45: ...plication access the printer driver Open the File menu and choose Print or Print Setup Then click Printer Setup Options or Properties or click a combination of these buttons depending on the application you use 3 Select the Special tab 4 Select the Form Overlay check box and click Overlay Settings to open the Overlay Settings dialog box 1 2 ...

Page 46: ...ick Create Overlay Data 6 Click Settings 7 Select the Use Form Name check box Then click Add Form Name The Add Form dialog box appears 8 In the Add Form dialog box type the form name in the Form Name box and its description in the Description box ...

Page 47: ...ame you entered at step 8 13 Print the file saved as overlay data It is possible to save any kind of file as an overlay The overlay data is created Printing with an overlay Follow the steps to print a document with overlay data 1 Open the file to print with overlay data 2 From the application access the printer driver Open the File menu and choose Print or Print Setup Then click Printer Setup Opti...

Page 48: ...n to the printer as in step 12 in Creating an overlay on page 34 This setting is available only for Form Name data Resetting the toner and the photoconductor counters After replacing a developer cartridge or a photoconductor unit reset the toner counter or the photoconductor counter You can reset these counters from the printer driver or the control panel When you have installed a photoconductor u...

Page 49: ...3 3 3 3 3 3 3 3 3 3 3 3 2 Click S050087 when you have installed a developer cartridge S050087 or click S050095 when you have installed a developer cartridge S050095 The toner clear dialog box appears 3 Click OK to reset the toner level counter ...

Page 50: ...tting the photoconductor counter 1 Click the Optional Settings tab and then click Printer Setting The Printer Setting dialog box appears 2 Click OPC Level Clear The photoconductor clear dialog box appears 3 Click OK to reset the OPC level counter ...

Page 51: ...error occurs the utility provides you with a message describing the error EPSON Status Monitor 3 is accessed from within the printer driver See the following section for more information Before using EPSON Status Monitor 3 be sure to read the printer driver s README file This file contains the latest information on the printer driver and EPSON Status Monitor 3 Installing the ESPON Status Monitor 3...

Page 52: ...ion Program screen does not appear automatically double click the My Computer icon right click the CD ROM icon and click Open in the menu that appears Then double click Setup exe 2 In the Installation Program screen double click Install EPSON Status Monitor 3 Alternatively you can install it by selecting Install EPSON Status Monitor 3 and then clicking the arrow at the top right ...

Page 53: ...sing the EPSON Status Monitor 3 You can access the EPSON Status Monitor 3 directly from any application programs from your Windows operating system The EPSON Status Monitor 3 appears automatically when an error occurs To access the EPSON Status Monitor 3 from your application click the Print or Page Setup command on the File menu click Properties and then click the Utility tab and click the EPSON ...

Page 54: ...s Me 98 or 95 Printing Preferences in Windows XP or 2000 or Document Defaults in Windows NT 4 0 Then click the Utility tab and click the EPSON Status Monitor 3 icon to start the EPSON Status Monitor 3 Note Do not clear the Monitor the printing status check box If you clear the check box the Status Alert window no longer comes up to notify you when an error occurs and your printer may not recover f...

Page 55: ...s using the EPSON Status Monitor 3 dialog box 1 Icon Message Shows the printer status 2 Printer image The image at the upper left shows the printer status graphically 3 Text box The text box next to the printer image displays the current status of the printer When a problem occurs the most probable solution is displayed 4 Close button Closes the dialog box 1 2 5 3 4 6 7 ...

Page 56: ...remaining in the paper source Information for the optional cassettes are displayed only if this option is installed 6 Toner Indicates the amount of remaining toner The toner icon flashes if toner is low 10 percent or less or out 7 Photoconductor unit life Indicates the remaining functional life of the photoconductor unit ...

Page 57: ...itoring Preferences in the Utility menu of the printer driver The Monitoring Preferences dialog box appears The following settings and buttons appear in the dialog box 1 Select Notification Use the check boxes in this area to select the types of error that you wish to be notified about 2 Default button Restores default settings 2 5 6 7 1 3 4 ...

Page 58: ...de of the task bar Once the shortcut icon is in the task bar you can double click it to open the Status Monitor 3 dialog box Alternatively you can right click the shortcut icon and select Monitoring Preferences to open the Monitoring Preferences dialog box and EPSON EPL 6100 Advanced to open the EPSON Status Monitor 3 dialog box 4 Allow monitoring of shared printers check box To monitor a shared p...

Page 59: ...fter a problem is cleared To close the box you need to click Close Stopping monitoring You can stop monitoring the printing status by clearing the Monitor the Printing Status check box in the printer driver s Utility menu if you don t need to monitor the printer at all Note The Monitor the Printing Status check box is displayed in the Utility menu of Document Defaults in Windows NT 4 0 or in the U...

Page 60: ... 3 will monitor When you install the EPSON Status Monitor 3 this utility is also installed Usually it is not necessary to change a setup Use this utility when you want to change the settings for some reason 1 Click Start point to Program point to EPSON Printers then click Monitored Printers 2 Clear the check box of the printers which are not monitored 3 Click OK ...

Page 61: ...n the control panel The current job is cancelled Note You can cancel all the print jobs by holding down the qJob Cancel button more than 2 seconds You can also cancel printing from your computer Double click the printer icon on the task bar then on the Printer menu click Purge Print Documents for Windows XP or 2000 users select Cancel All Documents Uninstalling Printer Software Uninstall the print...

Page 62: ...o Settings then click Control Panel 3 Double click the Add Remove Programs icon 4 Select the EPSON Printer Software then click Add Remove Note When using Windows XP or 2000 click Change or Remove Programs select EPSON Printer Software then click Change Remove 1 2 ...

Page 63: ...ter icon 6 Click the Utility tab confirm the EPSON Status Monitor 3 check box is selected Note Select the EPSON Status Monitor 3 check box on only when uninstalling the EPSON Status Monitor 3 7 If you uninstall the Monitored Printers utility select the EPSON Status Monitor 3 Monitored Printers check box and click OK ...

Page 64: ... the utility is uninstalled you cannot change the setting of Monitored Printers from the EPSON Status Monitor 3 of other printers 8 Follow the on screen instructions Uninstall only the EPSON Status Monitor 3 1 Quit all applications 2 Click Start point to Settings then click Control Panel 3 Double click the Add Remove Programs icon ...

Page 65: ... EPSON Printer Software then click Add Remove Note When using Windows XP or 2000 click Change or Remove Programs select EPSON Printer Software then click Change Remove 5 To not uninstall the printer driver click the white space to select no icon in the Printer Model menu 1 2 ...

Page 66: ...the EPSON Status Monitor 3 7 If you uninstall the Monitored Printers select the EPSON Status Monitor 3 Monitored Printers check box and click OK Note You can uninstall only the Monitored Printers utility of EPSON Status Monitor 3 When the utility is uninstalled you cannot change the setting of Monitored Printers from the EPSON Status Monitor 3 of other printers 8 Follow the on screen instructions ...

Page 67: ... permission to share the printer with the printer server The clients share the printer via the printer server According to the versions of Windows OS and your access right on a network perform the appropriate settings of the printer server and clients Setting the printer server For Windows Me 98 or 95 see Setting Up Your Printer as a Shared Printer on page 58 For Windows XP 2000 or NT 4 0 see Usin...

Page 68: ...r as a Shared Printer When the printer server s OS is Windows Me 98 or 95 follow these steps to set the printer server 1 Click Start point to Settings and click Control Panel 2 Double click the Network icon 3 Click File and Print Sharing on the Configuration menu 4 Select the I want to be able to allow others to print to my printer s check box then click OK 5 Click OK to accept the settings Note W...

Page 69: ...OK Type Comment and Password if needed Note Do not use spaces or hyphens for the share name or an error may occur When sharing the printer be sure to set EPSON Status Monitor 3 so that the shared printer can be monitored on the printer server See Setting Monitoring Preferences on page 47 You need to set the client computers so that they can use the printer on a network See the following pages for ...

Page 70: ... You must access Windows XP 2000 or NT 4 0 as the Administrators of the local machine 1 For the Windows 2000 or NT 4 0 printer server click Start point to Settings and click Printers For the Windows XP printer server click Start point to Printers and Faxes For Windows XP Home edition users point to Control panel first then click Printers and Faxes 2 Right click the EPSON EPL 6100 Advanced icon and...

Page 71: ...0 printer server select Shared for Windows 2000 or Shared as for Windows NT 4 0 then type the name in the Share Name box For the Windows XP printer server select Share this printer then type the name in the Share name box Note Do not use spaces or hyphens for the share name or an error may occur ...

Page 72: ... after step3 On the Windows NT 4 0 printer server Select Windows being used for clients For example select Windows 95 to install the additional driver for the Windows Me 98 or 95 clients Then click OK Note You do not have to select Windows NT 4 0x86 because that driver has been already installed Do not select additional drivers other than Windows 95 The other additional drivers are not available 1...

Page 73: ...er Click Additional Drivers Select Windows being used for clients then click OK For the Windows Me 98 or 95 clients Select Intel Windows 95 or 98 and Me For the Windows NT 4 0 clients SelectIntel Windows NT 4 0 or 2000 For the Windows XP or 2000 clients Intel Windows 2000 or XP may been already selected ...

Page 74: ... 2000 or XP only because that driver is preinstalled Do not select additional drivers other than Intel Windows 95 or 98 and Me and Intel Windows NT 4 0 or 2000 The other additional drivers are not available 5 When a prompt appears insert the CD ROM that comes with your printer in your CD ROM drive then click OK ...

Page 75: ... 2000 Digital Signature is not found may appear Click Yes for Windows 2000 or Continue Anyway for Windows XP and continue installing 7 When installing in Windows XP or 2000 click Close When installing in Windows NT 4 0 the property window closes automatically Note Confirm the following items when sharing the printer Be sure to set EPSON Status Monitor 3 so that the shared printer can be monitored ...

Page 76: ...ou need to set the printer server For details see Setting Up Your Printer as a Shared Printer on page 58 Windows Me 98 or 95 or Using an Additional Driver on page 60 Windows XP 2000 or NT 4 0 This section describes how to access the shared printer on a standard network system using the server Microsoft workgroup When you cannot access the shared printer due to the network system ask the administra...

Page 77: ... for Printer dialog box appears Note You can also type the name of the computer that is locally connected to the shared printer the shared printer s name in Network path or queue name 5 Click the computer or server that is connected to the shared printer and the name of the shared printer Then click OK Note The name of the shared printer may be changed by the computer or server that is connected t...

Page 78: ... 98 or 95 is not installed in the Windows XP 2000 or NT 4 0 printer server go to Installing the Printer Driver from the CD ROM on page 74 7 Make sure of the name of the shared printer and select whether to use the printer as the default printer or not Click OK and then follow the on screen instructions Note You can change the shared printer s name so that it appears only on the client computer Wit...

Page 79: ...tall the printer driver for Windows XP or 2000 in the Windows XP or 2000 clients the administrator installs the local printer driver in the clients from the CD ROM which comes with the printer then performs the following procedure 1 For the Windows 2000 clients click Start point to Settings and click Printers For the Windows XP clients click Start point to Printers and Faxes For Windows XP Home ed...

Page 80: ...ed printer then click Next Note Youcanalsotype the name of the computer that is locally connected to the shared printer the shared printer s name in Network path or queue name You do not necessarily need to type the name of the shared printer For Windows XP select Browse for a printer ...

Page 81: ...er driver or the current printer driver When the prompt to select the printer driver appears select the printer driver according to the message When the local printer driver for Windows XP or 2000 is installed beforehand you can select the printer driver for Windows XP or 2000 as the current printer driver instead of the alternative driver in Windows NT 4 0 server When the additional driver for Wi...

Page 82: ...ick Finish With Windows NT 4 0 Follow these steps to set Windows NT 4 0 clients You can install the printer driver of the shared printer when you have the Power Users or more powerful access right even if you do not have the Administrator 1 Click Start point to Settings and click Printers 2 Double click the Add Printer icon 3 Select Network printer server then click Next ...

Page 83: ... name of the shared printer may be changed by the computer or server that is connected to the shared printer To make sure of the name of the shared printer ask the administrator of the network When the printer driver is installed in the client beforehand you need to select the new printer driver or the current printer driver When the prompt to select the printer driver appears select the printer d...

Page 84: ...nal drivers are not installed in the Windows XP 2000 or NT 4 0 printer server The printer server s OS is the Windows Me 98 or 95 and the client s OS is the Windows XP 2000 or NT 4 0 The on screen displays on the following pages may differ depending on the version of Windows OS Note When installing in Windows XP 2000 or NT 4 0 clients you must access Windows XP 2000 or NT 4 0 with the Administrator...

Page 85: ...ers in Windows XP or 2000 Digital Signature is not found may appear Click Yes for Windows 2000 or Continue Anyway for Windows XP and continue installing The folder name differs depending on the OS being used 3 Select the name of the printer then click OK Then follow the on screen instructions Client s OS Folder Name Windows Me 98 or 95 Language WIN9X Windows XP or 2000 Language WIN2000 Windows NT ...

Page 86: ...76 Setting Up Your Printer on a Network ...

Page 87: ...settings in the printer driver such as resetting the toner and photoconductor counter The Remote Control Panel utility allows you to make such settings To install of the Remote Control Panel utility see Installing the Remote Control Panel utility on page 61 Accessing the Printer Driver To control your printer and change its settings use the printer driver The printer driver allows you to easily ma...

Page 88: ...ver that controls your printer It is automatically installed when you install the printer driver Making Changes to Printer Settings Choosing the print quality You can change the print quality or resolution of printouts to favor speed or detail If you need high quality output choose a higher number Please note that doing so reduces the print speed There are three levels of print output 600 dpi Clas...

Page 89: ... to proceed For details of the Enh MG or RITech functions see the Online Help Resizing printouts The Fit to page function in the Layout dialog box allows you to have your documents enlarged or reduced during printing according to the specified paper size Note The enlarging or reducing rate is automatically specified according to the paper size selected in the Paper Setting dialog box The modifying...

Page 90: ...r Driver with Macintosh 2 Select the Fit to Page check box 3 Select the desired paper size from the Output Paper drop down list The page will be printed to fit on the paper you have selected 4 Click OK to accept settings ...

Page 91: ...ur pages onto a single page and to specify the printing order automatically resizing each page to fit the specified paper size You can also choose to print documents surrounded by a frame 1 Open the Layout dialog box 2 Select the Print Layout check box then click Print Layout Settings The Print Layout Settings dialog box appears 1 2 ...

Page 92: ...which the pages are printed on each sheet Note Page Order choices depend on Pages selected in Orientation 5 Click OK to close the Print Layout Settings dialog box 6 Select the Print the Frame check box in the Layout dialog box when you want to print the pages surrounded by a frame 7 Click OK in the Layout dialog box to accept the settings ...

Page 93: ...allows you to make a variety of detailed watermark settings For example you can select the size intensity and position of your watermark 1 Open the Layout dialog box 2 Select the Watermark Settings check box 3 Select a watermark from the Watermark drop down list 4 Select the location on the page where you want to print the watermark by dragging the watermark image on the preview window Also when y...

Page 94: ...gle box Or select the Rotate by mouse check box and rotate the text watermark with the pointer on the preview window 7 Click OK to accept the settings Making a new watermark To make a text watermark follow the instructions below 1 Open the Layout dialog box 2 Select the Watermark Settings check box 3 Click New Delete ...

Page 95: ...ave Note To edit the saved text watermark select it from List and click Edit Text After editing be sure to click OK to close the dialog box To remove the saved text watermark select it from List and click Delete After editing be sure to click Save to close the dialog box 7 Click OK on the Layout dialog box The saved watermark is displayed on the preview window To make a bitmap watermark follow the...

Page 96: ... Printer Driver with Macintosh Note Before making a custom watermark you should prepare a bitmap PICT file 1 Open the Layout dialog box 2 Click New Delete 3 Type the file name in the Name box and click Add PICT 1 2 ...

Page 97: ...he saved watermark is displayed on the preview window Monitoring Your Printer EPSON Status Monitor 3 About the EPSON Status Monitor 3 The EPSON Status Monitor 3 is a utility program that monitors your printer and gives you information about its current status For example you can find out the amount of remaining toner or the remaining functional life of the developer cartridge through this utility ...

Page 98: ... port must already be selected in the Chooser so that necessary information can be received from the selected printer driver when the EPSON Status Monitor 3 starts If the printer port is not correct an error will occur If you change the printer driver in the Chooser while the spool file is printing in the background output to the printer may be disrupted Printer and consumable products status info...

Page 99: ...ssage Shows the printer status 2 Printer image The image at the upper left shows the printer status graphically 3 Text box The text box next to the printer image displays the current status of the printer When a problem occurs the most probable solution is displayed 4 Close button Closes the dialog box 5 Paper Displays the paper sources paper size and the approximate amount of paper remaining in e...

Page 100: ... and buttons appear in the dialog box 6 Toner Indicates the amount of remaining toner The toner icon flashes if toner is low 10 percent or less or out 7 Photoconductor Unit life Indicates theremainingfunctionallifeofthe photoconductor unit 1 Error Notification Selection Selects the types of errors that you wish to be notified about 2 Default button Restores default settings 3 Cancel button Cancels...

Page 101: ...em is cleared To close the box you need to click Close Canceling Printing To cancel printing press the q Job Cancel button on the control panel The current job is cancelled Note You can also cancel printing from your computer During background printing open the EPSON Monitor 3 from the Application menu Then stop printing from the EPSON Monitor 3 or delete the file which is in standby mode Uninstal...

Page 102: ...r Driver Installer folder and then double click the folder of the printer being used 4 Double click the Installer icon 5 Click Continue and then click Accept 6 Select Uninstall from the menu at the upper left and then click Uninstall 7 Follow the on screen instructions ...

Page 103: ...ond paper source in addition to the MP tray This section describes how to install the cassette unit and load paper Installing the 500 Sheet Lower Paper Cassette Unit A4 Followtheinstructionsbelowtoinstallthe500 SheetLowerPaper Cassette Unit A4 1 Turn off the printer 2 Unplug the printer s power cord from the electrical outlet and from the printer 3 Remove all interface cables from the interface co...

Page 104: ...ke sure that the printer and the cassette unit are facing the same way Lift the printer and align the pins on the cassette unit with the holes on the bottom of the printer then lower the printer until it rests securely on the cassette unit ...

Page 105: ...nter and into an electrical outlet 8 Turn on the printer To confirm that the 500 Sheet Lower Paper Cassette Unit A4 is installed correctly print a status sheet See Printing a Status Sheet on page 104 to print a status sheet To use the 500 Sheet Lower Paper Cassette Unit A4 as the paper source be sure to choose Lower Cassette in the printer driver or Lower Cassette in the Remote Control Panel utili...

Page 106: ... confirm that the 500 Sheet Lower Paper Cassette Unit A4 is correctly installed by checking the information displayed in the printer driver s Optional Settings menu Loading Paper Follow the steps below to load paper into the 500 Sheet Lower Paper Cassette Unit A4 1 Pull the paper tray out from the cassette unit ...

Page 107: ...n the plate in the paper tray until it locks into position 3 Fan a stack of paper and tap it on a flat surface to even the edges Make sure that the paper loaded is under the triangle marks on the inside of the paper tray Note Load letterheads printable side up and with the letterhead portion at the top ...

Page 108: ... the unit Removing the 500 Sheet Lower Paper Cassette Unit A4 Followtheinstructionsbelowtoinstallthe500 SheetLowerPaper Cassette Unit A4 1 Turn off the printer 2 Unplug the printer s power cord from the electrical outlet and from the printer 3 Remove all interface cables from the interface connectors ...

Page 109: ...rn on the printer Face up Tray The printer normally outputs paper face down on top of the printer If you want face up output you can install the optional Face up tray C12C813801 This tray gives you immediate viewing of your printed output and is recommended for printing on media that requires a straight through paper path such as labels thick paper and transparencies Installing the Face up tray Fo...

Page 110: ...8 Installing and Removing Options 1 Turn off the printer 2 Attach the Face up tray by inserting the pegs into the holes on the printer one side at a time Do not force both sides in at once ...

Page 111: ...put After installing the Face up tray you can switch the paper path from face down to face up by pushing the paper path selector down The paper path selector is located on the right side of the printer near the back Removing the Face up tray 1 Turn off the printer 2 Remove the Face up tray 3 Switch the paper path selector up ...

Page 112: ...ditional memory if you are having difficulty printing complex graphics Note The maximum expandable memory is 136 MB See Memory Module on page 137 for details about memory module requirements Installing a memory module Follow the instructions below to install a DIMM in the printer wWarning Toavoidelectricalshock donotattempttoinstallaDIMMunless the printer is turned off 1 Make sure that the printer...

Page 113: ... 6 6 2 Press the latch on the left side of the printer and raise the printer cover 3 Face the right side of the printer and using a cross head screwdriver remove the two screws holding the side cover in place Remove the side cover by pulling it toward you ...

Page 114: ... side cover wWarning Removing other screws and covers will expose high voltage areas Be careful when working inside the printer as some components are sharp and may cause injury 4 Identify the slot into which the DIMM is to be installed The DIMM is installed into the RAM slot gray wWarning Avoid touching the electrical components that are exposed after you remove the side cover Be aware that these...

Page 115: ...ule be sure to discharge any static electricity by touching a grounded piece of metal Otherwise you may damage static sensitive components 5 Firmly insert the DIMM into the RAM slot gray at an angle as shown below Hold both sides of the DIMM and turn it to the perpendicular to lock it into place ...

Page 116: ...14 Installing and Removing Options 6 Set the side cover back into place ...

Page 117: ...mount of memory is shown on the status sheet turn off the printer and review the steps above to make sure you correctly installed the DIMM If the amount of memory is still incorrect contact your dealer or a qualified service representative for assistance Note After installing both of the printer driver and the EPSON Status Monitor 3 Windows users can confirm that the memory module is correctly ins...

Page 118: ...d Removing Options Removing a memory module Follow the instructions below to remove the DIMM 1 Make sure that the printer is not plugged in 2 Press the latch on the left side of the printer then raise the printer cover ...

Page 119: ...Removing Options 17 6 6 6 6 6 6 6 6 6 6 6 6 3 Face the right side of the printer and using a cross head screwdriver remove the two screws holding the side cover in place Remove the side cover by pulling it toward you ...

Page 120: ...18 Installing and Removing Options 4 Push the clip of the RAM slot gray outward to release the memory module then grasp the DIMM firmly on both ends and pull it out 5 Set the side cover back into place ...

Page 121: ...tional Adobe PostScript 3 ROM Kit module C12C832521 into the ROM slot of your printer provides for optimized printing of complex documents through the PostScript printer language Installing a ROM module Follow the instructions below to install the ROM module wWarning To avoid electrical shock do not attempt to install a ROM module unless the printer is turned off ...

Page 122: ...20 Installing and Removing Options 1 Make sure that the printer is not plugged in 2 Press the latch on the left side of the printer and raise the printer cover ...

Page 123: ...lling it toward you Note Be careful to avoid dropping screws into the printer when removing them It may be helpful to use a magnetic screwdriver cCaution Make sure that the printer is turned off Remove only two screws attaching the right side cover wWarning Removing other screws and covers will expose high voltage areas Be careful when working inside the printer as some components are sharp and ma...

Page 124: ...ck wWarning Avoid touching the electrical components that are exposed after you remove the side cover Be aware that these components may become hot while the printer is in use cCaution Before you install the module be sure to discharge any static electricity by touching a grounded piece of metal Otherwise you may damage static sensitive components ...

Page 125: ...g and Removing Options 23 6 6 6 6 6 6 6 6 6 6 6 6 5 Firmly insert the ROM module into the A slot black at an angle as shown below Hold both sides of the ROM and turn it to the perpendicular to lock it into place ...

Page 126: ...24 Installing and Removing Options 6 Set the side cover back into place 7 Fasten the side cover with the two screws ...

Page 127: ...If the ROM module is not listed under the Hardware Configurations section of the status sheet turn off the printer unplug it disconnect all interface cables and review the steps abovetomakesureyouinstalledthemodulecorrectly IftheROM module still does not show up in the status sheet contact your dealer or a qualified service representative for assistance Removing a ROM module Follow the instruction...

Page 128: ...26 Installing and Removing Options 2 Press the latch on the left side of the printer then raise the printer cover ...

Page 129: ...Removing Options 27 6 6 6 6 6 6 6 6 6 6 6 6 3 Face the right side of the printer and using a cross head screwdriver remove the two screws holding the side cover in place Remove the side cover by pulling it toward you ...

Page 130: ...8 Installing and Removing Options 4 Push the clip of the A slot black outward to release the ROM module then grasp the ROM module firmly on both ends and pull it out 5 Set the side cover back into place ...

Page 131: ...ectiondescribeshowtoinstallanoptionalinterfacecardinto the Type B interface slot Installing an interface card Follow the instructions below to install an optional interface card cCaution Before you install the interface card be sure to discharge any static electricity by touching a grounded piece of metal Otherwise you may damage static sensitive components ...

Page 132: ... 4 Face the rear of the printer 5 Remove the two screws that secure the interface slot cover and remove the cover cCaution Make sure that the printer is turned off Remove only two screws attaching the right side cover wWarning Removing other screws and covers will expose high voltage areas Be careful when working inside the printer as some components are sharp and may cause injury ...

Page 133: ...Status Sheet on page 104 to print a status sheet If the installed interface is not shown on the status sheet turn off the printer unplug it disconnect all interface cables and review the steps above to make sure you installed the interface card correctly If the installed interface still does not show up in the status sheet contact your dealer or a qualified service representative for assistance Re...

Page 134: ...tore the interface card in a safe place until you need to use it again 7 Plug the printer s power cord back into the electrical outlet 8 Turn on the printer Printing a Status Sheet After installing options such as a 500 Sheet Lower Paper Cassette Unit A4 or a memory module print a status sheet to make sure if the options are correctly installed To print a status sheet press the Information button ...

Page 135: ... driver When to use the Remote Control Panel utility Note Before using this utility be sure to read the README file located in the RCP folder in the printer software CD ROM The folder name depends on the country of purchase This file contains important information about the utility The Remote Control Panel utility is the software interface that allows you to choose the printer emulation mode and m...

Page 136: ...the Remote Control Panel utility To install the utility follow these steps 1 Insert the printer software CD ROM containing the utility into your computer s CD ROM drive 2 Type the following at the DOS prompt and press the Enter key D RCP SETUP Operating system MS DOSVersion3 3xorlater Themousecan be used provided that the mouse driver is installed Microsoft Mouse v 7 04 or better or Logitech v 6 4...

Page 137: ...Panel utility type the following at the DOS prompt and press the Enter key If you changed the default directory during installation type that directory instead C EPSONRCP EPRCP If the Remote Control Panel utility was not able to communicate with the printer in bidirectional mode it returns the following error dialog box If bidirectional communication is possible skip this section and go directly t...

Page 138: ...es button Clicking this button will allow you to proceed through unidirectional communication No button Clicking this button will make the utility retry bidirectional communication Cancel button Clicking this button terminates the utility Select Printer combo box Allowsyoutoselectyourprinter from the list OK button Clicking this button brings you to the Mode Select dialog box Exit button Clicking ...

Page 139: ...ng and buttons appear in the dialog box Help button Clicking this button opens the Help screen Select Mode list box Allows you to select the desired printer emulation mode from the list OK button Clicking this button brings you to the main Remote Control Panel screen Exit button Clicking this button terminates the utility Help button Clicking this button opens the Help screen ...

Page 140: ...lso available in the printer driver Most application programs give you access to the printer driver from within the application itself You should always try to change basic printer settings from within the application program or by accessing the printer driver directly from the operating system Settings made in the application program or in the printer driver override those settings made in the Re...

Page 141: ...as they may have been changed by other users Even if the Remote Control Panel utility already shows your desired setting always click Send to ensure that you can print with that setting Page Setup button Click Page Setup on the Remote Control Panel screen and the following dialog box appears Note Use Next and Prev to access all available setting options Page Size You can set the default page size ...

Page 142: ...t letter GLG Government legal EXE Executive F4 MON Monarch C10 Commercial 10 DL C5 C6 ISO B5 International B5 CTM Custom Copies Allows you to set the number of copies to be printed You can enter any number from 1 to 999 If possible you should specify the number of copies from your application program This setting affects the setting under other emulation modes as well Form LaserJet4 only Lets you ...

Page 143: ...nter does not perform a carriage return with each line feed or form feed FF CR LF causes the printer to add a carriage return to each line feed or form feed command it receives Select CR LF if you find that the printer does not print characters beyond the right margin Orientation Lets you specify whether the page is printed in Portrait default or Landscape orientation The pages in this manual are ...

Page 144: ...output when a timeout is reached according to the Timeout setting The default setting is Off so paper is not printed when a timeout is reached This item is not available in the PCL6 mode Skip Blank Page When turned on the printer skips pages that have no images or characters allowing you to save paper The default setting is Off MP Type Allows you to specify the type of paper used when printing fro...

Page 145: ...need to use Page Protect if you are printing a highly complex page If a Print Overrun error occurs change the setting to On and reprint your data This reduces the amount of memory reserved for receiving data so your computer may take longer to send the print job but it will allow you to print complex jobs Page Protect usually works best if set to Auto default You may need to increase your printer ...

Page 146: ...ontinues printing within a few seconds after one of these problems occurs When Auto Continue is Off you must press the N Start Stop button to resume printing In most cases leave Auto Continue Off default so you can tell when an error occurs and make the necessary corrections You might want to set Auto Continue to On when printing long jobs or when you are away from the printer for long periods Den...

Page 147: ...he quality of the graphics is reduced Tray Assign Changes the assignment for the paper source select command When 4 is selected the commands are set as compatible with the HP LaserJet4 When 4K is selected the commands are set as compatible with the HP LaserJet 4000 5000 and 8000 When 5S is selected the commands are set as compatible with the HP LaserJet 5S MP Tray Size Allows you to set the paper ...

Page 148: ...n and the following dialog box appears Top Offset Allows you to adjust the vertical printing position on the page The setting is in millimeters You can move the printing position by 0 5 mm increments from the top edge the parameters are from 99 to 99 Left Offset Allows you to adjust the horizontal printing position on the page The setting is in millimeters You can move the printing position in 0 5...

Page 149: ...tically switches to the next channel that receives data You can set the timeout value in 1 second increments the parameters are from 5 to 300 Paper Size Ignore Allows you to select whether a paper size error is ignored when it occurs Turning this item on causes the printer to print even if the image size exceeds the printable area for the specified paper size This may cause smudges due to toner th...

Page 150: ...election on the Remote Control Panel screen and the following dialog box appears Note Use Next and Prev to access all available setting options Parallel I F Allows you to choose whether to activate the parallel port The default is On Parallel Speed Allows you to specify the pulse width of the ACKNLG signal on receiving data through the parallel port When this option is set to Fast default the puls...

Page 151: ...The default is On USB Buffer Size Allows you to specify the amount of memory to be used for receiving and printing data through the USB interface If set to Maximum more memory is allocated for receiving data If set to Minimum morememoryisallocatedfor printing data Thedefault setting is Normal AUX I F Allows you to choose whether to activate the auxiliary interface port if an optional interface car...

Page 152: ...dule You can specify a different emulation for each interface in other words for each computer you connect the printer to Note Settings made in the Remote Control Panel utility are not effective until you click the Send to download the information to the printer If you share this printer the settings shown on your Remote Control Panel utility may not reflect the actual settings in the printer as t...

Page 153: ... screen and the following dialog box appears Parallel Allows you to specify the emulation for the parallel interface USB Allows you to specify the emulation for the USB interface AUX Allows you to specify the emulation for the auxiliary interface This option is available only when an optional Type B interface card is installed ...

Page 154: ... Panel utility are not effective until you click Send to download the information to the printer If you share this printer the settings shown on your Remote Control Panel utility may not reflect the actual settings in the printer as they may have been changed by other users Even if the Remote Control Panel utility already shows your desired setting always click Send to ensure that you can print wi...

Page 155: ...et The following symbol sets are available Note The following symbol sets cannot be selected with the Swiss 721 SWM and Dutch 801 SWM fonts PsMath MsPublishing VeMath Math 8 and PiFont The characters 9Bh to 9Fh in the VeInternational and VeUS symbol sets cannot be printed when either the Swiss 721 SWM or Dutch 801 SWM font is selected Roman 8 Norweg1 Italian ECM94 1 Swedis2 ANSI ASCII UK French2 G...

Page 156: ...g box that appears depends on the emulation mode Note This button is not available in LaserJet4 mode GL2 mode The following dialog box appears when the emulation mode is GL2 Note Use Next and Prev to access all available setting options GL Mode Allows you to select the mode LJ4GL2 or GLlike The default setting is LJ4GL2 ...

Page 157: ...rigin Allows you to set the origin for the plotter unit coordinate system to the lower left corner Corner or to the center of the hard clip limit Center Pen Allows you to select the color of the printed characters Pen0 is white which means the background is printed instead of the character like the caution and warning symbols in this manual All others are black like the characters in this sentence...

Page 158: ...ined The default setting is Mitered See the illustrations below Pen0 Pen1 Pen2 Pen3 Pen4 Pen5 Pen6 Allows you to select the line width You can select a value from 0 05 mm to 5 00 mm in increments of 0 05 mm Pen3 to Pen6 are available only in GLlike mode NONE MITERED MITEREDBEVEL TRIANGULAR ROUND BEVELED ...

Page 159: ...spacing Condensed printing is useful for spreadsheets and other applications that need to fit a large amount of information on each line However 15 cpi characters per inch characters cannot be condensed T Margin ESCP2 FX only Allows you to specify the distance from the top of the sheet to the baseline of the first printable line This is measured in 0 05 inch increments Text ESCP2 FX only Allows yo...

Page 160: ...the printer does not send an automatic line feed LF command with each carriage return CR When you set AutoLF to On the printer adds a line feed to each carriage return it receives If your text lines overprint each other set AutoLF to On Bit Image With Bit Image set to Dark or Light your printer can correctly emulate the graphics densities set with the printer commands If you select Dark the bit im...

Page 161: ...Courier After selecting the desired font you can also adjust the character spacing and size of the font with the Pitch and Condensed options Pitch You can select a character pitch of 10 12 or 15 cpi characters per inch or choose proportional spacing Alt Graphics I239X only Turns the Alternate Graphics option on or off The default setting is Off Character Set I239X only Allows you to select the cha...

Page 162: ...tion mode For Macintosh Users Remote Control Panel utility overview This section gives you an overall introduction to the functions of the Remote Control Panel utility and provides you with instructions on its installation and execution When to use the Remote Control Panel utility The Remote Control Panel utility is the software interface that allows you to select the printer port and make setting...

Page 163: ...rectly to the desktop or anywhere on the hard disk Accessing the Remote Control Panel utility Follow the steps below to access the Remote Control Panel utility 1 Double click the RCP for EPL 6100 icon The Remote Control Panel utility for EPL 6100 dialog box appears 2 Select a printer port and then click Select Note When the printer is connected with the USB click USB port Operating system Mac OS 8...

Page 164: ...n click OK When you select USB Port in the Remote Control Panel for EPL 6100 dialog box When you select AppleTalk in the Remote Control Panel for EPL 6100 dialog box Note AppleTalk Zones are displayed when the zone is set in the network Select the zone which the printer is connected About the zone which connected the printer ask an administrator of the network ...

Page 165: ... when the printer is connected with the AppleTalk Confirm the printer name with an administrator of the network 4 Click Setting Note You can print a status sheet to click Status Sheet 5 MakethedesiredsettingsandclickOKwhenyouarefinished For details see Making printer settings on page 64 6 Click Quit ...

Page 166: ...ing settings and buttons appear in the dialog box Reset button The settings inside the printer and the dialog box are reset to the factory default settings Default button The settings in the dialog box are reset to the default settings To enable the settings click Execute Cancel button Terminates this utility without changing any settings Execute button Click this button to confirm the settings Th...

Page 167: ... printer begins warming up as soon as you send data and is ready to print in about 11 seconds When Standby is disabled the printer stays warmed up and ready to print all the time MP Tray Paper Size You can set the paper size in the MP tray here Note The custom size paper set in the printer driver is not selectable here The Page Size options are as follows A4 default A5 B5 LT Letter HLT Half letter...

Page 168: ...wer Paper Cassette Unit A4 is installed Time Out Allows you to set the length of time the printer waits before looking for the next print job If the printer is online and receives no new data for the number of seconds specified the printer automatically switches to the next channel that receives data You can set the timeout value in 1 second increments the parameters are from 0 to 300 Parallel I F...

Page 169: ...ou to set whether the printer should continue or stop printing when the printer encounters a Toner Out error If set to Continue default the printer continues printing regardless of the error This setting is recommended if you are physically distant from the printer If set to Stop the printer stops printing when it encounters the Toner Out error Auto Continue Permitstheprintertoautomaticallyrecover...

Page 170: ...ed data set this setting to Off default Dot Correction This setting is relevant to 1200 dpi printing only When set to On the printing pattern of 1 dot lines is automatically corrected to improve appearance Note When the Print Mode in the printer driver is set to CRT this setting is not available OPC Level Clear Click to reset the photoconductor unit life counter Note Reset the photoconductor count...

Page 171: ... photoconductor counters After replacing a developer cartridge or a photoconductor unit reset the toner counter or the photoconductor counter You can reset these counters from the Remote Control Panel utility Resetting the toner counter 1 Access the Remote Control Panel utility 2 Click Setting ...

Page 172: ... when you have installed a developer cartridge S050095 or click S050087 when you have installed a developer cartridge S050087 4 Click OK The toner counter is reset Resetting the photoconductor counter 1 Access the Remote Control Panel utility 2 Click Setting ...

Page 173: ...Using the Remote Control Panel Utility 71 7 7 7 7 7 7 7 7 7 7 7 7 3 Click OPC Level Clear 4 Click OK The photoconductor counter is reset ...

Page 174: ...72 Using the Remote Control Panel Utility ...

Page 175: ...le products into the printer wWarning Be careful not to touch the fuser which is marked CAUTION Hot Surface Avoid Contact or the surrounding areas If the printer has been in use the fuser and surrounding areas may be very hot Do not dispose of used consumable products in fire as they may explode and cause injury Dispose of them according to local regulations Replacing the Developer Cartridge The t...

Page 176: ... is flashing slowly or a message is displayed on the EPSON Status Monitor 3 screen follow these steps to replace the developer cartridge 1 Make sure the printer is turned off 2 Make sure the output tray on top of the printer is lowered 3 Open the printer cover by pressing the latch on the left side of the printer and lifting the cover up all the way cCaution You must completely open the printer co...

Page 177: ... wWarning Do not touch the fuser which is marked CAUTION Hot Surface Avoid Contact If the printer has been in use the fuser may be very hot cCaution Be careful not to spill any remaining toner from the used developer cartridge If toner is spilled inside the printer clean it with a clean dry lint free cloth or with a vacuum cleaning device ...

Page 178: ... of the handle to fold the handle Dispose of the used developer cartridge properly 6 Remove the new developer cartridge from its bag While holding the cartridge horizontally gently shake it a few times from side to side and then from front to back to distribute the toner evenly ...

Page 179: ...ducts 77 8 8 8 8 8 8 8 8 8 8 8 8 7 Remove the protective tape seal from the developer cartridge completely then raise up the handle cCaution Never touch the developing roller under the flap otherwise print quality may decline ...

Page 180: ...s 8 Hold the cartridge by its handle and lower it into the printer making sure that the pins on both sides of the cartridge fit into the grooves inside the printer Slide the cartridge gently into the opening until it locks into place ...

Page 181: ...n the Information button on the control panel simultaneously while turning on the printer Continue holding down these buttons until the Ready green and Error red lights turn on The toner counter is cleared Note You also can reset the toner counter from the printer software For more details see Resetting the toner and the photoconductor counters on page 38 Windows or Resetting the toner counter on ...

Page 182: ...Make sure the output tray at the top of the printer is lowered 3 Open the printer cover by pressing the latch button on the left side of the printer and lifting the cover up all the way cCaution You must completely open the printer cover to replace the photoconductor unit otherwise you may damage the printer ...

Page 183: ... 8 8 8 8 8 8 8 8 8 4 Holdthedevelopercartridgebythehandleandpullitstraight up and out of the printer wWarning Do not touch the fuser which is marked CAUTION Hot Surface Avoid Contact If the printer has been in use the fuser may be very hot ...

Page 184: ...uctor unit gently out of the printer as shown below 6 Properly dispose of the used photoconductor unit 7 Remove the new photoconductor unit from its bag cCaution Never touch the photoconductor unit s light sensitive drum Otherwise print quality may decline ...

Page 185: ... Consumable Products 83 8 8 8 8 8 8 8 8 8 8 8 8 8 Insert the pins on both sides of the new photoconductor unit into the grooves inside the printer Slide the unit gently into the opening until it locks into place ...

Page 186: ...84 Replacing Consumable Products 9 Reinstall the developer cartridge ...

Page 187: ...lpanelsimultaneouslywhileturningontheprinter Continue holding down these buttons until the Ready green and Error red lights turn on The photoconductor counter is cleared Note You also can reset the photoconductor counter from the printer driver Formoredetails see Resettingthephotoconductorcounter on page 40 Windows or Resetting the photoconductor counter on page 70 Macintosh ...

Page 188: ...86 Replacing Consumable Products ...

Page 189: ...affecting print quality Follow the steps below to clean the inside of the printer and the paper feeder 1 Make sure the printer is turned off 2 Open the printer cover by pressing the latch on the left side of the printer and lifting the cover up all the way wWarning Opening the printer exposes the fuser which is marked CAUTION Hot Surface Avoid Contact Be careful not to touch the fuser If the print...

Page 190: ... Remove all paper from the MP tray and clean the tray with a clean dry lint free cloth Cleaning the paper path rollers Paper is sometimes dusted with a powder to keep the image on one sheet from bleeding over to the back of the sheet stacked on top of it When feeding such paper from the MP tray the dust tends to get onto the paper roller and eventually causes misfeeds to occur Use the following pr...

Page 191: ...which is marked CAUTION Hot Surface Avoid Contact or the surrounding areas If the printer has been in use the fuser and the surrounding areas may be very hot 3 Remove the developer cartridge and the photoconductor unit from the printer as described in Replacing the Developer Cartridge on page 73 and Replacing the Photoconductor Unit on page 80 ...

Page 192: ... 5 Reinstall the photoconductor unit and then the developer cartridge as described in Replacing the Developer Cartridge on page 73 and Replacing the Photoconductor Unit on page 80 6 Close the printer cover until it clicks shut Cleaning the printer case If the printer s outer case is dirty or dusty turn off the printer and clean it with a soft clean cloth dampened with a mild detergent 1 2 ...

Page 193: ...a clean dry lint free cloth If a large amount of toner is present use a small vacuum cleaning device availablefrom computersupply stores toremoveit Then carefully wipe with a clean dry lint free cloth cCaution Toner and other fine powders can damage some vacuum cleaners Be sure to read the instructions for your vacuum cleaner before you use it on spilled toner Note If you spill toner on your cloth...

Page 194: ...aper from the tray 5 Grasp the base part of the MP tray with both hands pull the bottom edge outward and pull it out of the printer 6 Remove the optional 500 Sheet Lower Paper Cassette Unit A4 if installed 7 Replace the printer s protective materials then repack the printer in its original box cCaution Do not expose the photoconductor unit and the developer cartridge to light any longer than neces...

Page 195: ...dicate printer status and to alert you to errors and warnings The Status Alert window in the EPSON Status Monitor 3 indicates what type of error has occurred and offers you a possible solution Look through this section to find the kind of problem you have then try the recommended solutions in the order they are presented until your problem is solved Indicator lights 1 6 5 4 2 3 ...

Page 196: ... tray or Cassette Printer OFF OFF o OFF o Insufficient Memory for Current Task o OFF OFF OFF f Manual Feed OFF OFF f f f Optional Interface Card Error f OFF OFF OFF o Page contains too much data to process o OFF OFF OFF f Paper Out OFF OFF f OFF o Paper Jam Output OFF OFF o OFF o Printer Open OFF OFF OFF OFF o Printing on Incorrect Paper Size OFF OFF f OFF f ROM Module Incompatible o OFF OFF OFF o...

Page 197: ...ve for assistance Control panel All lights on Check Paper Size f Check Paper Type f Insufficient Memory to Print All Copies f Need Memory f Print Quality Decreased due to insufficient memory f Toner Low f Cancel All Print Jobs f OFF f f Cancel Print Job OFF OFF f f Cancel Print Job by host f f Offline OFF f Ready o OFF Standby f OFF Warming Up f OFF Service Required controller error ...

Page 198: ...he power cord and contact a qualified service representative Control panel m and Error lights on Indicates that there may be a paper jam inside the printer Open theprintercover removeanyjammedpaper andclosetheprinter cover The error will automatically clear itself and the jammed page s print data is reprinted Control panel m and Error lights on Indicates that there is a paper jam in the feed slot ...

Page 199: ...lowly Indicates that the Manual Feed check box is selected Make sure that the desired paper is displayed in the printer driver and loaded in the manual feed slot on the MP tray You have to press the N Start Stop button once when you want to print in manual feed mode You do not have to press the N Start Stop button for every sheet If you press the N Start Stop button when there is no paper in the m...

Page 200: ... light on The printer cannot read the installed optional interface card Turn off the printer and try reinstalling the card If the error persists you may have to contact a qualified service representative for assistance Control panel light on Error light flashing The time required to process data exceeds the print engine speed because the volume of data is too great to print Press the N Start Stop ...

Page 201: ... may be a paper jam inside the printer Open theprintercover removeanyjammedpaper andclosetheprinter cover The error will automatically clear itself and the jammed page s print data is reprinted Control panel Error light on The printer is open Make sure that the printer cover is closed properly by opening it and closing it again Control panel m and Error lights flashing The paper loaded in the pape...

Page 202: ... the Developer Cartridge on page 73 To clear this error and print a single sheet press the N Start Stop button on the control panel After that this error will occur again until the developer cartridge is replaced Control panel m light flashing The paper size setting in the printer driver is different from the size of paper loaded in the printer To print on the correct paper size make sure you load...

Page 203: ... contents of print jobs or add more memory Press the Information button on the control panel to clear the warning Control panel light flashing This warning indicates that the printer encountered memory problems when printing the document Press the Information button on the control panel to clear the warning To cancel the print job use your computer to delete it from the print queue The next time y...

Page 204: ...y set print quality lower in the printer driver Press the Information button on the control panel to clear the warning Control panel v light flashing The printer is almost out of toner Prepare a new developer cartridge to replace the current one See Replacing the Developer Cartridge on page 73 Control panel Ready and Error lights flashing Indicates that the printer is deleting all the print jobs s...

Page 205: ...or lights flashing Indicates that the printer is deleting the specified print job sent from the Host PC Control panel Error light flashing flashes at longer intervals than usual Indicates that the printer is not ready to print Press the N Start Stop button to make the printer ready to print Control panel Ready light on Indicates that the printer is ready to print Cancel Print Job by host Offline R...

Page 206: ...nd print data Printing a Status Sheet To confirm the current status of the printer print a status sheet from the control panel The status sheet contains information about the printer the current settings and the installed options if any Press the Information button on the control panel The Data light flashes and the printer starts printing a status sheet Note If information about the installed opt...

Page 207: ...rytoremovejammedpaperwithbothhandstoavoid tearing it If jammed paper is torn and remains in the printer or if paper is jammed in a place not mentioned in this chapter contact a qualified service representative wWarning Be careful not to touch the fuser which is marked CAUTION Hot Surface Avoid Contact or the surrounding areas If the printer has been in use the fuser and the surrounding areas may b...

Page 208: ... to accumulate on the Face up tray Try turning over the stack of paper in the paper tray Most paper packages indicate the top side of the paper with an arrow at the side of the package Paper jam inside the printer If the jammed sheet is inside the printer remove the sheet as follows 1 Close the output tray and open the printer cover slowly by pressing the latch on the left side of the printer and ...

Page 209: ...0 10 10 10 10 10 10 10 10 10 10 wWarning Opening the printer cover exposes the fuser which is marked CAUTION Hot Surface Avoid Contact Be careful not to touch the fuser If the printer has been in use the fuser may be very hot ...

Page 210: ...108 Troubleshooting 2 Remove the developer cartridge cCaution When removing the developer cartridge never touch the developing roller under the flap otherwise print quality may decline ...

Page 211: ...Troubleshooting 109 10 10 10 10 10 10 10 10 10 10 10 10 3 Remove the photoconductor unit cCaution Never touch the photoconductor unit s light sensitive drum otherwise print quality may decline ...

Page 212: ... paper from the paper path Note If paper is jammed at the fuser grasp the bottom of the paper and pull it out Otherwise it may reduce the printout quality Don t pull the jammed paper upward Otherwise it may reduce the printout quality ...

Page 213: ... and carefully reload it into the MP tray Do not reload curled or wrinkled sheets Printing automatically restarts from the page that jammed If the Error light red continues flashing after removing all jammed paper open and close the printer cover to clear the error Paper jam MP tray The following illustration shows what this type of jam looks like Follow the steps below to clear a feed jam at the ...

Page 214: ... cover and any stacked paper 2 Gently pull out any sheets that have fed part way into the printer 3 Close the output tray and open the printer cover Be sure to remove any pieces of paper that may have torn off or are remaining in the printer ...

Page 215: ...t into the MP tray Do not reload curled or wrinkled sheets 5 Reinstall the MP tray cover 6 Open the printer cover and then close the printer cover until it clicks shut The jammed page s print data is automatically reprinted Paper Jam Manual Feed slot When a small piece of paper is jammed at the inside of the Manual Feed slot follow the instructions below to clear the jammed paper 1 If the paper is...

Page 216: ...114 Troubleshooting 2 Replace the paper guides 3 Open the printer cover and then close the printer cover until it clicks shut The jammed page s print data is automatically reprinted ...

Page 217: ...0 10 10 10 10 10 10 10 10 10 10 10 Paper Jam Optional paper cassette The following illustration shows what this type of jam looks like Follow the steps below to clear a feed jam in the 500 Sheet Lower Paper Cassette Unit A4 ...

Page 218: ...116 Troubleshooting 1 Remove the paper tray from the 500 Sheet Lower Paper Cassette Unit A4 ...


Page 219: ...ide of the cassette unit and discard any curled or wrinkled sheets 3 Remove all paper from the paper tray and press down on the plate until it locks into position 4 Tap the edges of the paper stack then set it back into the paper tray making sure the paper is evenly aligned and that the top sheet is below the maximum paper mark ...

Page 220: ...ional Problems The Ready light green does not turn on when you turn the printer on Cause What to do The printer may not be connected to the electrical outlet Turn off the printer and check the power cable connections between the printer and the electrical outlet then turn the printer back on If the electrical outlet is controlled by an outside source such as a wall switch make sure the switch is t...

Page 221: ...re you use a double shielded twisted pair interface cable no longer than six feet in length Some or all of the printout is garbled or printed as asterisks Cause What to do The interface cable may not be plugged in securely Make sure that both ends of the interface cable are plugged in securely You may not be using the correct interface cable If you are using the parallel interface make sure that t...

Page 222: ... set incorrectly in your application software Make sure that you are using the correct page length and margin settings in your application software Graphics don t print correctly Cause What to do You may need more memory Graphics require large amounts of memory Lower the Print Quality setting in the printer driver or install more memory For more information see Memory Module on page 10 The backgro...

Page 223: ...ensity may be dark Lighten Density in the printer driver of Windows and Macintosh There may be a problem with the developer cartridge Turn off the printer Remove the cartridge shake it gently from side to side and thenreinstallit Ifthisdoesnot solve the problem replace the developer cartridge as described under Replacing the Developer Cartridge on page 73 There may be a problem with a photoconduct...

Page 224: ...ce the photoconductor unit as described under Replacing the Photoconductor Unit on page 80 Missing areas on printed image Cause What to do Your paper may be moist or damp This printer is sensitive to moisture absorbed by the paper The higher the moisture content in the paper the lighter the printed output Do not store paper in a humid or damp environment You may not be using the correct type of pa...

Page 225: ...eloper cartridge is installedasdescribedunder Replacing the Developer Cartridge on page 73 Theproblemmaybewithyour application software or interface cable Print out a status sheet through the printer driver If blank pages continue to appear the problem may be with the printer Turn off the printer and contact your dealer The printed image is light or faint Cause What to do Your paper may be moist o...

Page 226: ...e to side to distribute the toner and then reinstall it If the problem persists replace the cartridge as described under Replacing the Developer Cartridge on page 73 The image is too dark Cause What to do There may be a problem with the developer cartridge If the problem persists replace the developer cartridge as described under ReplacingtheDeveloperCartridge on page 73 Non printed side of the pa...

Page 227: ...s the quality automatically so that the printer can continue printing Check to see if the printout is acceptable If not add more memory for a permanent solution or lower Print Quality temporarily in the printer driver Insufficient memory for current task Cause What to do The printer has insufficient memory for current task Add more memory for a permanent solution or lower Print Quality temporarily...

Page 228: ... copies Cause What to do The printer does not have sufficient memory to collate print jobs Only one set of copies will be printed Reduce the contents of print jobs or add more memory For information on installing more memory see Memory Module on page 10 ...

Page 229: ...tsandsymbolsautomatically youwould probably never need to adjust the printer s settings However if you are writing your own printer control programs or if you are using older software that cannot control fonts refer to the following sections for symbol set details When you are considering which font to use you should also consider which symbol set to combine with the font Available symbol sets var...

Page 230: ...6N 8859 15 ISO 9N IBM DN 11U PcMultilingual 12U PcEur858 13U Legal 1U 76 typefaces are available for the following symbol sets PcBlt775 26U PcE Europe 17U PcTk437 9T Pc1004 9J WiAnsi 19U WiE Europe 9E WiTurkish 5T WiBALT 19L DeskTop 7J PsText 10J VeInternational 13J VeUS 14J MsPublishing 6J Math 8 8M PsMath 5M VeMath 6M PiFont 15U Windows 9U McText 12J Line Printer is available for Roman Extension...

Page 231: ...edis 2 Norweg 2 UK French 2 German HP Spanish Chinese Spanish IRV Swedish Portuguese IBM Portuguese and IBM Spanish These are partial variations of the Roman 8 set OCR A is available for OCR A 0O OCR B is available for OCR B 1O OCR B Extension 3Q Code 39 2 types is available for Code 39 0Y EAN UPC 2 types is available for EAN UPC 8Y ...

Page 232: ...Swiss 721 SWM Bold Swiss 721 SWM Italic Swiss 721 SWM Bold Italic Dutch 801 SWM Dutch 801 SWM Bold Dutch 801 SWM Italic Dutch 801 SWM Bold Italic Swiss 721 SWA Swiss 721 SWA Bold Swiss 721 SWA Italic Swiss 721 SWA Bold Italic Swiss 721 Narrow SWA Swiss 721 Narrow SWA Bold Swiss 721 Narrow SWA Italic Swiss 721 Narrow SWA Bold Italic Zapf Calligraphic 801 SWA Zapf Calligraphic 801 SWA Bold Zapf Call...

Page 233: ...re the available international character sets for ISO Character sets ANSI ASCII 0U Norweg 1 0D French 0F HP German 0G Italian 0l JlS ASCII 0K Swedis 2 0S Norweg 2 1D UK 1E French 2 1F German 1G HP Spanish 1S Chinese 2K Spanish 2S IRV 2U Swedish 3S Portuguese 4S IBM Portuguese 5S IBM Spanish 6S ...

Page 234: ...vailable available available not available EPSON Prestige available available not available available not available EPSON Roman available available not available available not available EPSON Sans serif available available not available available not available Swiss 721 SWM available available available available not available Letter Gothic SWC available available available available not available...

Page 235: ...r sets using the Remote Control Panel utility or the ESC R command Available for ESC P 2 emulation only Characters available with the ESC command To print the characters in the table below use the ESC command Character sets USA France Germany UK Japan Denmark1 Denmark2 Sweden Italy Spain1 Spain2 Norway Latin America Korea Legal ...

Page 236: ...vailable symbol sets in the I239X mode are Pc437 Pc850 Pc858 Pc860 Pc863 and Pc865 See In the ESC P2 or FX Modes on page 132 The available fonts are EPSON Sans Serif Courier SWC EPSON Prestige EPSON Gothic EPSON Presentor EPSON Orator and EPSON Script ...

Page 237: ...ided with the printer are shown below according to the emulation mode LJ4 GL2 mode Font name Family HP equivalent Courier SWC Medium Bold Italic Bold Italic Courier Dutch 801 SWC Medium Bold Italic Bold Italic CG Times Zapf Humanist 601 SWC Medium Bold Italic Bold Italic CG Omega Ribbon 131 SWC Coronet Clarendon Condensed SWC Clarendon Condensed Swiss 742 SWC Medium Bold Italic Bold Italic Univers...

Page 238: ...C Avant Garde SWA Medium Bold Italic Bold Italic ITCAvantGarde Gothic ITC Bookman SWA Medium Bold Italic Bold Italic ITC Bookman Century Schoolbook SWA Medium Bold Italic Bold Italic New Century Schoolbook Dutch 801 SWA Medium Bold Italic Bold Italic Times ITC Zapf Chancery SWA Italic ITC Zapf Chancery Medium Italic Symbol Set SWM Symbol Symbol Set SWA SymbolPS More WingBats SWM Wingdings ITC Zapf...

Page 239: ...FAN UPC fonts may not be readable Print a sample and make sure the fonts can be read before printing large quantities ESC P 2 and FX modes Available only in ESC P2 mode OCR B Code39 9 37 pitch 4 68 pitch EAN UPC Medium Bold Font name Family Courier SWC Medium Bold EPSON Prestige EPSON Roman EPSON Sans serif Swiss 721 SWM Medium Bold Letter Gothic SWC Medium Bold Dutch 801 SWM Medium Bold EPSON Scr...

Page 240: ... Print a sample and make sure the font can be read before printing large quantities YoucanprintfontsamplesusingtheRemoteControlPanelutility To print font samples for viewing follow these steps 1 Make sure that paper is loaded 2 Launch the Remote Control Panel utility For instructions see Accessing the Remote Control Panel utility on page 35 3 Choose the font sample from the File menu that you want...

Page 241: ...ion See your software documentation for instructions If you are sending unformatted text to the printer directly from DOS or if you are using a simple software package that does not include font selection you can select fonts by clicking Type in the Remote Control Panel s main screen when in the LJ4 mode Click Others when in the ESC P2 FX or I239X mode Downloading Fonts Fonts that reside on your c...

Page 242: ... computer or having fonts downloaded only when you need to print a particular font EPSON Font Manager The EPSON Font Manager provides you with 131 software fonts Installing the EPSON Font Manager Follow these steps to install the EPSON Font Manager 1 Make sure that the printer is turned off and that Windows is running on your computer 2 Insert the CD ROM that comes with your printer into your CD R...

Page 243: ...lete click OK The EPSON Font Manager is now installed on your computer EPSON BarCode Fonts EPSON BarCode Fonts let you easily create and print many types of bar codes Normally bar code creation is a laborious process requiring you to specify various command codes such as Start bar Stop bar and OCR B in addition to the bar code characters themselves However EPSON BarCode Fonts are designed to add s...

Page 244: ...A Yes Yes Creates UPC A bar codes UPC E EPSON UPC E Yes Yes Creates UPC E bar codes Code39 EPSON Code39 No No Printing of OCR B and check digits can be specified with the font name EPSON Code39 CD No Yes EPSON Code39 CD Num Yes Yes EPSON Code39 Num Yes No Code128 EPSON Code128 No Yes Creates Code128 bar codes Interleaved 2 of 5 ITF EPSON ITF No No Printing of OCR B and check digits can be specifie...

Page 245: ...here is for installation in Windows 98 the procedure for other Windows operating systems is nearly the same Codabar EPSON Codabar No No Printing of OCR B and check digits can be specified with the font name EPSON Codabar CD No Yes EPSON Codabar CD Num Yes Yes EPSON Codabar Num Yes No Computer IBM PC series or IBM compatible with an i386SX or higher CPU Operating system Microsoft Windows Me 98 95 X...

Page 246: ...s 5 From the File menu select Install New Font 6 Select the appropriate CD ROM or floppy drive then select the BarCode Fonts folder from the Folders list 7 In the List of fonts box select the BarCode Font you want to install or click Select All to install all EPSON BarCode Fonts Note Make sure that the Copy fonts to Fonts folder check box is selected 8 Click OK The selected EPSON BarCode Fonts are...

Page 247: ...sing EPSON BarCode Fonts The application featured in these instructions is Microsoft WordPad The actual procedure may differ slightly when printing from other applications 1 Open a document in your application and enter the characters you want to convert into a ba rcode 2 Select the characters then select Font from the Format menu ...

Page 248: ...Font you want to use then set the font size and click OK Note In Windows XP 2000 and NT 4 0 you cannot use font sizes larger than 96 points when printing ba rcodes 4 The characters you selected appear as bar code characters similar to those shown below ...

Page 249: ... by a ba rcode reader Notes on inputting and formatting barcodes Pleasenotethefollowingwheninputtingandformattingbar code characters Monochrome Printer Driver Color Printer Driver Host Based Monochrome Printer Driver Color not available Black not available Print Quality 600 dpi 600 dpi 600 dpi Toner Save Not selected Not selected Not selected Zoom Options Not selected Not selected Not selected Gra...

Page 250: ...guish bar codes from other text in your document set your application to show text symbols such as paragraph marks tabs etc Because special characters such as Start bar and Stop bar are added when an EPSON BarCode Font is selected the resulting bar code may have more characters than were originally input For best results use only the font sizes recommended in EPSON BarCode Font specifications on p...

Page 251: ...AN bar code standard Because the check digit is added automatically only 7 characters can be input The following codes are inserted automatically and need not be input by hand Left Right margin Left Right guard bar Center bar Check digit OCR B Character type Numbers 0 to 9 Number of characters Up to 7 characters Font size 52 pt to130 pt up to 96 pt in Windows XP 2000 and NT 4 0 Recommended sizes a...

Page 252: ...be input The following codes are inserted automatically and need not be input by hand Left Right margin Left Right guard bar Center bar Check digit OCR B EPSON EAN 8 Character type Numbers 0 to 9 Number of characters Up to 12 characters Font size 60 pt to150 pt up to 96 pt in Windows XP 2000 and NT 4 0 Recommended sizes are 60 pt 75 pt standard 112 5 pt and 150 pt ...

Page 253: ...saresupported Supplementarycodes are not supported The following codes are inserted automatically and need not be input by hand Left Right margin Left Right guard bar Center bar Check digit OCR B EPSON EAN 13 Character type Numbers 0 to 9 Number of characters Up to 11 characters Font size 60 pt to150 pt up to 96 pt in Windows XP 2000 and NT 4 0 Recommended sizes are 60 pt 75 pt standard 112 5 pt a...

Page 254: ...cification Manual The following codes are inserted automatically and need not be input by hand Left Right margin Left Right guard bar Check digit OCR B The numeral 0 EPSON UPC A Character type Numbers 0 to 9 Number of characters Up to 6 characters Font size 60 pt to150 pt up to 96 pt in Windows XP 2000 and NT 4 0 Recommended sizes are 60 pt 75 pt standard 112 5 pt and 150 pt ...

Page 255: ...this reason it is important to keep at least one space between the bar code and the surrounding text to prevent overlapping Spaces in Code39 bar codes should be input as _ underbars When printing two or more ba rcodes on one line separate the bar codes with a tab or select a font other than a BarCode Font and input the space If a space is input while a Code39 font is selected the bar code will not...

Page 256: ...set of a line of characters is changed in the middle of the line a conversion code is automatically inserted Font size When OCR B is not used 26 pt or more up to 96 pt in Windows XP 2000 and NT 4 0 Recommended sizes are 26 pt 52 pt 78 pt and 104 pt When OCR B is used 36 pt or more up to 96 pt in Windows XP 2000 and NT 4 0 Recommended sizes are 3 6pt 72pt 10 8pt and 144 pt EPSON Code39 EPSON Code39...

Page 257: ...ations that automatically delete spaces from the ends of lines or change multiple spaces into tabs When printing two or more ba rcodes on one line separate the bar codes with a tab or select a font other than a BarCode Font and input the space If a space is input while Code128 is selected the bar code will not be correct The following codes are inserted automatically and need not be input by hand ...

Page 258: ...ally adjusted to 15 or more of its total length in conformance to the Interleaved 2 of 5 standard For this reason it is important to keep at least one space between the bar code and the surrounding text to prevent overlapping Interleaved 2 of 5 treats every two characters as one set When there are an odd number of characters EPSON ITF fonts automatically add a zero to the beginning of the characte...

Page 259: ...p character Check digit The numeral 0 added to the beginning of character strings as needed Font size When OCR B is not used 26 pt or more up to 96 pt in Windows XP 2000 and NT 4 0 Recommended sizes are 26 pt 52 pt 78 pt and 104 pt When OCR B is used 36 pt or more up to 96 pt in Windows XP 2000 and NT 4 0 Recommended sizes are 36 pt 72pt 10 8pt and 144 pt ...

Page 260: ...l length in conformance to the Codabar standard For this reason it is important to keep at least one space between the bar code and the surrounding text to prevent overlapping When either a Start or a Stop character is input Codabar fonts automatically insert the complementary character If neither a Start nor a Stop character is input these characters are automatically input as the letter A EPSON ...

Page 261: ...ter when not input Check digit Character type Numbers 0 to 9 Symbols Number of characters No limit Font size When OCR B is not used 26 pt or more up to 96 pt in Windows XP 2000 and NT 4 0 Recommended sizes are 26 pt 52 pt 78 pt and 104 pt When OCR B is used 36 pt or more up to 96 pt in Windows XP 2000 and NT 4 0 Recommended sizes are 36 pt 72pt 10 8pt and 144 pt ...

Page 262: ...160 Working with Fonts Print Sample EPSON Codabar EPSON Codabar CD EPSON Codabar Num EPSON Codabar CD Num ...

Page 263: ...ervices for assistance We will be able to help you much more quickly if you are able to give the exact information indicated below Serial number of your printer The serial number label is on the back of the printer Printer model Brand and model of your computer Printer software version Click Version Info on the printer driver s Basic Settings menu Operating system Windows 95 98 NT 4 0 Mac OS 8 1 e...

Page 264: ...ease call 800 873 7766 for dealer referral Service Access World Wide Web From the Internet you can reach EPSON Support at http support epson com At this site you can download drivers and other files look at documentation such as product brochures and user manuals and access troubleshooting information EPSON Internet FTP Site If you have Internet FTP capability use your Web browser or other softwar...

Page 265: ...of the numbers below Service Access World Wide Web From the Internet you can reach EPSON s Latin American website at http www latin epson com In Brazil you can reach Epson at http www epson br Country Telephone number Argentina 11 4346 0300 Brazil 55 11 7296 6100 Chile 02 236 6717 Colombia 01 523 5000 Costa Rica 6 296 6222 México México D F Resto del país 5 328 4008 01 800 50 607 00 Perú 224 2336 ...

Page 266: ... frequently asked questions http www epson co uk To e mail EPSON Technical Support http www epson co uk support email For a full list of EPSON Customer and Warranty Support services http www epson co uk support Support Via Telephone Our Customer and Warranty Support teams can be contacted by calling 0870 163 7766 in the UK or 0044 0870 163 7766 from the Republic of Ireland They can provide the fol...

Page 267: ... Mac OS 8 1 Applications Theapplicationsyounormallyusewithyourprinterandtheir version numbers Pre Sales Enquiry Desk Our Enquiry Desk team can be contacted by calling 0800 220546 in the UK or 1 800 409132 from the Republic of Ireland by faxing 01442 227271 in the UK or 0044 1442 227271 from the Republic of Ireland and via e mail at info epson co uk They can provide the following information Pre sa...

Page 268: ...samedi de 9h00 à 20h00 sans interruption http www epson fr support selfhelp french htm pour accéder à l AIDE EN LIGNE http www epson fr support services index shtml pour accéder aux SERVICES du support technique Spain EPSON IBÉRICA S A Avda Roma 18 26 08290 Cerdanyola Barcelona España Tel 34 93 5821500 Fax 34 93 5821555 CENTRO DE ATENCIÓN AL CLIENTE 902 404142 Fax Centro de Atención al Cliente no ...

Page 269: ... http www epson it Portugal EPSON Portugal S A Rua do Progresso 471 1 Perafita Apartado 5132 4458 901 Perafita Codex Tel 22 999 17 00 Fax 22 999 17 90 TECHNICAL HELPDESK 808 200015 http www epson pt Austria ASC Büromaschinen GmbH Kettenbrückengasse 16 1052 Wien Tel 01 58966 0 Fax 01 5867726 http www artaker com http www epson at Netherlands CARD IS B V Ambachsweg 3606 AP Maarssen http www epson nl...

Page 270: ...8 Contacting Customer Support Belgium Luxemburg MDR ARC H Dom Saviolaan 8 1700 Dilbeek http www epson be Switzerland EXCOM Service A G Moosacherstrasse 6 Au 8820 Wadenswil Tel 01 7822111 http www excom ch ...

Page 271: ...t or initialized developer cartridge A component of the printer that contains the toner that creates the printed image on paper dots per inch dpi The number of dots per inch is a measure of printer resolution The higher the number of dots the higher the resolution download To transfer information from the computer to the printer downloaded font A font that is loaded into the printer s memory from ...

Page 272: ...erface transmits data one character or code at a time and a USB interface transmits data one bit at a time landscape Printing that is oriented sideways on the page This orientation gives you a page that is wider than it is high and is useful for printing spreadsheets memory The part of the printer s electronic system that is used to store information Some information is fixed and is used to contro...

Page 273: ...mounts of horizontal space depending on the width of the character Thus the uppercase M takes up more horizontal space than the lowercase l RAM Random Access Memory RAM is where temporary information is stored resolution A measure of the fineness and clarity of images produced by the printer or monitor Printer resolution is measured in dots per inch Monitor resolution is measured in pixels RITech ...

Page 274: ...Glossary TrueType An outline font format that was developed jointly by Apple Computer and Microsoft Corporation TrueType fonts are outline fonts that can be easily resized for screen display or for printing ...

Page 275: ...ing the toner counter Macintosh 69 resetting the toner counter Windows 38 Driver Macintosh about 77 accessing 77 uninstalling 91 Driver Windows about 25 accessing 25 uninstalling 51 E Emulation 50 Envelopes 21 EPSON BarCode Fonts about 141 formatting 147 inputting 147 installing 143 printing 145 specifications 149 system requirements 143 EPSON Status Monitor 3 Macintosh about 87 accessing 88 monit...

Page 276: ...nting paper jams 105 Paper jams cleaning 105 Paper source manual feed 19 MP tray 15 Photoconductor unit replacing 80 resetting the photoconductor counter Macintosh 70 resetting the photoconductor counter Windows 40 Precautions during operation 1 power on off cautions 6 replacing consumable products 73 Printer available options 13 cleaning 87 parts 7 settings Macintosh 78 settings Windows 26 sharin...

Page 277: ...ng developer cartridge 73 photoconductor unit 80 RITech about 12 S Safety precautions 1 Warnings Cautions and Notes 1 Status Sheet printing 104 Symbol sets ESC P2 mode 132 FX mode 132 I239X mode 134 international character sets 133 introduction 127 ISO sets 131 LJ4 mode 128 T Thick paper 22 Toner checking remaining toner 73 removing spilled toner 91 resetting the toner counter Macintosh 69 resetti...

Reviews: