background image

User Manual

Eclipse Series Gas Cooktops

EC64GS

60cm 4 burner gas cooktop - stainless steel

EC64GB

60cm 4 burner gas cooktop - black glass

EC74GTB

75cm 4 burner gas cooktop, twin wok - black glass

EC95GLS

90cm 5 burner gas cooktop - stainless steel

EC95GLB

90cm 5 burner gas cooktop - black glass

Summary of Contents for Eclipse EC64GB

Page 1: ...C64GS 60cm 4 burner gas cooktop stainless steel EC64GB 60cm 4 burner gas cooktop black glass EC74GTB 75cm 4 burner gas cooktop twin wok black glass EC95GLS 90cm 5 burner gas cooktop stainless steel EC95GLB 90cm 5 burner gas cooktop black glass ...

Page 2: ...and maintenance 12 Abnormal Operation 14 Service and spare parts 14 Warranty 14 Installation Technical data 15 Instructions for Installation 15 Building into kitchen benches 16 Combustible surfaces 16 Installation cutout drawings 17 Connection to the gas supply 20 Electrical connection 21 Replacing the power supply lead 21 Before leaving 22 Wiring Diagrams 23 Gas Conversion NG to ULPG 24 Gas Conve...

Page 3: ...cation and installation to be suitable compliant DO NOT MODIFY THIS APPLIANCE After removing the appliance from the packaging make sure that it is undamaged and that the electrical lead is in perfect condition Otherwise contact your dealer before operating the appliance Make sure that air is able to circulate freely around the appliance Poor ventilation produces a shortage of oxygen Make sure that...

Page 4: ...ON DO NOT STORE OR USE FLAMMABLE LIQUIDS OR ITEMS IN THE VICINITY OF THIS APPLIANCE NOT FOR USE IN MARINE CRAFT CARAVANS OR MOBILE HOMES UNLESS EACH BURNER IS FITTED WITH FLAME SAFEGUARD WHERE THIS APPLIANCE IS INSTALLED IN MARINE CRAFT OR IN CARAVANS IT SHALL NOT BE USED AS A SPACE HEATER WARNING Accessible parts will become hot when in use To avoid burns and scalds children should be kept away T...

Page 5: ...y result Do not remove the pan support and enclose the burner with a wok stand as this will concentrate and deflect heat onto the hotplate Do not use large pots or heavy weights which can bend the pan support or deflect flame onto the hotplate During use continued Explanation of symbols on the glass top For Gas on glass models only ...

Page 6: ... and accidents First refer to the contents of this manual If you do not find the necessary information contact your nearest Service Center Servicing work on this appliance must be carried out by Authorised Personnel Always request the use of original spare parts For Service Spare Parts please contact 1300 556 816 AU or 09 274 8265 NZ Environmental protection advice All the materials used are envir...

Page 7: ... Semi rapid burner 4 Rapid burner 5 Wok burner 6 Pan supports 7 Control knobs 1 2 5 4 6 7 3 A B C D E A Burner cap B Burner head C Burner bowl D Thermocouple E Ignition Candle 7 3 Note Model shown may not be identical to the hotplate you have purchased C D E B A A ...

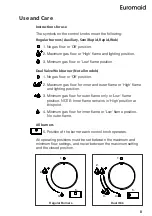
Page 8: ...ion 2 Maximum gas flow for inner and outer flame or High flame and lighting position 3 Minimum gas flow for outer flame only or Low flame position NOTE Inner flame remains in High position at this point 4 Minimum gas flow for inner flame or Low flame position No outer flame All burners 5 Position of the burner each control knob operates All operating positions must be set between the maximum and m...

Page 9: ... which would otherwise cut off the gas flow In the instance of a power failure place a lit match near the burner and proceed as described above If the flame does not light after the first attempt wait 5 minutes for the gas to dissipate before attempting to re light the burner Once lit check that the flame is even and turn the control knob to adjust the flame as required If the flame is uneven chec...

Page 10: ...the Dual Valve Wok burner not all models The Dual Valve Wok burner has the advantage of providing both very high or very low heat when needed The powerful Dual Flame provides high heat when frying boiling or searing is required It can also be turned to the lowest point where only the small inner flame remains alight to provide a low heat for simmering or keeping the dish warm Follow the instructio...

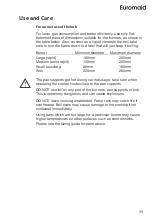
Page 11: ...iliary 80mm 160mm Wok 220mm 260mm The pan supports get hot during normal usage take care when operating the control knobs close to the pan supports DO NOT use foil on any part of the burners pan supports or hob This is extremely dangerous and can cause explosions DO NOT leave cooking unattended Fats or oils may catch fire if overheated Boil overs may cause damage to the cooktop if not contained im...

Page 12: ...iquids Water ingress can damage the internal components Stainless steel hob Clean the hob regularly with a moistened soft cloth lukewarm water and a little liquid detergent Always wipe stainless steel with the grain to avoid scratching from possible grit in the cloth If the hob gets very dirty use specific commercial products for Stainless Steel Do not use the following products Abrasive or harsh ...

Page 13: ...ly In addition to avoid ignition difficulties check that the cavities in the burner are not obstructed To remove deposits from the burner cavities remove the burner caps After cleaning put the burner heads and caps back together and return them correctly to their position After washing replace the pan supports checking that they are correctly positioned 13 Use and Care ...

Page 14: ... leaving the factory this appliance was tested and adjusted by specialist skilled staff to give the best operating results Any subsequent necessary repairs or adjustments must be carried out with the greatest care and attention by authorised personnel For this reason we strongly advise you contact the Glen DImplex Service Center specifying the nature of the problem the model of theequipment and th...

Page 15: ...el and gas type label Ventilation Ventilation must be in accordance with AS NZS5601 Gas Installations In general the appliance should have adequate ventilation for complete combustion of gas proper flueing and to maintain temperature of immediate surroundings within safe limits Before any procedure it is important to check that the appliance is DISCONNECTED from the electrical mains The Manufactur...

Page 16: ...he edge of the cut out Glass models Attach the gasket to the underside edge of the glass NOTE The join should be at the rear of the cooktop 4 Place the hob in the installation opening and push it down so that the hob is resting firmly on the benchtop 5 Fit the supplied brackets and screws as shown in the illustrations to the right There are several combinations that can be used depending on the th...

Page 17: ...17 EC64GB Installation EC64GS Installation Cutout Drawings 60 45 521 45 480 560 35 600 Gas Inlet Point 475 555 52 35 500 45 480 560 50 580 Gas Inlet Point 472 555 ...

Page 18: ...Installation Cutout Drawings EC74GTB Installation 70 50 745 480 740 521 780 475 60 45 18 ...

Page 19: ...480 840 50 860 500 Gas Inlet Point 472 835 55 19 EC95GLB Installation EC95GLS Installation Cutout Drawings 60 45 480 840 50 880 521 Gas Inlet Point 475 835 60 52 35 ...

Page 20: ...int must be accessible with the appliance installed Fit the supplied elbow and gasket as shown in the illustration to the right The gas inlet connection has a 1 2 BSP male thread When making the connection take care not to apply excessive stress by counterbalancing tightening force Ensure that the available gas supply is the same as the gas type label affixed to the base of the hob If not contact ...

Page 21: ...led In all cases the power supply lead must be positioned so that it does not reach a temperature 50 C above the room temperature An ideal route is shown in the Correct Installation below The cable is guided by cable clips fixed to the side of the cabinet in order to avoid any contact with any appliance underneath the hob 21 Oven Hotplate Cable or gas pipe must not contact oven Oven Hotplate Cable...

Page 22: ... gas taps to low flame position and observe each burner to ensure they ignite completely at all ports and that the flame is stable Conduct these checks for each burner individually and concurrently When satisfied with the hotplate please instruct the user on the correct method of operation In case the appliance fails to operate correctly after all checks have been carried out please call the Glen ...

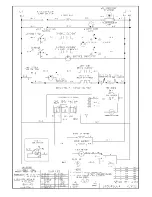
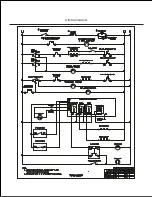
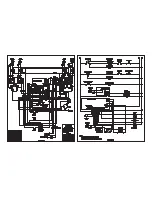
Page 23: ...Wiring diagrams 4 burner models 5 burner models 23 Red wire Red wire Installation ...

Page 24: ...the corresponding control knob 3 Use a thin blade screwdriver to turn the by pass screw as shown right Turn the by pass screw fully clockwise The result should be a small stable flame which is uniform around the entire burner ring If not turn the by pass screw anti clockwise until satisfied with the flame 4 Check that the burner does not go out when the tap is turned quickly from the maximum to th...

Page 25: ...ring If not turn the by pass screw anti clockwise until satisfied with the flame 4 Check that the burner does not go out when the tap is turned quickly from the maximum to the minimum position 5 Repeat for each burner Gas Conversion ULPG to NG If the required gas conversion kit is not supplied with your appliance contact Glen Dimplex Gas Conversion shall only be undertaken by authorised persons Th...

Page 26: ...od particles or built up grime can block the flow of gas 3 Check the burner heads and caps are positioned correctly Compare each burner to the other burners Check that the caps are on the correct burner head and are sitting flat and even OTHER IMPORTANT WARNINGS DO NOT leave cooking unattended Fats or oils may catch fire if overheated Boil overs may cause damage to the cooktop if not contained imm...

Page 27: ...t stay lit Complete the general troubleshooting on page 25 first Be sure to hold the knob down for at least 5 seconds after the burner lights This will ensure the flame failure safeguard thermocouple has enough time to heat up Uneven flame on burner Complete the general troubleshooting on page 25 first For new installations be sure cooktop is adjusted for the correct type of gas you are using Natu...

Page 28: ...and allow 24 48 hours for it to dry out before switching it back on Note Water will dry out Oil will take much longer or may not dry out at all All burners spark when trying to light one This is normal The ignition for all the burners is linked A burner will only light when you turn the knob providing it with gas If required please call the Glen Dimplex service department on 1300 556 816 AU or 09 ...

Page 29: ...ust be carried out by Glen Dimplex or their nominated service agent Note warranty periods detailed above may vary in line with agreements with select retail and builder partners and may differ between Australia and New Zealand The benefits conferred by this express warranty are in addition to the Consumer Guarantees referred to in section 3 and any other statutory rights you may have under the Aus...

Page 30: ...epaired or replaced if the goods fail to be of acceptable quality and the failure does not amount to a major failure 4 How to make a claim You may make a claim under this warranty through our website contacting our customer care line or via email Contact details for Glen Dimplex Australia and New Zealand can be found at the end of this document To make a valid claim under this warranty you must a ...

Page 31: ...ble Goods presented for repair may be replaced by refurbished goods of the same type rather than being repaired Refurbished parts may be used to repair the goods Products are designed and supplied for normal domestic use We will not be liable to you under this warranty for business loss or damage of any kind whatsoever Glen Dimplex Australia Pty Ltd Glen Dimplex New Zealand Ltd www glendimplex com...

Page 32: ..._____________________ ______________________________________________________ ______________________________________________________ ______________________________________________________ ______________________________________________________ ______________________________________________________ ______________________________________________________ ________________________________________________...

Page 33: ...adherence to the relevant electrical plumbing and building codes with compliance being issued as required by state or national legislation Additionally all upright cookers must have the anti tilt device installed correctly in adherence to the relevant standards by a licenced installer For maximum effectiveness and efficiency all rangehoods should be installed with the use of ductwork by a licenced...

Reviews: