background image

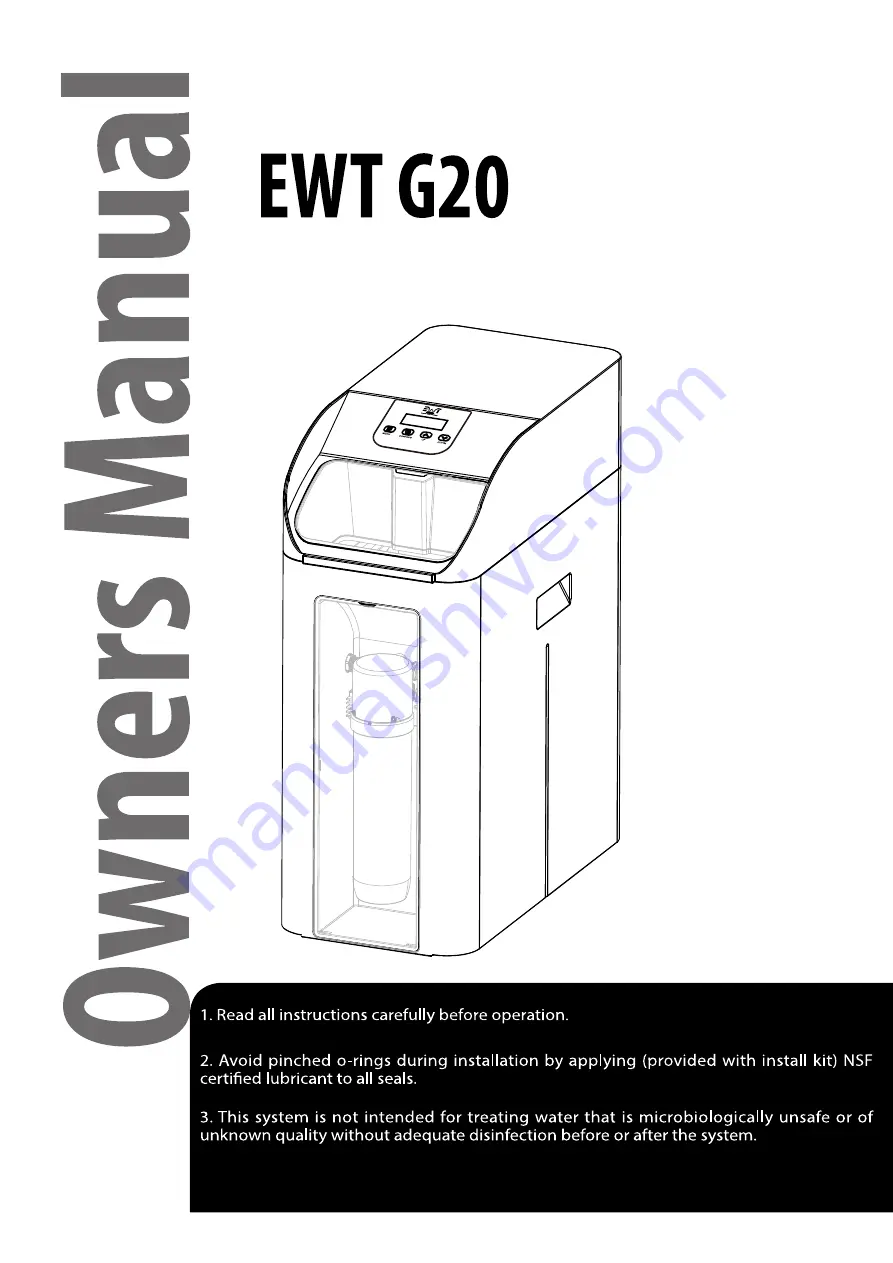
Water Filter&Softener

Summary of Contents for EWT G20

Page 1: ...Water Filter Softener ...

Page 2: ......

Page 3: ...ECT YOUR WATER SOFTENER 8 CHECK THE VALVE SERIAL NUMBER 9 CHECK THE SOFTENER SERIAL NUMBER 10 PARTS BREAKDOWN 11 PRE INSTALLATION INSTRUCTIONS 15 INSTALLATION INSTRUCTIONS 15 WATER BYPASS 17 PROGRAMMING GUIDE 18 FILTER CARTRIDGE LIFE SETTINGS 21 START UP INSTRUCTIONS 22 MAINTENANCE INSTRUCTIONS 24 TROUBLE SHOOTING GUIDE 31 ...

Page 4: ...nstruction concerning use of the appliance in a safe way and understand the hazards involved You must read and understand the contents of this manual before installing or operating your water softener Softeners are exposed to high levels of iron manganese sulfur and sediments Damage to pistons seals and or spacers within the control valve are not covered in this warranty due to the harsh environme...

Page 5: ...AT IS HARD WATER AND HOW IT IS SOFTENED CAUTION DO NOT USE WATER FILTERED THROUGH THIS SOFTENER WHERE THE WATER IS MICROBIOLOGICALLY UNSAFE OR THE WATER IS OF UNKNOWN QUALITY THE WATER MUST BE DISINFECTED BEFORE OR AFTER THE UNIT ...

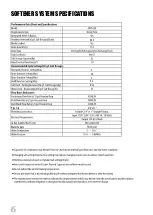
Page 6: ...SOFTENER SYSTEM SPECIFICATIONS 445 2 24 1 4 3 Pipe Size 3 4 or1 Carton Size Water Supply ...

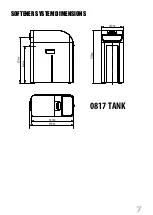
Page 7: ...SOFTENER SYSTEM DIMENSIONS 0817 TANK 490mm 465mm 240mm ...

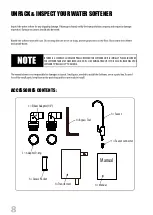
Page 8: ...E WHEN THE SOFTENER UNIT IS INITIALLY PLACED IN SERVICE THE SOFTENER TANK MAY HAVE BEEN LAID ON ITS SIDE DURING TRANSIT IF THIS OCCURS BACKWASH THE SOFTENERTO RECLASSIFY THE MEDIA Elbow Adaptor 1 2 1 Bypass Tool 1 Transformer 1 Grease Packet Manual 1 Manual 1 Faucet 1 Faucet Connector Adaptor O ring ...

Page 9: ...d for year 2017 M stand for year 2016 L stand for year2015 5 MONTH 1 JAN 2 FEB 3 MAR 4 APRIL 5 MAY 6 JUNE 7 JULY 8 AUG 9 SEP A OCT B NOV C DEC G DATE 1 2 3 4 5 6 7 8 9 A 10 B 11 C 12 D 13 E 14 F 15 G 16 H 17 I 18 J 19 K 20 L 21 M 22 N 23 O 24 P 25 Q 26 R 27 S 28 T 29 U 30 V 31 0005 Batch code VALVE SERIAL NUMBER Valve Part Year 22018885O5G0005 Month Date Batch code ...

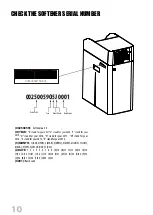
Page 10: ...7 M stand for year 2016 L stand for year 2015 K stand foryear 2014 5 MONTH 1 JAN 2 FEB 3 MAR 4 APRIL 5 MAY 6 JUNE 7 JULY 8 AUG 9 SEP A OCT B NOV C DEC J DATE 1 2 3 4 5 6 7 8 9 A 10 B 11 C 12 D 13 E 14 F 15 G 16 H 17 I 18 J 19 K 20 L 21 M 22 N 23 O 24 P 25 Q 26 R 27 S 28 T 29 U 30 V 31 0001 Batch code Valve Part Year 00250059O5J 0001 Month Date Batch code 00250059O5J0001 ...

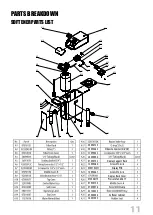
Page 11: ...ay Support Rack 13000486 Screw ST2 6 8 05031023H Display PCB 13000487 Screw ST2 6 6 Display Back Cover 07500817E PressureTank 0817 07050155 07050076 02150039 07040068 Softener Cabinet 26051052 A1 A3 A2 A4 A5 A6 A7 A8 A9 A10 A11 A12 A13 A14 A15 A16 A17 A18 A19 A26 A21 A22 A23 A24 A25 A22 A27 A28 A29 A30 A31 A20 ...

Page 12: ...Screw M5 12 B19 05056088 Screw M5 16 B20 05056180M BrineValve Injector Stem Assy B21 05056066 O Ring φ11 2 1 B22 05056037 Air Disperser 05056067 O Ring φ7 8 1 9 05056177 Injector Body 05056103 Injector Screen 30040083 InjectorThroat Red 1 30040084 Injector Nozzle Red 05056205 O RING 23 9 1 8 05056029 Injector Cover 05056086 Screw M5 30 05056172 Secure Clip S 05056188 DLFC 2 0GPM 05056134 O ring 12...

Page 13: ... 05010023 Magnet φ3 2 7 C10 05030008 Brine Gear C11 13000463 Screw ST2 9 13 with washer C12 05030007 Main Gear C13 05030009 Drive Gear C14 05056098 Motor Pin 05030005 PowerHead Housing 1 05010046 Meter Cable Clip 1 05010108 Meter Cable 1 Communication Cable 1 30110005 Rubber Sleeve 05056013 Communication Cable Clip 05010029B PowerCable 05010035 PowerCable Clip ...

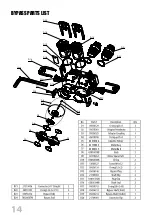
Page 14: ...BYPASS PARTS LIST 05010106 02170055 Meter Assy 05040129 Meter Ball D1 D2 D3 D4 D5 D7 D6 D9 D10 D11 D12 D8 D13 D14 D15 D16 D17 D18 D19 D20 D21 D22 ...

Page 15: ...o the water supply source 2 Locate as close as possible to a oor or laundry tub drain 3 Locate in correct relationship to other water conditioning equipment See Fig 1 4 Softener should be located in the supply line before the water heater Temperatures above 48 8 120 F damage softeners 5 Do not install a softener in a location where freezing temperatures occur Freezing may cause permanent damage to...

Page 16: ... INSTALLATION Two adjustable wrenches Additional tools may be required if modi cations to home plumbing are required Use copper brass or PEX pipe and ttings Some codes may also allow PVC plastic pipe Refer to local codes Always install the included bypass valve or 3 shut off valves Bypass valves let you turn off water to the softener for repairs but still have water in the house pipes 5 8 OD drain l...

Page 17: ...nobs to the BYPASS position You can use your water related fixtures and appliances as the water supply is bypassing the softener However the water you use will be hard To resume treated service open the bypass valve by rotating the knobs to SERVICE position Please make sure bypass knobs are completely open otherwise the unSoftenered water could bypass through the valve SERVICE BYPASS BYPASS NOT AL...

Page 18: ...ormation required at the time of installation This function is to press and select one item to change and accepts the values if changed This function is to scroll up or down the programming items and increase or decrease the values of the settings while in the programming mode START UP SETTING MENU ...

Page 19: ...PACITY IRON MN IRON MN REFILLFLOWRATE 0 2gpM DAILY RESERVE 4 DAYS AVERAGE 1 400L DAY OVERRIDE OFF RINSE OVERRIDE OFF 1 99 REGENS BW OVERRIDE OFF FORCED REGEN OFF SMARTCLEAN OFF 10Min 7Days PROGRAMMING COMPLETE HARDNESS UNITS mg L 9 4g STD CAPACITY Press key Press key CONFIRM Press key Press key Press key Press key Press key Press key Press key Press key DAY OVERRIDE OFF 1 99 DAYS 1 99 DAYS Press k...

Page 20: ...in a non volatile memory and will not be lost during a power failure If power fails while the unit is in regeneration the valve will nish regeneration from the point it is at once power is restored If the valve misses a scheduled regeneration due to a power failure it will queue a regeneration at the next regeneration time once power is restored ...

Page 21: ...ept the days setting press CONFIRM key twice again to complete filter life time mode setting Press DOWN key for 8 seconds to enter Code Page Press UP or DOWN key to change code to 308 to enter lter life meter mode setting page Press CONFIRM key to select liter option press UP or DOWN key to set the speci c water volume based on the local water quality Press CONFIRM key again to accept the lter lif...

Page 22: ... at BACKWASH position 4 1 Press and hold MENU key for 3s to unlock 1 Add two liters of water into the cabinet at the time of installation This is for the unit to achieve proper capacity in the rst time of regeneration 4 2 Press and hold CONFIRM key to enter MANUAL REGEN display press MANU key again to have an immediately Regen 4 3 When it arrives BRINE position press any key to skip the BRINE cycl...

Page 23: ...from the unit before turning the water on fully then allow water to run to drain for 3 4 minutes or until all media nes are washed out of the softener indicated by clear water in the drain hose 6 Press any button to advance to the RINSE position Check the drain line ow Allow the water to run for 3 4 minutes or until the water is clear 7 Press any button to advance to the REFILL position Check that...

Page 24: ...ammonia or solvents Never subject your conditioner to freezing If you suspect salt bridging carefully pound on the outside of the plastic cabinet or pour some warm water over the salt to break up the bridge This should always be followed up by allowing the unit to use up any remaining salt and then thoroughly cleaning out the cabinet Allow four hours to produce a brine solution then manually regen...

Page 25: ...er Take the new lter cartridge and insert it on lter cartridgehead Remove the ltercartridge Filter Front Cover Replace Filter Cartridge Reset Filter Life CODE 307 Press DOWN key for 8 seconds to enter Code Page Press UP or DOWN key to change code to 307 to enter lter life reset page Press DOWN key to choose YES and press CONFIRM key to con rm Filter life reset is complete AUX IN3 RESET YES ...

Page 26: ... cover assy and disconnect the wire connection 5 Remove the brine tube drain tube meter cable and meter tube 1 Turn off water supply to conditioner using the bypass tool attached on the bypass BypassTool Close the inlet and outlet Communication wireconncetions DrainTube BrineTube Meter Cable MeterTube 2 Screws 2 Clips 6 Remove the clips that connect control valve and bypass 7 Disconnect the softene...

Page 27: ... the steps in this section Piston Screw 2 XScrews from Powerhead ValveBody Assembly Powerhead Assembly Washer REPLACE PISTON AND OR BRINE VALVE 1 Follow steps 1 to 6 of timer Powerhead replacement 2 Remove three screws from the plate on the valve body 3 Remove the plate from the valve body and pull the Piston Assembly from the valve The brine valve assembly can alsobe removed in this stage 4 Remov...

Page 28: ...r support from the bypass 5 Remove the meter and replace it Co u p l i n g Adapter Meter Support Meter Injector Cap O ringon Cap 2 Screws Screen Injectors 1 Remove the two screws of theinjector cap 2 Pull theinjector cap out watch for the o ring onthecap 3 Screw the injectorassembly out clean replace it 4 Pull the screen out clean replace it 5 Afterservcing reverse following stepsin this section M...

Page 29: ...the motor Remove motor disconnect the wire attached on PCB if any watch for the pin under the motor 3 Replace the motor 1 Pull thedrain lineclip and remove the drain lineelbow and washer 2 Clean replace drain line ow control DLFC 1 Screw the copper ttingout 2 Remove the retainer out 3 Clean replace the BLFC button 2 X Screws Copper Fitting BLFC Retainer Motor ...

Page 30: ...ce the PCB 4 X Screws PCB 3 Remove the four screwsattached on display back cover 4 Remove the display back cover 5 Remove the four screwsattached on display PCB 6 Remove the display PCB 1 Unplug electrical cord from outlet 2 Remove the cover assy and disconnect the wire connection Communication wireconncetions 4 X Screws 1 X Display Back Cover 4 X Screws 1 X Display PCB ...

Page 31: ...minator control Check for dry well condition B Ensure drain line ow control is sized 6 IRON IN CONDITIONED WATER A Fouled resin bed B Iron content exceeds recommended parameters A Check backwash brine draw and brine tank fill Increase frequency of regeneration Increase backwash time B Add iron removal lter system 7 EXCESSIVE WATER IN BRINE TANK A Plugged drain line ow control B Brine valve failure...

Page 32: ......

Reviews: