
First Use Assembly
Unscrew the black filler cap and remove the additional service kit
stored inside the sprayer’s tank and place in a safe place for future
use.
The sprayer will require the harness straps to be attached prior
to first use. One quick release hook clip and two locking clips are
supplied with the sprayer. One locking clip is used to fix the harness
directly onto the tank base and the second is used to attach the
harness to the quick release hook and allow adjustment of the strap
length before attaching it to the tank.
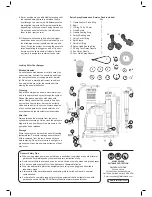
Fixing the harness
1. Attaching the fixed strap to the sprayer tank.
First pass the webbing strap
though the fixed hook clip
located on the side base of
the tank, then through one
of the locking clips (Fig.1).
Fold the webbing strap back
over the locking clip and
then thread the end back
through the fixed hook clip
(Fig 2).
Hold the end of the strap
and the webbing strap
together and pull the locking
clip up into the fixed hook
clip. This will lock the strap
in position. (Fig 3).
Repeat the procedure to
attach the quick release
clip to the other end of the
webbing strap. The hook
then clips to the bottom of
the sprayer.
The fit of the harness can
be adjusted to suit the user
by releasing the locking
clips on both straps and
pulling the strap end up to
shorten its length.
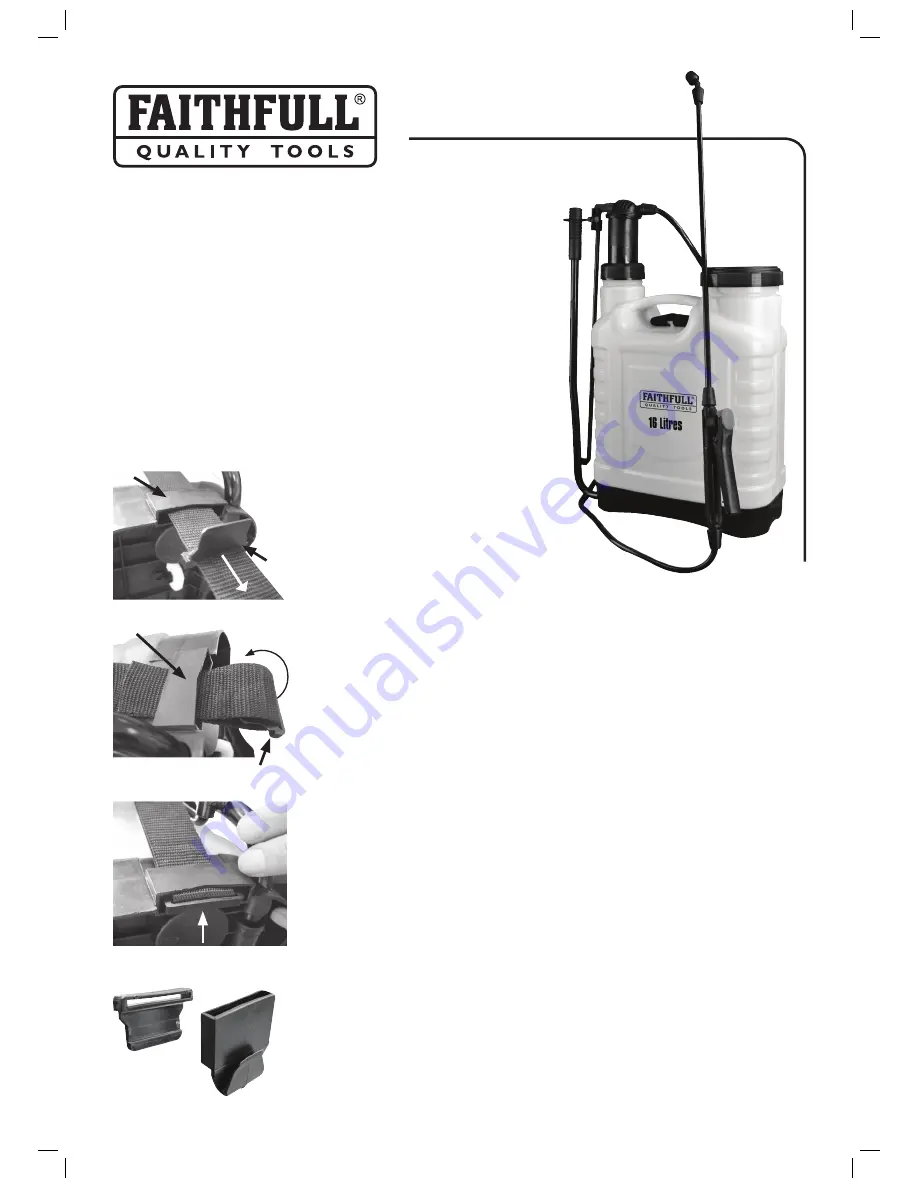
FAI SPRAY16
Knapsack Sprayer
16 Litres
Please read these instructions
carefully and retain for future reference.
This sprayer is designed for the application of water based
domestic garden and agricultural chemicals, disinfectants
and cleaning agents. Do not use to spray caustic or corrosive
solutions or use with spirit based products as this may affect
the pumps seals.
Operating Instructions
1 Before filling always check that the sprayer’s shoulder straps
are correctly fitted and adjusted so that the sprayer sits
comfortably on your back.
2 Unscrew the large filler opening cap but do not remove the
internal plastic filter.
3 Fill the sprayer to the desired level ensuring you do not
exceed the maximum fill mark.
4 Replace the cap and screw down firmly.
5 Operate the pump handle 8 - 10 times to draw liquid into the
pump pressure chamber and to provide the required working
pressure.
6 To commence spraying depress the trigger handle until
the desired flow rate is achieved. The trigger is fitted with
a handy lock so that it may be locked in the on position for
prolonged spraying operations.
7 Continue operating the pump handle using a steady motion
to maintain pressure in the sprayer pump whilst spraying.
Fig. 1
Fixed hook
clip
Locking
clip
Locking clip
facing inwards
Fixed hook
clip
Fig. 2
Fig. 3
Locking clip and webbing strap pulled
together into the fixed hook clip
Quick release hook
Locking clip


