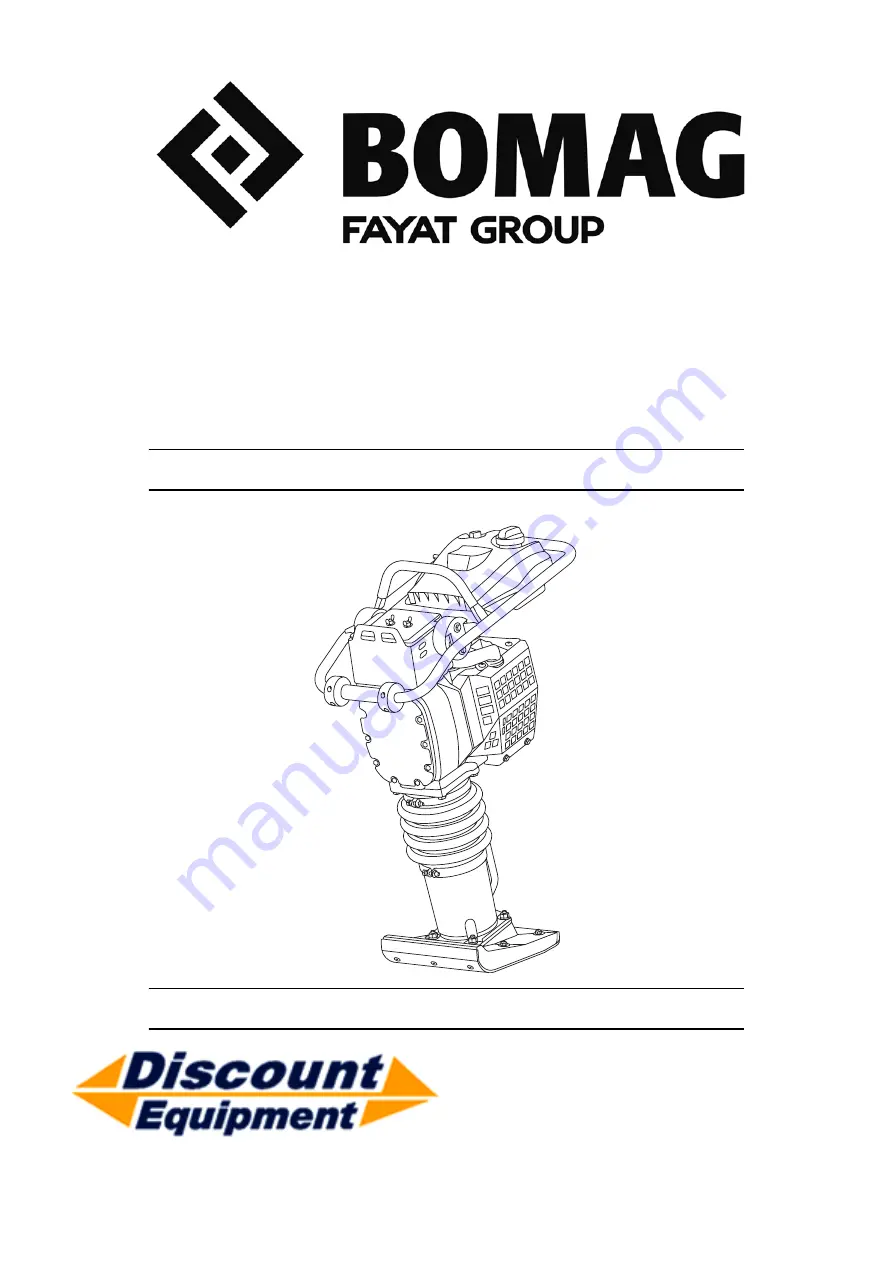
background image

Operating instructions

Maintenance instructions

Original operating instructions

01/2013

Catalogue No.

008 076 21

BT 60/4 / BT 65/4

S/N 101 540 57 .... / S/N 101 540 58 1177 >

Vibratory Tampers

www.discount-equipment.com

Go to

Discount-Equipment.com 

to

order your parts

Summary of Contents for BOMAG BT 60/4

Page 1: ...ions Original operating instructions 01 2013 Catalogue No 008 076 21 BT 60 4 BT 65 4 S N 101 540 57 S N 101 540 58 1177 Vibratory Tampers www discount equipment com G o t o D i s c o u n t E q u i p m e n t c o m t o o r d e r y o u r p a r t s ...

Page 2: ...ne needs We sell worldwide for the brands Genie Terex JLG MultiQuip Mikasa Essick Whiteman Mayco Toro Stone Diamond Products Generac Magnum Airman Haulotte Barreto Power Blanket Nifty Lift Atlas Copco Chicago Pneumatic Allmand Miller Curber Skyjack Lull Skytrak Tsurumi Husquvarna Target Stow Wacker Sakai Mi T M Sullair Basic Dynapac MBW Weber Bartell Bennar Newman Haulotte Ditch Runner Menegotti M...

Page 3: ...G o t o D i s c o u n t E q u i p m e n t c o m t o o r d e r y o u r p a r t s ...

Page 4: ...is manual was written for operators and mainte nance personnel on construction sites These operating and maintenance instructions are part of the machine You should only operate the machine after you have been instructed and in compliance with these instructions Strictly observe the safety regulations Please observe also the guidelines of the Civil En gineering Liability Association Safety Rules f...

Page 5: ...observe strictly the safety regulations and all notes on risks and dangers Fig 1 Fig 2 Fig 3 540231 Made by Hellerwald 56154 Boppard Made in Germany kW kg Patent Protection Type Serial Number Year of Construction Nominal Power Operating Mass Designation 540232 Made by Hellerwald 56154 Boppard Made in Germany kW kg Patent Protection Type Serial Number Year of Construction Nominal Power Operating Ma...

Page 6: ...uels and lubricants 35 6 3 Table of fuels and lubricants 36 6 4 Running in instructions 37 6 5 Maintenance table 38 Maintenance every day 39 6 6 Clean the machine 39 6 7 Check the engine oil level 39 6 8 Check the fuel level 40 Maintenance every month 41 6 9 Change the engine oil 41 6 10 Cleaning checking the spark plug replacing if necessary 42 6 11 Check the tamper foot 43 Maintenance every year...

Page 7: ...8 Check clean the air filter replace if necessary 55 7 Trouble shooting 57 7 1 General notes 58 7 2 Engine problems 59 8 Disposal 61 8 1 Final shut down of machine 62 G o t o D i s c o u n t E q u i p m e n t c o m t o o r d e r y o u r p a r t s ...

Page 8: ...BOMAG 7 BT 60 4 BT 65 4 2 Technical Data G o t o D i s c o u n t E q u i p m e n t c o m t o o r d e r y o u r p a r t s ...

Page 9: ...134 Operating weight CECE kg lbs 62 137 Travel characteristics Max working speed depending on soil m min ft min 20 66 Max areal output depending on soil m2 h ft2 h 336 3616 Drive Engine manufacturer Honda Type GX 100 Cooling Air Number of cylinders 1 Displacement cm3 98 540234 H1 L1 H W L B G o t o D i s c o u n t E q u i p m e n t c o m t o o r d e r y o u r p a r t s ...

Page 10: ...m mechanical Frequency Hz 10 11 8 Impact force kN lbf 13 5 3035 Filling capacities Fuel tank l gal us 3 0 0 80 Oil in tamper foot l gal us 0 75 0 20 Engine oil l gal us 0 3 0 08 1 The right for technical modifications remains reserved 1 BT 60 4 G o t o D i s c o u n t E q u i p m e n t c o m t o o r d e r y o u r p a r t s ...

Page 11: ... 148 Operating weight CECE kg lbs 68 150 Travel characteristics Max working speed depending on soil m min ft min 20 66 Max areal output depending on soil m2 h ft2 h 336 3616 Drive Engine manufacturer Honda Type GX 100 Cooling Air Number of cylinders 1 Displacement cm3 98 540234 H1 L1 H W L B G o t o D i s c o u n t E q u i p m e n t c o m t o o r d e r y o u r p a r t s ...

Page 12: ...em mechanical Frequency Hz 10 11 8 Impact force kN lbf 16 2 3642 Filling capacities Fuel tank l gal us 3 0 0 80 Oil in tamper foot l gal us 1 0 0 26 Engine oil l gal us 0 3 0 08 1 The right for technical modifications remains reserved 1 BT 65 4 G o t o D i s c o u n t E q u i p m e n t c o m t o o r d e r y o u r p a r t s ...

Page 13: ...5 4 LpA 93 dB A determined acc to ISO 11204 and EN 500 Guaranteed sound power level BT 60 4 LWA 108 dB A determined acc to ISO 3744 and EN 500 BT 65 4 LWA 108 dB A determined acc to ISO 3744 and EN 500 Danger Loss of hearing Wear your personal noise protection means ear defenders before starting operation Vibration value Hand arm vibration Vector total of the weighted effective acceleration in thr...

Page 14: ...BOMAG 13 BT 60 4 BT 65 4 3 Safety regulations G o t o D i s c o u n t E q u i p m e n t c o m t o o r d e r y o u r p a r t s ...

Page 15: ...t is intended for Any danger caused by intended use is the sole re sponsibility of the customer or driver operator the manufacturer cannot be made liable Examples for unintended use are l Working in horizontal direction l Ramming of poles l Vibrating of paving blocks It is not permitted to stand on the machine while working Starting and operation of the machine in explosive environments and in und...

Page 16: ...arts of the machine Note i Paragraphs marked like this contain technical in formation for the optimal economical use of the machine Environment Paragraphs marked like this point out practic es for safe and environmental disposal of fuels and lubricants as well as replacement parts Observe the regulations for the protection of the environment Loading transporting the machine Always shut the engine ...

Page 17: ...e machine Stand the machine on ground as level as possible Before leaving the machine l Secure the machine against tipping over Refuelling Do not inhale any fuel fumes Do not swallow fuel Avoid contact with skin and eyes Refuel only with the engine shut down Do not refuel in closed rooms No open fire do not smoke Do not spill any fuel Catch running out fuel do not let it seep into the ground Keep ...

Page 18: ...filter ex haust pipe and air intake opening After maintenance work After all maintenance work is completed reinstall all guards and safety installations Repair Repairs must only be carried out by qualified and authorized personnel Always follow our repair in structions Exhaust gases are highly dangerous Always en sure an adequate supply of fresh air when starting in closed rooms Attach a warning t...

Page 19: ...rmation sticker Lashing point 6 Information sticker Choke lever 7 Warning sticker Spring 7 3 1 2 OPERATION STOP 1 2 6 2 3 4 1 2 1 5 Low Oil Level No Start Max 0 3 l 18 3 in 3 3 6 Sec 1 2 MINUTEN MIN MAX 3600 4200 min 1 2 MINUTEN MIN MAX MAX 3850 4200 min 1 MIN 1850 2000 min 1 1 OFF OFF ON STOP OPERATION 5 RUN 6 4 540235 Stickers and decals G o t o D i s c o u n t E q u i p m e n t c o m t o o r d ...

Page 20: ...BOMAG 19 BT 60 4 BT 65 4 4 Indicators and Controls G o t o D i s c o u n t E q u i p m e n t c o m t o o r d e r y o u r p a r t s ...

Page 21: ... control steps 4 2 Description of indicators and control elements Fig 7 No 1 Throttle lever No 2 Recoil starter Fig 8 No 3 Engine oil level warning lamp No 4 Engine stop switch Position OFF Fuel valve closed engine off Position ON Fuel valve open engine can be start ed Caution If the oil level warning lamp 3 Fig 8 lights up when starting the engine the oil level must be corrected as otherwise the ...

Page 22: ...gine on RPM meter Note i After the first 25 operating hours SVC flashes for about 2 hours to remind you that the initial service is due Then after 100 operating hours SVC flashes again for about 2 hours again to remind you that service is due The SVC indication cannot be reset 540238 RUN G o t o D i s c o u n t E q u i p m e n t c o m t o o r d e r y o u r p a r t s ...

Page 23: ...BOMAG 23 BT 60 4 BT 65 4 5 Operation G o t o D i s c o u n t E q u i p m e n t c o m t o o r d e r y o u r p a r t s ...

Page 24: ...he running in time of the vibratory tamper is 10 operating hours The following inspections must be carried out be fore each working day or before a longer working period Danger Danger of accident Please observe strictly the safety regulations in the corresponding section of this instruc tion manual l Park the machine on ground as level as possi ble Check l condition of engine and machine l fuel ta...

Page 25: ...erous Always ensure an adequate supply of fresh air when starting and operating in closed rooms and trenches Danger Danger of accident Examine the starter rope of the recoil starter for chafing before starting replace if neces sary A damaged rope can break and cause in juries during starting Always hold on to the machine Keep your feet away from the tamper plate be cause the vibration starts immed...

Page 26: ...ig 15 un til resistance can be felt l Let the starter handle run back to initial posi tion Fig 16 l Pull the starter handle quickly and with power Fig 16 Caution Do not let the starter handle hit back l Guide the starter handle back to initial position by hand l If the engine does not start during the first at tempt repeat the starting process 540239 G o t o D i s c o u n t E q u i p m e n t c o m...

Page 27: ...n operating the recoil starter l Check the engine oil level fill up if necessary l Repeat the starting procedure Engine drowned Note i When the choke is closed and the starter rope is pulled several times the engine draws in too much fuel and will probably not start Remedy l Set the engine stop switch to position OFF fuel valve closed l Open the choke l Set the throttle lever to full speed positio...

Page 28: ... is running Always hold on to the machine Steer the machine only be the steering handle Guide the machine so hat your hands do not hit against solid objects Keep your feet clear of the tamper foot plate Wear your personal noise protection ear de fenders Watch out for unusual noises and develop ment of smoke Perform trouble shooting and have the fault corrected Caution Do not hold the throttle leve...

Page 29: ...ness of the material to be compact ed should not be higher that is possible for the vi bratory tamper to cope with Should the tamper get out of its vibrating rhythm on excessively compacted soil harmonic running of the tamper can be achieved again by slightly al tering the steep and or inclination of the tamper Fig 24 l Always shift the throttle lever to position MIN for short work breaks Fig 24 N...

Page 30: ...et the engine stop switch Fig 26 to position OFF Danger Danger of burning Danger of accident Immediately after shutting down the engine is still hot do not touch the exhaust Park the machine so that it cannot turn over Fig 27 l Pull the rope by the starter handle Fig 27 un til resistance can be felt l Let the starter handle run back to initial posi tion Note i This procedure protects against moist...

Page 31: ... personnel qualified person Use only safe lifting gear of sufficient load bearing capacity Minimum lifting capacity of lifting gear see operating weight in chapter Technical Data Fasten the lifting gear only at the specified lift ing points Check all lifting and lashing points for damage before lifting or lashing down the machine Do not use a damaged or in any other way im paired lifting and lashi...

Page 32: ... to transport it on the rollers l Lash the tamper down to the transport vehicle so that it is secured against rolling sliding and turning over Fig 30 l For loading the machine attach the lifting gear only to the lifting eye provided for this purpose Fig 30 540243 540244 G o t o D i s c o u n t E q u i p m e n t c o m t o o r d e r y o u r p a r t s ...

Page 33: ...BOMAG 33 BT 60 4 BT 65 4 6 Maintenance G o t o D i s c o u n t E q u i p m e n t c o m t o o r d e r y o u r p a r t s ...

Page 34: ...waste container and dispose of environmentally Notes on the fuel system The lifetime of the engine mainly depends on the purity of the fuel l Keep fuel clean of any contamination and wa ter l When choosing the storage place for fuel make sure that spilled fuel will not harm the en vironment Fresh fuel should not be stored for longer than 3 months if no fuel stabilizer has been added When storing f...

Page 35: ...a octane number of 91 or higher or Pump Octane Number 86 or higher Use only commercially available brand fuel You can use unleaded standard grade petrol with maximum 10 percent by volume of ethanol E10 or maximum 5 percent by volume of methanol Methanol must also contain co solvents and corro sion inhibitors Using fuels with higher ethanol or methanol con tents exceeding the values specified above...

Page 36: ...ne oil API SJ or higher 0 3 l 0 08 USgal up to dipstick mark SAE 10W 30 20 C to 30 C 4 F to 86 F SAE 15W 40 15 C to 40 C 5 F to 104 F SAE 30 10 C to 30 C 50 F to 86 F Fuel Gasoline unleaded 3 0 l 0 80 USgal Padfoot SAE 75W 90 API GL 5 BOMAG 009 925 05 20 l BT60 4 0 75 l 0 20 USgal BT65 4 1 0 l 0 26 USgal G o t o D i s c o u n t E q u i p m e n t c o m t o o r d e r y o u r p a r t s ...

Page 37: ...the engine is subjected to the oil consumption will drop to the normal level after approx 100 to 200 operating hours After approx 25 operating hours l Change the engine oil l Check the idel speed and the max speed of the engine adjust if necessary l Check engine and machine for leaks l Retighten the fastening screws on air filter ex haust fuel tank and other attachments l Retighten the bolted conn...

Page 38: ...Clean check the spark plug replace if nec essary X 6 11 Check the tamper foot X 6 12 Check adjust the valve clearance Intake valve 0 15 mm 0 006 in Exhaust 0 20 mm 0 008 in X 6 13 Change the fuel filter X 6 14 Cleaning the fuel screen X 6 15 Check adjust the engine speed X 6 16 Replacing the starter rope X 6 17 Oil change in tamper foot X 6 18 Check clean the air filter replace if neces sary in ca...

Page 39: ... oil level with highest care to avoid over or underfilling of the engine Under filling can damage the engine Overfilling caus es excessive development of smoke and can also lead to engine damage The engine cannot be started if the engine oil level is too low For quality of oil refer to the table of fuels and lubricants l Stand the tamper on flat and level ground l Shut down the engine Fig 33 l Cle...

Page 40: ...el fumes Caution Contaminated fuel can cause malfunction or even damage of the engine Fill in fuel through the screen filter For quality and quantity of fuel refer to the ta ble of fuels and lubricants Environment Catch running out fuel do not let it seep into the ground Fig 34 l Set the engine stop switch Fig 34 to position OFF fuel valve closed Fig 35 l Clean the area around the filler cover uns...

Page 41: ... lubricants Environment Catch running out old oil do not let it seep into the ground and dispose off environmentally Fig 36 l Clean the area around oil dipstick 1 Fig 36 and drain plug 2 l Unscrew the oil dipstick l Unscrew the oil drain plug let the old oil run out and catch it l Clean the drain plug and screw it back in with a new seal ring l Fill in fresh engine oil through the oil filler openi...

Page 42: ...socket 1 Fig 38 l Unscrew the spark plug using a 5 8 inch spark plug spanner Fig 39 l Check the spark plug Fig 39 visually and clean it if necessary l Check the electrode gap with a feeler gauge if necessary adjust the gap to 0 6 0 7 mm 0 024 0 028 in l Turn the spark plug carefully in by hand l Once the sealing surface of the new spark plug is in contact tighten for another 1 2 turn with the spar...

Page 43: ...s and lubricants Fig 40 l Clean the sight glass Fig 40 l Check the oil level l The oil must be visible in the inspection glass top up if necessary Check the concertina wall Fig 41 l Check concertina wall for condition damage and tight fit l Check hose clamps for tight fit Fig 41 Retighten the screws in the tamper foot plate Fig 42 l Retighten the screws Fig 42 G o t o D i s c o u n t E q u i p m e...

Page 44: ...ine Fig 43 l Remove the top engine cover Fig 43 Fig 44 l Unscrew the fastening screws for the cylinder head cover Fig 44 Caution Do not apply force to remove the cylinder head cover Replace the cylinder head cover if it is dented Fig 45 l Insert the screw driver into the recess Fig 45 and take the cylinder head cover carefully off Fig 46 Caution Do not mix up the recoil starter fastening screws by...

Page 45: ...e locking nut with a tightening torque of 7 5 Nm 5 5 ft lbs Fig 49 l Clean the sealing faces on cylinder head cover and cylinder block l Apply a bead of liquid gasket Three Bond 1207B or similar with a diameter of approx 1 5 to 2 mm 0 06 to 0 08 in to the inside of the cylinder head cover Fig 49 Note i Attach the cylinder head cover within the next 10 minutes l Place the cylinder head cover on the...

Page 46: ...the en gine 6 13 Replace the fuel filter Danger Fire hazard When working on the fuel system do not use open fire do not smoke Do not spill any fuel Shut down the engine Danger Health hazard Do not inhale any fuel fumes Environment Catch running out fuel do not let it seep into the ground Dispose of the used fuel filter environmentally Fig 52 l Set the engine stop switch Fig 52 to position OFF fuel...

Page 47: ...ilter with hose clamps 6 14 Cleaning the fuel screen Danger Fire hazard Health hazard When working on the fuel system do not use open fire do not smoke do not spill any fuel Clean the fuel screen filter only when the en gine is cold Danger Health hazard Do not inhale any fuel fumes Environment Catch running out fuel do not let it seep into the ground Fig 54 l Disconnect fuel hose Fig 54 from fuel ...

Page 48: ...56 l Clean the screen grid l Check the condition of the screen grid holes replace the fuel cock if necessary l Screw the fuel cock back in with a new seal l Install the engine stop switch again Retighten the fastening screws with a tightening torque of 10 Nm 7 4 ft lbs l Reassemble the cover Retighten the fasten ing screws with a tightening torque of 3 Nm 2 2 ft lbs l Fasten the fuel hose to the f...

Page 49: ... keep an eye on a running machine Danger Loss of hearing Wear your personal noise protection means ear defenders before starting operation Checking the engine speed Idle speed 1850 to 2000 min 1 Maximum speed 3850 to 4200 min 1 Note i Before checking the engine speeds you should change the air filter and check the engine oil level l Start the engine Note i Run the tamper on ground that can be comp...

Page 50: ... Remove the protection grid on the left hand side of the engine Fig 60 Fig 61 l Adjust the idle speed using the rear stop screw 2 on the engine speed control lever 1 Fig 61 l Adjust the maximum speed by the front stop screw 3 l Secure the stop screws 2 3 l Assemble the protection grid on the left hand side of the engine Note i Adjust the throttle cable if this should be neces sary 540249 540083 2 ...

Page 51: ... coiled completely l Before assembling the rope turn the coil 2 Fig 64 5 revolutions in anti clockwise direc tion and align the rope openings in coil and housing 5 to each other A Fig 65 l Secure the coil 2 Fig 65 against winding up For this purpose fix coil and housing 5 with a cable strap 1 l Loosen the knots at both ends of the starter rope and remove the old starter rope l Thread in the new st...

Page 52: ...rter by pulling the starter handle Fig 67 Caution Do not mix up the recoil starter fastening screws by mistake Mount the recoil starter to the engine housing l Insert the screw M6x12 1 Fig 67 with washer 2 and clamp 3 into the recoil starter l Insert the screw M6x16 6 with washer 5 and engine guard holder into the recoil starter l Insert screw M6x8 4 into the recoil starter l Tighten screws 1 4 an...

Page 53: ...ew the oil drain plug Fig 68 let the old oil run out and catch it l Check the seal on the drain plug replace if necessary l Turn the drain plug in and tighten it Fig 69 l Stand the tamper on its foot and secure it against tipping over l Clean the filler plug Fig 69 and unscrew it l Fill in new oil l Screw the filler plug back in with a new seal ring Fig 70 l Clean the inspection glass Fig 70 and c...

Page 54: ... 71 l Remove cover 1 Fig 71 carefully take out the air filter 2 Caution Make sure that no dirt falls into the air intake channel Danger Danger of injury Always wear protective clothes goggles gloves when working with compressed air Fig 72 l In case of dry fine dust blow out the filter car tridge carefully from inside to outside with dry clean compressed air Fig 72 max 6 bar 87 psi Caution Before i...

Page 55: ... l In case of dry fine dust blow out the air filter carefully from inside to outside with dry clean compressed air Fig 75 max 2 bar 29 psi l In case of excessive contamination or damage replace the air filter Caution Before installation check seals and air filter for damage replace if necessary l Assemble the air filter 5 Fig 74 and tighten the cover 3 l Connect the air guide hose 1 to the air fil...

Page 56: ...BOMAG 57 BT 60 4 BT 65 4 7 Trouble shooting G o t o D i s c o u n t E q u i p m e n t c o m t o o r d e r y o u r p a r t s ...

Page 57: ... by incorrect operation of the machine or insufficient mainte nance Whenever a fault occurs you should there fore thoroughly read these instruction on correct operation and maintenance If you cannot locate the cause of a fault or rectify it yourself by following the trouble shooting chart you should contact our customer service depart ment G o t o D i s c o u n t E q u i p m e n t c o m t o o r d ...

Page 58: ...ecoil starter does not return to initial posi tion Recoil starter dirty Clean the recoil starter Spring broken Replace the recoil starter Engine stops frequently in short intervals Fuel system clogged Clean the fuel screen in the tank Replacing the fuel filter Clean the fuel screen in the carburettor Engine does not run with full speed Throttle cable defective Replacing the throttle cable Throttle...

Page 59: ...BOMAG 61 BT 60 4 BT 65 4 8 Disposal G o t o D i s c o u n t E q u i p m e n t c o m t o o r d e r y o u r p a r t s ...

Page 60: ...d specialist workshop Environment Catch all fuels and lubricants do not let them seep into the ground and dispose of in compli ance with legal regulations l Empty the fuel tank l Drain lubrication oil from engine and tamper foot Danger Danger of explosion Parts that previously contained combustible fluids must not be cut with a cutting torch G o t o D i s c o u n t E q u i p m e n t c o m t o o r ...

Page 61: ...ne needs We sell worldwide for the brands Genie Terex JLG MultiQuip Mikasa Essick Whiteman Mayco Toro Stone Diamond Products Generac Magnum Airman Haulotte Barreto Power Blanket Nifty Lift Atlas Copco Chicago Pneumatic Allmand Miller Curber Skyjack Lull Skytrak Tsurumi Husquvarna Target Stow Wacker Sakai Mi T M Sullair Basic Dynapac MBW Weber Bartell Bennar Newman Haulotte Ditch Runner Menegotti M...

Reviews:

Related manuals for BOMAG BT 60/4