background image

©

 C.

 & E

. Fei

n

 Gm

bH.

 P

ri

n

ted

 i

n

 G

er

m

an

y.

 Abb

ildun

gen 

unve

rb

indl

ic

h

. T

ec

hni

sc

he

 Änd

eru

ngen

 vo

rb

eha

lte

n.

  3

 41

 01

 26

3 2

1

 0 

BY

 20

1

8.0

2

 D

E

.

USA

FEIN Power Tools, Inc.
1000 Omega Drive
Suite 1180
Pittsburgh, PA 15205
Phone: 800-441-9878
www.feinus.com

Canada

FEIN Canadian Power Tool 
Company
323 Traders Boulevard East
Mississauga, Ontario L4Z 2E5
Telephone: (905) 8901390
Phone: 1-800-265-2581
www.fein.com

Headquarter

C. & E. Fein GmbH
Hans-Fein-Straße 81
D-73529 Schwäbisch Gmünd-Bargau
www.fein.com

FEIN Service

FEIN Power Tools, Inc.
2735 Hickory Grove Road
Davenport, IA 52804
Phone: 800-441-9878
magdrillrepair@feinus.com

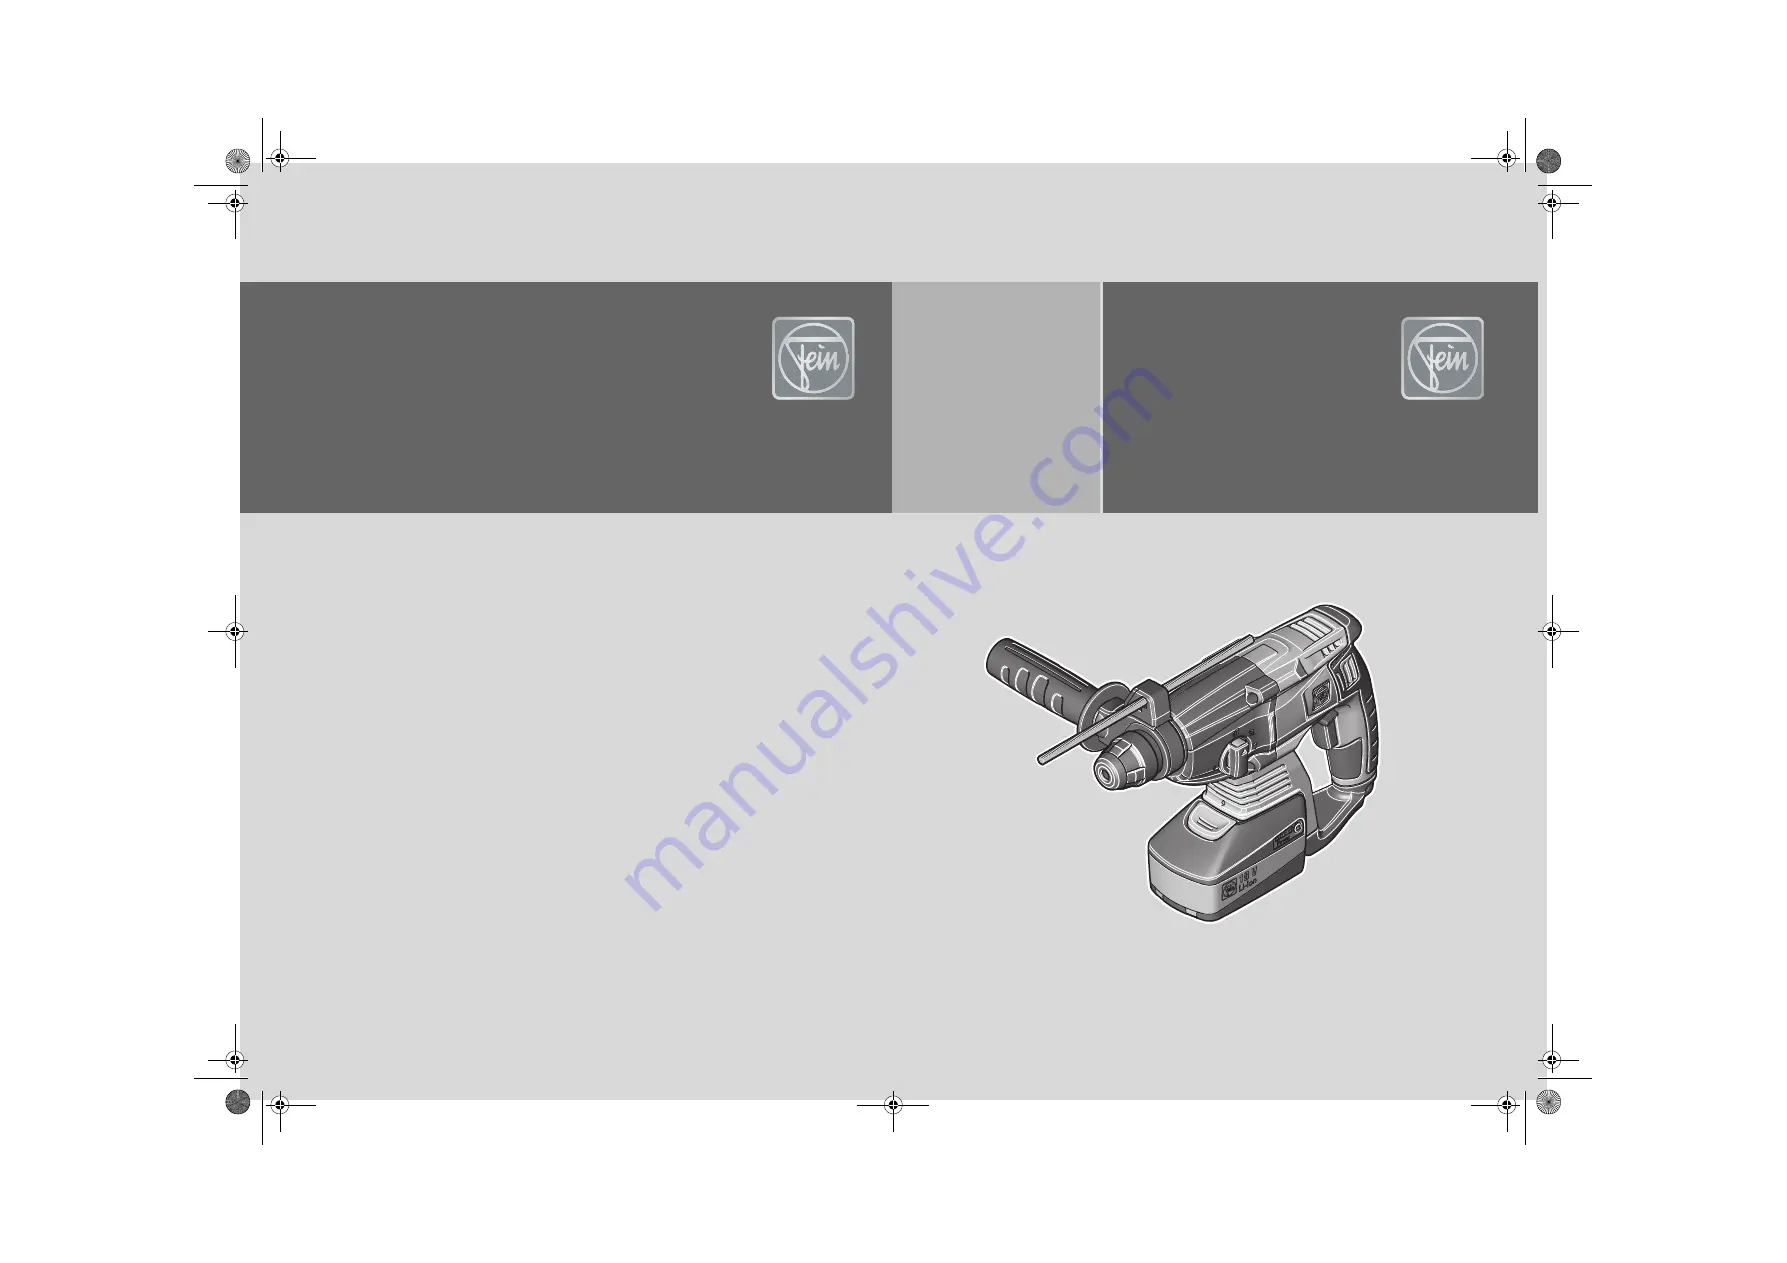
 ABH 18 (**)

7 140 ...

OBJ_BUCH-0000000298-001.book  Page 1  Thursday, February 8, 2018  9:01 AM

Summary of Contents for ABH 18 Series

Page 1: ...FEIN Canadian Power Tool Company 323 Traders Boulevard East Mississauga Ontario L4Z 2E5 Telephone 905 8901390 Phone 1 800 265 2581 www fein com Headquarter C E Fein GmbH Hans Fein Stra e 81 D 73529 Sc...

Page 2: ...2 Instruction Manual Mode d emploi Instrucciones de uso en 3 fr 22 es 42 OBJ_BUCH 0000000298 001 book Page 2 Thursday February 8 2018 9 02 AM...

Page 3: ...er tools Unmodified plugs and matching outlets will reduce risk of electric shock b Avoid body contact with earthed or grounded surfaces such as pipes radia tors ranges and refrigerators There is an i...

Page 4: ...alignment or binding of moving parts breakage of parts and any other condi tion that may affect the power tool s operation If damaged have the power tool repaired before use Many accidents are caused...

Page 5: ...ally designed and recommended by the power tool manufacturer Safe operation is not ensured merely because an accessory fits your power tool Clean the ventilation openings on the power tool at regular...

Page 6: ...s some wood types such as beech and oak Minerals and metal Silicate particles from bricks concrete and other materials containing stone Solvent from solvent containing paint varnish Arsenic chromium a...

Page 7: ...ol However if the power tool is used for other applications with different accessories or poorly maintained the vibration emission may differ This may significantly increase the vibrational impact ove...

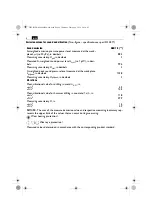
Page 8: ...in decibels 105 8 Measuring uncertainty KpCpeak in decibels 3 Vibrations Mean vibrational value for drilling in metal h D in m s2 ft s2 4 2 14 2 Mean vibrational value for hammer drilling in concrete...

Page 9: ...efore commencing this working step remove the battery from the power tool Otherwise there may be danger of injury caused by unin tentional starting of the power tool Use eye protection during operatio...

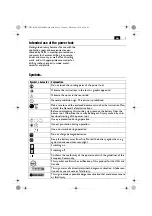
Page 10: ...er Explanation CAUTION Character Unit of measurement national Explanation n rpm min min 1 r min Rated speed n0 rpm min min 1 r min No load speed P W Electrical power Angle width U V Electric voltage f...

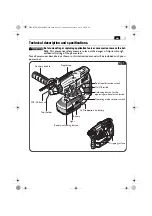
Page 11: ...accessories described or shown in this instruction manual will be included with your power tool WARNING Auxiliary handle Depth stop On Off switch Tool holder Battery Operating mode selector switch Unl...

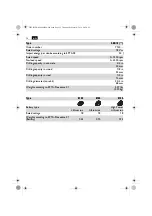
Page 12: ...ing capacity in wood 7 8 in 22 mm Drilling capacity in steel 1 2 in 13 mm Drilling diameter core bit 2 3 4 in 68 mm Weight according to EPTA Procedure 01 5 07 lbs 2 30 kg Type B18A B18A B18A Battery t...

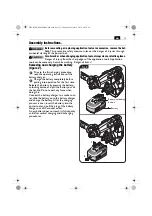
Page 13: ...uctions of the battery charger Charge the battery completely before putting into operation for the first time Release the battery by pressing the battery unlocking button and pull the battery out of t...

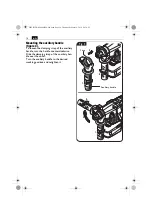
Page 14: ...handle turn the handle counterclockwise Slide the clamping strap of the auxiliary han dle over the collar Turn the auxiliary handle to the desired working position and retighten it 1 2 3 Auxiliary han...

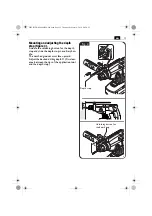
Page 15: ...e depth stop in auxiliary han dle The notched grooves must face upward Adjust the desired drilling depth X X clear ance between the tips of the application tool and the depth stop Fig 4 Unlocking butt...

Page 16: ...sure rules out the danger of injuries through accidental starting of the power tool Slide the application tool into the tool holder rotating it clockwise until it locks Pull the locking sleeve back an...

Page 17: ...elector switch only when the machine is at a complete stop Setting the operating mode figure 7 Change the operating mode only when the power tool is switched off Otherwise the machine can become damag...

Page 18: ...sition Switching on and off figure 9 Always hold the power tool firmly Otherwise you could lose control over the power tool In case of overload the machine switches off Switching on Press the On Off s...

Page 19: ...attery tem perature must be within the battery operat ing temperature range Battery charge control indicator figure 11 Press the button to activate the LED indication The real percentage of the batter...

Page 20: ...cts if necessary Do not use cleaning agents and solvents that can cause damage to plastic parts These include Gas oline carbon tetrachloride chloric solvents ammonia and domestic cleaning agents that...

Page 21: ...being shipped consulting an expert for hazardous material is required Dispatch batteries only when the housing is undamaged and no liquid is escaping from the bat tery Make sure that the battery conta...

Page 22: ...pas faire fonctionner les outils lec trique en atmosph re explosive par exemple en pr sence de liquides inflam mables de gaz ou de poussi res Les outils lectroportatifs produisent des tincelles qui p...

Page 23: ...poussi re peut r duire les risques dus aux poussi res 4 Utilisation et entretien de l outil a Ne pas forcer l outil Utiliser l outil adapt votre application L outil adap t r alisera mieux le travail...

Page 24: ...es des poi gn es lors des travaux pendant lesquels l outil de travail risque de toucher des c bles lectriques cach s Le contact avec un fil sous tension peut galement mettre sous tension les parties...

Page 25: ...s de la batterie et de l outil lectrique a l aide d un chiffon sec et propre Ne charger les batteries qu avec des char geurs recommand s par le fabricant Un chargeur appropri un type sp cifique de ba...

Page 26: ...ations lors de l utili sation de l outil lectrique peut d vier des valeurs indiqu es en fonction de l utilisation de l outil lectrique Pour prot ger l op ra teur des mesures de s curit doivent tre d t...

Page 27: ...ail LpCpeak en d cibel 105 8 Incertitude KpCpeak en d cibel 3 Vibration Valeur de vibration moyenne pour le per age dans le m tal h D in m s2 ft s2 4 2 14 2 Valeur de vibration moyenne pour le per age...

Page 28: ...s tels que la notice d utilisa tion et les instructions g n rales de s curit Avant d effectuer ce travail retirer la batterie de l outil lectrique Sinon il y a des risques de blessures dues un d marra...

Page 29: ...tiellement fourni avec Symbole signe Explication AVERTISSEMENT ATTENTION Signe Unit nationale Explication n rpm min min 1 r min Vitesse de r f rence n0 rpm min min 1 r min Vitesse vide P W Unit de mes...

Page 30: ...e partie des accessoires d crits ou repr sent s dans cette notice d utili sation soit fournie avec l outil lectrique AVERTISSEMENT Poign e suppl mentaire But e de profondeur Interrupteur Marche Arr t...

Page 31: ...tre de per age bois 7 8 in 22 mm Diam tre de per age acier 1 2 in 13 mm Diam tre de per age couronne tr pans 2 3 4 in 68 mm Poids suivant EPTA Procedure 01 5 07 lbs 2 30 kg Type B18A B18A B18A Type d...

Page 32: ...figure 2 Lisez la notice d utilisation du chargeur avant le premier processus de charge Avant la premi re mise en service char gez l accumulateur compl tement D verrouillez l accumulateur en appuyant...

Page 33: ...gn e suppl mentaire Poussez la languette de la poign e suppl mentaire sur le col de serrage Tournez la poign e suppl mentaire pour la mettre dans la position de travail souhait e et serrez la 1 2 3 Po...

Page 34: ...ans la poign e suppl mentai re Le striage doit tre orient vers le haut R gler la profondeur de per age X souhait e X la distance entre la pointe de l outil de travail et la pointe de la but e de profo...

Page 35: ...un danger de blessure caus par un d marrage non intentionn de l outil lectrique Ins rer l outil de travail dans le sens des aiguilles d une montre dans le porte outil jusqu ce qu il s encliquette Tir...

Page 36: ...sens de rotation qu l arr t total du moteur R glage du mode de fonctionnement figure 7 Ne changez le mode de fonctionnement que lorsque l outil lectrique est teint Sinon l outil lectrique pourrait tr...

Page 37: ...9 Toujours bien tenir l outil lectroportatif Vous risquez sinon de perdre le contr le de l outil lectri que En cas de surcharge l outil lectroportatif s arr te Mise en fonctionnement Appuyez sur l int...

Page 38: ...llume la lampe Si l on rel che l interrupteur Marche Arr t la lampe reste allum e pendant une courte dur e puis s teint automatiquement Maniement de la batterie N utilisez et ne chargez la batterie qu...

Page 39: ...pour viter toute d charge avanc e de la batterie Affichage LED Explication Action 1 4 LED vertes tat de charge en pourcen tage Machine pr te l emploi Voyant rouge perma nent La batterie est pres que v...

Page 40: ...ager les parties en mati re plastique Par exemple l essence le t trachlorure de carbone solvants chlor s l ammoniaque et produits de nettoyage domestiques contenant de l ammoniaque Lors du travail des...

Page 41: ...t imp ratif de faire appel un expert en transport des mati res dangereuses N exp diez les batteries que si le carter ne pr sente pas de dommages et aucun liquide ne s coule Veillez ce que les contacts...

Page 42: ...as de tra bajo pueden provocar accidentes b No utilice la herramienta el ctrica en un entorno con peligro de explosi n en el que se encuentren combustibles l qui dos gases o material en polvo Las herr...

Page 43: ...har con las piezas en movi miento g Siempre que sea posible utilizar unos equipos de aspiraci n o captaci n de polvo aseg rese de que stos est n apropiadamente conectados y que sean utilizados correct...

Page 44: ...a realizar use una careta de protecci n protecci n para los ojos o lentes de protecci n Si fuese necesario col quese una mascarilla antipolvo un pro tector ac stico guantes de protecci n o man dil de...

Page 45: ...que pudieran puen tear sus contactos Un cortocircuito entre los contactos de la bater a puede causar quema duras o un incendio Retire la bater a antes de transportar y guar dar la herramienta el ctric...

Page 46: ...de la exposici n resultante bajo las con diciones de uso actuales El nivel de vibraciones indicado en estas ins trucciones ha sido determinado seg n el pro cedimiento de medici n fijado en la norma E...

Page 47: ...rabajo en decibelios 105 8 Inseguridad KpCpeak en decibelios 3 Vibraci n promedio de vibraciones al taladrar en metal h D en m s2 ft s2 4 2 14 2 promedio de vibraciones al percutir en concreto h ID en...

Page 48: ...rabajo descrito retire primero el acumulador de la herramienta el ctrica De lo contrario podr a accidentarse al ponerse en marcha fortuitamente la herramienta el ctrica Al trabajar protegerse los ojos...

Page 49: ...in min 1 r min Revoluciones en vac o n0 rpm min min 1 r min Revoluciones en vac o P W Unidad de medida de la potencia Unidad de medida del ngulo U V Unidad de medida de la tensi n el ctrica f Hz Unida...

Page 50: ...mienta el ctrica puede que no corresponda en su totalidad al material descrito o mostrado en estas instrucciones de servicio ADVERTENCIA Agarradera adicional Tope de profundidad Switch Porta tiles Bat...

Page 51: ...de taladro en madera 7 8 in 22 mm Di metro de taladro en acero 1 2 in 13 mm Di metro de taladro corona perforadora hueca 2 3 4 in 68 mm Peso seg n EPTA Procedure 01 5 07 lbs 2 30 kg Tipo B18A B18A B1...

Page 52: ...a 2 Lea las instrucciones de uso del cargador antes de cargar por primera vez la bate r a Antes de la puesta en marcha cargue completamente la bater a Libere la bater a presionando el bot n de extracc...

Page 53: ...rradera adicional Deslice la abrazadera de la agarradera adicio nal sobre el cuello de fijaci n Gire la agarradera adicional a la posici n de trabajo deseada y apri tela firmemente 1 2 3 Agarradera ad...

Page 54: ...d en la agarradera adicional La cara con el estriado debe quedar hacia arriba Ajuste la profundidad de perforaci n X deseada X distancia entre la punta del til y la punta del tope de profundidad Fig 4...

Page 55: ...ccidentes que pudieran presen tarse en caso de una puesta en marcha involuntaria Introduzca girando en sentido horario el til en el porta tiles de manera que bien sujeto Jale hacia atr s el casquillo...

Page 56: ...entido de giro nicamente accione el selector del sen tido de giro con el motor detenido Ajuste del modo de operaci n Figura 7 Solamente cambie el modo de operaci n estando desconectada la herramienta...

Page 57: ...9 Siempre sujete firmemente la herramienta el ctrica En caso contrario podr a perder el control sobre la herramienta el ctrica En caso de sobrecarga se desconecta la herra mienta el ctrica Conexi n A...

Page 58: ...se enciende la l mpara Al soltar el switch la l mpara se mantiene todav a encendida brevemente y se desco necta despu s autom ticamente Trato del acumulador nicamente utilice y cargue el acumulador s...

Page 59: ...ctr nico desconecta el motor de forma autom tica Indicador LED Significado Acci n 1 4 LED verdes Nivel por centual de carga Operaci n Luz roja perma nente Acumula dor casi vac o Cargar acumulador Luz...

Page 60: ...s de estos agentes son gasolina tetra cloruro de carbono disolventes cloratados amoniaco y detergentes dom sticos que con tengan amoniaco Al trabajar materiales que contengan yeso se puede llegar a de...

Page 61: ...recurrirse a los servicios de un experto en mercanc as peligrosas al preparar la pieza para su env o Solo env e bater as cuya carcasa no est da ada y que no pierdan l quido Aseg rese que los contacto...

Reviews: