

GB
GB
13
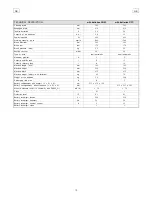
SUMMARY
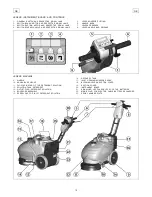
LEGEND INSTRUMENT BOARD AND CONTROLS
14
LEGEND MACHINE
14
TECHNICAL DESCRIPTION
15
INTRODUCTORY COMMENT
16
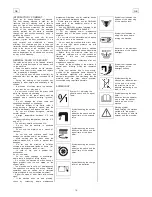
GENERAL RULES OF SECURITY
16
SYMBOLOGY
16
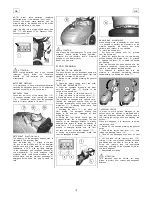
BEFORE USE
17
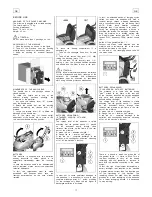
Handling of the packed machine
17
Unpacking of the machine
17
Movements of the handle bar
17
Batteries
17
Batteries recharging
17
(standard version with AGM batteries)
17
Batteries recharging
17
(plus version with XFC batteries)
17
Batteries disposal
18
Recovery tank
18
Detergent solution tank
18
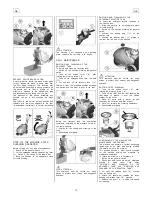
FLOOR CLEANING
18
Starting of the machine
18
Handle bar adjustment
18
Overflow device
18
Security device brush lifting
19
STOP OF THE MACHINE AFTER CLEANING OPERATION
19
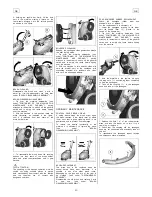
DAILY MAINTENANCE
19
Emptying and cleaning of the recovery tank
19
Emptying and cleaning of the detergent solution tank
19
Suction filter cleaning
19
Positioning of the machine for maintenance and parking
19
Brush cleaning
20
Brush disassembly/assembly
20
Squeegee cleaning
20
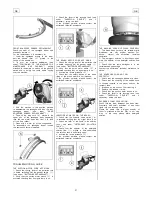
ORDINARY MAINTENANCE
20
Control device brush wear
20
Brush replacement
20
Rear squeegee rubber replacement
20
Front squeegee rubber replacement
21
TROUBLESHOOTING GUIDE
21
The suction motor does not work
21
The brush motor does not work
21
Insufficient water on the brush
21
The machine does not clean properly
21
The squeegee does not dry perfectly
21
Excessive foam production
21
PROGRAMMED MAINTENANCE
22
RECOMMENDED BRUSHES
22


